2018 FORD F250 SUPER DUTY roof
[x] Cancel search: roofPage 5 of 656
Power Running Boards
Using Power Running Boards...................80
Steering Wheel
Adjusting the Steering Wheel - Vehicles With: Manual Adjustable Steering
Column..........................................................82
Adjusting the Steering Wheel - Vehicles With: Power Adjustable Steering
Column..........................................................82
Audio Control
...................................................83
Voice Control
...................................................84
Cruise Control
.................................................84
Information Display Control......................85
Heated Steering Wheel...............................85
Pedals
Adjusting the Pedals
....................................86
Wipers and Washers
Windshield Wipers
.........................................87
Autowipers........................................................87
Windshield Washers
.....................................88
Lighting
General Information.....................................89
Lighting Control..............................................89
Autolamps........................................................90
Instrument Lighting Dimmer.....................90
Daytime Running Lamps..............................91
Automatic High Beam Control..................92
Front Fog Lamps............................................93
Direction Indicators
.......................................93
Spot Lamps......................................................93
Interior Lamps
.................................................94
Ambient Lighting
............................................97
Windows and Mirrors
Power Windows
.............................................98
Global Opening
..............................................99 Exterior Mirrors
................................................99
Interior Mirror
...................................................101
Sliding Windows
...........................................102
Sun Visors
........................................................102
Moonroof.........................................................103
Instrument Cluster
Gauges
.............................................................105
Warning Lamps and Indicators
...............108
Audible Warnings and Indicators.............112
Information Displays
General Information
.....................................114
Information Messages
.................................131
Climate Control
Manual Climate Control
............................148
Automatic Climate Control......................150
Hints on Controlling the Interior Climate..........................................................151
Heated Rear Window..................................154
Heated Exterior Mirrors..............................154
Cabin Air Filter...............................................154
Remote Start
..................................................155
Seats
Sitting in the Correct Position..................156
Head Restraints
............................................156
Manual Seats
.................................................158
Power Seats
...................................................159
Memory Function
..........................................161
Rear Seats.......................................................163
Heated Seats.................................................164
Climate Controlled Seats..........................165
Front Seat Armrest
......................................166
Rear Seat Armrest........................................167
Universal Garage Door Opener
Universal Garage Door Opener...............168
2
Super Duty (TFE) Canada/United States of America, enUSA, Edition date: 201709, First Printing Table of Contents
Page 39 of 656
The childproof locks are located on the
rear edge of each rear door and must be
set separately for each door.
Left-Hand Side
Turn counterclockwise to lock and
clockwise to unlock.
Right-Hand Side
Turn clockwise to lock and
counterclockwise to unlock.
36
Super Duty (TFE) Canada/United States of America, enUSA, Edition date: 201709, First Printing Child Safety
Page 56 of 656

The side airbags are located on the
outboard side of the seatbacks of the front
seats. In certain sideways crashes, the
airbag on the side affected by the crash
will be inflated. The airbag was designed
to inflate between the door panel and
occupant to further enhance the protection
provided occupants in side impact crashes.
The system consists of the following:
•
A label or embossed side panel
indicating that side airbags are found
on your vehicle.
• Side airbags located inside the
seatback of the driver and front
passenger seats. ·Crash sensors and monitoring
system with readiness indicator.
See Crash Sensors and Airbag
Indicator (page 54).
The design and development of the side
airbag system included recommended
testing procedures that were developed
by a group of automotive safety experts
known as the Side Airbag Technical
Working Group. These recommended
testing procedures help reduce the risk of
injuries related to the deployment of side
airbags. SAFETY CANOPY™ WARNINGS
Do not place objects or mount
equipment on or near the headliner
at the siderail that may come into
contact with a deploying curtain airbag.
Failure to follow these instructions may
increase the risk of personal injury in the
event of a crash. Do not lean your head on the door.
The curtain airbag could injure you
as it deploys from the headliner.
Do not attempt to service, repair, or
modify the supplementary restraint
system or associated components.
Failure to follow this instruction could
result in personal injury or death. All occupants of your vehicle,
including the driver, should always
properly wear their seatbelts, even
when an airbag supplemental restraint
system is provided. Failure to properly wear
your seatbelt could seriously increase the
risk of injury or death. To reduce risk of injury, do not
obstruct or place objects in the
deployment path of the airbag.
If a supplementary restraint system
component has deployed, it will not
function again. Have the system and
associated components inspected as soon
as possible. Failure to follow this
instruction could result in personal injury
or death. The Safety Canopy deploys during
significant side crashes or when a certain
likelihood of a rollover event is detected
by the rollover sensor. The Safety Canopy
is mounted to the roof side rail sheet metal,
behind the headliner, above each row of
seats. In certain sideways crashes or
rollover events, the Safety Canopy will be
53
Super Duty (TFE) Canada/United States of America, enUSA, Edition date: 201709, First Printing Supplementary Restraints SystemE152533 E67017
Page 57 of 656

activated, regardless of which seats are
occupied. The Safety Canopy is designed
to inflate between the side window area
and occupants to further enhance
protection provided in side impact crashes
and rollover events.
The system consists of the following:
•
Safety Canopy curtain airbags above
the trim panels over the front and rear
side windows identified by a label or
wording on the headliner or roof-pillar
trim.
• A flexible headliner which opens above
the side doors to allow air curtain
deployment · Crash sensors and monitoring
system with a readiness
indicator. See Crash Sensors
and Airbag Indicator (page 54).
Properly restrain children 12 years old and
under in the rear seats. The Safety Canopy
will not interfere with children restrained
using a properly installed child or booster
seat because it is designed to inflate
downward from the headliner above the
doors along the side window opening. The design and development of the Safety
Canopy included recommended testing
procedures that were developed by a
group of automotive safety experts known
as the Side Airbag Technical Working
Group. These recommended testing
procedures help reduce the risk of injuries
related to the deployment of side airbags
(including the Safety Canopy).
CRASH SENSORS AND
AIRBAG INDICATOR
WARNING
Modifying or adding equipment to
the front end of the vehicle (including
frame, bumper, front end body
structure and tow hooks) may affect the
performance of the airbag system,
increasing the risk of injury. Do not modify
the front end of the vehicle. Your vehicle has a collection of crash and
occupant sensors which provide
information to the restraints control
module which deploys (activates) the
front safety belt pretensioners, driver
airbag, passenger airbag, seat mounted
side airbags, and the Safety Canopy®.
Based on the type of crash (frontal impact,
side impact or rollover), the restraints
control module will deploy the appropriate
safety devices.
The restraints control module also
monitors the readiness of the above safety
devices plus the crash and occupant
sensors. The readiness of the safety
system is indicated by a warning indicator
light in the instrument cluster or by a
backup tone if the warning light is not
working. See
Instrument Cluster (page
105). Routine maintenance of the airbag is
not required.
A difficulty with the system is indicated by
one or more of the following:
54
Super Duty (TFE) Canada/United States of America, enUSA, Edition date: 201709, First Printing Supplementary Restraints SystemE75004 E67017
Page 71 of 656
Note:
The system may not function if the
key is close to metal objects or electronic
devices, for example keys or a cell phone.
Note: If the system does not function, use
the key blade to lock and unlock your
vehicle. See Remote Control (page 56).
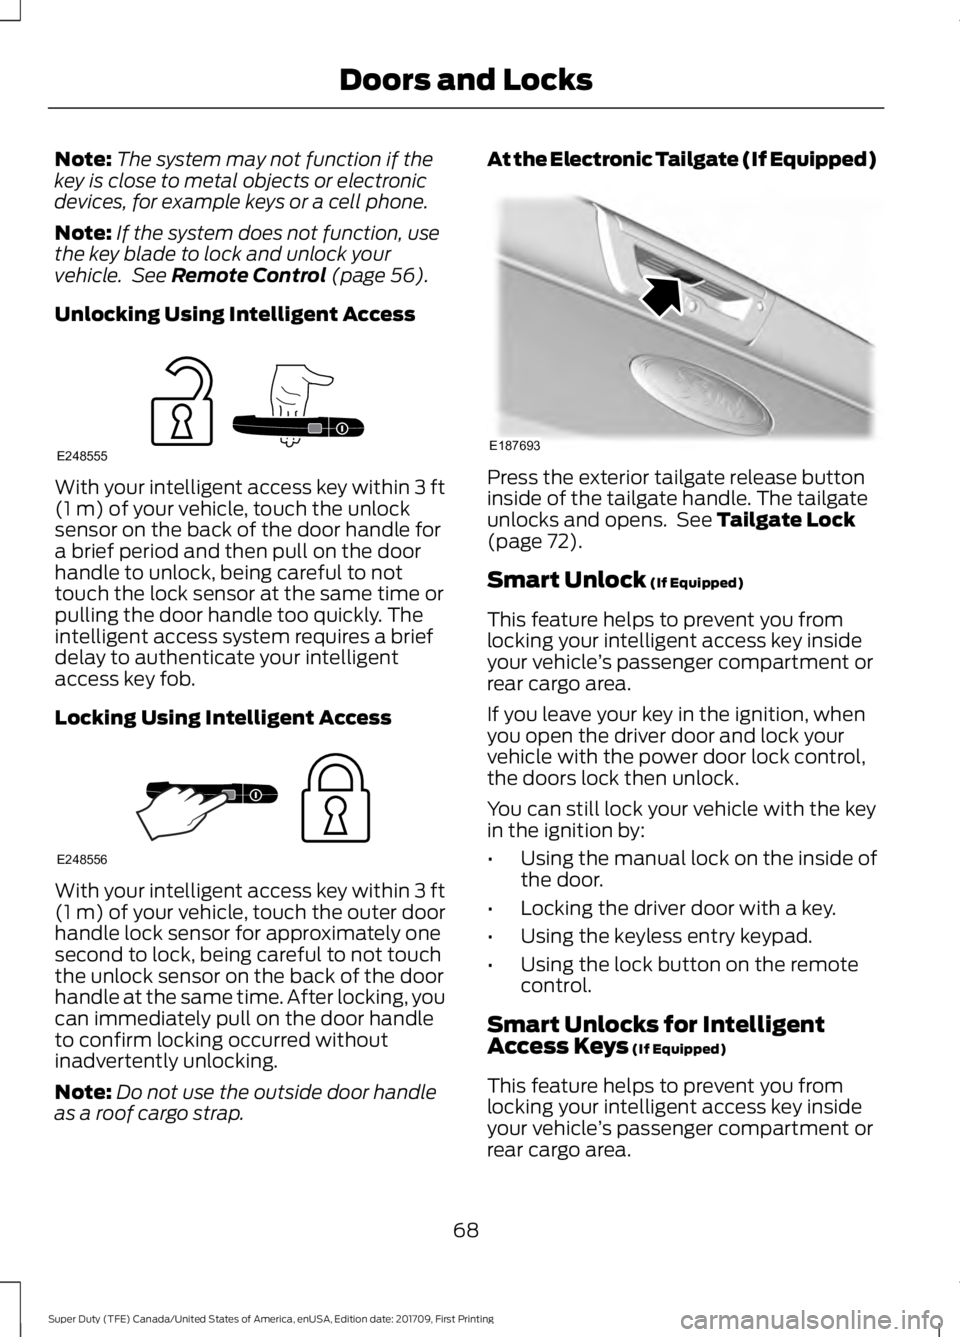
Unlocking Using Intelligent Access With your intelligent access key within
3 ft
(1 m) of your vehicle, touch the unlock
sensor on the back of the door handle for
a brief period and then pull on the door
handle to unlock, being careful to not
touch the lock sensor at the same time or
pulling the door handle too quickly. The
intelligent access system requires a brief
delay to authenticate your intelligent
access key fob.
Locking Using Intelligent Access With your intelligent access key within
3 ft
(1 m) of your vehicle, touch the outer door
handle lock sensor for approximately one
second to lock, being careful to not touch
the unlock sensor on the back of the door
handle at the same time. After locking, you
can immediately pull on the door handle
to confirm locking occurred without
inadvertently unlocking.
Note: Do not use the outside door handle
as a roof cargo strap. At the Electronic Tailgate (If Equipped)
Press the exterior tailgate release button
inside of the tailgate handle. The tailgate
unlocks and opens. See
Tailgate Lock
(page 72).
Smart Unlock
(If Equipped)
This feature helps to prevent you from
locking your intelligent access key inside
your vehicle ’s passenger compartment or
rear cargo area.
If you leave your key in the ignition, when
you open the driver door and lock your
vehicle with the power door lock control,
the doors lock then unlock.
You can still lock your vehicle with the key
in the ignition by:
• Using the manual lock on the inside of
the door.
• Locking the driver door with a key.
• Using the keyless entry keypad.
• Using the lock button on the remote
control.
Smart Unlocks for Intelligent
Access Keys
(If Equipped)
This feature helps to prevent you from
locking your intelligent access key inside
your vehicle ’s passenger compartment or
rear cargo area.
68
Super Duty (TFE) Canada/United States of America, enUSA, Edition date: 201709, First Printing Doors and LocksE248555 E248556 E187693
Page 83 of 656
USING POWER RUNNING
BOARDS
WARNINGS
In extreme climates, excessive ice
buildup may occur, causing the
running boards not to deploy. Make
sure that the running boards have
deployed, and have finished moving before
attempting to step on them. The running
boards will resume normal function once
the blockage is cleared. Switch off the running boards before
jacking or placing any object under
your vehicle. Never place your hand
between the extended running board and
your vehicle. A moving running board may
cause injury. Note:
Do not use the running boards, front
and rear hinge assemblies, running board
motors, or the running board underbody
mounts to lift your vehicle when jacking.
Always use proper jacking points.
Note: The running boards may operate
more slowly in cool temperatures.
Note: The running board mechanism may
trap debris such as mud, dirt, snow, ice and
salt. This may cause unwanted noise. If this
happens, manually set the running boards
to the deployed position. Then, wash the
system, in particular the front and rear hinge
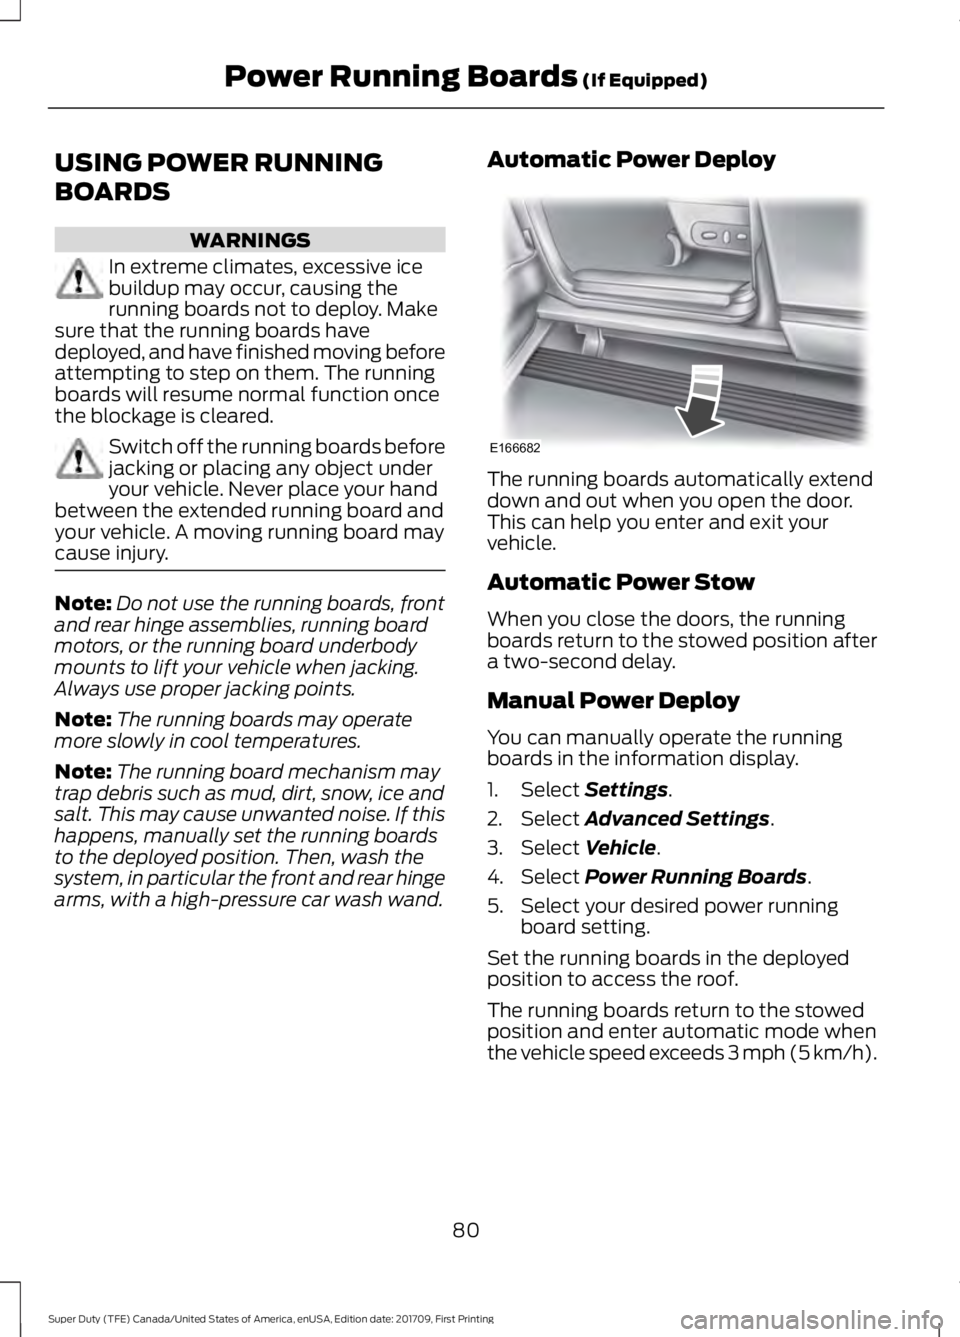
arms, with a high-pressure car wash wand. Automatic Power Deploy The running boards automatically extend
down and out when you open the door.
This can help you enter and exit your
vehicle.
Automatic Power Stow
When you close the doors, the running
boards return to the stowed position after
a two-second delay.
Manual Power Deploy
You can manually operate the running
boards in the information display.
1. Select Settings.
2. Select
Advanced Settings.
3. Select
Vehicle.
4. Select
Power Running Boards.
5. Select your desired power running board setting.
Set the running boards in the deployed
position to access the roof.
The running boards return to the stowed
position and enter automatic mode when
the vehicle speed exceeds 3 mph (5 km/h).
80
Super Duty (TFE) Canada/United States of America, enUSA, Edition date: 201709, First Printing Power Running Boards
(If Equipped)E166682
Page 106 of 656
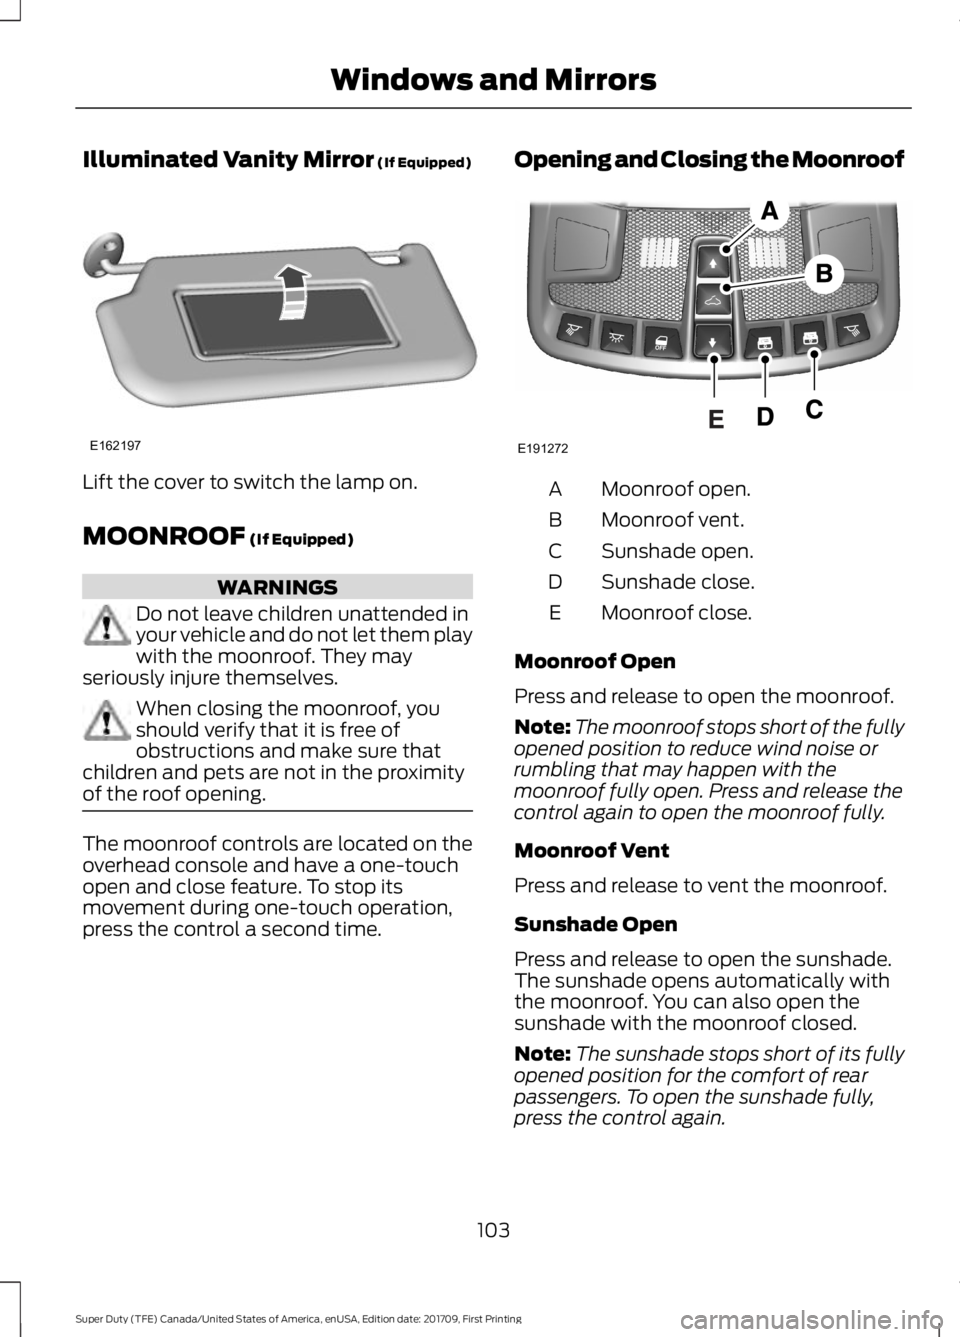
Illuminated Vanity Mirror (If Equipped)
Lift the cover to switch the lamp on.
MOONROOF
(If Equipped)
WARNINGS
Do not leave children unattended in
your vehicle and do not let them play
with the moonroof. They may
seriously injure themselves. When closing the moonroof, you
should verify that it is free of
obstructions and make sure that
children and pets are not in the proximity
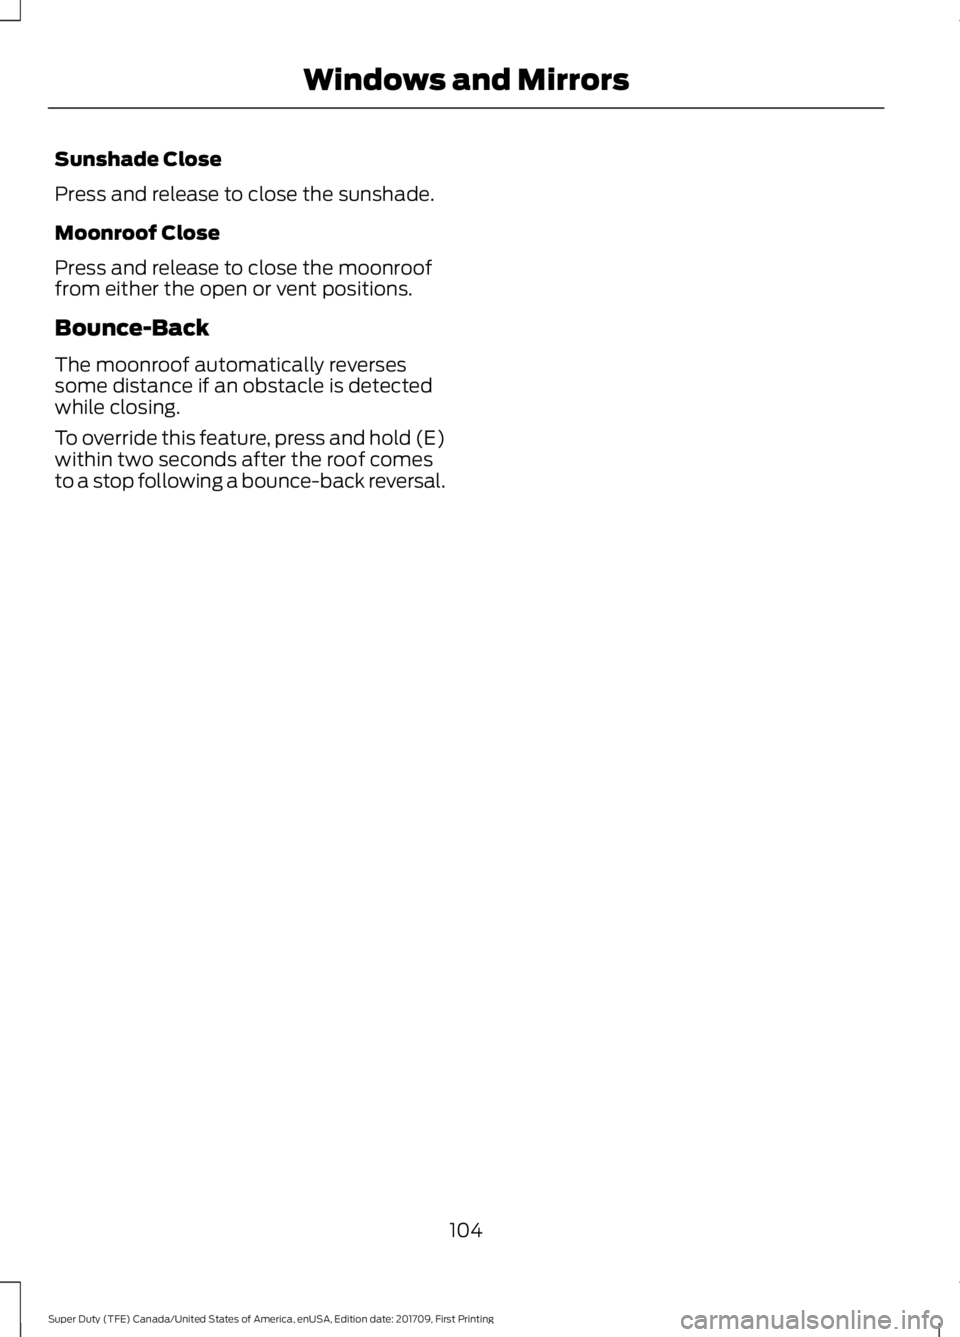
of the roof opening. The moonroof controls are located on the
overhead console and have a one-touch
open and close feature. To stop its
movement during one-touch operation,
press the control a second time. Opening and Closing the Moonroof Moonroof open.
A
Moonroof vent.
B
Sunshade open.
C
Sunshade close.
D
Moonroof close.
E
Moonroof Open
Press and release to open the moonroof.
Note: The moonroof stops short of the fully
opened position to reduce wind noise or
rumbling that may happen with the
moonroof fully open. Press and release the
control again to open the moonroof fully.
Moonroof Vent
Press and release to vent the moonroof.
Sunshade Open
Press and release to open the sunshade.
The sunshade opens automatically with
the moonroof. You can also open the
sunshade with the moonroof closed.
Note: The sunshade stops short of its fully
opened position for the comfort of rear
passengers. To open the sunshade fully,
press the control again.
103
Super Duty (TFE) Canada/United States of America, enUSA, Edition date: 201709, First Printing Windows and MirrorsE162197 E191272
Page 107 of 656
Sunshade Close
Press and release to close the sunshade.
Moonroof Close
Press and release to close the moonroof
from either the open or vent positions.
Bounce-Back
The moonroof automatically reverses
some distance if an obstacle is detected
while closing.
To override this feature, press and hold (E)
within two seconds after the roof comes
to a stop following a bounce-back reversal.
104
Super Duty (TFE) Canada/United States of America, enUSA, Edition date: 201709, First Printing Windows and Mirrors