2018 FORD F-450 ESP
[x] Cancel search: ESPPage 250 of 660

Changing the Set Speed
•
Press SET+ or SET- to change the set
speed in small increments.
• Press the accelerator or brake pedal
until you reach the desired speed. Press
SET+
or SET-.
• Press and hold
SET+ or SET- to
change the set speed in large
increments. Release the control when
you reach the desired speed.
The system may apply the brakes to slow
the vehicle to the new set speed. The set
speed displays continuously in the
information display when the system is
active.
Canceling the Set Speed
Press
CNCL or tap the brake pedal. The
set speed does not erase.
Resuming the Set Speed
Note: Only use resume if you are aware of
the set speed and intend to return to it.
Press
RES. Your vehicle speed returns to
the previously set speed and gap setting.
The set speed displays continuously in the
information display when the system is
active.
Automatic Cancellation
Note: If the engine speed drops too low, an
audible warning sounds and a message
appears in the information display.
Automatic braking releases.
Hilly Condition and Trailer Tow
Usage
Note: An audible alarm sounds and the
system shuts down if it applies brakes for
an extended period of time. This allows the
brakes to cool. The system functions
normally again after the brakes cool. Note:
When towing with adaptive cruise
control, switch on Tow/Haul Mode and
Diesel Engine Brake.
Note: Tow/Haul mode increases the time
gaps and allows more distance for braking.
Select a lower gear when the system is
active in situations such as prolonged
downhill driving on steep grades, for
example in mountainous areas. The
system needs additional engine braking in
these situations to reduce the load on the
vehicle ’s regular brake system to prevent
it from overheating.
Switching Adaptive Cruise Control
Off
Note: You erase the set speed and gap
setting when you switch the system off.
Press
OFF when the system is in standby
mode, or switch the ignition off.
Detection Issues WARNINGS
On rare occasions, detection issues
can occur due to the road
infrastructures, for example bridges,
tunnels and safety barriers. In these cases,
the system may brake late or
unexpectedly. At all times, you are
responsible for controlling your vehicle,
supervising the system and intervening, if
required. If the system malfunctions, have your
vehicle checked as soon as possible.
The radar sensor has a limited field of view.
It may not detect vehicles at all or detect
a vehicle later than expected in some
situations. The lead vehicle graphic does
not illuminate if the system does not
detect a vehicle in front of you.
247
Super Duty (TFE) Canada/United States of America, enUSA, Edition date: 201709, Second Printing Cruise Control
(If Equipped)
Page 252 of 660

Possible Causes and Actions for This Message Displaying:
Action
Cause
Clean the grille surface in front of the radar
or remove the object causing the obstruc-
tion.
The surface of the radar is dirty or
obstructed.
Wait a short time. It may take several
minutes for the radar to detect that it is free
from obstruction.
The surface of the radar is clean but the
message remains in the display.
Do not use the system in these conditions
because it may not detect any vehicles
ahead.
Heavy rain or snow is interfering with the
radar signals.
Do not use the system in these conditions
because it may not detect any vehicles
ahead.
Water, snow or ice on the surface of the
road may interfere with the radar signals.
Wait a short time or switch to normal cruise
control.
You are in a desert or remote area with no
other vehicles and no roadside objects.
Due to the nature of radar technology, it is possible to get a blockage warning with no
actual block. This happens, for example, when driving in sparse rural or desert
environments. A false blocked condition either self clears, or clears after you restart your
vehicle.
Switching to Normal Cruise
Control WARNING
Normal cruise control will not brake
when your vehicle is approaching
slower vehicles. Always be aware of
which mode you have selected and apply
the brakes when necessary. You can change from adaptive cruise
control to normal cruise control through
the information display. The cruise control indicator light
replaces the adaptive cruise
control indicator light if you
select normal cruise control. The gap
setting does not display, and the system
does not respond to lead vehicles.
Automatic braking remains active to
maintain set speed.
249
Super Duty (TFE) Canada/United States of America, enUSA, Edition date: 201709, Second Printing Cruise Control (If Equipped)E71340
Page 253 of 660

LANE KEEPING SYSTEM (If
Equipped) WARNING
The system is designed to aid the
driver. It is not intended to replace
your attention and judgment. You are
still responsible to drive with due care and
attention. Note:
The system works as long as the
camera can detect one lane marking at a
speed above
40 mph (64 km/h).
Note: The system may not function if the
camera is blocked or there is damage to the
windshield.
The Lane Keeping System automatically
detects and tracks the road lane markings
using a camera mounted behind the
interior review view mirror. The system
notifies you to stay in your lane when the
front camera detects an unintentional lane
change is likely to occur.
Switching the System On and Off
Note: The system on or off setting is stored
until it is manually changed, unless a MyKey
is detected. If the system detects a MyKey,
it defaults to on and the mode is set to alert.
Note: If a MyKey is detected, pressing the
button will not affect the on or off status of
the system. You can only change the mode
and intensity settings. Press the button located on the
center console to switch the
system on or off. System Settings
The system sensitivity and intensity can
be adjusted through the display screen.
See General Information (page 113). The
system remembers the last selection. You
do not need to readjust the setting each
time you turn on your vehicle.
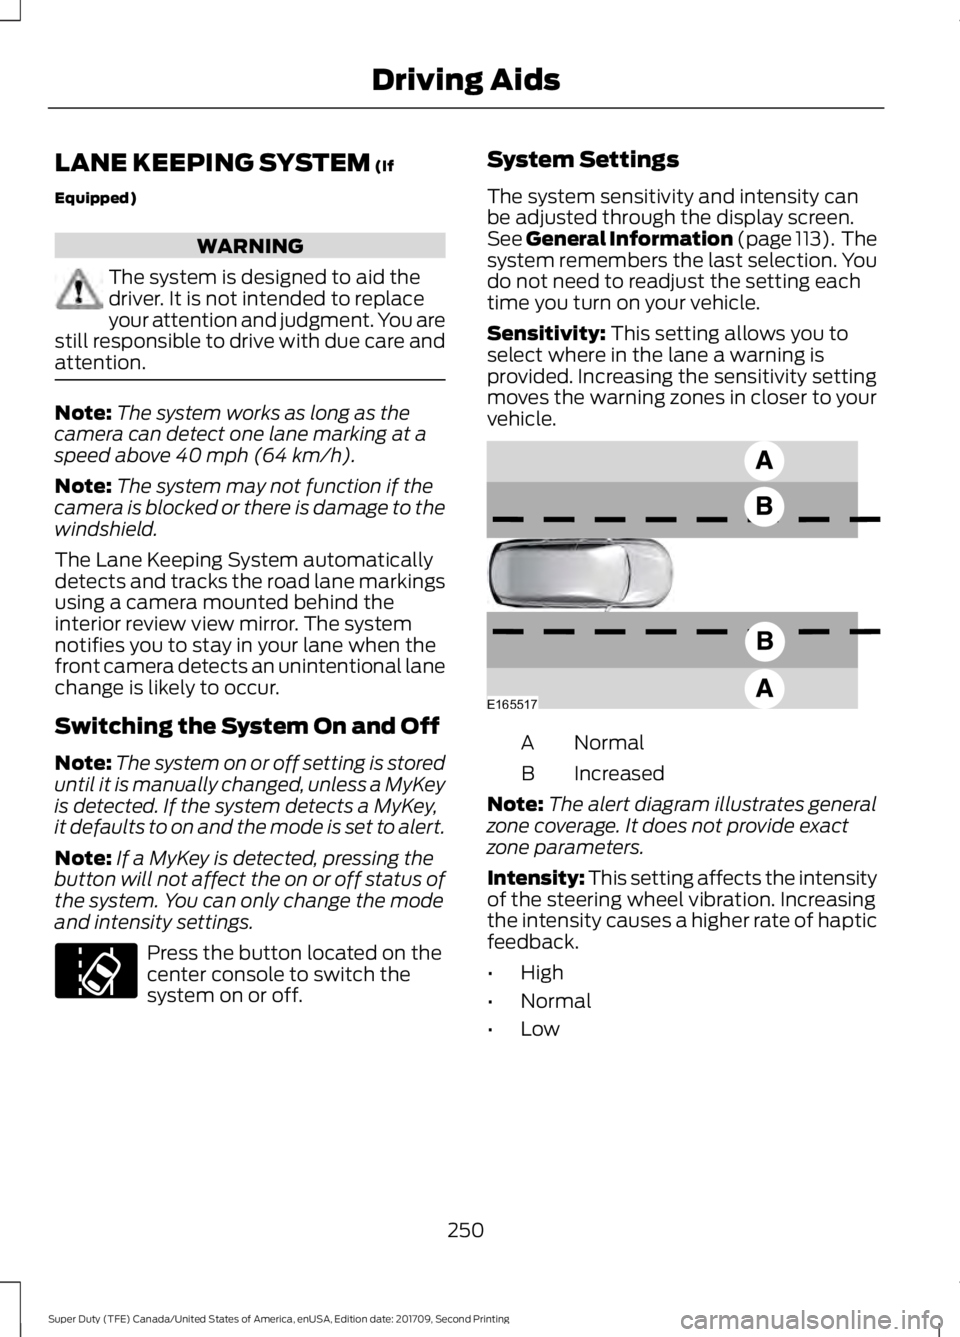
Sensitivity:
This setting allows you to
select where in the lane a warning is
provided. Increasing the sensitivity setting
moves the warning zones in closer to your
vehicle. Normal
A
Increased
B
Note: The alert diagram illustrates general
zone coverage. It does not provide exact
zone parameters.
Intensity: This setting affects the intensity
of the steering wheel vibration. Increasing
the intensity causes a higher rate of haptic
feedback.
• High
• Normal
• Low
250
Super Duty (TFE) Canada/United States of America, enUSA, Edition date: 201709, Second Printing Driving AidsE173233 E165517
Page 256 of 660

The Blind Spot Information System is
designed to aid you in detecting vehicles
that may have entered the blind spot zone
(A). The detection area is on both sides of
your vehicle, extending rearward from the
exterior mirrors to approximately 13 ft
(4 m) beyond the bumper. The system is
designed to alert you if certain vehicles
enter the blind spot zone while driving.
Note: The Blind Spot Information System
does not prevent contact with other vehicles
or objects; nor detect parked vehicles,
people, animals or infrastructure (fences,
guardrails, trees). It is only designed to alert
you to moving vehicles in the blind spot
zones.
Note: When a vehicle passes quickly
through the blind spot zone, typically fewer
than two seconds, the system does not
trigger.
Using the System
The Blind Spot Information System turns
on when you start the engine and you drive
your vehicle forward above
5 mph
(8 km/h).
For automatic transmissions, the Blind
Spot Information System remains on while
the transmission is in drive (D). If shifted
into reverse (R) or park (P) the Blind Spot
Information System turns off. Once shifted
back into drive (D), the Blind Spot
Information System turns back on when
you drive your vehicle above
5 mph
(8 km/h).
Note: For automatic transmissions, the
Blind Spot Information System does not
function in reverse (R) or park (P).
For manual transmissions, the Blind Spot
Information System is on for all gears
except reverse (R). System Lights and Messages
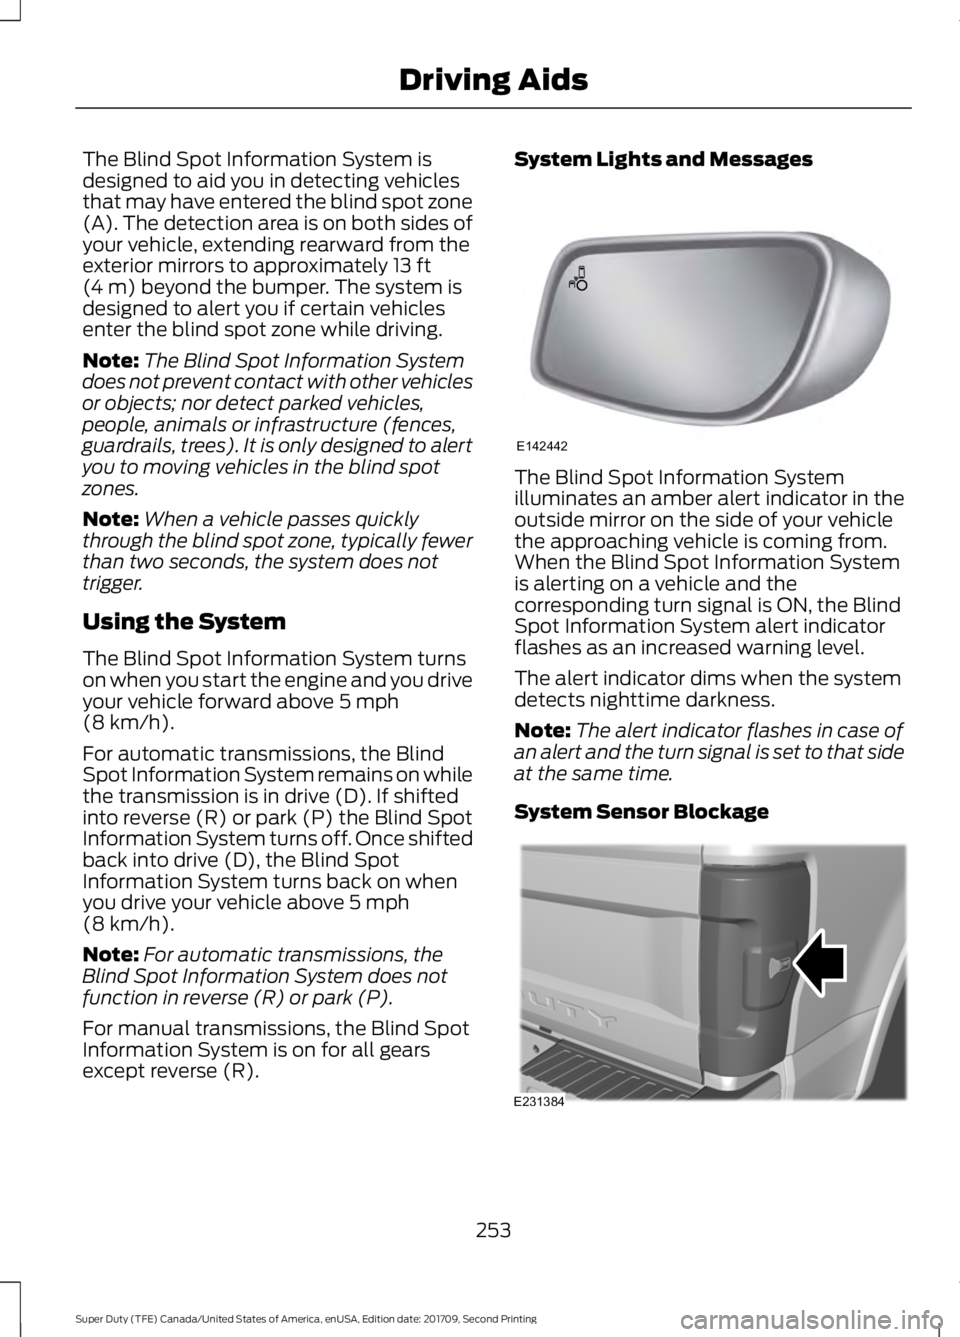
The Blind Spot Information System
illuminates an amber alert indicator in the
outside mirror on the side of your vehicle
the approaching vehicle is coming from.
When the Blind Spot Information System
is alerting on a vehicle and the
corresponding turn signal is ON, the Blind
Spot Information System alert indicator
flashes as an increased warning level.
The alert indicator dims when the system
detects nighttime darkness.
Note:
The alert indicator flashes in case of
an alert and the turn signal is set to that side
at the same time.
System Sensor Blockage 253
Super Duty (TFE) Canada/United States of America, enUSA, Edition date: 201709, Second Printing Driving AidsE142442 E231384
Page 263 of 660

•
Heavy or uneven efforts may be caused
by low power steering fluid. Check for
low power steering pump fluid level
before seeking service by your dealer.
• Do not fill the power steering pump
reservoir above the MAX mark on the
reservoir, as this may result in leaks
from the reservoir.
If the power steering system breaks down
(or if the engine is turned off), you can
steer the vehicle manually, but it takes
more effort.
If the steering wanders or pulls, check for:
• an improperly inflated tire
• uneven tire wear
• loose or worn suspension components
• loose or worn steering components
• improper vehicle alignment
If any steering components are serviced or
replaced, install new fasteners (many are
coated with thread adhesive or have
prevailing torque features which may not
be re-used). Never re-use a bolt or nut.
Torque fasteners to specifications.
A high crown in the road or high crosswinds
may also make the steering seem to
wander or pull.
Adaptive Steering (If Equipped)
Note: The adaptive steering system has
diagnostic checks that continuously monitor
the system. If a fault is detected a message
displays in the information display. If a red
warning message displays, stop your vehicle
as soon as it is safe to do so. The message
may clear if the fault is no longer present. If
an adaptive steering system warning
message appears each time you start your
vehicle, have the system checked as soon
as possible. The adaptive steering system continually
changes the steering ratio with changes to
vehicle speed, optimizing the steering
response in all conditions. The system also
changes when you switch on the
transmission tow/haul feature. When you
select the tow/haul button, the adaptive
steering system reduces vehicle sensitivity
to steering inputs at higher vehicle speeds,
while maintaining the ease of parking and
maneuverability at low speeds.
Note:
The adaptive steering system is
designed with a locking device. With the
lock engaged, the adaptive steering system
remains mechanically locked at a fixed
steering ratio. You may also notice a click
when you switch the vehicle on or after you
switch it off, as the lock disengages or
engages.
Note: If your vehicle loses electrical power
or detects a fault when you are driving, the
system automatically shuts down and you
retain normal steering function with a fixed
steering ratio. During this time it is possible
that the steering wheel may not be straight
when the vehicle is driving straight ahead.
In addition, the driver may notice that the
steering wheel angle required to steer the
vehicle may be different.
Note: During parking maneuvers, the
adaptive steering system balances the driver
work load for various steering wheel inputs
and vehicle loading conditions. Under
extreme operating conditions the system
locking device may engage. This strategy
prevents overheating and permanent
damage to the adaptive steering system.
Typical steering and driving maneuvers
allow the system to cool and return to
normal operation.
260
Super Duty (TFE) Canada/United States of America, enUSA, Edition date: 201709, Second Printing Driving Aids
Page 264 of 660

COLLISION WARNING SYSTEM
(If Equipped)
Principle Of Operation (If Equipped)
WARNINGS
This system is an extra driving aid. It
does not replace your attention and
judgment, or the need to apply the
brakes. This system does NOT
automatically brake your vehicle. If you fail
to press the brake pedal when necessary,
you may collide with another vehicle. The collision warning system with
brake support cannot help prevent
all collisions. Do not rely on this
system to replace your judgment and the
need to maintain correct distance and
speed. Note:
The system does not detect, warn or
respond to potential collisions with vehicles
to the rear or sides of your vehicle.
Note: The collision warning system is active
at speeds above approximately
5 mph
(8 km/h).
Note: The collision warning system will be
unavailable if you disable the electronic
stability control. See
Using Stability
Control (page 231). The system alerts you of certain collision
risks. The system's sensor detects your
vehicle's rapid approach to other vehicles
traveling in the same direction as your
vehicle. When your vehicle rapidly approaches
another vehicle, a red warning light flashes
and a tone sounds.
The brake support system assists you in
reducing any collision speed by
pre-charging the brakes. If the risk of
collision continues to increases after the
audio-visual warning, the brake support
prepares the brake system for rapid
braking. The system does not
automatically activate the brakes, but if
the brake pedal is pressed even lightly, the
brakes apply full stopping power.
Using the Collision Warning System
WARNING
The collision warning system
’s brake
support reduces collision speed only
if you brake your vehicle before any
collision. As in any typical braking situation,
you must press your brake pedal. You can use your information display
control to adjust the collision warning
system's sensitivity or to turn the system
On or Off. Your vehicle will remember
these settings across key cycles. You may
change the collision warning system
sensitivity to any one of three possible
settings. See General Information (page
113
).
261
Super Duty (TFE) Canada/United States of America, enUSA, Edition date: 201709, Second Printing Driving AidsE156130 E156131
Page 277 of 660

TRAILER REVERSING AIDS
Trailer Reverse Guidance
WARNING
Driving while distracted can result in
loss of vehicle control, crash and
injury. We strongly recommend that
you use extreme caution when using any
device that may take your focus off the
road. Your primary responsibility is the safe
operation of your vehicle. We recommend
against the use of any hand-held device
while driving and encourage the use of
voice-operated systems when possible.
Make sure you are aware of all applicable
local laws that may affect the use of
electronic devices while driving. Note:
You must always be aware of the
vehicle and trailer combination and the
surrounding environment.
Note: The system does not detect or
prevent the vehicle or trailer from making
contact with obstacles in the surrounding
environment.
Note: Keep in mind that the front end of
the vehicle swings out when changing the
direction of the trailer.
Note: The system relies on user
measurements to determine sticker
placement and system limits. It is critical to
take the key measurements correctly.
Incorrect measurements can result in the
improper function of the system up to and
including contact between the vehicle and
trailer.
Note: The system limits vehicle speed when
backing up. The system is not a replacement
for proper use of the throttle and brake
pedals.
Note: Some features associated with this
system do not work until you set it up. Principle of Operation
Trailer reverse guidance is a driver
assistance feature that helps take the
guesswork out of getting your trailer
positioned where you want it, quickly and
easily, when driving in reverse (R).
Each trailer you use with your vehicle has
to be setup once. Sticker placement is
extremely important and there are specific
placement rules.
Setting Up Trailer Reverse
Guidance
Note:
Your vehicle saves the trailer
information when you enter it into the
system. A maximum of 10 trailers can be
added to the system.
Step 1: Position your Vehicle and Trailer
Hitch your trailer to the truck and connect
the electrical wiring harness. Check to
make sure that the wiring is working. See
Essential Towing Checks (page 286).
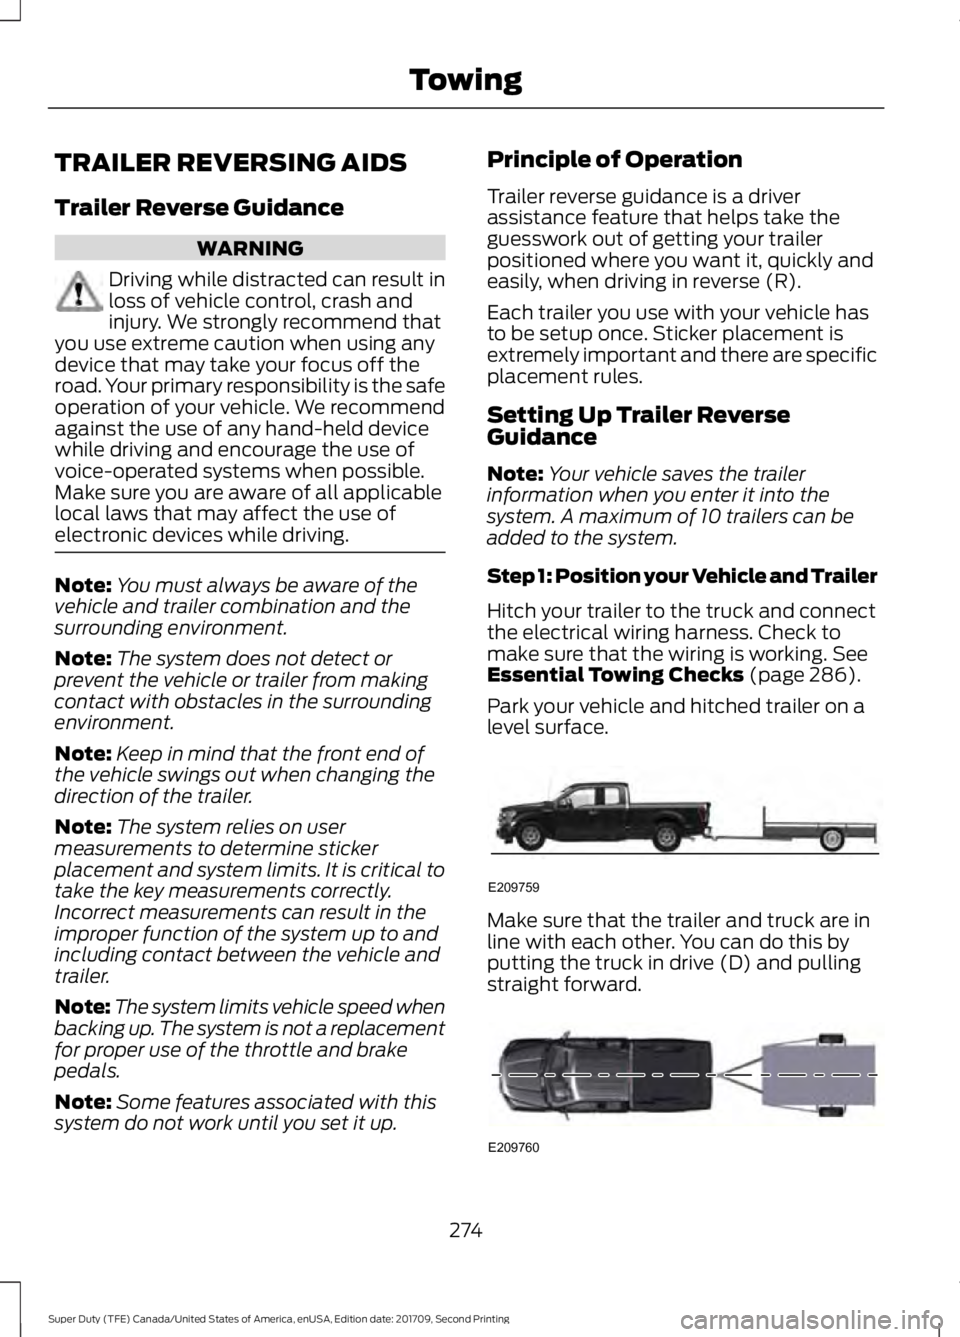
Park your vehicle and hitched trailer on a
level surface. Make sure that the trailer and truck are in
line with each other. You can do this by
putting the truck in drive (D) and pulling
straight forward.
274
Super Duty (TFE) Canada/United States of America, enUSA, Edition date: 201709, Second Printing TowingE209759 E209760
Page 295 of 660

Trailer Brake Effort Setting
The trailer brake controller allows the user
to customize how aggressively the trailer
brakes engage. The default value is the low
setting and is the recommended setting
for most trailers. If your trailer's brakes
require more initial voltage, or if you prefer
more aggressive trailer braking, then select
either the medium or the high setting.
Procedure for Setting Trailer Brake
Controller Mode
Choose the low, medium or high setting
for the required initial trailer brake output.
Procedure for Adjusting Gain
Note:
Only perform this procedure in a
traffic-free environment at speeds of
approximately 20– 25 mph (30–40 km/h).
The gain setting adjusts the trailer brake
controller for the specific towing condition.
You should change the setting as towing
conditions change. Changes to towing
conditions include trailer load, vehicle load,
road conditions and weather.
The gain should be set to provide the
maximum trailer braking assistance while
making sure the trailer wheels do not lock
when using the brakes. Locked trailer
wheels may lead to trailer instability.
1. Make sure the trailer brakes are in good
working condition, functioning normally
and properly adjusted. See your trailer
dealer if necessary.
2. Hook up the trailer and make the electrical connections according to the
trailer manufacturer's instructions.
3. When you plug in a trailer with electric or electric-over-hydraulic brakes, a
confirmation message appears in the
information display. 4. Use the gain adjustment (+ and -)
buttons to increase or decrease the
gain setting to the desired starting
point. A gain setting of 6.0 is a good
starting point for heavier loads.
5. In a traffic-free environment, tow the trailer on a dry, level surface at a speed
of
20– 25 mph (30–40 km/h) and
squeeze the manual control lever
completely.
6. If the trailer wheels lock up, indicated by squealing tires, reduce the gain
setting. If the trailer wheels turn freely,
increase the gain setting. Repeat Steps
5 and 6 until the gain setting is at a
point just below trailer wheel lock-up.
If towing a heavier trailer, trailer wheel
lock-up may not be attainable even
with the maximum gain setting of 10.
Information Display Warning Messages
Note: An authorized dealer can diagnose
the trailer brake controller to determine
exactly which trailer fault has occurred.
However, your Ford warranty does not cover
this diagnosis if the fault is with the trailer.
TRAILER BRAKE MODULE FAULT
Displays in response to faults sensed by
the trailer brake controller, accompanied
by a single tone. If this message appears,
contact an authorized dealer as soon as
possible for diagnosis and repair. The
controller may still function, but with
degraded performance.
WIRING FAULT ON TRAILER
Displays when there is a short circuit on
the electric brake output wire.
If this message displays, with no trailer
connected, the problem is with your vehicle
wiring or trailer brake controller. Contact
an authorized dealer.
292
Super Duty (TFE) Canada/United States of America, enUSA, Edition date: 201709, Second Printing Towing