2018 FORD F-150 oil capacities
[x] Cancel search: oil capacitiesPage 8 of 641

Engine Oil Dipstick - Gasoline
...............350
Engine Oil Dipstick - Diesel ......................
351
Engine Oil Check - Gasoline ....................
351
Engine Oil Check - Diesel .........................
352
Oil Change Indicator Reset .....................
353
Engine Coolant Check ..............................
354
Automatic Transmission Fluid Check ........................................................................\
358
Transfer Case Fluid Check ......................
358
Brake Fluid Check .......................................
359
Power Steering Fluid Check ...................
359
Washer Fluid Check ...................................
359
Draining the Fuel Filter Water Trap ......
360
Fuel Filter - Diesel ......................................
360
Fuel Filter - Gasoline .................................
360
Changing the 12V Battery .......................
360
Checking the Wiper Blades .....................
362
Changing the Wiper Blades ....................
363
Adjusting the Headlamps .......................
363
Changing a Bulb .........................................
364
Bulb Specification Chart .........................
368
Changing the Engine Air Filter - Gasoline ........................................................................\
370
Changing the Engine Air Filter - Diesel ........................................................................\
370
Vehicle Care
General Information ...................................
373
Cleaning Products ......................................
373
Cleaning the Exterior ..................................
373
Waxing ............................................................
375
Cleaning the Engine ...................................
375
Cleaning the Exhaust ................................
375
Cleaning the Windows and Wiper Blades ........................................................................\
376
Cleaning the Interior ..................................
376
Cleaning the Instrument Panel and Instrument Cluster Lens .......................
377
Cleaning Leather Seats ............................
378
Repairing Minor Paint Damage ..............
379Cleaning the Wheels
.................................
379
Vehicle Storage ............................................
379
Body Styling Kits ..........................................
381
Wheels and Tires
General Information ..................................
382
Tire Care .........................................................
384
Using Snow Chains ...................................
398
Tire Pressure Monitoring System .........
399
Changing a Road Wheel ..........................
405
Technical Specifications ...........................
413
Capacities and Specifications
Engine Specifications - 2.7L EcoBoost™ ........................................................................\
.
415
Engine Specifications - 3.0L V6, Diesel ........................................................................\
.
415
Engine Specifications - 3.3L Duratec - V6 ..................................................................
416
Engine Specifications - 3.5L Ecoboost™ ........................................................................\
.
416
Engine Specifications - 5.0L Modular - V8 ..................................................................
417
Motorcraft Parts - 2.7L EcoBoost™ ......
418
Motorcraft Parts - 3.0L V6, Diesel ........
418
Motorcraft Parts - 3.3L Duratec - V6 ........................................................................\
.
419
Motorcraft Parts - 3.5L Ecoboost™ .....
420
Motorcraft Parts - 5.0L Modular - V8 ........................................................................\
420
Vehicle Identification Number ................
421
Vehicle Certification Label ......................
422
Transmission Code Designation ...........
423
Capacities and Specifications - 2.7L EcoBoost™ ...............................................
424
Capacities and Specifications - 3.0L V6, Diesel ..........................................................
428
Capacities and Specifications - 3.3L Duratec - V6 .............................................
432
Capacities and Specifications - 3.5L Ecoboost™ ...............................................
437
5
F-150 (TFC) Canada/United States of America, enUSA, Edition date: 201709, Fifth-Printing Table of Contents
Page 178 of 641

2. When your vehicle has stopped, move
the transmission selector lever to
position P and turn the key to off.
3. Apply the parking brake.
Vehicles with Keyless Start
1. Move the transmission selector lever to position
N and use the brakes to
bring your vehicle to a safe stop.
2. When your vehicle has stopped, move the transmission selector lever to
position
P.
3. Press and hold the button for one second, or press it three times within
two seconds.
4. Apply the parking brake.
Guarding Against Exhaust Fumes WARNING:
Exhaust leaks may
result in entry of harmful and potentially
lethal fumes into the passenger
compartment. If you smell exhaust
fumes inside your vehicle, have your
vehicle inspected immediately. Do not
drive if you smell exhaust fumes.
Important Ventilating Information
If you stop your vehicle and leave the
engine idling for long periods, we
recommend that you do one of the
following:
• Open the windows at least
1 in
(2.5 cm).
• Set your climate control to outside air.
STARTING A DIESEL ENGINE
Read all starting instructions carefully
before you start your vehicle. For temperatures below
32°F (0°C), the
use of the correct grade engine oil is
essential for proper operation. Refer to
Engine oil specifications for more
information. See
Capacities and
Specifications (page 424).
Your vehicle may be equipped with a cold
weather starting strategy that prevents
severe engine damage by assisting in
engine lubrication warm-up. In extremely
cold ambient temperatures, this strategy
activates and prevents the accelerator
pedal from being used for 30 seconds after
starting your vehicle. A message will
appear in the information display as your
vehicle warms up. By not allowing the
accelerator pedal to be used, the engine
oil is allowed to properly lubricate the
bearings preventing engine damage due
to lack of proper lubrication. After the 30
second warm-up period, the accelerator
pedal will be operational again and a
message will appear informing you the
vehicle is ok to drive.
When starting the engine in extremely cold
temperatures
-15°F (-26°C), it is
recommended to allow the engine to idle
for several minutes before driving the
vehicle.
Before starting the engine check the
following:
• Make sure all occupants have fastened
their seatbelts.
• Make sure the headlamps and
electrical accessories are off.
• Make sure the parking brake is on.
• Make sure the transmission is in park
(P).
Note: Do not press the accelerator during
starting.
Vehicles with Keyless Start
Note: Do not touch the accelerator pedal.
175
F-150 (TFC) Canada/United States of America, enUSA, Edition date: 201709, Fifth-Printing Starting and Stopping the Engine
Page 180 of 641

Switch the ignition on. Do not
start the engine until the
glow-plug indicator turns off.
When the glow plug pre-heat indicator
turns off, turn the key to start and release
the key as soon as the engine starts. After
starting the engine, the glow plugs may
remain on for a period. If you do not start
the engine before the glow plug activation
time ends, you will need to reset the glow
plugs by switching the ignition off. After
the engine starts, allow it to idle for about
15 seconds. This is to protect the engine.
Do not increase engine speed until the oil
pressure gauge indicates normal pressure.
For vehicles with keyless start:
1. Fully depress brake pedal and hold to allow time for glow-plugs to heat.
2. Press and release the start button.
Note: A message "Engine Start Pending,
Please Wait", along with the glow plug
indicator displays on the instrument cluster.
3. When the engine starts, release the brake pedal.
Cold Weather Operation
Note: Idling in cold weather does not heat
the engine to its normal operating
temperature. Long periods of idling,
especially in cold weather, can cause a
buildup of deposits which can cause engine
damage.
Changing to a lighter grade engine oil also
makes starting easier under these
conditions. Refer to Engine oil
specifications. See Capacities and
Specifications (page 424).
Diesel fuel is adjusted seasonally for cold
temperatures. Diesel fuel which has not
been properly formulated for the ambient
conditions may gel which can clog the fuel
filters. One indication that the fuel filter(s)
may be clogged is if the engine starts, stalls
after a short time, and then does not restart. If you have been using biodiesel,
you may need to use a fuel with lower
biodiesel content, try another brand, or
discontinue using biodiesel. Do not use
alcohol based additives to correct fuel
gelling. This may result in damage to the
fuel injectors and system. Use the proper
anti-gel and performance improvement
product. See
Capacities and
Specifications (page 424).
Your vehicle is equipped with a fuel and
water separator that recirculates fuel from
the engine to help prevent fuel filter
clogging. To avoid engine fuel starvation
during cold weather operation of 32°F
(0°C) or below, we recommended that
the fuel level in your tank should not drop
below 1⁄4 full. This helps prevent air from
entering the fuel system and stalling the
engine.
In cold weather below 32°F (0°C), the
engine may slowly increase to a higher idle
speed if left idling in park (P). As the engine
warms-up, the engine sound level
decreases due to the activation of
PCM-controlled sound reduction features.
If you operate your vehicle in a heavy
snowstorm or blowing snow conditions,
snow and ice can clog the engine air
induction. If this occurs, the engine may
experience a significant reduction in power
output. At the earliest opportunity, clear
all the snow and/or ice away from inside
the air filter assembly. Remove the air
cleaner cover and the pleated paper filter,
leaving the foam filter in and remove any
snow or ice. Make sure you install the foam
filter correctly in place. Remove any debris,
snow or ice on the foam filter by brushing
the surface with soft brush. Once you have
cleared all of the debris, reinstall the air
filter and assembly.
Do not use water, solvents, or a hard brush
for cleaning the foam filter.
177
F-150 (TFC) Canada/United States of America, enUSA, Edition date: 201709, Fifth-Printing Starting and Stopping the Engine
Page 354 of 641

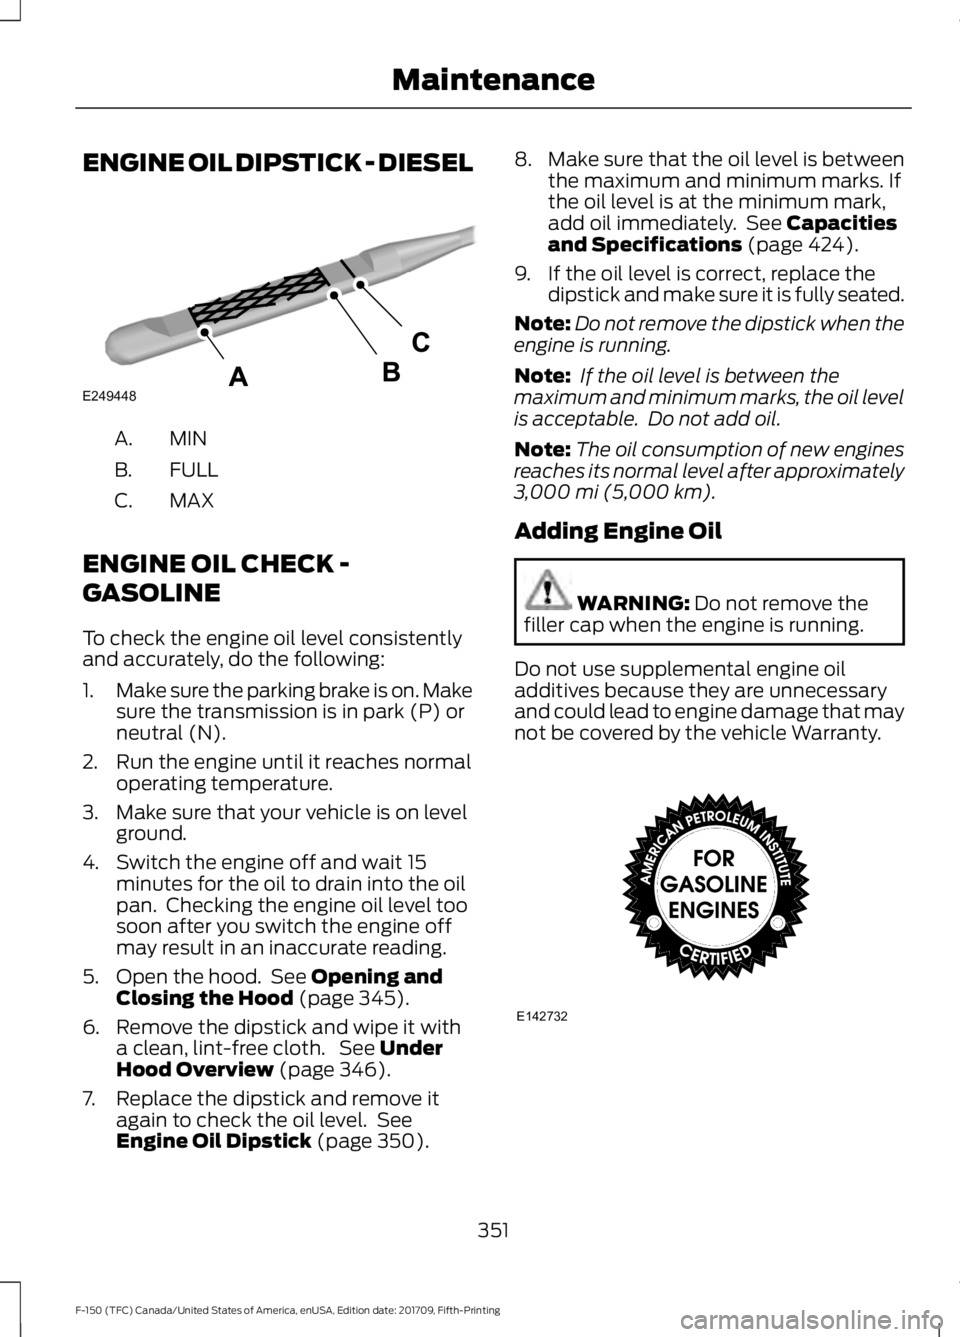
ENGINE OIL DIPSTICK - DIESEL
MINA.
FULL
B.
MAX
C.
ENGINE OIL CHECK -
GASOLINE
To check the engine oil level consistently
and accurately, do the following:
1. Make sure the parking brake is on. Make
sure the transmission is in park (P) or
neutral (N).
2. Run the engine until it reaches normal operating temperature.
3. Make sure that your vehicle is on level ground.
4. Switch the engine off and wait 15 minutes for the oil to drain into the oil
pan. Checking the engine oil level too
soon after you switch the engine off
may result in an inaccurate reading.
5. Open the hood. See Opening and
Closing the Hood (page 345).
6. Remove the dipstick and wipe it with a clean, lint-free cloth. See
Under
Hood Overview (page 346).
7. Replace the dipstick and remove it again to check the oil level. See
Engine Oil Dipstick
(page 350). 8.
Make sure that the oil level is between
the maximum and minimum marks. If
the oil level is at the minimum mark,
add oil immediately. See
Capacities
and Specifications (page 424).
9. If the oil level is correct, replace the dipstick and make sure it is fully seated.
Note: Do not remove the dipstick when the
engine is running.
Note: If the oil level is between the
maximum and minimum marks, the oil level
is acceptable. Do not add oil.
Note: The oil consumption of new engines
reaches its normal level after approximately
3,000 mi (5,000 km)
.
Adding Engine Oil WARNING:
Do not remove the
filler cap when the engine is running.
Do not use supplemental engine oil
additives because they are unnecessary
and could lead to engine damage that may
not be covered by the vehicle Warranty. 351
F-150 (TFC) Canada/United States of America, enUSA, Edition date: 201709, Fifth-Printing MaintenanceE249448 E142732
Page 355 of 641

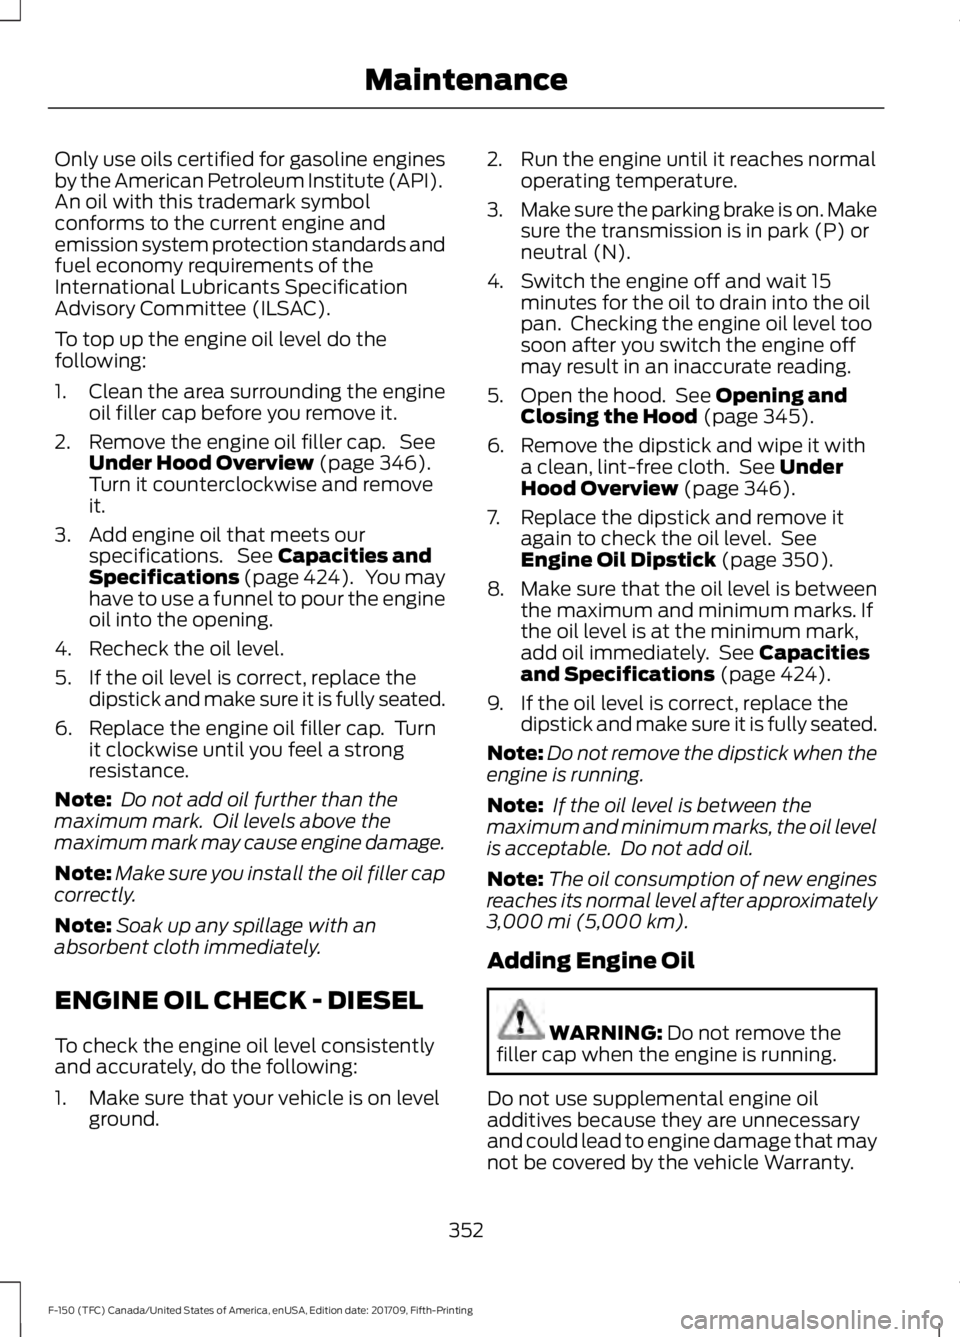
Only use oils certified for gasoline engines
by the American Petroleum Institute (API).
An oil with this trademark symbol
conforms to the current engine and
emission system protection standards and
fuel economy requirements of the
International Lubricants Specification
Advisory Committee (ILSAC).
To top up the engine oil level do the
following:
1. Clean the area surrounding the engine
oil filler cap before you remove it.
2. Remove the engine oil filler cap. See Under Hood Overview (page 346).
Turn it counterclockwise and remove
it.
3. Add engine oil that meets our specifications. See
Capacities and
Specifications (page 424). You may
have to use a funnel to pour the engine
oil into the opening.
4. Recheck the oil level.
5. If the oil level is correct, replace the dipstick and make sure it is fully seated.
6. Replace the engine oil filler cap. Turn it clockwise until you feel a strong
resistance.
Note: Do not add oil further than the
maximum mark. Oil levels above the
maximum mark may cause engine damage.
Note: Make sure you install the oil filler cap
correctly.
Note: Soak up any spillage with an
absorbent cloth immediately.
ENGINE OIL CHECK - DIESEL
To check the engine oil level consistently
and accurately, do the following:
1. Make sure that your vehicle is on level ground. 2. Run the engine until it reaches normal
operating temperature.
3. Make sure the parking brake is on. Make
sure the transmission is in park (P) or
neutral (N).
4. Switch the engine off and wait 15 minutes for the oil to drain into the oil
pan. Checking the engine oil level too
soon after you switch the engine off
may result in an inaccurate reading.
5. Open the hood. See
Opening and
Closing the Hood (page 345).
6. Remove the dipstick and wipe it with a clean, lint-free cloth. See
Under
Hood Overview (page 346).
7. Replace the dipstick and remove it again to check the oil level. See
Engine Oil Dipstick
(page 350).
8. Make sure that the oil level is between
the maximum and minimum marks. If
the oil level is at the minimum mark,
add oil immediately. See
Capacities
and Specifications (page 424).
9. If the oil level is correct, replace the dipstick and make sure it is fully seated.
Note: Do not remove the dipstick when the
engine is running.
Note: If the oil level is between the
maximum and minimum marks, the oil level
is acceptable. Do not add oil.
Note: The oil consumption of new engines
reaches its normal level after approximately
3,000 mi (5,000 km)
.
Adding Engine Oil WARNING:
Do not remove the
filler cap when the engine is running.
Do not use supplemental engine oil
additives because they are unnecessary
and could lead to engine damage that may
not be covered by the vehicle Warranty.
352
F-150 (TFC) Canada/United States of America, enUSA, Edition date: 201709, Fifth-Printing Maintenance
Page 356 of 641

The American Petroleum Institute (API)
service symbol is used to identify the
proper engine oil for your engine. The API
service symbol will be displayed on the oil
container you purchase. The API symbol
displays the oil performance category in
the top half of the symbol and the viscosity
grade in the center of the symbol.
To top up the engine oil level do the
following:
1. Clean the area surrounding the engine
oil filler cap before you remove it.
2. Remove the engine oil filler cap. See
Under Hood Overview (page 347).
3. Add engine oil that meets Ford specifications.
See Capacities and
Specifications (page 415).
4. Recheck the oil level.
5. If the oil level is correct, replace the dipstick and make sure it is fully seated.
6. Replace the engine oil filler cap. Turn it clockwise until you feel a strong
resistance.
Note: Do not add oil further than the
maximum mark. Oil levels above the
maximum mark may cause engine damage.
Note: Make sure you install the oil filler cap
correctly.
Note: Soak up any spillage with an
absorbent cloth immediately. OIL CHANGE INDICATOR
RESET
Use the information display controls on
the steering wheel to reset the oil change
indicator.
From the main menu scroll to:
Action and description
Message
Press the right arrow button,
then from this menu scroll
to the following message.
Settings
Press the right arrow button,
then from this menu scroll
to the following message.
Conveni-
ence
Press the right arrow button,
then from this menu scroll
to the following message.
Oil Life
Reset
Press and hold the
OK
button until the instrument
cluster displays the
following message.
Hold OK to
Reset
Reset Successful
When the oil change indic-
ator resets the instrument
cluster displays 100%.
Remaining Life
{00}%
If the instrument cluster
displays one of the following
messages, repeat the
process.
Not Reset
Reset Cancelled
353
F-150 (TFC) Canada/United States of America, enUSA, Edition date: 201709, Fifth-Printing MaintenanceE258300
Page 418 of 641

ENGINE SPECIFICATIONS - 2.7L ECOBOOST™
Specification
Measurement
164
Cubic inches
1-4-2-5-3-6
Firing order
Coil on plug
Ignition system
.028-.031 in. (0.7 - 0.8 mm)
Spark plug gap
10.3:1
Compression ratio
Drivebelt Routing ENGINE SPECIFICATIONS - 3.0L V6, DIESEL
Specification
Measurement
183
Cubic inches
Ultra Low Sulfur Diesel
Required Fuel
1-4-2-5-3-6
Firing order
16:1
Compression ratio
415
F-150 (TFC) Canada/United States of America, enUSA, Edition date: 201709, Fifth-Printing Capacities and SpecificationsE176088
Page 419 of 641

Drivebelt Routing
ENGINE SPECIFICATIONS - 3.3L DURATEC - V6
Specification
Measurement
201
Cubic inches
1-4-2-5-3-6
Firing order
Coil on plug
Ignition system
.049-.053 in. (1.25 - 1.35 mm)
Spark plug gap
12:1
Compression ratio
Drivebelt Routing ENGINE SPECIFICATIONS - 3.5L ECOBOOST™
416
F-150 (TFC) Canada/United States of America, enUSA, Edition date: 201709, Fifth-Printing Capacities and SpecificationsE249449 E167467