2018 FORD EXPEDITION change wheel
[x] Cancel search: change wheelPage 364 of 571

C.
80: Indicates the aspect ratio
which gives the tire's ratio of
height to width. Numbers of 70 or
lower indicate a short sidewall.
D. D:
Indicates a diagonal type tire.
R:
Indicates a radial type tire.
E. 16:
Indicates the wheel or rim
diameter in inches. If you change
your wheel size, you will have to
purchase new tires to match the
new wheel diameter.
Location of the Tire Label
You will find a Tire Label
containing tire inflation pressure
by tire size and other important
information located on the B-Pillar
or the edge of the driver's door.
See
Load Carrying (page 264).
Inflating Your Tires
Safe operation of your vehicle
requires that your tires are
properly inflated. Remember that
a tire can lose up to half of its air
pressure without appearing flat.
Every day before you drive, check
your tires. If one looks lower than
the others, use a tire gauge to
check pressure of all tires and
adjust if required.
At least once a month and before
long trips, inspect each tire and
check the tire pressure with a tire
gauge (including spare, if
equipped). Inflate all tires to the
inflation pressure recommended
by us. You are strongly urged to buy a
reliable tire pressure gauge, as
automatic service station gauges
may be inaccurate. We
recommend the use of a digital or
dial-type tire pressure gauge
rather than a stick-type tire
pressure gauge.
Use the recommended cold
inflation pressure for optimum tire
performance and wear.
Under-inflation or over-inflation
may cause uneven treadwear
patterns.
WARNING: Under-inflation
is the most common cause of
tire failures and may result in
severe tire cracking, tread
separation or blowout, with
unexpected loss of vehicle
control and increased risk of
injury. Under-inflation increases
sidewall flexing and rolling
resistance, resulting in heat
buildup and internal damage to
the tire. It also may result in
unnecessary tire stress, irregular
wear, loss of vehicle control and
accidents. A tire can lose up to
half of its air pressure and not
appear to be flat!
Always inflate your tires to the our
recommended inflation pressure
even if it is less than the maximum
inflation pressure information
found on the tire. Our
recommended tire inflation
pressure is found on the Safety
Compliance Certification Label or
361
Expedition (TB8) Canada/United States of America, enUSA, Edition date: 201708, Third-Printing- Wheels and Tires
Page 365 of 571

Tire Label (affixed to either the
door hinge pillar, door-latch post,
or the door edge that meets the
door-latch post, next to the
driver's seating position), or Tire
Label located on the B-pillar or
the edge of the driver's door.
Failure to follow the tire pressure
recommendations can cause
uneven treadwear patterns and
adversely affect the way your
vehicle handles.
Note:
Do not reduce tire pressure
to change the ride characteristics
of the vehicle. If you do not
maintain the inflation pressure at
the levels specified by us, your
vehicle may experience a condition
known as shimmy. Shimmy is a
severe vibration and oscillation in
the steering wheel after the vehicle
travels over a bump or dip in the
road that does not dampen out by
itself. Shimmy may result from
significant under-inflation of the
tires, improper tires (load range,
size, or type), or vehicle
modifications such as lift-kits. In
the event that your vehicle
experiences shimmy, you should
slowly reduce speed by either lifting
off the accelerator pedal or lightly
applying the brakes. The shimmy
will cease as the vehicle speed
decreases.
Maximum Inflation Pressure is
the tire manufacturer's maximum
permissible pressure and the
pressure at which the maximum
load can be carried by the tire. This
pressure is normally higher than the manufacturer
’s recommended
cold inflation pressure which can
be found on the Safety
Compliance Certification Label
(affixed to either the door hinge
pillar, door-latch post, or the door
edge that meets the door-latch
post, next to the driver's seating
position), or Tire Label located on
the B-pillar or the edge of the
driver's door. The cold inflation
pressure should never be set lower
than the recommended pressure
on the Safety Compliance
Certification Label or Tire Label.
When weather temperature
changes occur, tire inflation
pressures also change. A 10°F
(6°C) temperature drop can
cause a corresponding drop of 1
psi (7 kPa) in inflation pressure.
Check your tire pressures
frequently and adjust them to the
proper pressure which can be
found on the Safety Compliance
Certification Label or Tire Label.
To check the pressure in your
tire(s):
1. Make sure the tires are cool,
meaning they are not hot from
driving even a mile.
362
Expedition (TB8) Canada/United States of America, enUSA, Edition date: 201708, Third-Printing- Wheels and Tires
Page 373 of 571

Each tire, including the spare (if
provided), should be checked
monthly when cold and inflated
to the inflation pressure recommended by
the vehicle manufacturer on the vehicle
placard or tire inflation pressure label. (If
your vehicle has tires of a different size
than the size indicated on the vehicle
placard or tire inflation pressure label, you
should determine the proper tire inflation
pressure for those tires).
As an added safety feature, your vehicle
has been equipped with a Tire Pressure
Monitoring System (TPMS) that
illuminates a low tire pressure telltale
when one or more of your tires is
significantly under-inflated. Accordingly,
when the low tire pressure telltale
illuminates, you should stop and check
your tires as soon as possible, and inflate
them to the proper pressure. Driving on a
significantly under-inflated tire causes the
tire to overheat and can lead to tire failure.
Under-inflation also reduces fuel efficiency
and tire tread life, and may affect the
vehicle ’s handling and stopping ability.
Please note that the TPMS is not a
substitute for proper tire maintenance, and
it is the driver ’s responsibility to maintain
correct tire pressure, even if under-inflation
has not reached the level to trigger
illumination of the TPMS low tire pressure
telltale.
Your vehicle has also been equipped with
a TPMS malfunction indicator to indicate
when the system is not operating properly.
The TPMS malfunction indicator is
combined with the low tire pressure
telltale. When the system detects a
malfunction, the telltale will flash for
approximately one minute and then remain
continuously illuminated. This sequence
will continue upon subsequent vehicle
start-ups as long as the malfunction exists. When the malfunction indicator is
illuminated, the system may not be able
to detect or signal low tire pressure as
intended. TPMS malfunctions may occur
for a variety of reasons, including the
installation of replacement or alternate
tires or wheels on the vehicle that prevent
the TPMS from functioning properly.
Always check the TPMS malfunction
telltale after replacing one or more tires or
wheels on your vehicle to ensure that the
replacement or alternate tires and wheels
allow the TPMS to continue to function
properly.
This device complies with Part 15 of the
FCC Rules and with License exempt RSS
Standards of Industry Canada. Operation
is subject to the following two conditions:
1. This device may not cause harmful
interference, and
2. This device must accept any interference received, including
interference that may cause undesired
operation.
Note: Changes or modifications not
expressively approved by the party
responsible for compliance could void the
user's authority to operate the equipment.
The term "IC:" before the radio certification
number only signifies that Industry Canada
technical specifications were met.
370
Expedition (TB8) Canada/United States of America, enUSA, Edition date: 201708, Third-Printing- Wheels and Tires
Page 377 of 571

When driving with the full-size dissimilar
spare wheel and tire assembly, do not:
•
Exceed 70 mph (113 km/h).
• Use more than one dissimilar spare
wheel and tire assembly at a time.
• Use snow chains on the end of the
vehicle with the dissimilar spare wheel
and tire assembly.
When driving with the full-size dissimilar
spare wheel and tire assembly, it is
recommended that you do not:
• Exceed
50 mph (80 km/h) in 4WD.
• Engage 4WD unless the vehicle is
stationary.
• Use 4WD on dry pavement.
The usage of a full-size dissimilar spare
wheel and tire assembly can lead to
impairment of the following:
• Handling, stability and braking
performance.
• Comfort and noise. •
Ground clearance and parking at curbs.
• Winter weather driving capability.
• Wet weather driving capability.
• Four-wheel driving capability.
When driving with the full-size dissimilar
spare wheel and tire assembly additional
caution should be given to:
• Towing a trailer.
• Driving vehicles equipped with a
camper body.
• Driving vehicles with a load on the
cargo rack.
Drive cautiously when using a full-size
dissimilar spare wheel and tire assembly
and seek service as soon as possible.
Location of the Spare Tire and
Tools
The spare tire is located under the vehicle,
just forward of the rear bumper. The jack,
swivel wrench and lug wrench are in the
following locations: Location
Item
Under the vehicle, just forward of the rearbumper
Spare tire
Under the access panel located in the floorcompartment behind the rear seat
Jack and tool kit bag
Tire Change Procedure WARNING:
Only use replacement
tires and wheels that are the same size,
load index, speed rating and type (such
as P-metric versus LT-metric or
all-season versus all-terrain) as those
originally provided by Ford. The
recommended tire and wheel size may
be found on either the Safety
Compliance Certification Label (affixed to either the door hinge pillar, door-latch
post, or the door edge that meets the
door-latch post, next to the driver's
seating position), or the Tire Label which
is located on the B-Pillar or edge of the
driver's door. If this information is not
found on these labels, then you should
contact your authorized dealer as soon
374
Expedition (TB8) Canada/United States of America, enUSA, Edition date: 201708, Third-Printing- Wheels and Tires
Page 378 of 571

as possible. Use of any tire or wheel not
recommended by Ford can affect the
safety and performance of your vehicle,
which could result in an increased risk of
loss of vehicle control, vehicle rollover,
personal injury and death.
WARNING: When one of the front
wheels is off the ground, the
transmission alone will not prevent the
vehicle from moving or slipping off the
jack, even if the transmission is in park
(P). WARNING:
To help prevent your
vehicle from moving when changing a
wheel, shift the transmission into park
(P), set the parking brake and use an
appropriate block or wheel chock to
secure the wheel diagonally opposite to
the wheel being changed. For example,
when changing the front left wheel,
place an appropriate block or wheel
chock on the right rear wheel. WARNING:
Do not attempt to
change a tire on the side of the vehicle
close to moving traffic. Pull far enough
off the road to avoid the danger of being
hit when operating the jack or changing
the wheel. WARNING:
Always use the jack
provided as original equipment with your
vehicle. If using a jack other than the one
provided, make sure the jack capacity is
adequate for the vehicle weight,
including any vehicle cargo or
modifications. If you are unsure if the jack
capacity is adequate, contact the
authorized dealer. WARNING:
Switch off the running
boards before jacking or placing any
object under your vehicle. Never place
your hand between the extended running
board and your vehicle. A moving running
board may cause injury. WARNING:
Only use the spare
wheel carrier to stow the wheel provided
with your vehicle. Other wheel sizes
could cause the spare wheel carrier to
fail if it does not fit securely or is too
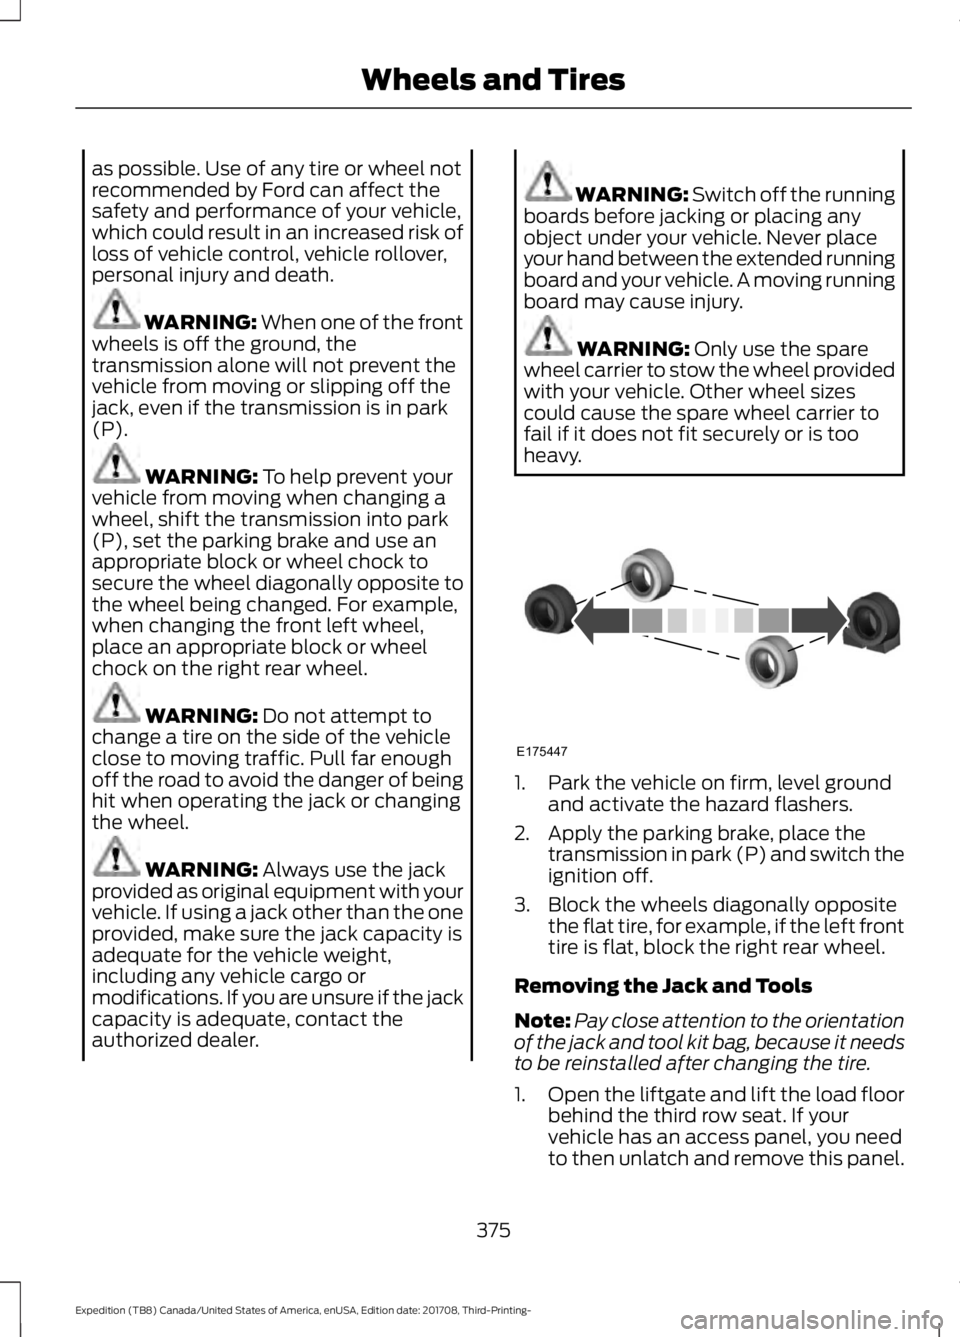
heavy. 1. Park the vehicle on firm, level ground
and activate the hazard flashers.
2. Apply the parking brake, place the transmission in park (P) and switch the
ignition off.
3. Block the wheels diagonally opposite the flat tire, for example, if the left front
tire is flat, block the right rear wheel.
Removing the Jack and Tools
Note: Pay close attention to the orientation
of the jack and tool kit bag, because it needs
to be reinstalled after changing the tire.
1. Open the liftgate and lift the load floor
behind the third row seat. If your
vehicle has an access panel, you need
to then unlatch and remove this panel.
375
Expedition (TB8) Canada/United States of America, enUSA, Edition date: 201708, Third-Printing- Wheels and TiresE175447
Page 409 of 571

To Access Using the SYNC Menu
Press the Mobile Apps button to access
the menu on-screen. Then select:
Action and Description
Menu
Item
Scroll through the list of
Find Action and Description
Menu
Item
available applications and
select a particular app.
Mobile
Apps
Note: If you cannot find a compatible SYNC
AppLink app, make sure the required app is
running on the mobile device.
To Access Using Voice Commands
Press the voice button, then when prompted say: Action and Description
Voice Command
Say the name of the application after the tone.
The app should start. When an app is running through SYNC, you can press the voice button and speak commands specific to the app, for example "Play Playlist Road Trip".
Mobile Applications
SYNC lists all of the currently available mobile apps.
List Applications
Searches your connected mobile device for SYNC-compatible mobile apps.
Find Applications
Use this command to discover the available voice commands.
Help
App Permissions
App permissions are organized by groups.
You can grant these group permissions
individually. You can change a permission
group status any time when not driving, by
using the settings menu. When you launch an app using SYNC, the
system may ask you to grant certain
permissions, for example:
•
To allow your vehicle to provide vehicle
information to the app such as, but not
limited to: Fuel level, fuel economy, fuel
consumption, engine speed, rain
sensor, odometer, VIN, external
temperature, gear position, tire
pressure, and head lamp status.
• To allow your vehicle to provide driving
characteristic information such as, but
not limited to: MyKey, seat belt status,
engine revolutions per minute, gear
position, braking events, steering wheel
angle, and accelerator pedal position.
406
Expedition (TB8) Canada/United States of America, enUSA, Edition date: 201708, Third-Printing- SYNC™
Page 506 of 571

At Every Oil Change Interval as Indicated by the Information Display
1
Inspect the steering linkage, ball joints, suspension, tire-rod ends, driveshaft and U-
joints.
Inspect the wheels and related components for abnormal noise, wear, looseness or
drag.
1 Do not exceed one year or 10,000 mi (16,000 km) between service intervals.
2 Reset the Intelligent Oil-Life Monitor after engine oil and filter changes. Other Maintenance Items
1
Replace cabin air filter.
Every 20,000 mi (32,000 km)
Replace engine air filter.
Every
30,000 mi (48,000 km)
Replace spark plugs.
Every
100,000 mi (160,000 km) Inspect accessory drive belt(s).2
Change automatic transmission fluid.
Every
150,000 mi (240,000 km) Change front axle fluid - Four-wheel drive
vehicles.
Change rear axle fluid.
Change transfer case fluid - Four-wheel drive
vehicles.
Replace accessory drive belt(s).
Change engine coolant - if your vehicles has
yellow-colored coolant.
3
Every
200,000 mi (320,000 km)
1 Perform these maintenance items within 3,000 mi (4,800 km) of the last engine oil and
filter change. Do not exceed the designated distance for the interval.
2 After initial inspection, inspect every other oil change until replaced.
3 Initial replacement at ten years or 200,000 mi (320,000 km), then every five years or
100,000 mi (160,000 km).
503
Expedition (TB8) Canada/United States of America, enUSA, Edition date: 201708, Third-Printing- Scheduled Maintenance
Page 507 of 571

SPECIAL OPERATING
CONDITIONS SCHEDULED
MAINTENANCE
If you operate your vehicle primarily in any
of the follo
wing conditions, you need to
perform extra maintenance, as indicated.
If you operate your vehicle
occasionally
under any of these conditions, it is not
necessary to perform the extra
maintenance. For specific
recommendations, see your dealership
service advisor or technician. Perform the services shown in the
following tables when specified or within
3,000 mi (4,800 km)
of the message
appearing in the information display
prompting you to change your oil.
• Example 1: The message comes on at
28,751 mi (46,270 km)
. Perform the
30,000 mi (48,000 km) automatic
transmission fluid replacement.
• Example 2
: The message has not
come on, but the odometer reads
30,000 mi (48,000 km) (for example,
the Intelligent Oil-Life Monitor was
reset at
25,000 mi (40,000 km)).
Perform the engine air filter
replacement. Towing a Trailer or Using a Car-top Carrier
Change engine oil and filter as indicated by the information
display and perform services listed in the Normal Sched-
uled Maintenance chart.
As required
Inspect and lubricate U-joints (if equipped with grease
fittings).
Inspect frequently, service
as required
See axle maintenance items under
Exceptions.
Change transfer case fluid (Four-wheel drive vehicles).
Every
60,000 mi
(96,000 km) Replace spark plugs.Extensive Idling or Low-speed Driving for Long Distances, as in Heavy Commercial Use
Change engine oil and filter as indicated by the information
display and perform services listed in the Normal Sched-
uled Maintenance chart.
As required
Replace engine air filter.
Inspect frequently, service
as required
Replace cabin air filter.
Change transfer case fluid (Four-wheel drive vehicles).
Every
60,000 mi
(96,000 km) Replace spark plugs.
504
Expedition (TB8) Canada/United States of America, enUSA, Edition date: 201708, Third-Printing- Scheduled Maintenance