Page 471 of 553

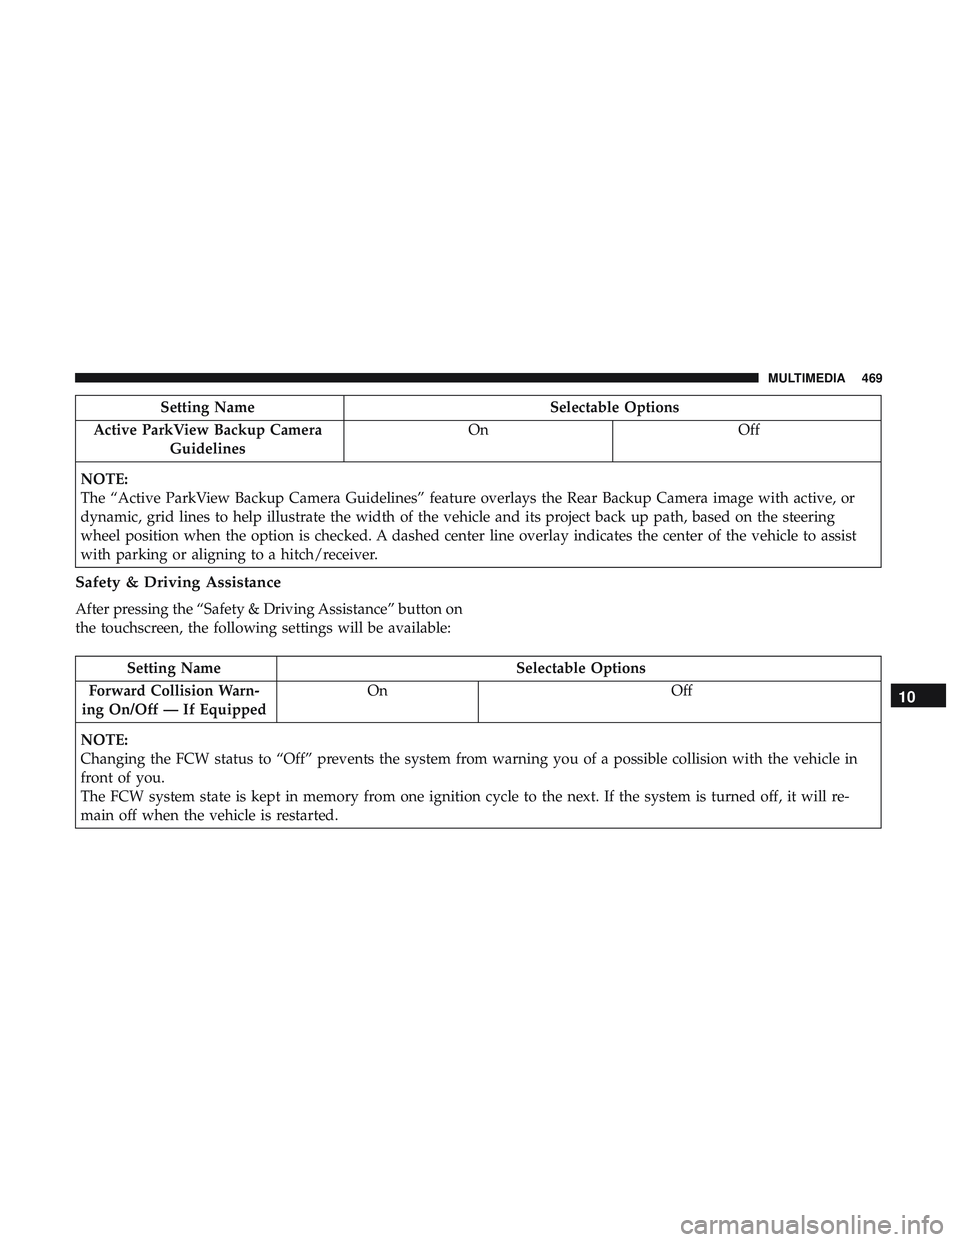
Setting NameSelectable Options
Active ParkView Backup Camera Guidelines On
Off
NOTE:
The “Active ParkView Backup Camera Guidelines” feature overlays the Rear Backup Camera image with active, or
dynamic, grid lines to help illustrate the width of the vehicle and its project back up path, based on the steering
wheel position when the option is checked. A dashed center line overlay indicates the center of the vehicle to assist
with parking or aligning to a hitch/receiver.
Safety & Driving Assistance
After pressing the “Safety & Driving Assistance” button on
the touchscreen, the following settings will be available:
Setting Name Selectable Options
Forward Collision Warn-
ing On/Off — If Equipped On
Off
NOTE:
Changing the FCW status to “Off” prevents the system from warning you of a possible collision with the vehicle in
front of you.
The FCW system state is kept in memory from one ignition cycle to the next. If the system is turned off, it will re-
main off when the vehicle is restarted.
10
MULTIMEDIA 469
Page 473 of 553
Setting NameSelectable Options
LaneSense Warning — If Equipped Early
Medium Late
NOTE:
When the “LanseSense Warning” feature is selected, it sets the distance at which the steering wheel provides feedback
for potential lane departures. The LDW sensitivity can be set to provide either an “Early,” “Medium,” or “Late”
warning zone start point. LaneSense Strength — If Equipped Low
Medium High
NOTE:
When the “LaneSense Strength” feature is selected, it sets the strength of the steering wheel feedback for potential
lane departures. ParkSense — If Equipped Sound Only Sound & Display
NOTE:
The ParkSense system scans for objects behind the vehicle when the transmission gear selector is in REVERSE and the
vehicle speed is less than 11 mph (18 km/h). It provides an alert (audible and/or visual) to indicate the proximity to
other objects. The system can be enabled with Sound Only, or Sound & Display.
10
MULTIMEDIA 471
Page 480 of 553
Setting NameSelectable Options
Personal Settings Linked To Key Fob — IfEquipped On
Off
NOTE:
•This feature provides automatic recall of all settings stored to a memory location (driver ’s seat, exterior mirrors,
steering column position and radio station pre-sets) to enhance driver mobility when entering and exiting the ve-
hicle.
•The seat returns to the memorized seat location (if Personal Settings Linked to Key Fob is set to on) when the key
fob is used to unlock the door.
Auto Comfort Systems — If Equipped
After pressing the “Auto-On Comfort” button on the
touchscreen, the following settings will be available:
Setting Name Selectable Options
Auto-On Dr Heat Seat OffRemote Start All Starts
NOTE:
When this feature is selected the driver’s heated seat and heated steering wheel will automatically turn on when tem-
peratures are below 40° F (4.4° C). When temperatures are above 80° F (26.7° C) the driver vented seat will turn on.
478 MULTIMEDIA
Page 495 of 553

When G-Force is selected, the following features will be
available:
•Vehicle Speed:
Measures the current speed of the vehicle in either mph
or km/h, starting at zero with no maximum value.
• Front G-Force:
Measures the force on the front of the vehicle.
• Right G-Force:
Measures the force on the right side of the vehicle.
• Left G-Forces:
Measures the force on the left of the vehicle. •
Rear G-Forces:
Measures the force on the rear of the vehicle.
NOTE: Front, Right, Left, and Rear G-Froces are all peak
values. These readings can be reset by clearing peak
G-Force on the instrument cluster
• Steering Wheel Angle
Steering Wheel Angle utilizes the steering angle sensor to
measure the degree of the steering wheel relative to zero.
The zero degree measurement indicates a steering wheel
straight ahead position. When the steering angle value is
negative, this indicates a turn to the left, and when the
steering angle value is positive, a turn to the right.
The friction circle display shows instantaneous G-Force as
a highlight and previous G-Force as dots within the circle.
The system records previous G-Force for three minutes. If
there are multiple samples at a given point, the color of the
dot will darken from blue to red. Vectors more frequent
will show in red; infrequent vectors will show in blue.
10
MULTIMEDIA 493
Page 501 of 553
The Paddle Shifters may be enabled or disabled while in
this mode.Sport Mode
Sport Mode is a configuration set-up for typical enthusiast
driving. The Transmission and Steering are both set to their
Sport settings. The steering wheel paddle switches are
enabled. The Traction Control defaults to Normal. Any of
these four settings may be changed to the driver ’s prefer-
ences by pressing the buttons on the touchscreen. Push the
Default Mode Set-UpSport Mode
10
MULTIMEDIA 499
Page 504 of 553
Paddle Shifters — If Equipped With Automatic
Transmission•
ON
Press the “ON” button on the touchscreen to enable
steering wheel Paddle Shifters.
• OFF
Press the “OFF” button on the touchscreen to disable
steering wheel Paddle Shifters.
Paddle – Automatic Transmission
502 MULTIMEDIA
Page 506 of 553

•SPORT
Press the “Sport” button on the touchscreen to provide an
increased amount of steering feel, requiring a higher
amount of steering effort.
• NORMAL
Press the “Norm” button on the touchscreen to provide a
balanced steering feel and steering effort. This is also your
vehicles pre-set steering setting.
• COMFORT
Press the “Comf” button on the touchscreen to provide a
lower steering effort.
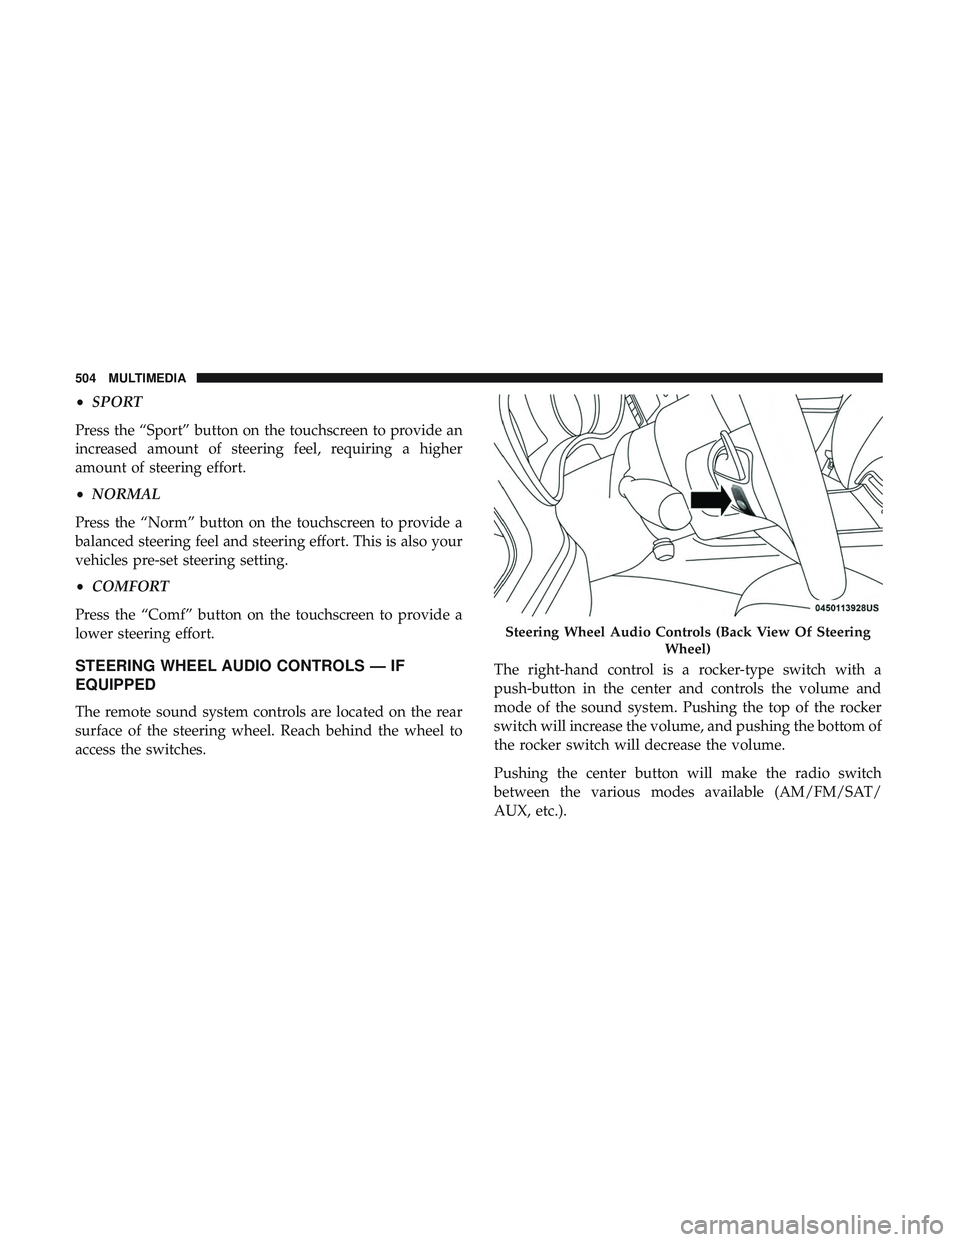
STEERING WHEEL AUDIO CONTROLS — IF
EQUIPPED
The remote sound system controls are located on the rear
surface of the steering wheel. Reach behind the wheel to
access the switches. The right-hand control is a rocker-type switch with a
push-button in the center and controls the volume and
mode of the sound system. Pushing the top of the rocker
switch will increase the volume, and pushing the bottom of
the rocker switch will decrease the volume.
Pushing the center button will make the radio switch
between the various modes available (AM/FM/SAT/
AUX, etc.).
Steering Wheel Audio Controls (Back View Of Steering
Wheel)
504 MULTIMEDIA
Page 511 of 553

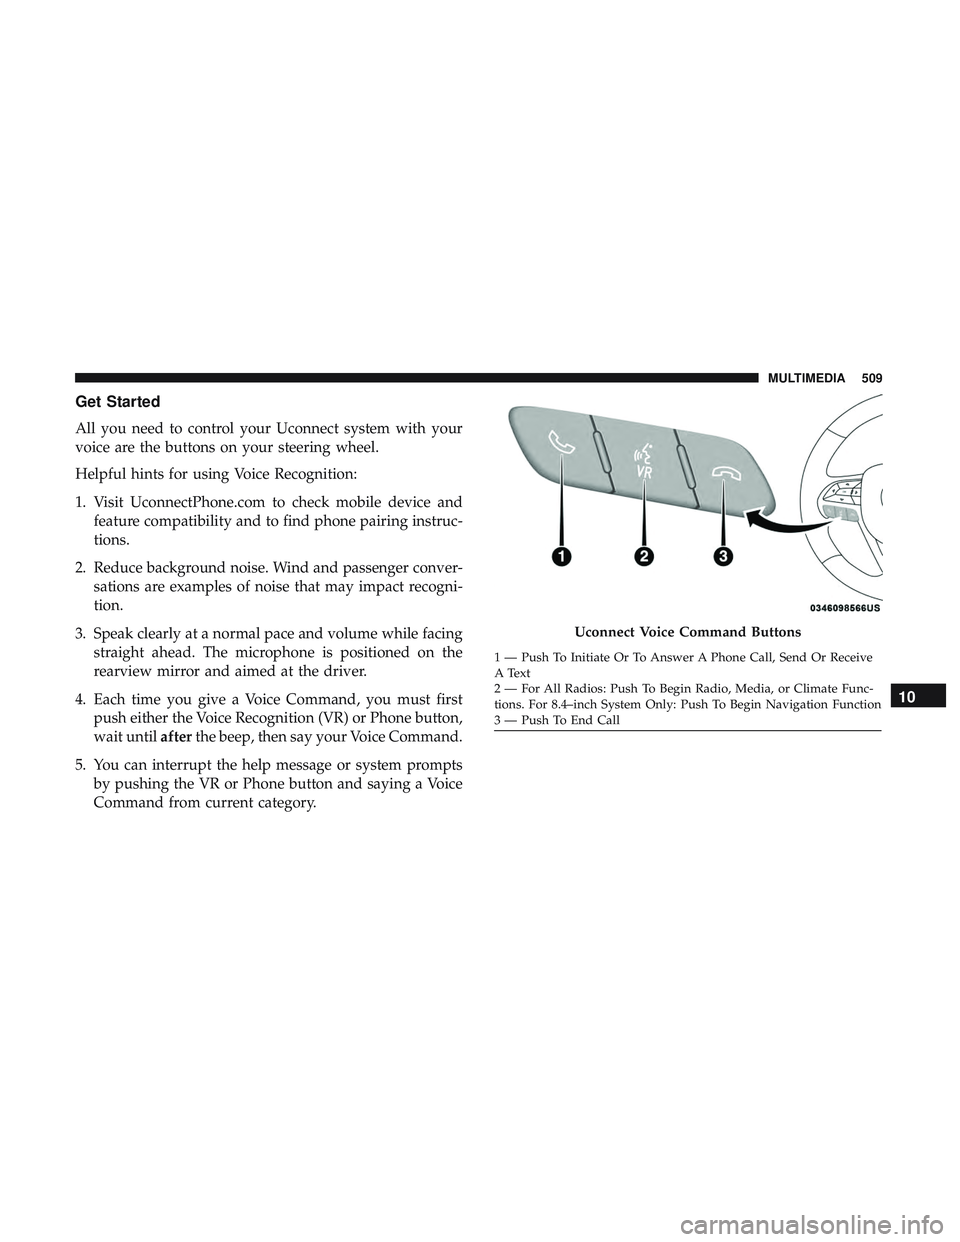
Get Started
All you need to control your Uconnect system with your
voice are the buttons on your steering wheel.
Helpful hints for using Voice Recognition:
1. Visit UconnectPhone.com to check mobile device andfeature compatibility and to find phone pairing instruc-
tions.
2. Reduce background noise. Wind and passenger conver- sations are examples of noise that may impact recogni-
tion.
3. Speak clearly at a normal pace and volume while facing straight ahead. The microphone is positioned on the
rearview mirror and aimed at the driver.
4. Each time you give a Voice Command, you must first push either the Voice Recognition (VR) or Phone button,
wait until afterthe beep, then say your Voice Command.
5. You can interrupt the help message or system prompts by pushing the VR or Phone button and saying a Voice
Command from current category.
Uconnect Voice Command Buttons
1 — Push To Initiate Or To Answer A Phone Call, Send Or Receive
A Text
2 — For All Radios: Push To Begin Radio, Media, or Climate Func-
tions. For 8.4–inch System Only: Push To Begin Navigation Function
3 — Push To End Call
10
MULTIMEDIA 509