Page 389 of 553

Automatic Transmission
Selection Of Lubricant
It is important to use the proper transmission fluid to
ensure optimum transmission performance and life. Use
only the manufacturer’s specified transmission fluid. Refer
to “Fluids And Lubricants” in “Technical Specifications”
for fluid specifications. It is important to maintain the
transmission fluid at the correct level using the recom-
mended fluid.
NOTE:No chemical flushes should be used in any trans-
mission; only the approved lubricant should be used.
CAUTION!
Using a transmission fluid other than the manufactur-
er ’s recommended fluid may cause deterioration in
transmission shift quality and/or torque converter
shudder. Refer to “Fluids And Lubricants” in “Techni-
cal Specifications” for fluid specifications.
Special Additives
The manufacturer strongly recommends against using any
special additives in the transmission. Automatic Transmis-
sion Fluid (ATF) is an engineered product and its perfor-
mance may be impaired by supplemental additives. There-
fore, do not add any fluid additives to the transmission.
Avoid using transmission sealers as they may adversely
affect seals.
CAUTION!
Do not use chemical flushes in your transmission as
the chemicals can damage your transmission compo-
nents. Such damage is not covered by the New Vehicle
Limited Warranty.
Fluid Level Check
The fluid level is preset at the factory and does not require
adjustment under normal operating conditions. Routine
fluid level checks are not required; therefore the transmis-
sion has no dipstick. An authorized dealer can check your
transmission fluid level using special service tools. If you
notice fluid leakage or transmission malfunction, visit an
authorized dealer immediately to have the transmission
8
SERVICING AND MAINTENANCE 387
Page 463 of 553

Setting NameSelectable Options
NOTE:
New vehicle purchasers or lessees will receive a free limited time subscription to SiriusXM Satellite Radio with your
radio. Following the expiration of the free services, it will be necessary to access the information on the Subscription
Information screen to re-subscribe.
1. Press the “Subscription Info” button on the touchscreen to access the Subscription Information screen.
2. Write down the SIRIUS ID numbers for your receiver. To reactivate your service, either call the number listed on the screen or visit the provider online.
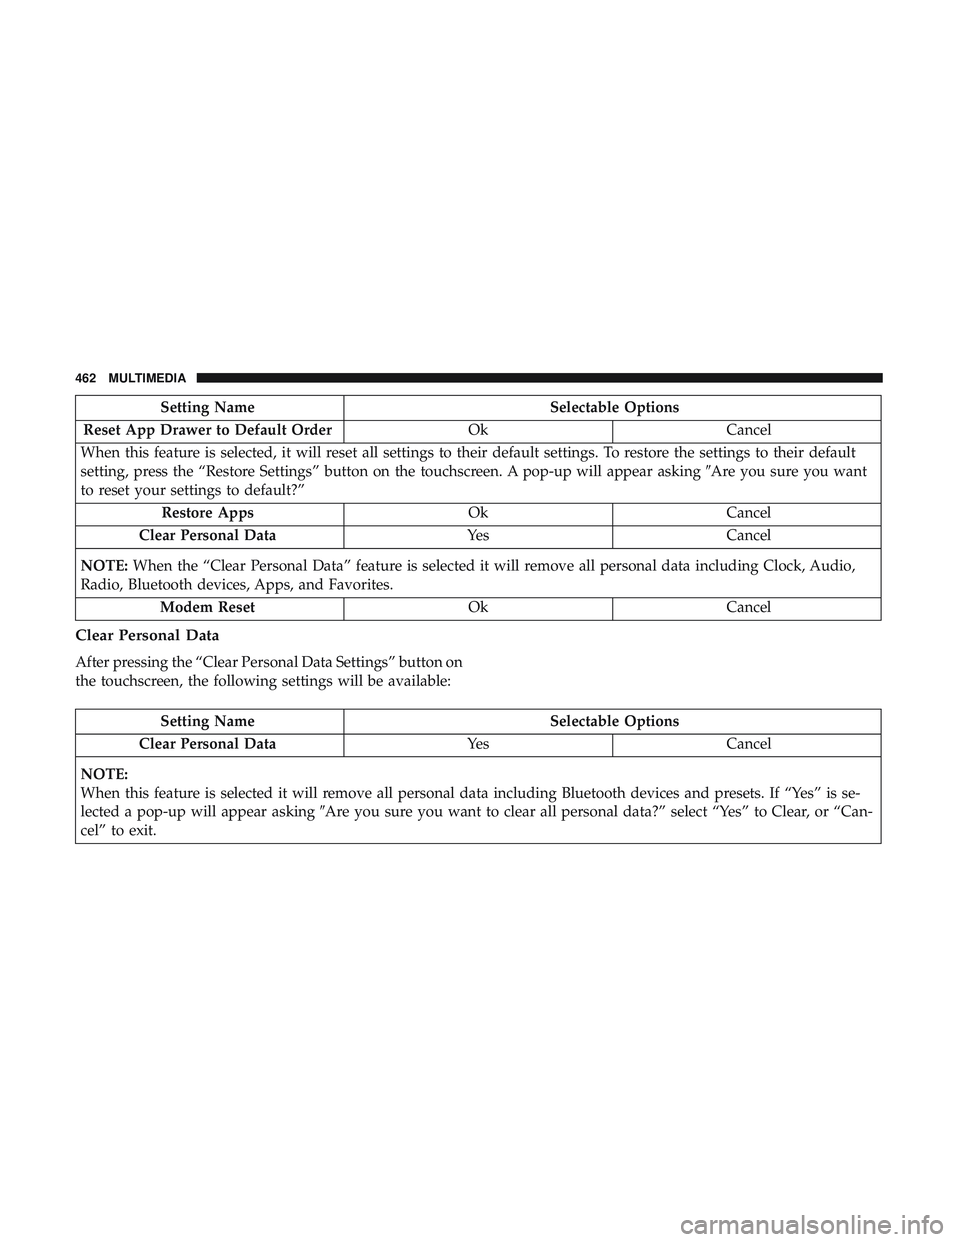
Restore Settings
After pressing the “Restore Settings” button on the touch-
screen, the following settings will be available:
Setting Name Selectable Options
Restore Settings YesCancel
NOTE:
When the “Restore Settings” feature is selected it will reset the Display, Clock, Audio, and Radio Settings to their de-
fault settings. If “Yes” is selected, a pop-up will appear asking �Are you sure you want to reset your settings to de-
fault?” Select “Yes” to restore, or “Cancel” to exit.10
MULTIMEDIA 461
Page 464 of 553

Setting NameSelectable Options
Reset App Drawer to Default Order OkCancel
When this feature is selected, it will reset all settings to their default settings. To restore the settings to their default
setting, press the “Restore Settings” button on the touchscreen. A pop-up will appear asking �Are you sure you want
to reset your settings to default?”
Restore Apps OkCancel
Clear Personal Data YesCancel
NOTE: When the “Clear Personal Data” feature is selected it will remove all personal data including Clock, Audio,
Radio, Bluetooth devices, Apps, and Favorites.
Modem Reset OkCancel
Clear Personal Data
After pressing the “Clear Personal Data Settings” button on
the touchscreen, the following settings will be available:
Setting Name Selectable Options
Clear Personal Data YesCancel
NOTE:
When this feature is selected it will remove all personal data including Bluetooth devices and presets. If “Yes” is se-
lected a pop-up will appear asking �Are you sure you want to clear all personal data?” select “Yes” to Clear, or “Can-
cel” to exit.
462 MULTIMEDIA
Page 486 of 553
Setting NameSelectable Options
Subscription Information Subscription Info
NOTE:
New vehicle purchasers or lessees will receive a free limited time subscription to SiriusXM Satellite Radio with your
radio. Following the expiration of the free services, it will be necessary to access the information on the Subscription
Information screen to re-subscribe.
1. Press the “Subscription Info” button on the touchscreen to access the Subscription Information screen.
2. Write down the SIRIUS ID numbers for your receiver. To reactivate your service, either call the number listed on the screen or visit the provider online.
SiriusXM Travel Link is a separate subscription.
Reset
After pressing the “Reset” button on the touchscreen, the
following settings will be available:
Setting Name Selectable Options
Reset App Drawer to De- fault Ok
Cancel
Restore Apps Ok Cancel
Restore Settings to Default OkCancel X
484 MULTIMEDIA
Page 487 of 553

Setting NameSelectable Options
NOTE:
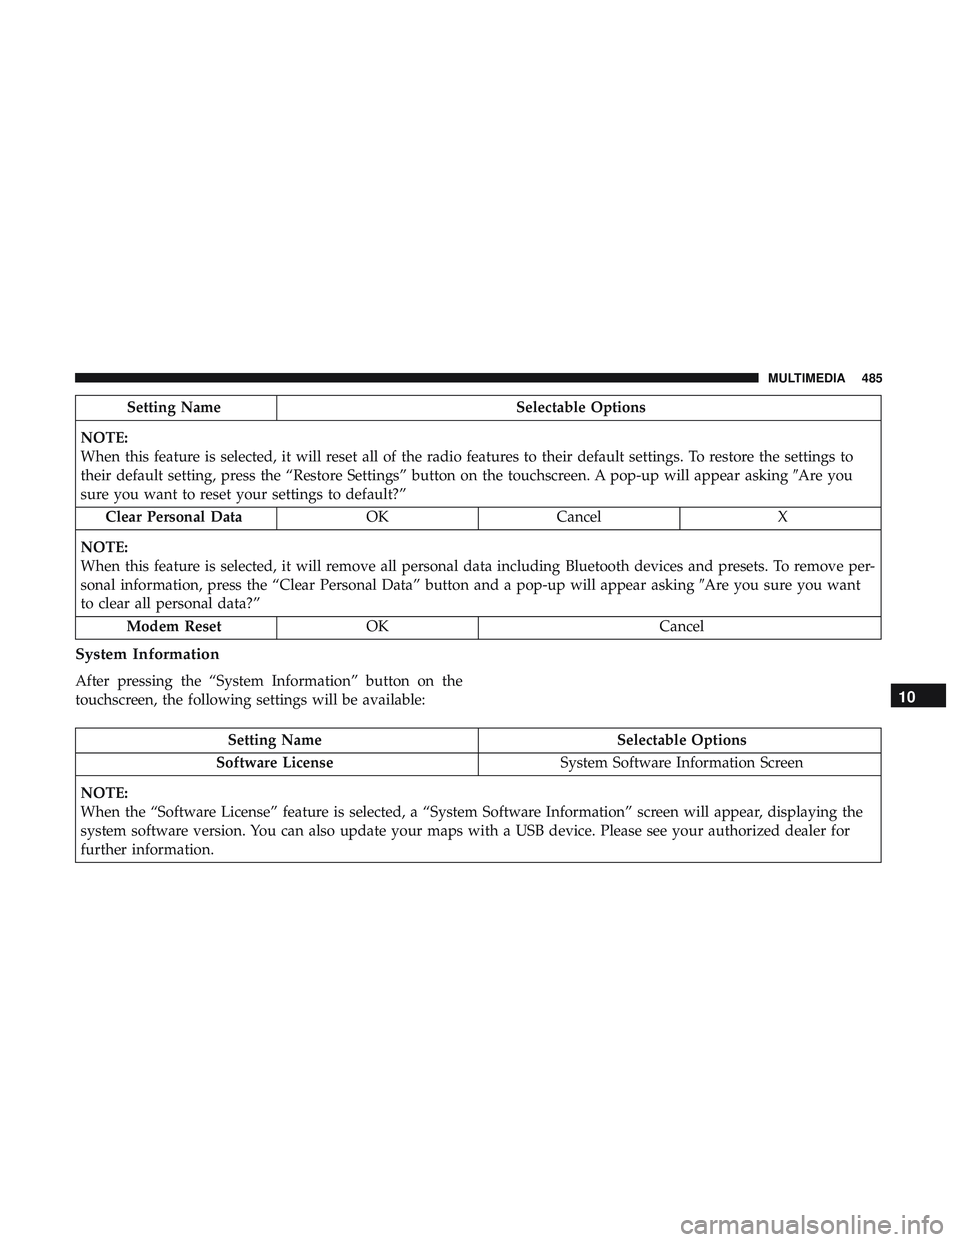
When this feature is selected, it will reset all of the radio features to their default settings. To restore the settings to
their default setting, press the “Restore Settings” button on the touchscreen. A pop-up will appear asking �Are you
sure you want to reset your settings to default?”
Clear Personal Data OKCancel X
NOTE:
When this feature is selected, it will remove all personal data including Bluetooth devices and presets. To remove per-
sonal information, press the “Clear Personal Data” button and a pop-up will appear asking �Are you sure you want
to clear all personal data?”
Modem Reset OK Cancel
System Information
After pressing the “System Information” button on the
touchscreen, the following settings will be available:
Setting Name Selectable Options
Software License System Software Information Screen
NOTE:
When the “Software License” feature is selected, a “System Software Information” screen will appear, displaying the
system software version. You can also update your maps with a USB device. Please see your authorized dealer for
further information.
10
MULTIMEDIA 485
Page 495 of 553

When G-Force is selected, the following features will be
available:
•Vehicle Speed:
Measures the current speed of the vehicle in either mph
or km/h, starting at zero with no maximum value.
• Front G-Force:
Measures the force on the front of the vehicle.
• Right G-Force:
Measures the force on the right side of the vehicle.
• Left G-Forces:
Measures the force on the left of the vehicle. •
Rear G-Forces:
Measures the force on the rear of the vehicle.
NOTE: Front, Right, Left, and Rear G-Froces are all peak
values. These readings can be reset by clearing peak
G-Force on the instrument cluster
• Steering Wheel Angle
Steering Wheel Angle utilizes the steering angle sensor to
measure the degree of the steering wheel relative to zero.
The zero degree measurement indicates a steering wheel
straight ahead position. When the steering angle value is
negative, this indicates a turn to the left, and when the
steering angle value is positive, a turn to the right.
The friction circle display shows instantaneous G-Force as
a highlight and previous G-Force as dots within the circle.
The system records previous G-Force for three minutes. If
there are multiple samples at a given point, the color of the
dot will darken from blue to red. Vectors more frequent
will show in red; infrequent vectors will show in blue.
10
MULTIMEDIA 493
Page 507 of 553

The left-hand control is a rocker-type switch with a push-
button in the center. The function of the left-hand control is
different depending on which mode you are in.
The following describes the left-hand control operation in
each mode.
Radio Operation
Pushing the top of the switch will “Seek” up for the next
listenable station and pushing the bottom of the switch will
“Seek” down for the next listenable station.
The button located in the center of the left-hand control
will tune to the next preset station that you have pro-
grammed in the radio preset button.
Media Mode
Pushing the top of the switch once goes to the next track on
the selected media (AUX/USB/Bluetooth). Pushing the
bottom of the switch once goes to the beginning of the
current track, or to the beginning of the previous track if it
is within eight seconds after the current track begins to
play.
AUX/USB/MP3 CONTROL
This feature allows an external USB device to be plugged
into the USB port.
For further information, refer to the Uconnect Owner ’s
Manual Supplement.
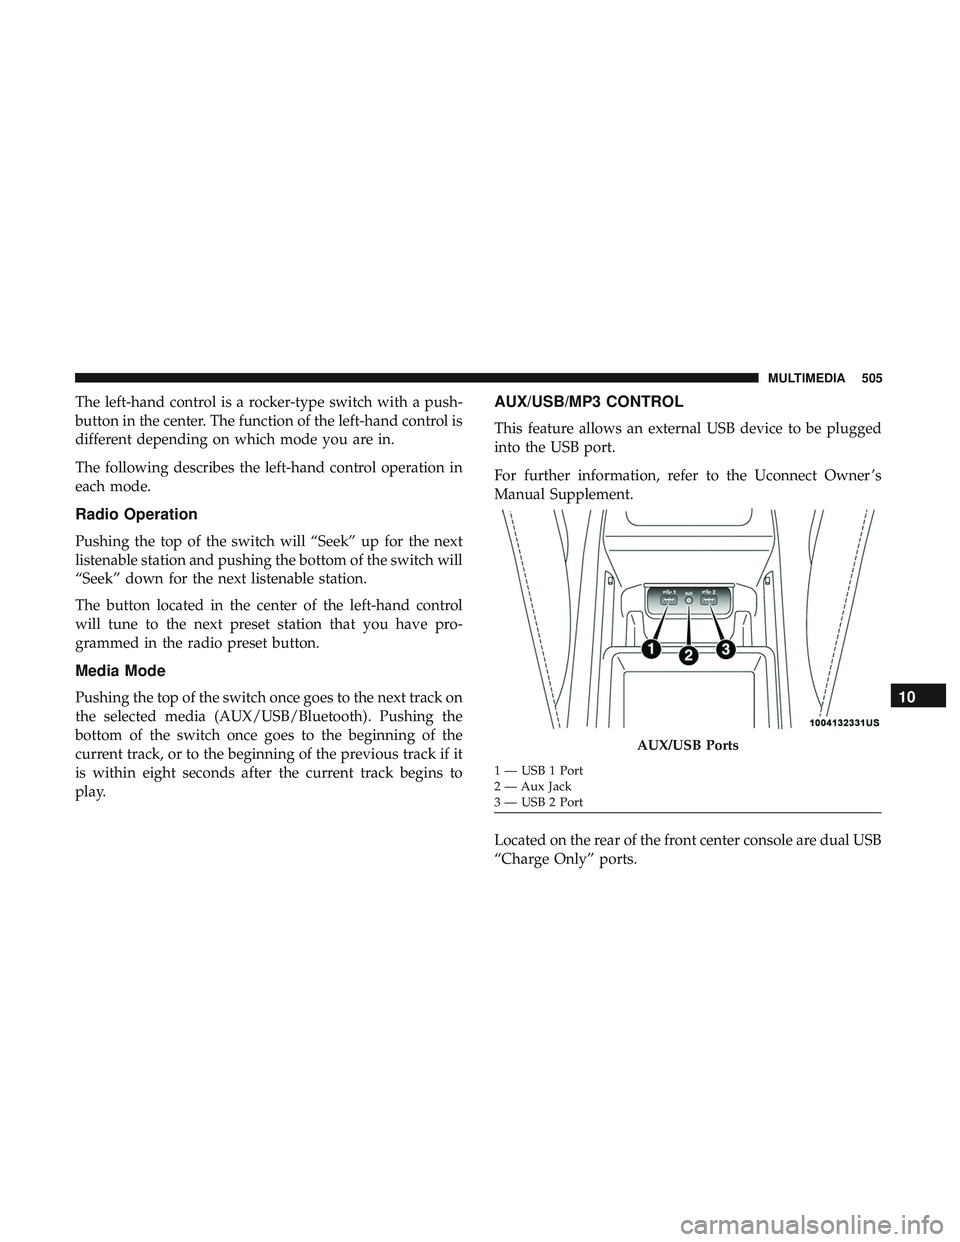
Located on the rear of the front center console are dual USB
“Charge Only” ports.
AUX/USB Ports
1 — USB 1 Port
2 — Aux Jack
3 — USB 2 Port
10
MULTIMEDIA 505
Page 544 of 553

Service............................... .307
Traction Control ........................ .152
Turn Signals ....................65, 69, 141, 217
Vanity Mirror ............................64
Warning Instrument Cluster Descriptions . . . .134, 141
Loading Vehicle ........................283, 285
Capacities ............................. .285
Tires................................. .395
Load Shed Battery Saver On ...................129
Load Shed Electrical Load Reduction .............129
Load Shed Intelligent Battery Sensor .............129
Locks Automatic Door ..........................41
Auto Unlock .............................41
Child Protection ..........................41
Power Door .............................36
Low Tire Pressure System .....................166
Lubrication, Body ..........................375
Lug Nuts ............................... .422
Maintenance Free Battery .....................366
Maintenance Schedule .............353, 354, 357, 359
Malfunction Indicator Light (Check Engine) . . . .135, 143
Manual, Service ............................532
Media Hub ...............................505 Memory Feature (Memory Seats)
..............43, 47
Memory Seat ............................43, 47
Memory Seats And Radio ...................43, 47
Methanol ............................... .426
Mirrors ..................................60
Electric Powered ..........................62
Electric Remote ...........................62
Heated .................................63
Outside ................................62
Rearview ........................ .60, 61, 301
Vanity .................................64
Modifications/Alterations, Vehicle ................5
Monitor, Tire Pressure System ..................166
Mopar Parts ............................. .531
MP3 Control ............................. .505
Multi-Function Control Lever ...................65
New V
ehicle Break-In Period ..................226
Occupant Restraints ........................ .172
Octane Rating, Gasoline (Fuel) ..............424, 432
Oil Change Indicator ........................124
Reset .................................124
Oil, Engine ............................368, 432
Capacity ...............................431
542 INDEX