Page 43 of 516

Power Seats — If Equipped
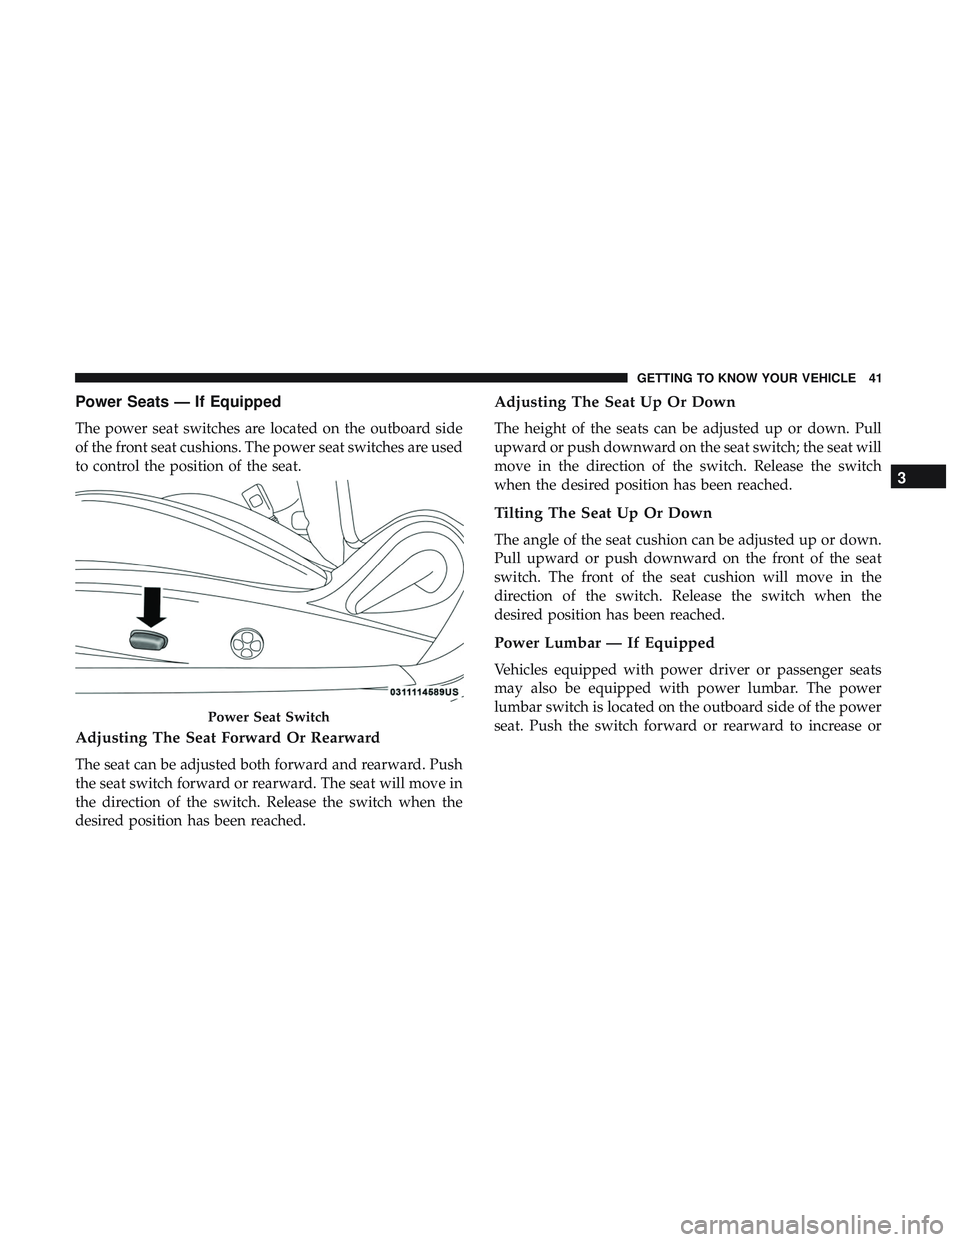
The power seat switches are located on the outboard side
of the front seat cushions. The power seat switches are used
to control the position of the seat.
Adjusting The Seat Forward Or Rearward
The seat can be adjusted both forward and rearward. Push
the seat switch forward or rearward. The seat will move in
the direction of the switch. Release the switch when the
desired position has been reached.
Adjusting The Seat Up Or Down
The height of the seats can be adjusted up or down. Pull
upward or push downward on the seat switch; the seat will
move in the direction of the switch. Release the switch
when the desired position has been reached.
Tilting The Seat Up Or Down
The angle of the seat cushion can be adjusted up or down.
Pull upward or push downward on the front of the seat
switch. The front of the seat cushion will move in the
direction of the switch. Release the switch when the
desired position has been reached.
Power Lumbar — If Equipped
Vehicles equipped with power driver or passenger seats
may also be equipped with power lumbar. The power
lumbar switch is located on the outboard side of the power
seat. Push the switch forward or rearward to increase or
Power Seat Switch
3
GETTING TO KNOW YOUR VEHICLE 41
Page 48 of 516

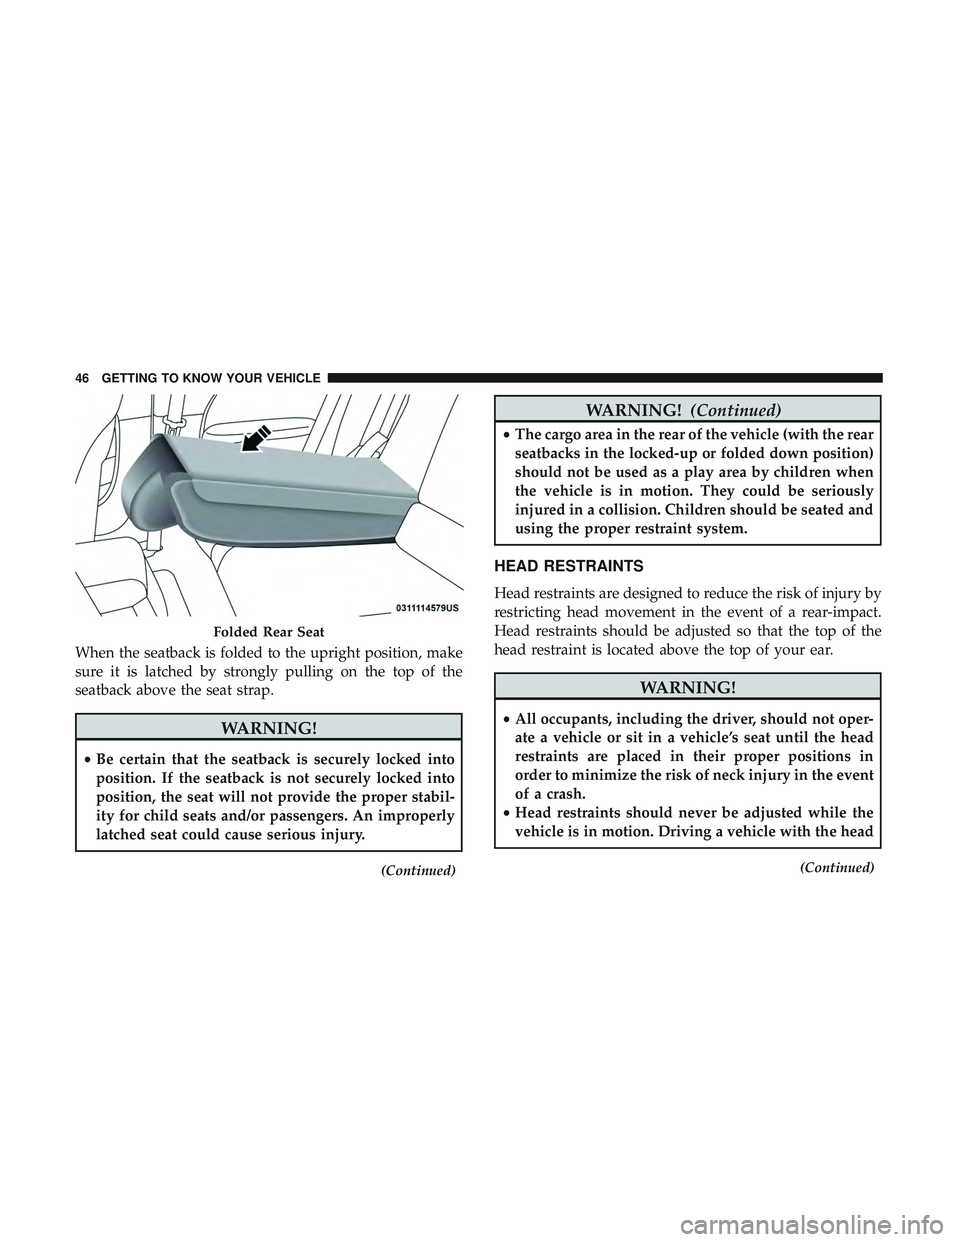
When the seatback is folded to the upright position, make
sure it is latched by strongly pulling on the top of the
seatback above the seat strap.
WARNING!
•Be certain that the seatback is securely locked into
position. If the seatback is not securely locked into
position, the seat will not provide the proper stabil-
ity for child seats and/or passengers. An improperly
latched seat could cause serious injury.
(Continued)
WARNING! (Continued)
•The cargo area in the rear of the vehicle (with the rear
seatbacks in the locked-up or folded down position)
should not be used as a play area by children when
the vehicle is in motion. They could be seriously
injured in a collision. Children should be seated and
using the proper restraint system.
HEAD RESTRAINTS
Head restraints are designed to reduce the risk of injury by
restricting head movement in the event of a rear-impact.
Head restraints should be adjusted so that the top of the
head restraint is located above the top of your ear.
WARNING!
• All occupants, including the driver, should not oper-
ate a vehicle or sit in a vehicle’s seat until the head
restraints are placed in their proper positions in
order to minimize the risk of neck injury in the event
of a crash.
• Head restraints should never be adjusted while the
vehicle is in motion. Driving a vehicle with the head
(Continued)
Folded Rear Seat
46 GETTING TO KNOW YOUR VEHICLE
Page 49 of 516

WARNING!(Continued)
restraints improperly adjusted or removed could
cause serious injury or death in the event of a
collision.
NOTE: Do not reverse the head restraints (making the rear
of the head restraint face forward) in an attempt to gain
additional clearance to the back of your head.
Reactive Head Restraints — Front Seats
The front driver and passenger seats are equipped with
Reactive Head Restraints (RHR). In the event of a rear
impact, the RHRs will automatically extend forward mini-
mizing the gap between the back of the occupants head
and the RHR.
The RHRs will automatically return to their normal posi-
tion following a rear impact. If the RHRs do not return to
their normal position, see your authorized dealer immedi-
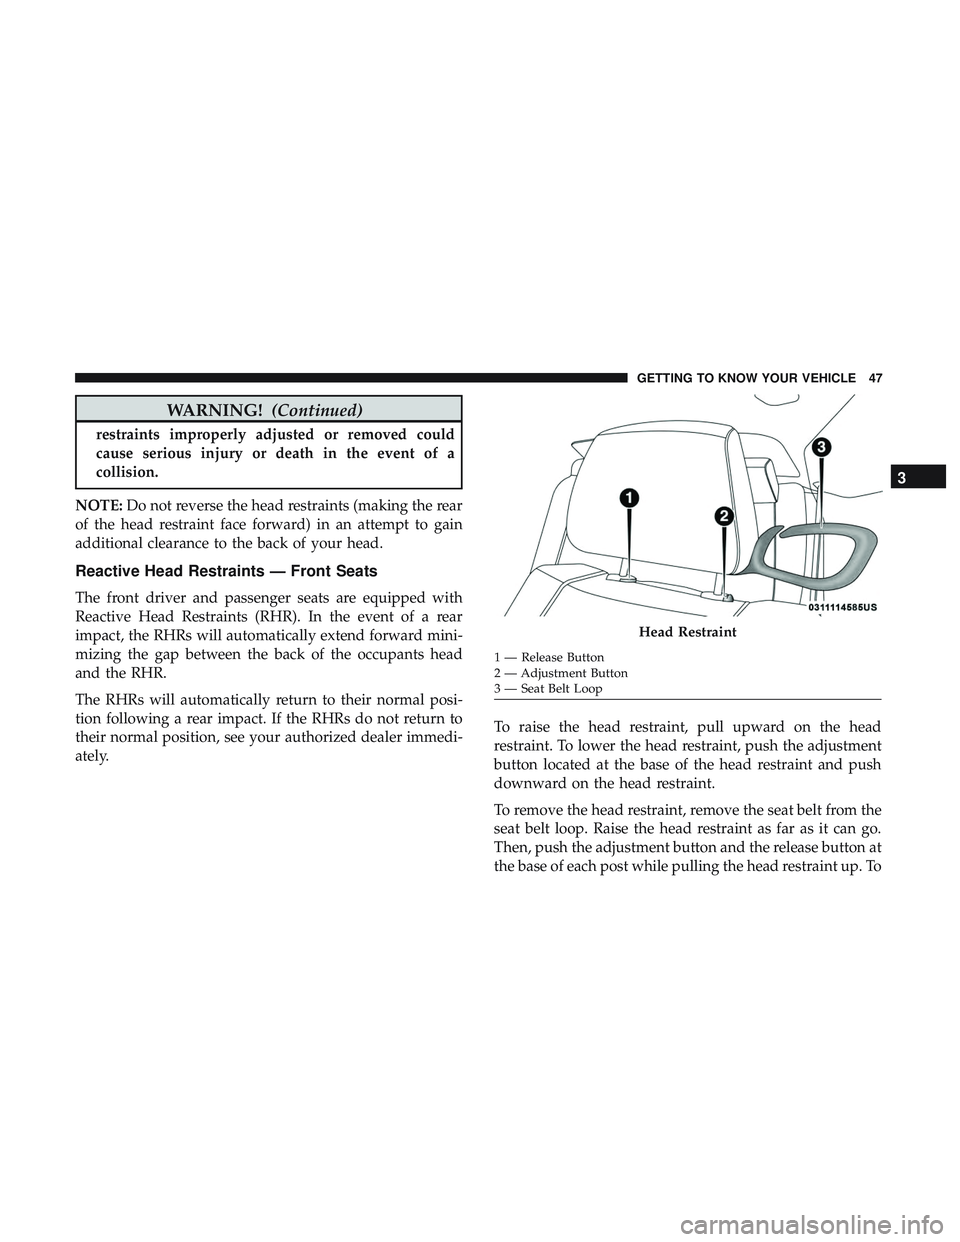
ately. To raise the head restraint, pull upward on the head
restraint. To lower the head restraint, push the adjustment
button located at the base of the head restraint and push
downward on the head restraint.
To remove the head restraint, remove the seat belt from the
seat belt loop. Raise the head restraint as far as it can go.
Then, push the adjustment button and the release button at
the base of each post while pulling the head restraint up. To
Head Restraint
1 — Release Button
2 — Adjustment Button
3 — Seat Belt Loop
3
GETTING TO KNOW YOUR VEHICLE 47
Page 163 of 516

WARNING!(Continued)
•Never place a rear-facing child restraint in front of an
air bag. A deploying passenger front air bag can
cause death or serious injury to a child 12 years or
younger, including a child in a rear-facing child
restraint.
• Only use a rear-facing child restraint in the rear seat
of a vehicle with a rear seat.
Driver And Passenger Front Air Bag Features
The Advanced Front Air Bag system has multistage driver
and front passenger air bags. This system provides output
appropriate to the severity and type of collision as deter-
mined by the Occupant Restraint Controller (ORC), which
may receive information from the front impact sensors (if
equipped) or other system components.
The first stage inflator is triggered immediately during an
impact that requires air bag deployment. A low energy
output is used in less severe collisions. A higher energy
output is used for more severe collisions.
This vehicle may be equipped with a driver and/or front
passenger seat belt buckle switch that detects whether the driver or front passenger seat belt is buckled. The seat belt
buckle switch may adjust the inflation rate of the Ad-
vanced Front Air Bags.
This vehicle may be equipped with driver and/or front
passenger seat track position sensors that may adjust the
inflation rate of the Advanced Front Air Bags based upon
seat position.
WARNING!
•
No objects should be placed over or near the air bag
on the instrument panel or steering wheel because
any such objects could cause harm if the vehicle is in
a collision severe enough to cause the air bag to
inflate.
• Do not put anything on or around the air bag covers
or attempt to open them manually. You may damage
the air bags and you could be injured because the air
bags may no longer be functional. The protective
covers for the air bag cushions are designed to open
only when the air bags are inflating.
• Relying on the air bags alone could lead to more
severe injuries in a collision. The air bags work with
your seat belt to restrain you properly. In some
(Continued)
5
SAFETY 161
Page 480 of 516
Apple iPhone iOS 6 or later supports readingincoming
text messages only. To enable this feature on your Apple
iPhone, follow these four simple steps:
TIP: Voice Text Reply is not compatible with iPhone, but if
your vehicle is equipped with Siri Eyes Free, you can use
your voice to send a text message.Climate
Too hot? Too cold? Adjust vehicle temperatures hands-free
and keep everyone comfortable while you keep moving
ahead. (If vehicle is equipped with climate control.)
Push the VR button
. After the beep, say one of the
following commands:
• “Set driver temperature to 70degrees”
• “Set passenger temperature to 70degrees”
TIP: Voice Command for Climate may only be used to
adjust the interior temperature of your vehicle. Voice
Command will not work to adjust the heated seats or
steering wheel if equipped.
iPhone Notification Settings
1 — Select “Settings”
2 — Select “Bluetooth”
3 — Select The (i) For The Paired Vehicle
4 — Turn On “Show Notifications” 478 MULTIMEDIA