Page 16 of 516

▫Automatic Unlock Doors On Exit ............38
▫ Automatic Door Locks — If Equipped ........39
� SEATS ................................39
▫
Manual Adjustment (Front Seats) — If Equipped . .39
▫ Power Seats — If Equipped ................41
▫ Heated Seats — If Equipped ...............42
▫ Front Ventilated Seats — If Equipped .........43
▫ Passenger Seat Easy Entry .................44
▫ Folding Rear Seat .......................45
� HEAD RESTRAINTS ......................46
▫ Reactive Head Restraints — Front Seats .......47
▫ Rear Head Restraints .....................48
� STEERING WHEEL .......................48
▫ Manual Tilt/Telescoping Steering Column ......48
▫ Power Tilt/Telescoping Steering Column — If
Equipped .............................49
▫ Heated Steering Wheel — If Equipped .........50�
MIRRORS ..............................50
▫ Automatic Dimming Mirror ................50
▫ Outside Mirrors ........................51
▫ Power Mirrors .........................52
▫ Heated Mirrors — If Equipped .............52
▫ Illuminated Vanity Mirrors ................53
� EXTERIOR LIGHTS .......................54
▫ Headlight Switch .......................54
▫ Multifunction Lever .....................54
▫ Daytime Running Lights (DRL) — If Equipped . .55
▫ High/Low Beam Switch ..................55
▫ Automatic High Beam Headlamp Control — If
Equipped .............................55
▫ Flash-To-Pass ..........................55
▫ Automatic Headlights ....................56
▫ Parking Lights .........................56
▫ Headlights On With Wipers ................56
14 GETTING TO KNOW YOUR VEHICLE
Page 50 of 516

reinstall the head restraint, put the head restraint posts into
the holes while pushing the adjustment button and release
button. Then, adjust it to the appropriate height.
NOTE:It may be necessary to recline the front seat before
removing the head restraint to provide enough clearance
from the roof.
WARNING!
• A loose head restraint thrown forward in a collision
or hard stop could cause serious injury or death to
occupants of the vehicle. Always securely stow re-
moved head restraints in a location outside the
occupant compartment.
• ALL the head restraints MUST be reinstalled in the
vehicle to properly protect the occupants. Follow the
re-installation instructions above prior to operating
the vehicle or occupying a seat.
• Do not place items over the top of the Reactive Head
Restraint, such as coats, seat covers or portable DVD
players. These items may interfere with the opera-
tion of the Reactive Head Restraint in the event of a
collision and could result in serious injury or death.
Rear Head Restraints
The rear outboard head restraints are non-adjustable and
are designed to reduce the risk of injury by restricting head
movement in the event of a rear impact.
STEERING WHEEL
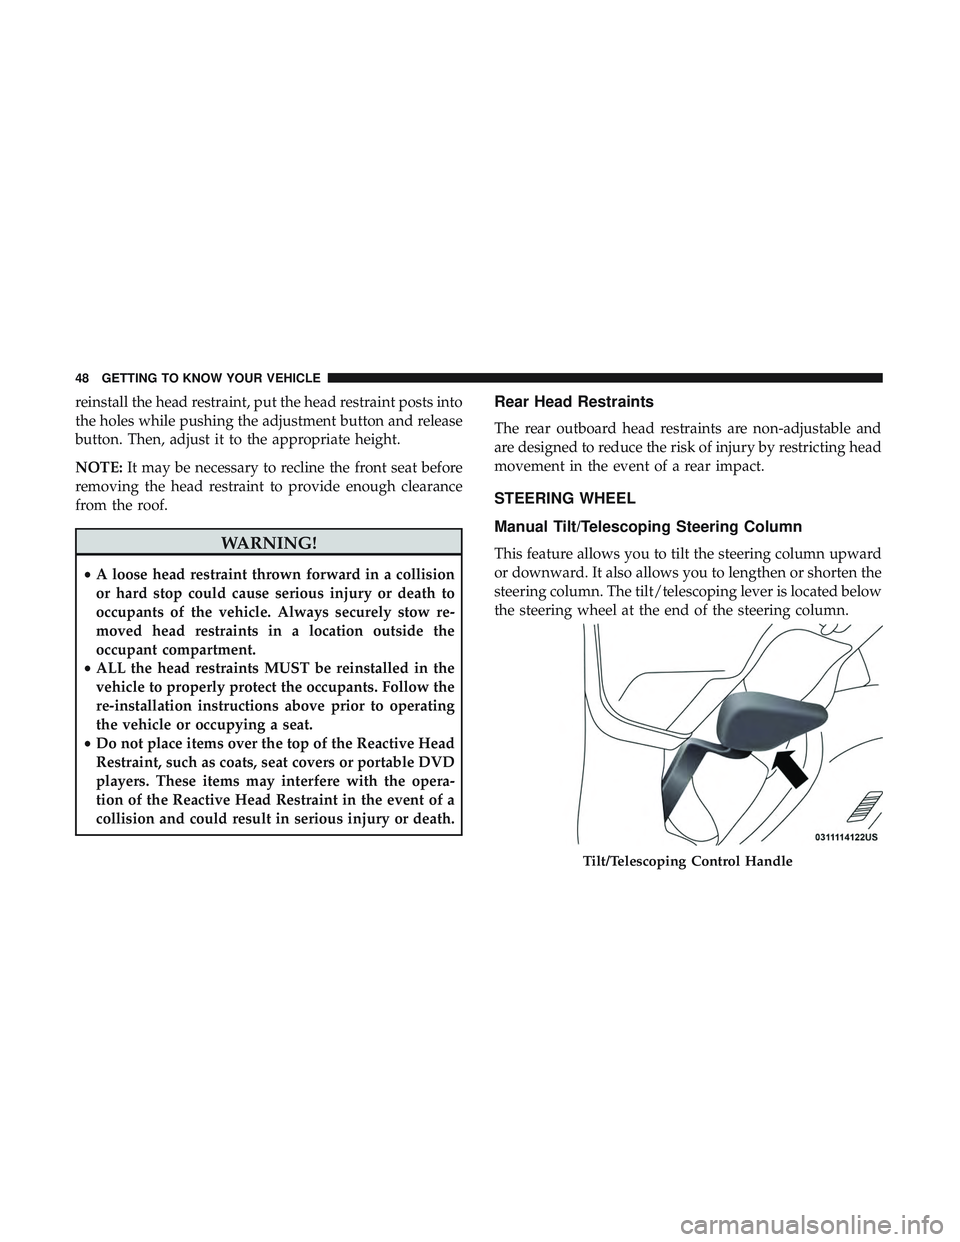
Manual Tilt/Telescoping Steering Column
This feature allows you to tilt the steering column upward
or downward. It also allows you to lengthen or shorten the
steering column. The tilt/telescoping lever is located below
the steering wheel at the end of the steering column.
Tilt/Telescoping Control Handle
48 GETTING TO KNOW YOUR VEHICLE
Page 101 of 516

INSTRUMENT CLUSTER DISPLAY
Your vehicle will be equipped with an instrument cluster
display, which offers useful information to the driver. With
the ignition in the STOP/OFF mode, opening/closing of a
door will activate the display for viewing, and display the
total miles, or kilometers, in the odometer. Your instrument
cluster display is designed to display important informa-
tion about your vehicle’s systems and features. Using a
driver interactive display located on the instrument panel,
your instrument cluster display can show you how sys-
tems are working and give you warnings when they are
not. The steering wheel mounted controls allow you to
scroll through the main menus and submenus. You can
access the specific information you want and make selec-
tions and adjustments.
Location And Controls
The instrument cluster display features an interactive
display which is located in the instrument cluster.This system conveniently allows the driver to select a
variety of useful information by pushing the arrow buttons
located on the left side of the steering wheel. The instru-
ment cluster display menu items consist of the following:
•
Speedometer
• Performance — If Equipped
• Vehicle Info
• Driver Assist — If Equipped
• Fuel Economy
• Trip
Instrument Cluster Display
4
GETTING TO KNOW YOUR INSTRUMENT PANEL 99