2018 CITROEN DS3 radio controls
[x] Cancel search: radio controlsPage 33 of 248

31
Activation
When the lighting is on:
F p ress the button to adjust the brightness of
the lighting for the instruments and controls,
F
r
elease the button when the desired level is
reached.
Deactivation
When the vehicle lighting is off, or in day
mode for vehicles with daytime running lamps,
pressing the button does not have any effect.
Black panel (comfortable
night driving display)
When driving at night, this function allows
certain instrument panel displays to be
switched off so as to reduce visual fatigue for
the driver.
Activation
F With the lighting on, press the left-hand button of the instrument panel several times
to progressively reduce the brightness of
the instruments and controls.
F
P
ress again to reduce the brightness to
a
minimum and switch off the mood lighting.
F
P
ress again to activate the black panel.
The essential driving information, such as the
vehicle speed, warning/indicator lamps and
the cruise control or speed limiter remains
displayed in the instrument panel.
Monochrome screen A
Displays on the screen
This displays the following information:
-
t he time, -
t
he date,
-
t
he exterior temperature (this flashes if
there is a risk of ice),
-
t
he status of accesses (doors, boot, etc.),
-
t
he audio source (radio, CD, etc.) being
listened to,
-
t
he trip computer,
-
i
nformation or alert messages,
-
s
ettings menus for the screen and the
vehicle equipment.
Controls
From the front panel of your Audio system,
press:
F
t
he "MENU " button to access the main
menu ,
F
t
he "5" or " 6" buttons to scroll through the
items in the screen,
F
the MODE button to change the permanent
application (date, audio source, etc.),
01
Instruments
Page 35 of 248

33
As a safety measure, configuration of the
m ultifunction screens by the driver must
only be done when stationary.
Monochrome screen C
Displays on the screen
This displays the following information:
- t he time,
-
t
he date,
-
t
he exterior temperature (this flashes if
there is a
risk of ice),
-
t
he status of accesses (doors, boot, etc.),
-
a
udio sources (radio, CD, USB port, jack
socket, etc.),
-
t
he trip computer,
-
i
nformation or alert messages,
-
s
ettings menus for the screen and the
vehicle equipment.
Controls Main menu
"Audio functions " menu
With the Audio system switched on,
once this menu has been selected,
you can activate or deactivate the
functions linked with use of the radio
(RDS, REG, RadioText), the CD
(introscan, random play, CD repeat)
or the MP3
player (USB port /jack
auxiliary socket).
" Trip computer " menu
Once this menu has been selected,
you can access information
concerning the status of the vehicle
(alert log, status of various systems,
e t c .) .
From the front panel of your Audio system,
press:
F
t
he "
MENU " button to access the main
menu ,
F
t
he "
5" or " 6" buttons to scroll through the
items in the screen,
F
the MODE button to change the permanent
application (trip computer, audio source,
e t c .),
F
t
he " 7" or " 8" buttons to change the value
of a
setting,
F
t
he " OK" button to confirm,
or
F
t
he " Back " button to abandon the operation
in progress. F
P
ress the "
MENU" button for access to the
main menu :
-
a
udio functions,
-
t
rip computer,
-
customisation-configuration,
-
t
elephone (hands-free kit).
F
P
ress the "
5" or " 6" button to select the
menu required, then confirm by pressing the
" OK " button.
01
Instruments
Page 37 of 248

35
For safety reasons, the vehicle must be
stationary before the driver per forms any
operations that require close attention.
Some functions can only be viewed with
the vehicle stationary. Their display is
interrupted once the vehicle starts moving
again.
General operation
Recommendations Principles
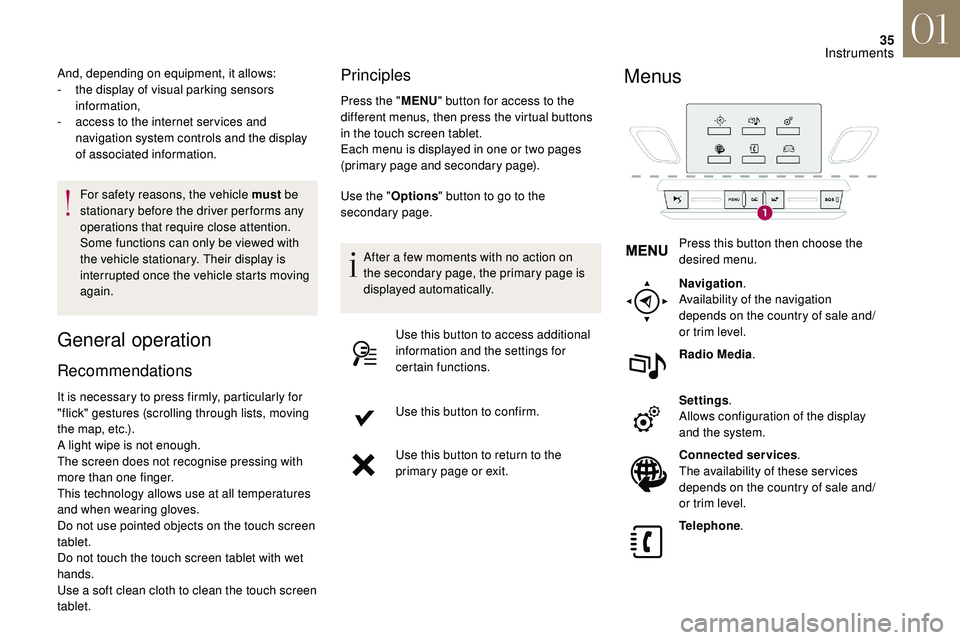
Press the "
MENU" button for access to the
different menus, then press the virtual buttons
in the touch screen tablet.
Each menu is displayed in one or two pages
(primary page and secondary page).
And, depending on equipment, it allows:
-
t
he display of visual parking sensors
information,
-
a
ccess to the internet ser vices and
navigation system controls and the display
of associated information.
It is necessary to press firmly, particularly for
"flick" gestures (scrolling through lists, moving
the map, etc.).
A light wipe is not enough.
The screen does not recognise pressing with
more than one finger.
This technology allows use at all temperatures
and when wearing gloves.
Do not use pointed objects on the touch screen
tablet.
Do not touch the touch screen tablet with wet
hands.
Use a
soft clean cloth to clean the touch screen
tablet. Use the "
Options" button to go to the
secondary page.
After a
few moments with no action on
the secondary page, the primary page is
displayed automatically.
Use this button to access additional
information and the settings for
certain functions.
Use this button to confirm.
Use this button to return to the
primary page or exit.
Menus
Press this button then choose the
desired menu.
Navigation .
Availability of the navigation
depends on the country of sale and/
or trim level.
Radio Media .
Settings .
Allows configuration of the display
and the system.
Connected services .
The availability of these ser vices
depends on the country of sale and/
or trim level.
Telephone .
01
Instruments
Page 82 of 248

80
It reads the audio file formats (mp3, ogg, wma,
wav, etc.) sent to your audio system, to be
listened to via the vehicle's loudspeakers.
You can manage these files using the steering
mounted controls or the audio system control
panel and display them in the instrument panel
screen.While it is being used, the portable device
can recharge automatically.
12 V accessory socket
F To connect a 12 V accessory (max. power:
120 W), lift the cover and connect a suitable
adaptor. The connection of an unapproved
electrical device, such as a
USB charger,
may adversely affect the operation of
vehicle electrical systems, causing
faults such as poor radio reception or
interference with displays in the screens.
Mats
Fitting
When fitting the mat on the driver's side for the
first time, use only the fixings provided in the
wallet attached.
The other mats are simply placed on the
carpet.
Removing
To remove the mat on the driver's side:
F m ove the seat as far back as possible,
F
un
clip the fixings,
F
r
emove the mat.
Refitting
To refit the mat on the driver's side:
F p osition the mat correctly,
F
p
ut on the fixings again by pressing,
F
c
heck that the mat is secured correctly.
03
Ease of use and comfort
Page 205 of 248

1
7-inch touch screen tablet
GPS satellite navigation –
Multimedia audio system –
Bluetooth
® telephone
Contents
First steps
2
S
teering mounted controls
3
M
enus
3
N
avigation
4
R
adio
7
D
AB radio (Digital Audio Broadcasting)
9
M
edia
9
S
ettings
1
1
Connected services
1
2
Telephone
1
4
Frequently asked questions
1
7The system is protected in such a
way that
it will only operate in your vehicle.
As a safety measure, the driver should
only carry out operations that require
close attention with the vehicle stationary.
The display of the energy economy mode
message signals that the system is about
to go into standby. For more information,
refer to the "Energy economy mode"
section.
7-inch touch screen tablet
Page 207 of 248

3
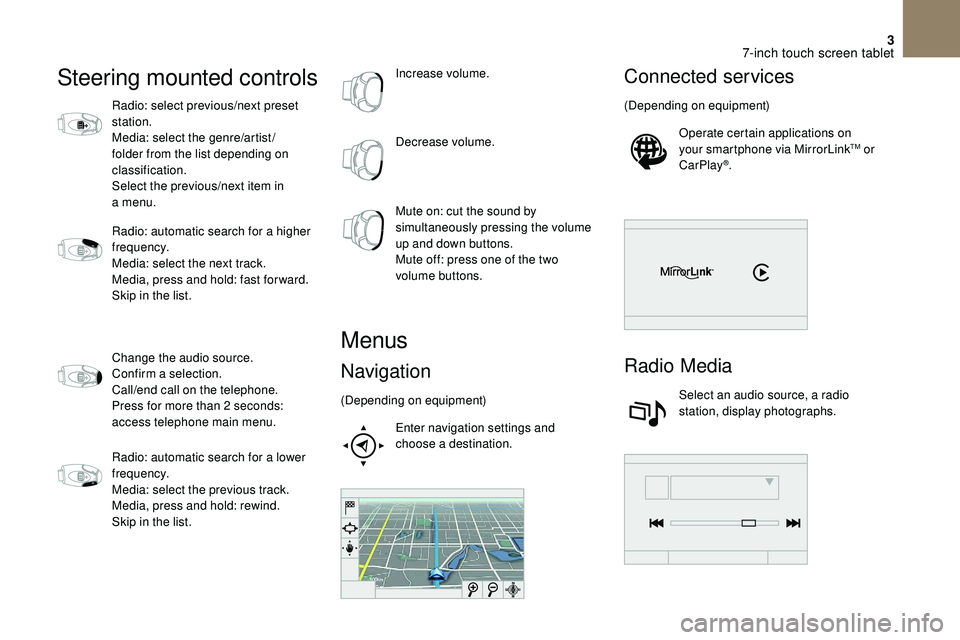
Steering mounted controls
Radio: select previous/next preset
station.
Media: select the genre/artist/
folder from the list depending on
classification.
Select the previous/next item in
a menu.
Radio: automatic search for a
higher
frequency.
Media: select the next track.
Media, press and hold: fast for ward.
Skip in the list.
Change the audio source.
Confirm a
selection.
Call/end call on the telephone.
Press for more than 2
seconds:
access telephone main menu.
Radio: automatic search for a
lower
frequency.
Media: select the previous track.
Media, press and hold: rewind.
Skip in the list. Increase volume.
Decrease volume.
Mute on: cut the sound by
simultaneously pressing the volume
up and down buttons.
Mute off: press one of the two
volume buttons.
Menus
Navigation
(Depending on equipment)
Enter navigation settings and
choose a
destination.
Connected services
(Depending on equipment)Operate certain applications on
your smartphone via MirrorLink
TM or
CarPlay®.
Radio Media
Select an audio source, a radio
station, display photographs.
7-inch touch screen tablet
Page 214 of 248

10
Reduce the number of non-music files and the
number of folders to reduce the waiting time.
The playlists are updated every time the
ignition is switched off or a USB memory stick
is connected. The lists are memorised: if they
are not modified, the subsequent loading time
will be shorter.
Auxiliary socket (AUX)
This source is only available if the "Auxiliary
socket" option has been activated in the
"Media" settings.
Connect a
portable device (MP3 player, etc.) to
the AUX Jack socket using the audio cable (not
supplied).
First adjust the volume on your portable device
(to a
high level). Then adjust the volume of your
audio system.
Display and management of the controls are
via the portable device.
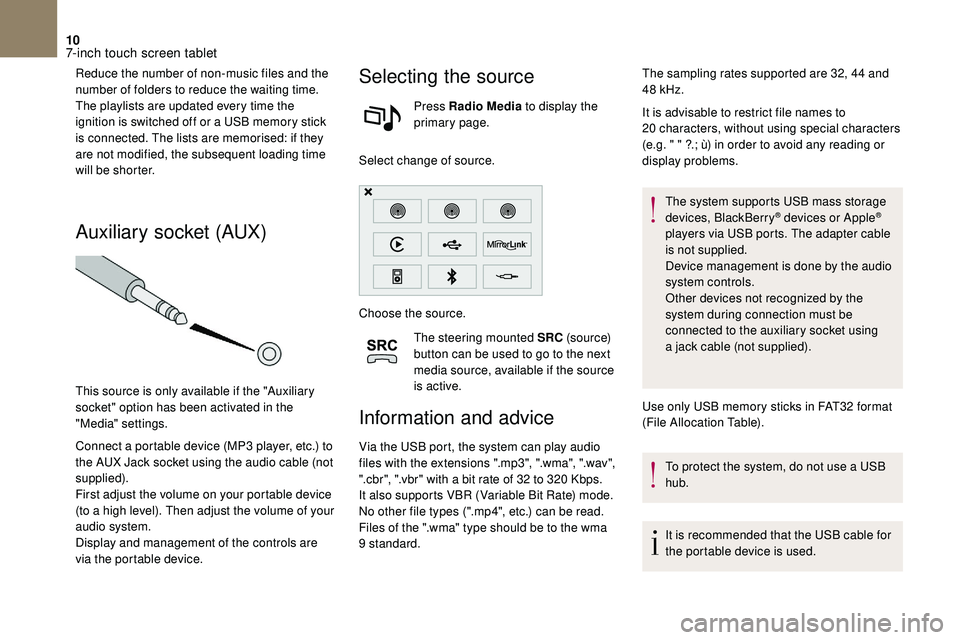
Selecting the source
Press Radio Media to display the
primary page.
Select change of source.
Choose the source. The steering mounted SRC (s o u r c e)
button can be used to go to the next
media source, available if the source
is active.
Information and advice
Via the USB port, the system can play audio
files with the extensions ".mp3", ".wma", ".wav",
".cbr", ".vbr" with a
bit rate of 32 to 320 Kbps.
It also supports VBR (Variable Bit Rate) mode.
No other file types (".mp4", etc.) can be read.
Files of the ".wma" type should be to the wma
9
standard. It is advisable to restrict file names to
20
characters, without using special characters
(e.g. " " ?.; ù) in order to avoid any reading or
display problems.
The system supports USB mass storage
devices, BlackBerry
® devices or Apple®
players via USB ports. The adapter cable
is not supplied.
Device management is done by the audio
system controls.
Other devices not recognized by the
system during connection must be
connected to the auxiliary socket using
a
jack cable (not supplied).
Use only USB memory sticks in FAT32
format
(File Allocation Table).
To protect the system, do not use a
USB
hub.
It is recommended that the USB cable for
the portable device is used.
The sampling rates supported are 32, 44
and
48
kHz.
7-inch touch screen tablet
Page 229 of 248

1
Audio system
Audio system/Bluetooth®
Contents
First steps
1
S
teering mounted controls
2
M
enus
2
R
adio
3
M
edia
4
T
elephone
6
F
requently asked questions
8Y
our Audio system is coded in such a way
that it will only operate in your vehicle.
As a
safety measure, the driver must
only carry out operations which require
sustained attention when the vehicle is
stationary.
To avoid discharging the battery, the audio
system may switch off after a
few minutes
if the engine is not running.
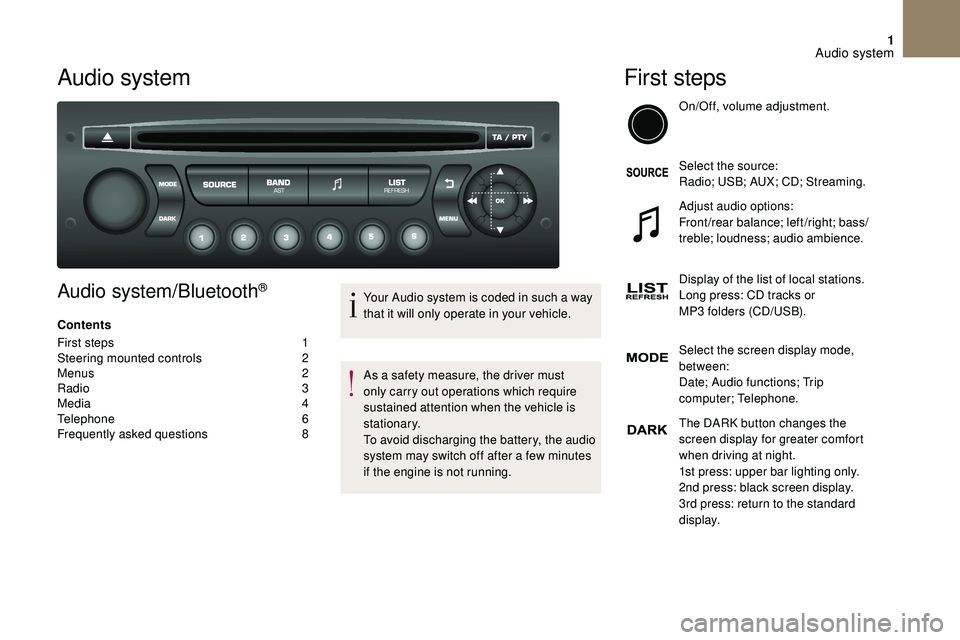
First steps
On/Off, volume adjustment.
Select the source:
Radio; USB; AUX; CD; Streaming.
Adjust audio options:
Front/rear balance; left/right; bass/
treble; loudness; audio ambience.
Display of the list of local stations.
Long press: CD tracks or
MP3
folders (CD/USB).
Select the screen display mode,
between:
Date; Audio functions; Trip
computer; Telephone.
The DARK button changes the
screen display for greater comfort
when driving at night.
1st press: upper bar lighting only.
2nd press: black screen display.
3rd press: return to the standard
display.
Audio system