2018 CHRYSLER PACIFICA Sliding door panel
[x] Cancel search: Sliding door panelPage 40 of 696
NOTE:
•Passive Entry may be programmed ON/OFF. Refer to
“Uconnect Settings” in “Multimedia” for further infor-
mation.
• If wearing gloves on your hands, or if it has been
raining/snowing on the Passive Entry door handle, the
unlock sensitivity can be affected, resulting in a slower
response time.
• If the vehicle is unlocked by Passive Entry and no door
is opened within 60 seconds, the vehicle will re-lock and
if equipped will arm the security alarm.
• The sliding side doors can be unlocked from the outside
using the hands free or Passive Entry system.
• The key fob may not be able to be detected by the vehicle
passive entry system if it is located next to a mobile
phone, laptop, wireless charging pad, or other electronic
device; these devices may block the key fob’s wireless
signal and prevent the passive entry handle from
locking/unlocking the vehicle.
• If set by the customer in the Uconnect Settings, unlock-
ing with Passive Entry will initiate illuminated approach (low beams, license plate lamp, position lamps) for the
time 0, 30(default), 60 or 90 seconds. Passive Entry also
initiates two flashes of the turn lamps.
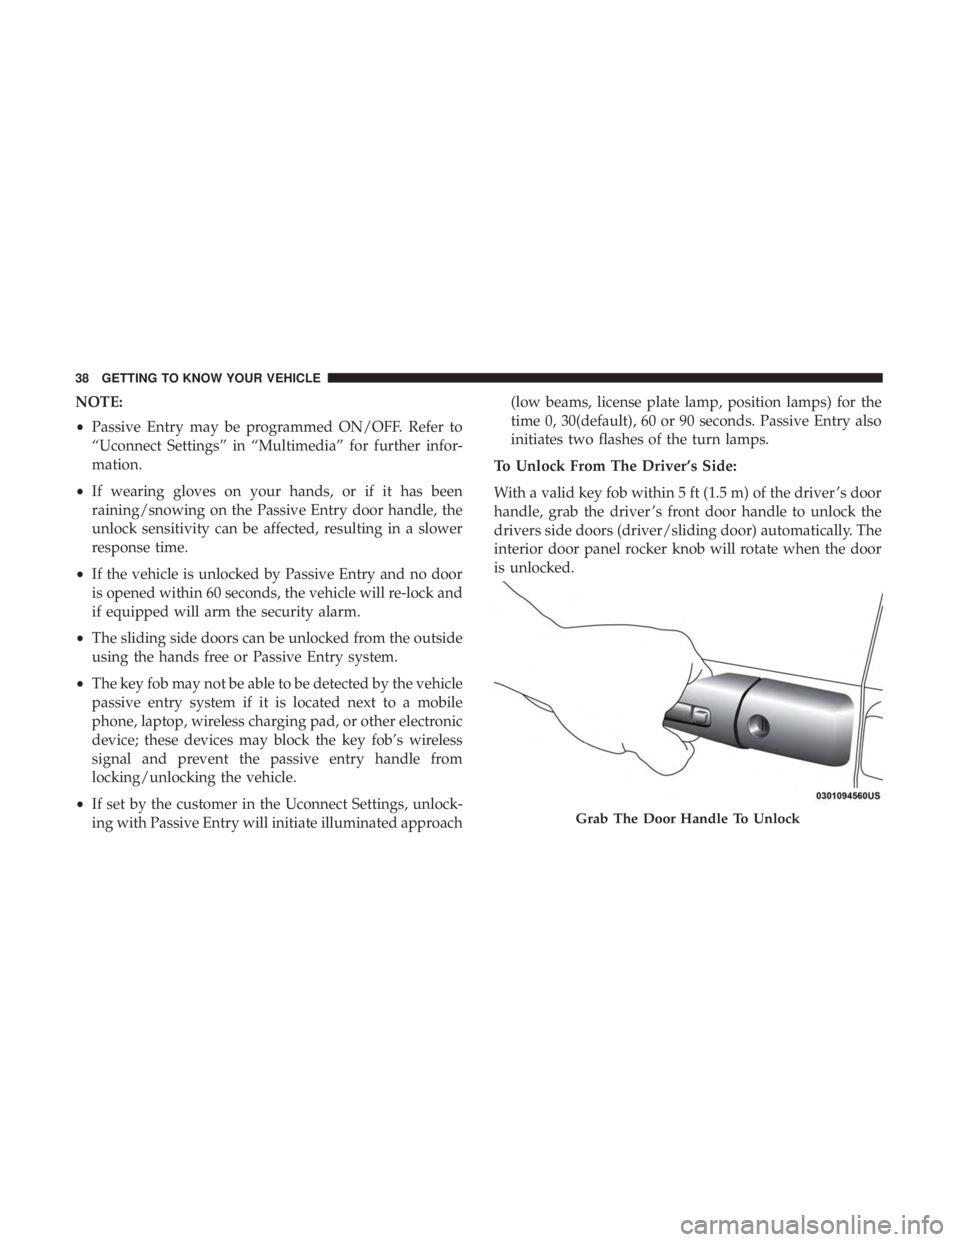
To Unlock From The Driver’s Side:
With a valid key fob within 5 ft (1.5 m) of the driver ’s door
handle, grab the driver ’s front door handle to unlock the
drivers side doors (driver/sliding door) automatically. The
interior door panel rocker knob will rotate when the door
is unlocked.
Grab The Door Handle To Unlock
38 GETTING TO KNOW YOUR VEHICLE
Page 43 of 696
NOTE:
•After pushing the door handle button, you must wait
two seconds before you can lock or unlock the doors,
using either Passive Entry door handle. This is done to
allow you to check if the vehicle is locked by pulling the
door handle, without the vehicle reacting and unlocking.
• The Passive Entry system will not operate if the key fob
battery is dead.
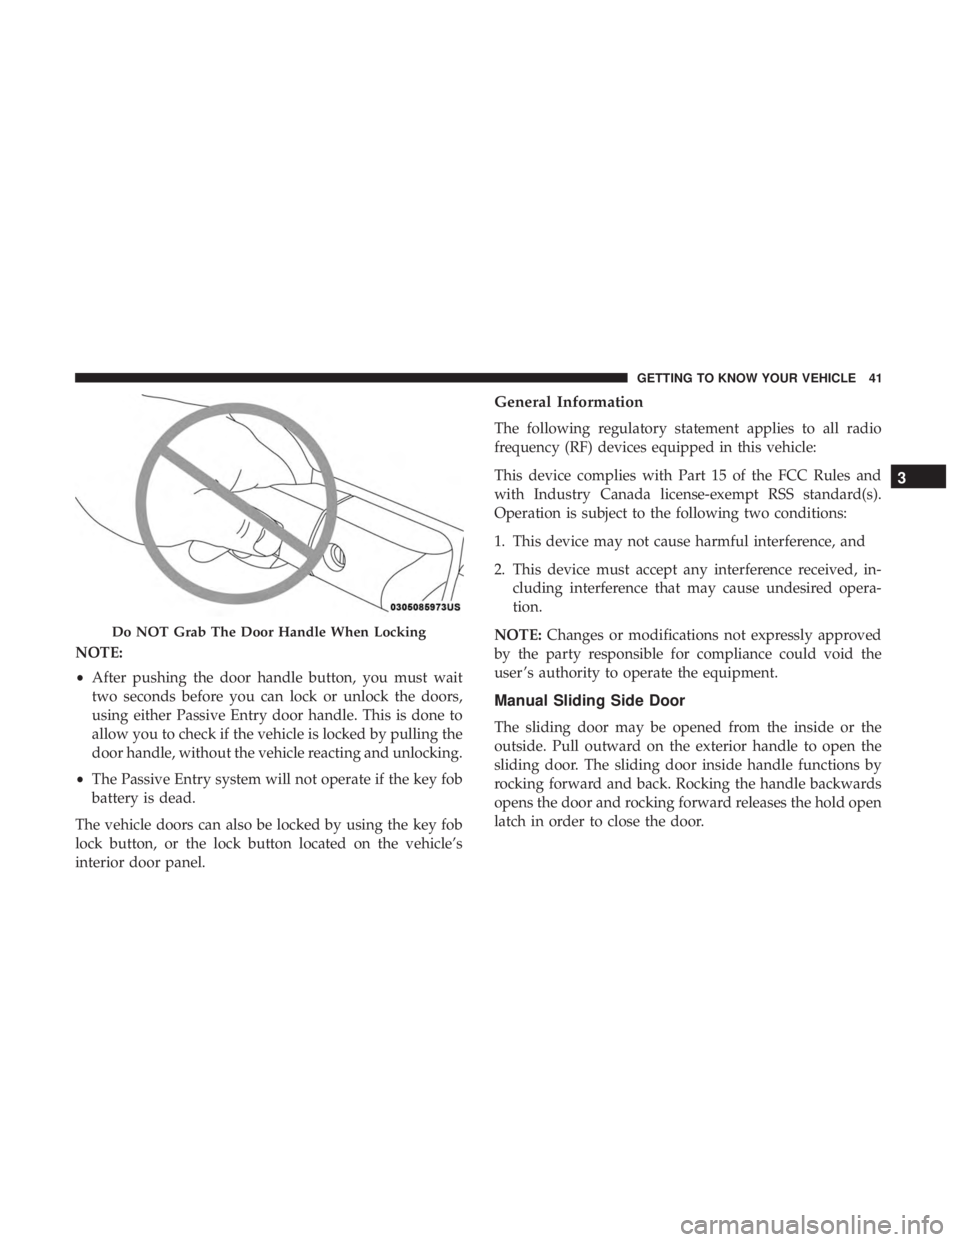
The vehicle doors can also be locked by using the key fob
lock button, or the lock button located on the vehicle’s
interior door panel.
General Information
The following regulatory statement applies to all radio
frequency (RF) devices equipped in this vehicle:
This device complies with Part 15 of the FCC Rules and
with Industry Canada license-exempt RSS standard(s).
Operation is subject to the following two conditions:
1. This device may not cause harmful interference, and
2. This device must accept any interference received, in- cluding interference that may cause undesired opera-
tion.
NOTE: Changes or modifications not expressly approved
by the party responsible for compliance could void the
user ’s authority to operate the equipment.
Manual Sliding Side Door
The sliding door may be opened from the inside or the
outside. Pull outward on the exterior handle to open the
sliding door. The sliding door inside handle functions by
rocking forward and back. Rocking the handle backwards
opens the door and rocking forward releases the hold open
latch in order to close the door.
Do NOT Grab The Door Handle When Locking
3
GETTING TO KNOW YOUR VEHICLE 41
Page 45 of 696
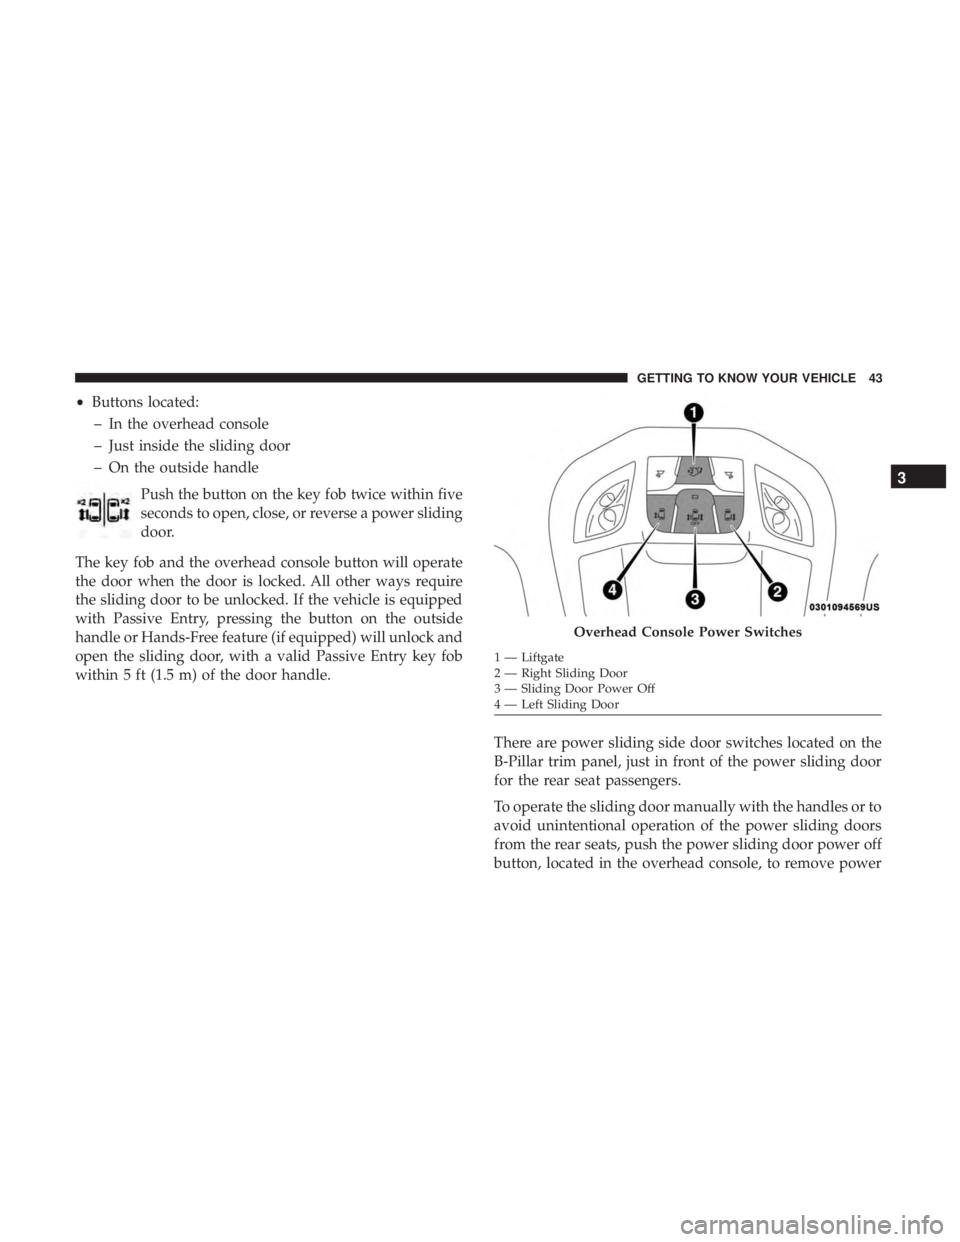
•Buttons located:
– In the overhead console
– Just inside the sliding door
– On the outside handle
Push the button on the key fob twice within five
seconds to open, close, or reverse a power sliding
door.
The key fob and the overhead console button will operate
the door when the door is locked. All other ways require
the sliding door to be unlocked. If the vehicle is equipped
with Passive Entry, pressing the button on the outside
handle or Hands-Free feature (if equipped) will unlock and
open the sliding door, with a valid Passive Entry key fob
within 5 ft (1.5 m) of the door handle.
There are power sliding side door switches located on the
B-Pillar trim panel, just in front of the power sliding door
for the rear seat passengers.
To operate the sliding door manually with the handles or to
avoid unintentional operation of the power sliding doors
from the rear seats, push the power sliding door power off
button, located in the overhead console, to remove power
Overhead Console Power Switches
1 — Liftgate
2 — Right Sliding Door
3 — Sliding Door Power Off
4 — Left Sliding Door
3
GETTING TO KNOW YOUR VEHICLE 43
Page 62 of 696
•Press the heated seat buttona second time to turn
the LO setting on.
• Press the heated seat buttona third time to turn the
heating elements off.
If the HI-level setting is selected, the system will automati-
cally switch to LO-level after approximately 60 minutes of
continuous operation. At that time, the display will change
from HI to LO, indicating the change. The LO-level setting
will turn off automatically after approximately 45 minutes.
NOTE:
• Once a heat setting is selected, heat will be felt within
two to five minutes.
• The engine must be running for the heated seats to
operate.
Vehicles Equipped With Remote Start
On models that are equipped with remote start, the heated
seats can be programmed to come on during a remote start.
This feature can be programmed through the Uconnect
system. Refer to “Uconnect Settings” in “Multimedia” for
further information.
WARNING!
• Persons who are unable to feel pain to the skin
because of advanced age, chronic illness, diabetes,
spinal cord injury, medication, alcohol use, exhaus-
tion or other physical condition must exercise care
when using the seat heater. It may cause burns even
at low temperatures, especially if used for long
periods of time.
• Do not place anything on the seat or seatback that
insulates against heat, such as a blanket or cushion.
This may cause the seat heater to overheat. Sitting in
a seat that has been overheated could cause serious
burns due to the increased surface temperature of the
seat.
Rear Heated Seats — If Equipped
On some models, the second row seats are equipped with
heaters. There are two heated seat switches that allow the
second row passengers to operate the seats independently.
The heated seat switches are located on the sliding side
door handle trim panels.
60 GETTING TO KNOW YOUR VEHICLE
Page 64 of 696
Vehicles Equipped With Remote Start
On models that are equipped with remote start, the venti-
lated seats can be programed to come on during a remote
start.
This feature can be programmed through the Uconnect
system. Refer to “Uconnect Settings” in “Multimedia” for
further information.
Stow ’n Go Seating
On vehicles equipped with Stow ’n Go seating, the second
and third row seats can be folded into the floor for
convenient storage.
Auto Advance ‘n Return — If Equipped
On vehicles equipped with the Auto Advance ‘n Return
feature, the front seat will move forward automatically to a
location that will allow the second row Stow ‘n Go seat
movement, without interference by the front seat. After the
second row seat is stowed, the front seat will move back to
the previous location once the Auto Advance ‘n Return
button is pushed again.
The Auto Advance ‘n Return feature is available to both the
front driver and passenger power seats, if equipped.
WARNING!
During power seat operation, personal injury or cargo
damage may occur. Ensure the front seat is not occu-
pied and the seat travel path is clear.
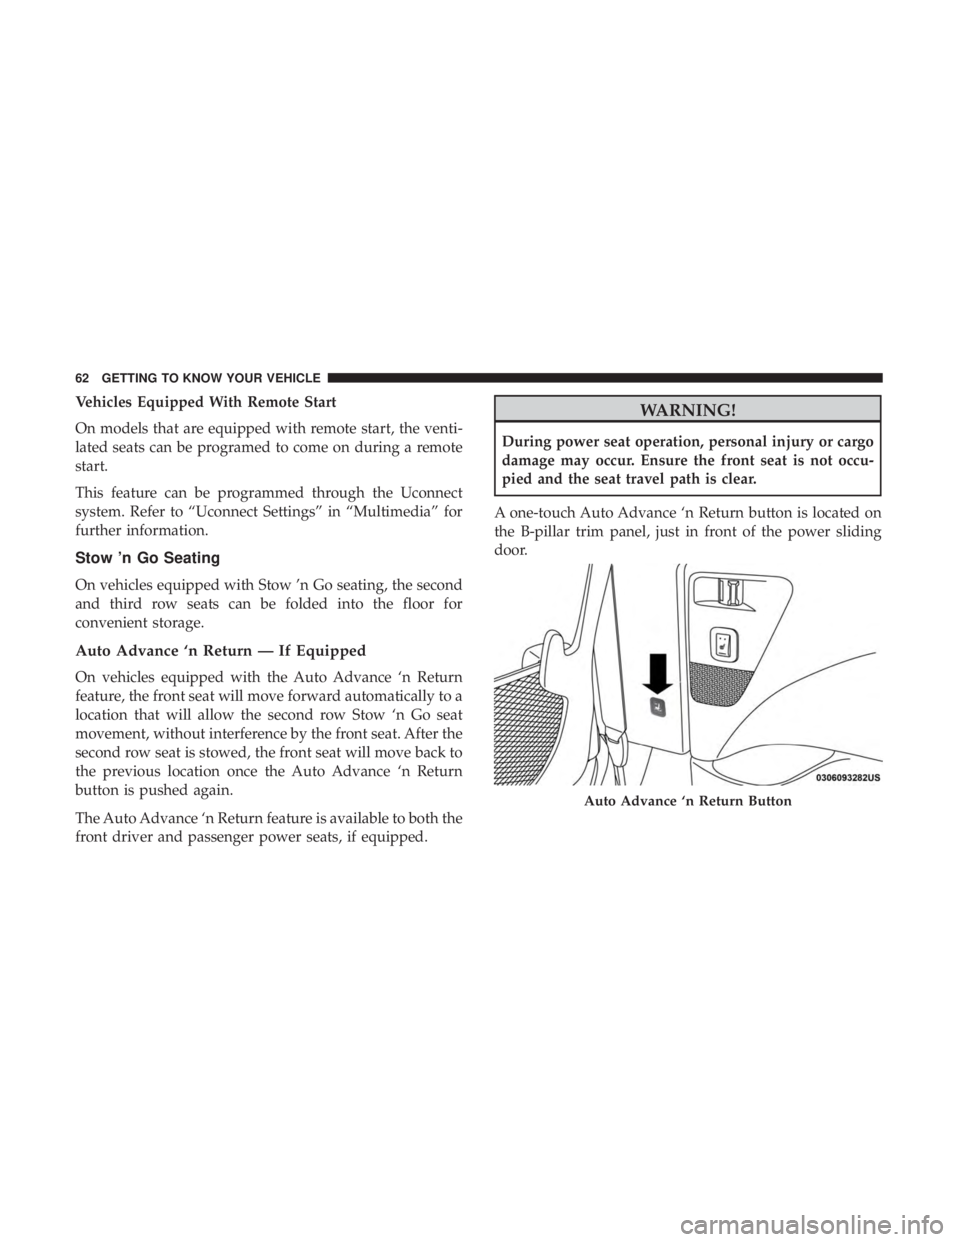
A one-touch Auto Advance ‘n Return button is located on
the B-pillar trim panel, just in front of the power sliding
door.
Auto Advance ‘n Return Button
62 GETTING TO KNOW YOUR VEHICLE
Page 149 of 696
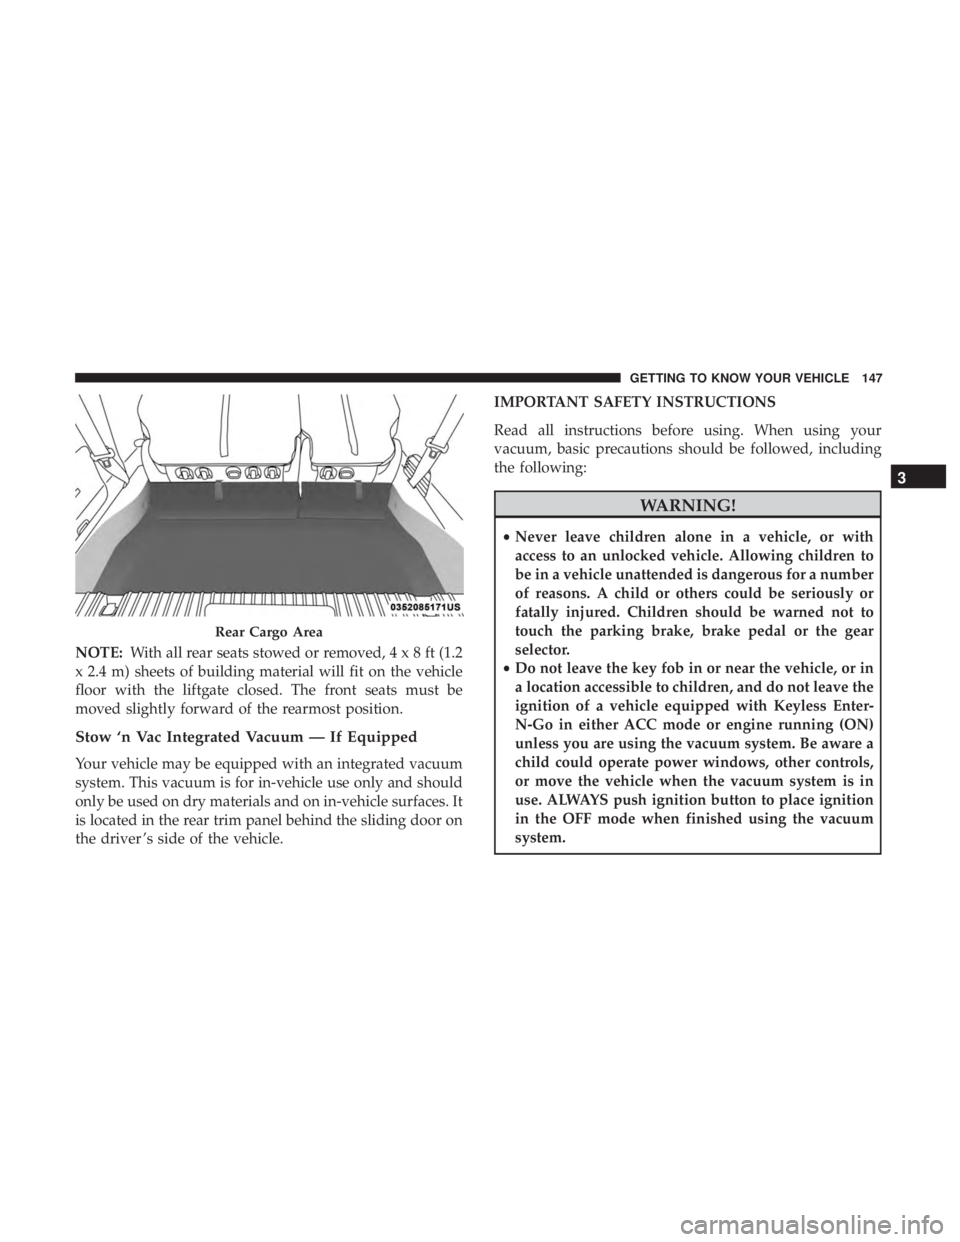
NOTE:With all rear seats stowed or removed,4x8ft(1.2
x 2.4 m) sheets of building material will fit on the vehicle
floor with the liftgate closed. The front seats must be
moved slightly forward of the rearmost position.
Stow ‘n Vac Integrated Vacuum — If Equipped
Your vehicle may be equipped with an integrated vacuum
system. This vacuum is for in-vehicle use only and should
only be used on dry materials and on in-vehicle surfaces. It
is located in the rear trim panel behind the sliding door on
the driver ’s side of the vehicle. IMPORTANT SAFETY INSTRUCTIONS
Read all instructions before using. When using your
vacuum, basic precautions should be followed, including
the following:
WARNING!
•
Never leave children alone in a vehicle, or with
access to an unlocked vehicle. Allowing children to
be in a vehicle unattended is dangerous for a number
of reasons. A child or others could be seriously or
fatally injured. Children should be warned not to
touch the parking brake, brake pedal or the gear
selector.
• Do not leave the key fob in or near the vehicle, or in
a location accessible to children, and do not leave the
ignition of a vehicle equipped with Keyless Enter-
N-Go in either ACC mode or engine running (ON)
unless you are using the vacuum system. Be aware a
child could operate power windows, other controls,
or move the vehicle when the vacuum system is in
use. ALWAYS push ignition button to place ignition
in the OFF mode when finished using the vacuum
system.
Rear Cargo Area
3
GETTING TO KNOW YOUR VEHICLE 147
Page 156 of 696
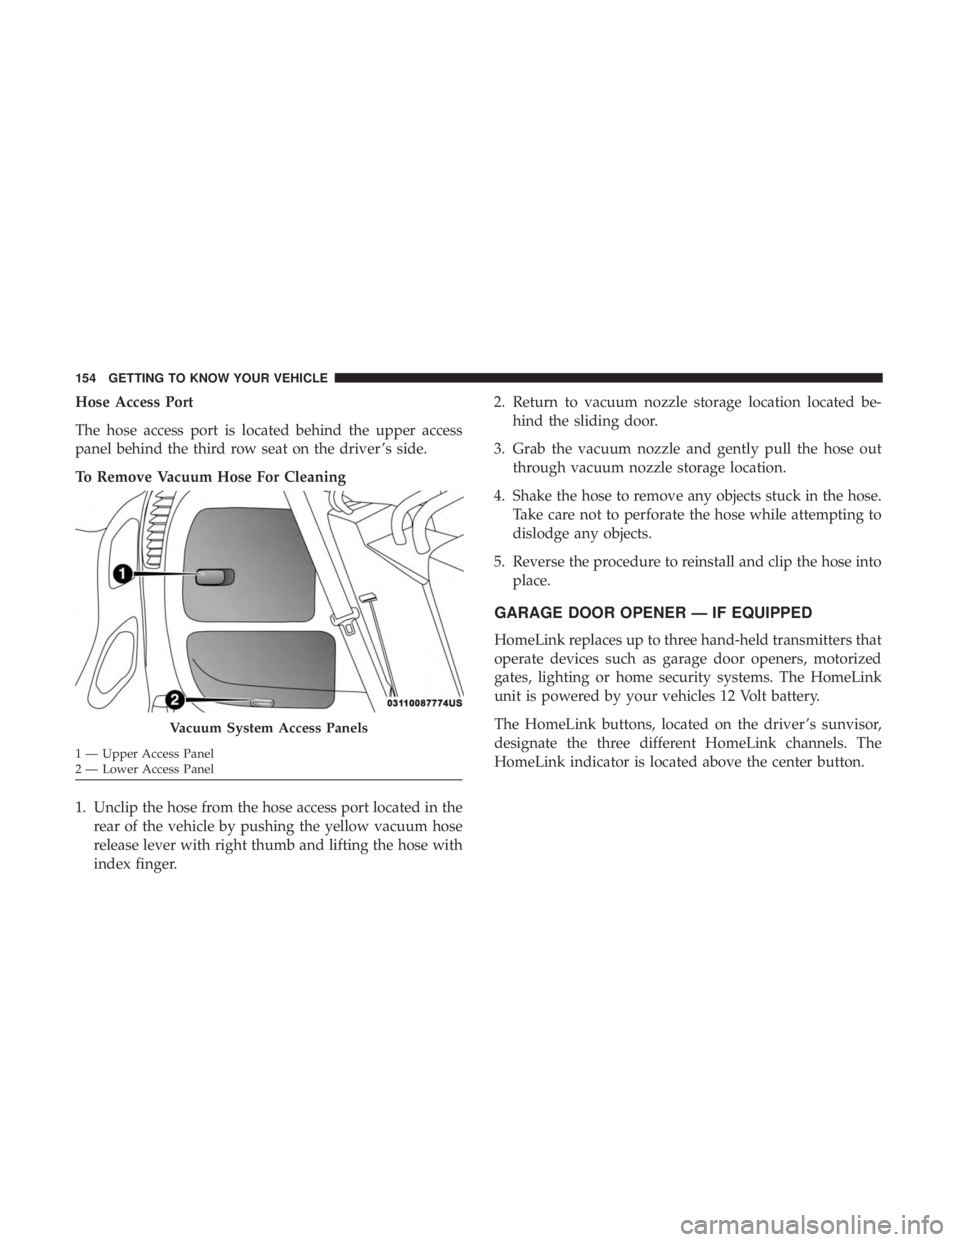
Hose Access Port
The hose access port is located behind the upper access
panel behind the third row seat on the driver ’s side.
To Remove Vacuum Hose For Cleaning
1. Unclip the hose from the hose access port located in therear of the vehicle by pushing the yellow vacuum hose
release lever with right thumb and lifting the hose with
index finger. 2. Return to vacuum nozzle storage location located be-
hind the sliding door.
3. Grab the vacuum nozzle and gently pull the hose out through vacuum nozzle storage location.
4. Shake the hose to remove any objects stuck in the hose. Take care not to perforate the hose while attempting to
dislodge any objects.
5. Reverse the procedure to reinstall and clip the hose into place.
GARAGE DOOR OPENER — IF EQUIPPED
HomeLink replaces up to three hand-held transmitters that
operate devices such as garage door openers, motorized
gates, lighting or home security systems. The HomeLink
unit is powered by your vehicles 12 Volt battery.
The HomeLink buttons, located on the driver ’s sunvisor,
designate the three different HomeLink channels. The
HomeLink indicator is located above the center button.
Vacuum System Access Panels
1 — Upper Access Panel
2 — Lower Access Panel 154 GETTING TO KNOW YOUR VEHICLE
Page 550 of 696

IDENTIFICATION DATA
Vehicle Identification Number
The Vehicle Identification Number (VIN) is on the left front
corner of the instrument panel and is visible from outside
of the vehicle through the windshield. This number also
appears stamped under the right rear sliding door trim
panel and printed on the Automobile Information Disclo-
sure Label affixed to a window on your vehicle, the vehicle
registration and title.NOTE:It is illegal to remove or alter the VIN.
BRAKE SYSTEM
Your vehicle is equipped with dual hydraulic brake sys-
tems. If either of the two hydraulic systems loses normal
capability, the remaining system will still function. How-
ever, there will be some loss of overall braking effective-
ness. You may notice increased pedal travel during appli-
cation, greater pedal force required to slow or stop, and
potential activation of the Brake Warning Light.
Vehicle Identification Number
Vehicle Identification Number
548 TECHNICAL SPECIFICATIONS