Page 398 of 492

BODYWORK
Protection From Atmospheric Agents
Vehicle body care requirements vary according to geo-
graphic locations and usage. Chemicals that make roads
passable in snow and ice and those that are sprayed on
trees and road surfaces during other seasons are highly
corrosive to the metal in your vehicle. Outside parking,
which exposes your vehicle to airborne contaminants, road
surfaces on which the vehicle is operated, extreme hot or
cold weather and other extreme conditions will have an
adverse effect on paint, metal trim, and underbody protec-
tion.
The following maintenance recommendations will enable
you to obtain maximum benefit from the corrosion resis-
tance built into your vehicle.
What Causes Corrosion?
Corrosion is the result of deterioration or removal of paint
and protective coatings from your vehicle.The most common causes are:
•
Road salt, dirt and moisture accumulation.
• Stone and gravel impact.
• Insects, tree sap and tar.
• Salt in the air near seacoast localities.
• Atmospheric fallout/industrial pollutants.
Body And Underbody Maintenance
Cleaning Headlights
Your vehicle is equipped with plastic headlights and fog
lights that are lighter and less susceptible to stone breakage
than glass headlights.
Plastic is not as scratch resistant as glass and therefore
different lens cleaning procedures must be followed.
To minimize the possibility of scratching the lenses and
reducing light output, avoid wiping with a dry cloth. To
remove road dirt, wash with a mild soap solution followed
by rinsing.
Do not use abrasive cleaning components, solvents, steel
wool or other aggressive material to clean the lenses.
396 SERVICING AND MAINTENANCE
Page 424 of 492

CAUTION!
Do NOT attach any object to the touchscreen, doing so
can result in damage to the touchscreen.
Customer Programmable Features — Uconnect
4C/4C NAV Settings
Press the “Apps” button (If Equipped), and then
press the “Settings” button on the touchscreen to dis-
play the menu setting screen. In this mode, the
Uconnect system allows you to access programmable
features that may be equipped such as Language, Dis-
play, Units, Voice, Clock, Safety & Driving Assistance,
Lights, Doors & Locks, Auto-On Comfort, Engine Off
Options, Audio, Phone, SiriusXM Setup, Restore Set-
tings, Clear Personal Data and System Information.
NOTE: Depending on the vehicles options, feature settings
may vary.
When making a selection, press the button on the touch-
screen to enter the desired mode. Once in the desired
mode, press and release the preferred setting “option” until
a check-mark appears next to the setting, showing that
setting has been selected. Once the setting is complete,
either press the back arrow button on the touchscreen to
return to the previous menu, or press the “X” button on the
touchscreen to close out of the settings screen. Pressing the
up or down arrow button on the right side of the screen
will allow you to toggle up or down through the available
settings.
Uconnect 4C/4C NAV Buttons On The Touchscreen And
Buttons On The Faceplate
1 — Uconnect Buttons On The Touchscreen
2 — Uconnect Buttons On The Faceplate 422 MULTIMEDIA
Page 425 of 492
Language
After pressing the “Language” button on the touchscreen,
the following settings will be available:
Setting NameSelectable Options
Set Language EnglishFrançais Español
Display
After pressing the “Display” button on the touchscreen, the
following settings will be available:
Setting Name Selectable Options
Display Mode AutoManual
Display Brightness With Headlights ON +–
NOTE:
•When in the “Display Brightness With Headlights ON” display, you may select the brightness with the headlights
on.
•To make changes to the �Display Brightness with Headlights ON� setting, the headlights must be on and the inte-
rior dimmer switch must not be in the �party�or�parade� positions.
10
MULTIMEDIA 423
Page 426 of 492

Setting NameSelectable Options
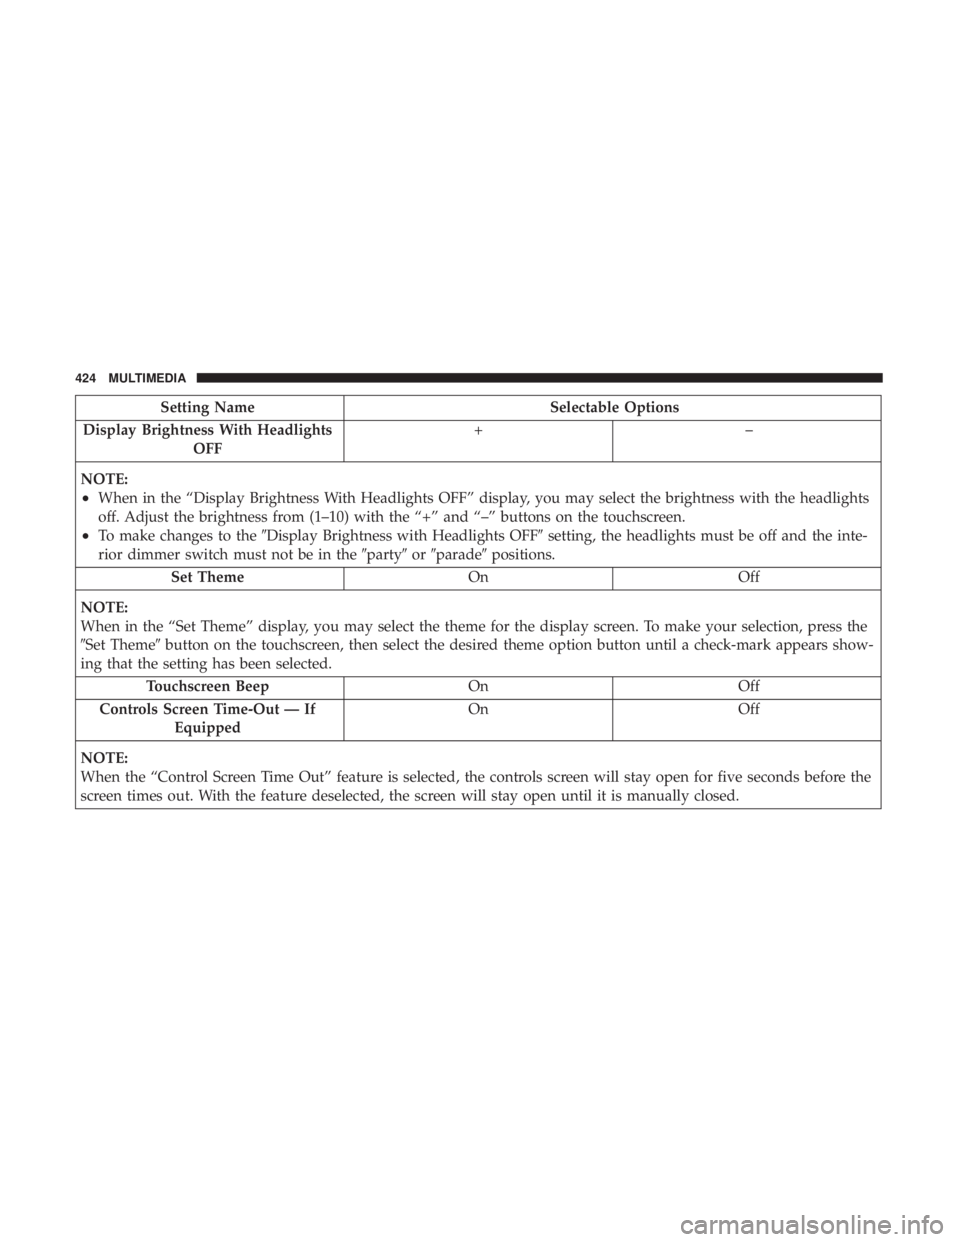
Display Brightness With Headlights OFF +–
NOTE:
•When in the “Display Brightness With Headlights OFF” display, you may select the brightness with the headlights
off. Adjust the brightness from (1–10) with the “+” and “–” buttons on the touchscreen.
•To make changes to the �Display Brightness with Headlights OFF� setting, the headlights must be off and the inte-
rior dimmer switch must not be in the �party�or�parade� positions.
Set Theme OnOff
NOTE:
When in the “Set Theme” display, you may select the theme for the display screen. To make your selection, press the
�Set Theme� button on the touchscreen, then select the desired theme option button until a check-mark appears show-
ing that the setting has been selected.
Touchscreen Beep OnOff
Controls Screen Time-Out — If Equipped On
Off
NOTE:
When the “Control Screen Time Out” feature is selected, the controls screen will stay open for five seconds before the
screen times out. With the feature deselected, the screen will stay open until it is manually closed.
424 MULTIMEDIA
Page 434 of 492

Setting NameSelectable Options
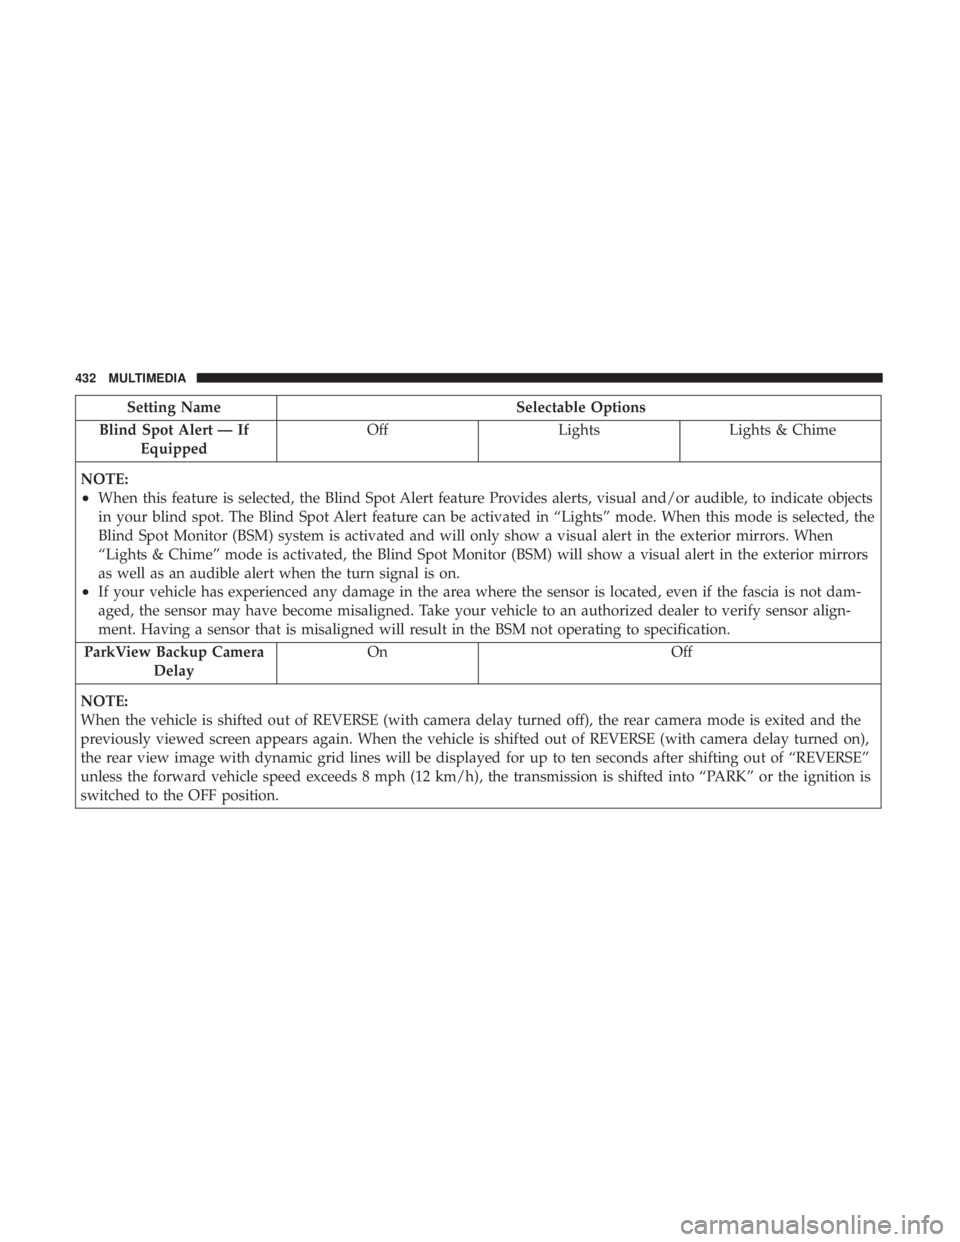
Blind Spot Alert — If Equipped Off
LightsLights & Chime
NOTE:
•When this feature is selected, the Blind Spot Alert feature Provides alerts, visual and/or audible, to indicate objects
in your blind spot. The Blind Spot Alert feature can be activated in “Lights” mode. When this mode is selected, the
Blind Spot Monitor (BSM) system is activated and will only show a visual alert in the exterior mirrors. When
“Lights & Chime” mode is activated, the Blind Spot Monitor (BSM) will show a visual alert in the exterior mirrors
as well as an audible alert when the turn signal is on.
•If your vehicle has experienced any damage in the area where the sensor is located, even if the fascia is not dam-
aged, the sensor may have become misaligned. Take your vehicle to an authorized dealer to verify sensor align-
ment. Having a sensor that is misaligned will result in the BSM not operating to specification.
ParkView Backup Camera Delay On Off
NOTE:
When the vehicle is shifted out of REVERSE (with camera delay turned off), the rear camera mode is exited and the
previously viewed screen appears again. When the vehicle is shifted out of REVERSE (with camera delay turned on),
the rear view image with dynamic grid lines will be displayed for up to ten seconds after shifting out of “REVERSE”
unless the forward vehicle speed exceeds 8 mph (12 km/h), the transmission is shifted into “PARK” or the ignition is
switched to the OFF position.
432 MULTIMEDIA
Page 436 of 492
Setting NameSelectable Options
Tilt Side Mirrors in Reverse OnOff
NOTE:
When the “Tilt Side Mirror In Reverse” feature is selected, the exterior sideview mirrors will tilt downward when the
ignition is in the RUN position and the transmission gear selector is in the REVERSE position. The mirrors will move
back to their previous position when the transmission is shifted out of REVERSE.
Lights
After pressing the “Lights” button on the touchscreen, the
following settings will be available:
Setting Name Selectable Options
Headlight Off Delay 030609 0
Headlight Illumina- tion On Approach 03
0609 0
Headlights With Wipers — IfEquipped On
Off
Auto Dim High Beams — IfEquipped On
Off
434 MULTIMEDIA
Page 437 of 492
Setting NameSelectable Options
Daytime Running Lights — IfEquipped On
Off
Steering Directed Lights On
Off
Flash Lights With Lock On
Off
Doors & Locks
After pressing the “Doors & Locks” button on the touch-
screen, the following settings will be available:
Setting Name Selectable Options
Auto Unlock On Exit On Off
NOTE:
When the “Auto Unlocks On Exit” feature is selected, all doors will unlock when the vehicle is stopped, the transmis-
sion is in the PARK or NEUTRAL position and the driver’s door is opened.
10
MULTIMEDIA 435
Page 438 of 492

Setting NameSelectable Options
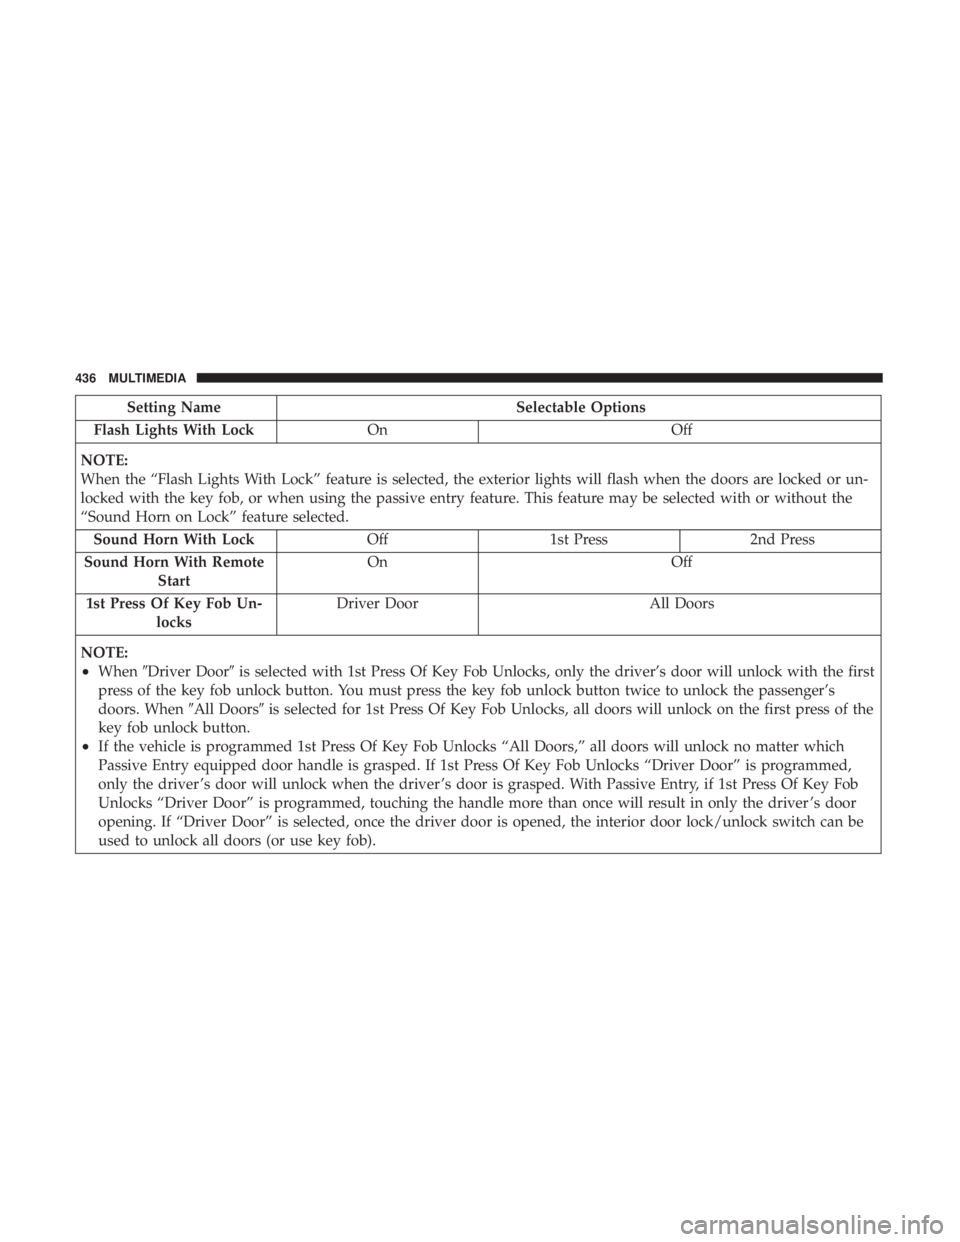
Flash Lights With Lock On Off
NOTE:
When the “Flash Lights With Lock” feature is selected, the exterior lights will flash when the doors are locked or un-
locked with the key fob, or when using the passive entry feature. This feature may be selected with or without the
“Sound Horn on Lock” feature selected. Sound Horn With Lock Off1st Press 2nd Press
Sound Horn With Remote Start On
Off
1st Press Of Key Fob Un- locks Driver Door
All Doors
NOTE:
•When �Driver Door� is selected with 1st Press Of Key Fob Unlocks, only the driver’s door will unlock with the first
press of the key fob unlock button. You must press the key fob unlock button twice to unlock the passenger’s
doors. When �All Doors�is selected for 1st Press Of Key Fob Unlocks, all doors will unlock on the first press of the
key fob unlock button.
•If the vehicle is programmed 1st Press Of Key Fob Unlocks “All Doors,” all doors will unlock no matter which
Passive Entry equipped door handle is grasped. If 1st Press Of Key Fob Unlocks “Driver Door” is programmed,
only the driver ’s door will unlock when the driver ’s door is grasped. With Passive Entry, if 1st Press Of Key Fob
Unlocks “Driver Door” is programmed, touching the handle more than once will result in only the driver ’s door
opening. If “Driver Door” is selected, once the driver door is opened, the interior door lock/unlock switch can be
used to unlock all doors (or use key fob).
436 MULTIMEDIA