2018 CHEVROLET SILVERADO change wheel
[x] Cancel search: change wheelPage 251 of 501
Chevrolet Silverado Owner Manual (GMNA-Localizing-U.S./Canada/Mexico-
11349200) - 2018 - CRC - 2/27/18
250 Driving and Operating
For an eAssist vehicle, see the
Silverado/Sierra eAssist
supplement.
Caution
If you add electrical parts or
accessories, you could change
the way the engine operates. Any
resulting damage would not be
covered by the vehicle warranty.
SeeAdd-On Electrical Equipment
0 329.
Caution
If the steering wheel is turned
until it reaches the end of its
travel, and is held in that position
while starting the vehicle, damage
may occur to the power steering
system and there may be loss of
power steering assist.
Place the transmission in the
proper gear.
Automatic Transmission
Move the shift lever to P (Park) or
N (Neutral). To restart the engine
when the vehicle is already moving,
use N (Neutral) only.
Caution
Do not try to shift to P (Park) if the
vehicle is moving. If you do, you
could damage the transmission.
Shift to P (Park) only when the
vehicle is stopped.
Manual Transmission
The shift lever should be in Neutral
and the parking brake engaged.
Hold the clutch pedal down to the
floor and start the engine.
Starting Procedure
1. With your foot off the accelerator pedal, turn the
ignition key to START. When
the engine starts, let go of the
key. The idle speed will go
down as the engine gets warm.
Do not race the engine immediately after starting it.
Operate the engine and
transmission gently to allow the
oil to warm up and lubricate all
moving parts.
When the low fuel warning light
is on and the FUEL LEVEL
LOW message is displayed in
the Driver Information Center
(DIC), hold the ignition switch
in the START position to
continue engine cranking.
Caution
Cranking the engine for long
periods of time, by returning the
ignition to the START position
immediately after cranking has
ended, can overheat and damage
the cranking motor, and drain the
battery. Wait at least 15 seconds
between each try, to let the
cranking motor cool down.
2. If the engine does not start after five to 10 seconds,
especially in very cold weather
(below −18 °C or 0 °F), it could
Page 274 of 501
Chevrolet Silverado Owner Manual (GMNA-Localizing-U.S./Canada/Mexico-
11349200) - 2018 - CRC - 2/27/18
Driving and Operating 273
Brakes
Antilock Brake
System (ABS)
This vehicle has an Antilock Brake
System (ABS), an advanced
electronic braking system that helps
prevent a braking skid.
When the vehicle begins to drive
away, ABS checks itself.
A momentary motor or clicking noise
may be heard while this test is going
on, and it may even be noticed that
the brake pedal moves a little. This
is normal.
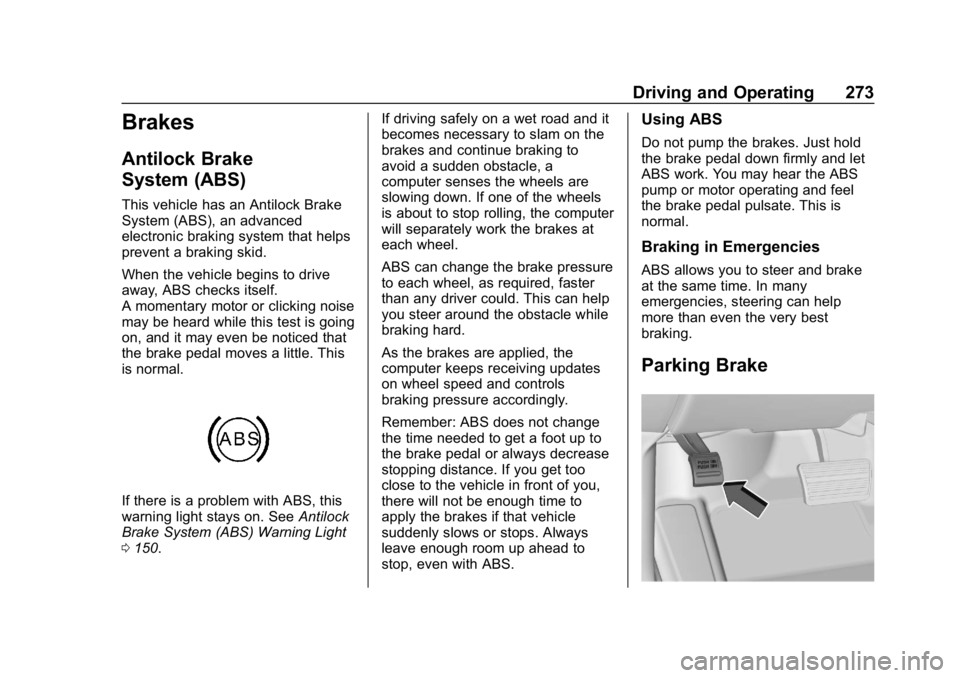
If there is a problem with ABS, this
warning light stays on. SeeAntilock
Brake System (ABS) Warning Light
0 150. If driving safely on a wet road and it
becomes necessary to slam on the
brakes and continue braking to
avoid a sudden obstacle, a
computer senses the wheels are
slowing down. If one of the wheels
is about to stop rolling, the computer
will separately work the brakes at
each wheel.
ABS can change the brake pressure
to each wheel, as required, faster
than any driver could. This can help
you steer around the obstacle while
braking hard.
As the brakes are applied, the
computer keeps receiving updates
on wheel speed and controls
braking pressure accordingly.
Remember: ABS does not change
the time needed to get a foot up to
the brake pedal or always decrease
stopping distance. If you get too
close to the vehicle in front of you,
there will not be enough time to
apply the brakes if that vehicle
suddenly slows or stops. Always
leave enough room up ahead to
stop, even with ABS.
Using ABS
Do not pump the brakes. Just hold
the brake pedal down firmly and let
ABS work. You may hear the ABS
pump or motor operating and feel
the brake pedal pulsate. This is
normal.
Braking in Emergencies
ABS allows you to steer and brake
at the same time. In many
emergencies, steering can help
more than even the very best
braking.
Parking Brake
Page 280 of 501
Chevrolet Silverado Owner Manual (GMNA-Localizing-U.S./Canada/Mexico-
11349200) - 2018 - CRC - 2/27/18
Driving and Operating 279
Cruise Control
{Warning
Cruise control can be dangerous
where you cannot drive safely at
a steady speed. Do not use
cruise control on winding roads or
in heavy traffic.
Cruise control can be dangerous
on slippery roads. On such roads,
fast changes in tire traction can
cause excessive wheel slip, and
you could lose control. Do not use
cruise control on slippery roads.
With cruise control a speed of about
40 km/h (25 mph) or more can be
maintained without keeping your
foot on the accelerator. Cruise
control does not work at speeds
below about 40 km/h (25 mph).
If equipped with an Allison or
Hydra-Matic 6-speed automatic
transmission, see “Tow/Haul Mode
Grade Braking” underTow/Haul
Mode 0262 for an explanation of how cruise control interacts with the
Range Selection Mode, Tow/Haul
Mode, and Grade Braking systems.
If the cruise control is being used
and the Traction Control System
(TCS) or StabiliTrak begins to limit
wheel spin, the cruise control will
automatically disengage. See
Traction Control/Electronic Stability
Control
0276. When road
conditions allow you to safely use it
again, cruise control can be turned
back on.
If the brakes are applied, cruise
control disengages.
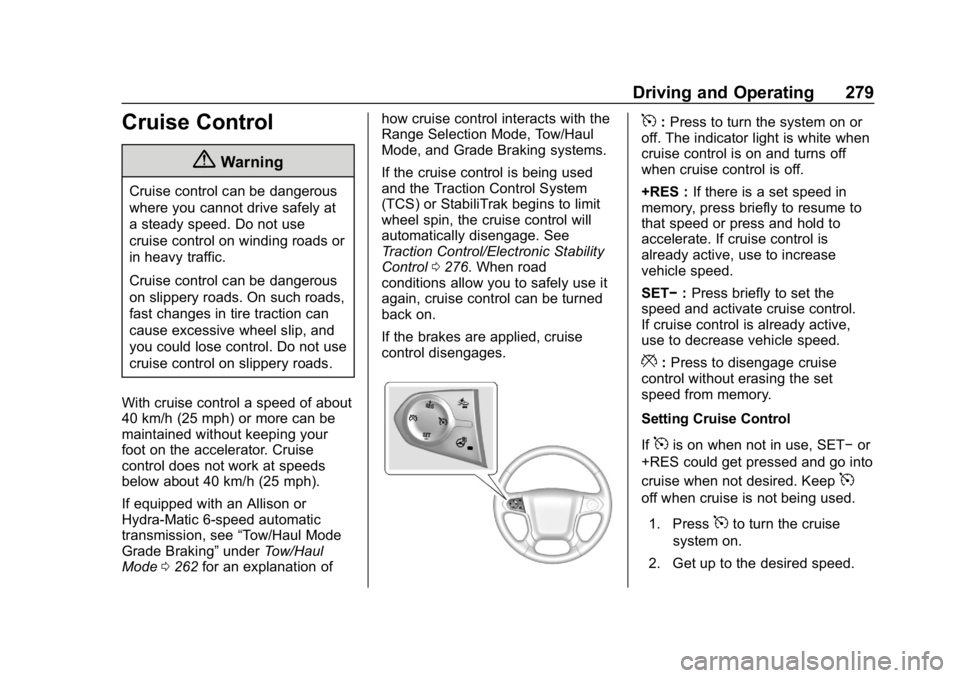
5: Press to turn the system on or
off. The indicator light is white when
cruise control is on and turns off
when cruise control is off.
+RES : If there is a set speed in
memory, press briefly to resume to
that speed or press and hold to
accelerate. If cruise control is
already active, use to increase
vehicle speed.
SET− :Press briefly to set the
speed and activate cruise control.
If cruise control is already active,
use to decrease vehicle speed.
*: Press to disengage cruise
control without erasing the set
speed from memory.
Setting Cruise Control
If
5is on when not in use, SET− or
+RES could get pressed and go into
cruise when not desired. Keep
5
off when cruise is not being used.
1. Press
5to turn the cruise
system on.
2. Get up to the desired speed.
Page 287 of 501
Chevrolet Silverado Owner Manual (GMNA-Localizing-U.S./Canada/Mexico-
11349200) - 2018 - CRC - 2/27/18
286 Driving and Operating
Warning (Continued)
or ice, or if the windshield is
damaged. It may also not detect a
vehicle on winding or hilly roads,
or in conditions that can limit
visibility such as fog, rain,
or snow, or if the headlamps or
windshield are not cleaned or in
proper condition. Keep the
windshield, headlamps, and FCA
sensors clean and in good repair.
Collision Alert
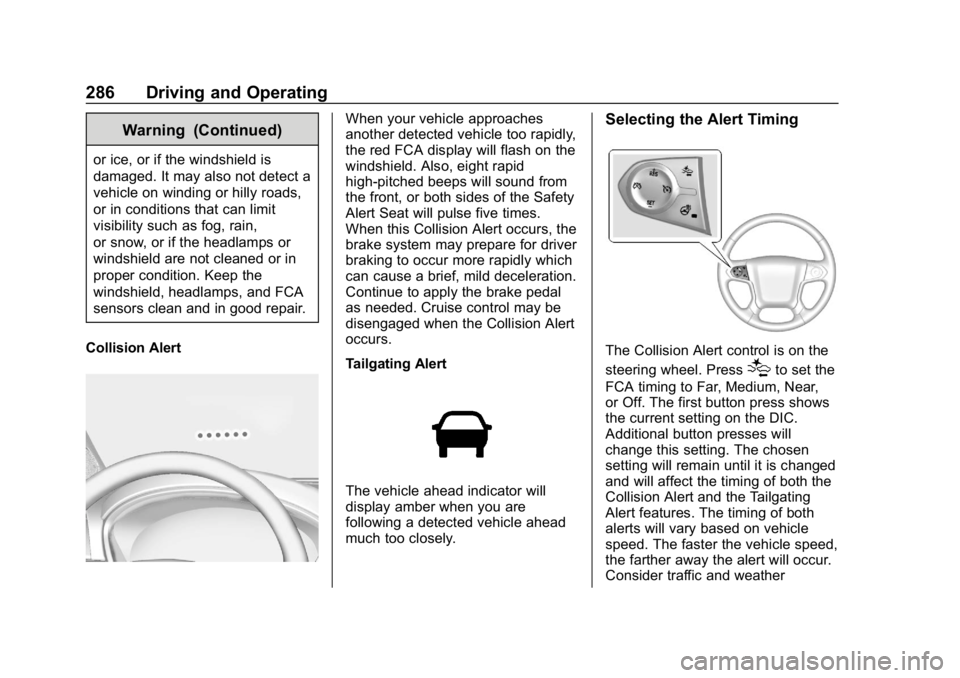
When your vehicle approaches
another detected vehicle too rapidly,
the red FCA display will flash on the
windshield. Also, eight rapid
high-pitched beeps will sound from
the front, or both sides of the Safety
Alert Seat will pulse five times.
When this Collision Alert occurs, the
brake system may prepare for driver
braking to occur more rapidly which
can cause a brief, mild deceleration.
Continue to apply the brake pedal
as needed. Cruise control may be
disengaged when the Collision Alert
occurs.
Tailgating Alert
The vehicle ahead indicator will
display amber when you are
following a detected vehicle ahead
much too closely.
Selecting the Alert Timing
The Collision Alert control is on the
steering wheel. Press
[to set the
FCA timing to Far, Medium, Near,
or Off. The first button press shows
the current setting on the DIC.
Additional button presses will
change this setting. The chosen
setting will remain until it is changed
and will affect the timing of both the
Collision Alert and the Tailgating
Alert features. The timing of both
alerts will vary based on vehicle
speed. The faster the vehicle speed,
the farther away the alert will occur.
Consider traffic and weather
Page 292 of 501
Chevrolet Silverado Owner Manual (GMNA-Localizing-U.S./Canada/Mexico-
11349200) - 2018 - CRC - 2/27/18
Driving and Operating 291
How the System Works
The LKA camera sensor is on the
windshield ahead of the rearview
mirror.
To turn LKA on and off, press
A
on the center stack.
When on,
Ais green if LKA is
available to assist and provide LDW
alerts. It may assist by gently
turning the steering wheel and
display
Aas amber if the vehicle
approaches a detected lane marking
without using a turn signal in that
direction. It may also provide an
LDW alert by flashing
Aamber
as the lane marking is crossed.
Additionally, there may be three
beeps, or the driver seat may pulse
three times, on the right or left,
depending on the lane departure
direction. Take Steering
The LKA system does not
continuously steer the vehicle.
If LKA does not detect active driver
steering, an alert, chime, or DIC
message may be provided. Move
the steering wheel to dismiss.
When the System Does Not
Seem to Work Properly
The system performance may be
affected by:
.
Close vehicles ahead.
. Sudden lighting changes, such
as when driving through tunnels.
. Banked roads.
. Roads with poor lane markings,
such as two-lane roads.
If the LKA system is not functioning
properly when lane markings are
clearly visible, cleaning the
windshield may help. A camera blocked message may
display if the camera is blocked.
Cleaning the outside of the
windshield behind the rearview
mirror may correct the issue. Some
driver assistance systems may have
reduced performance or not work at
all. An LKA or LDW unavailable
message may display if the systems
are temporarily unavailable. This
message could be due to a blocked
camera. The LKA system does not
need service. Clean the outside of
the windshield behind the rearview
mirror.
LKA assistance and/or LDW alerts
may occur due to tar marks,
shadows, cracks in the road,
temporary or construction lane
markings, or other road
imperfections. This is normal system
operation; the vehicle does not need
service. Turn LKA off if these
conditions continue.
Page 299 of 501
Chevrolet Silverado Owner Manual (GMNA-Localizing-U.S./Canada/Mexico-
11349200) - 2018 - CRC - 2/27/18
298 Driving and Operating
The structure, tires, and brakes of
the trailer must be rated to carry the
load. Inadequate trailer equipment
can cause the combination to
operate in an unexpected or unsafe
manner.
Before starting, check all trailer hitch
parts and attachments, safety
chains, electrical connectors, lamps,
tires, and mirrors. Get familiar with
the handling and braking of the rig.
If the trailer has electric brakes, start
the combination moving and then
apply the trailer brake controller by
hand to be sure the brakes work.
During the trip, check occasionally
to be sure that the load is secure
and the lamps and any trailer
brakes still work.
Following Distance
Stay at least twice as far behind the
vehicle ahead as you would when
driving the vehicle without a trailer.
This can help to avoid heavy
braking and sudden turns.
Passing
More passing distance is needed
when towing a trailer. The
combination will not accelerate as
quickly and is longer so it is
necessary to go much farther
beyond the passed vehicle before
returning to the lane.
Backing Up
Hold the bottom of the steering
wheel with one hand. To move the
trailer to the left, move that hand to
the left. To move the trailer to the
right, move your hand to the right.
Always back up slowly and,
if possible, have someone
guide you.
Making TurnsCaution
Making very sharp turns while
trailering could cause the trailer to
come in contact with the vehicle.
The vehicle could be damaged.
Avoid making very sharp turns
while trailering. When turning with a trailer, make
wider turns than normal. Do this so
the trailer will not strike soft
shoulders, curbs, road signs, trees,
or other objects. Avoid jerky or
sudden maneuvers. Signal well in
advance.
If the trailer turn signal bulbs burn
out, the arrows on the instrument
cluster will still flash for turns. It is
important to check occasionally to
be sure the trailer bulbs are still
working.
Turn Signals When Towing a
Trailer
The turn signal indicators on the
instrument cluster flash whenever
signaling a turn or lane change.
Properly hooked up, the trailer
lamps also flash, telling other
drivers the vehicle is turning,
changing lanes, or stopping. When
towing a trailer, the arrows on the
instrument cluster flash for turns
even if the bulbs on the trailer are
burned out.
Page 327 of 501
Chevrolet Silverado Owner Manual (GMNA-Localizing-U.S./Canada/Mexico-
11349200) - 2018 - CRC - 2/27/18
326 Driving and Operating
The trailer's and the vehicle's brake
lamps will come on when either
vehicle brakes or manual trailer
brakes are applied.
Trailer Gain Adjustment Procedure
Trailer Gain should be set for a
specific trailering condition and must
be adjusted anytime vehicle loading,
trailer loading, or road surface
conditions change.
{Warning
Trailer brakes that are
over-gained or under-gained may
not stop the vehicle and the trailer
as intended and can result in a
crash. Always follow the
instructions to set the Trailer Gain
for the proper trailer stopping
performance.
Use the following to adjust Trailer
Gain for each towing condition: 1. Drive the vehicle with the trailer attached on a level road
surface representative of the
towing condition and free of traffic at about 32 to 40 km/h
(20 to 25 mph) and fully apply
the Manual Trailer Brake Apply
Lever.
Adjusting Trailer Gain at
speeds lower than 32 to
40 km/h (20 to 25 mph) may
result in an incorrect gain
setting.
2. Adjust the Trailer Gain, using the Trailer Gain Adjustment
Buttons, to just below the point
of trailer wheel lock-up,
indicated by trailer wheel
squeal or tire smoke when a
trailer wheel locks.
Trailer wheel lock-up may not
occur if towing a heavily loaded
trailer. In this case, adjust the
Trailer Gain to the highest
allowable setting for the towing
condition.
3. Readjust Trailer Gain anytime vehicle loading, trailer loading,
or road surface conditions
change or if trailer wheel
lock-up is noticed at any time
while towing. Other ITBC-Related DIC Messages
In addition to displaying TRAILER
GAIN and OUTPUT through the
DIC, trailer connection and ITBC
system status are displayed on
the DIC.
TRAILER CONNECTED: This
message will briefly display when a
trailer with electric brakes is first
connected to the vehicle. This
message will automatically turn off
in about 10 seconds. This message
can be acknowledged before it
automatically turns off.
CHECK TRAILER WIRING: This
message will display if:
.
The ITBC system first
determines connection to a
trailer with electric brakes and
then the trailer harness becomes
disconnected from the vehicle.
If the disconnect occurs while
the vehicle is stationary, this
message will automatically turn
off in about 30 seconds. This
message will also turn off if it is
acknowledged or if the trailer
harness is reconnected.
Page 362 of 501
Chevrolet Silverado Owner Manual (GMNA-Localizing-U.S./Canada/Mexico-
11349200) - 2018 - CRC - 2/27/18
Vehicle Care 361
Caution
Continuing to drive with worn-out
brake pads could result in costly
brake repair.
Some driving conditions or climates
can cause a brake squeal when the
brakes are first applied or lightly
applied. This does not mean
something is wrong with the brakes.
Properly torqued wheel nuts are
necessary to help prevent brake
pulsation. When tires are rotated,
inspect brake pads for wear and
evenly tighten wheel nuts in the
proper sequence to torque
specifications in Capacities and
Specifications 0457.
Brake linings should always be
replaced as complete axle sets.
Brake Pedal Travel
See your dealer if the brake pedal
does not return to normal height,
or if there is a rapid increase in
pedal travel. This could be a sign
that brake service may be required.
Replacing Brake System Parts
Always replace brake system parts
with new, approved replacement
parts. If this is not done, the brakes
may not work properly. The braking
performance expected can change
in many other ways if the wrong
replacement brake parts are
installed or parts are improperly
installed.
Brake Fluid
The brake master cylinder reservoir
is filled with DOT 3 brake fluid. See
Engine Compartment Overview
0 338 for the location of the
reservoir.
There are only two reasons why the
brake fluid level in the reservoir may
go down: .
Normal brake lining wear. When
new linings are installed, the
fluid level goes back up.
. A fluid leak in the brake
hydraulic system. Have the
brake hydraulic system fixed.
With a leak, the brakes will not
work well.
Always clean the brake fluid
reservoir cap and the area around
the cap before removing it.
Do not top off the brake fluid.
Adding fluid does not correct a leak.
If fluid is added when the linings are
worn, there will be too much fluid
when new brake linings are
installed. Add or remove fluid, as
necessary, only when work is done
on the brake hydraulic system.
{Warning
If too much brake fluid is added, it
can spill on the engine and burn,
if the engine is hot enough. You
or others could be burned, and
the vehicle could be damaged. (Continued)