2018 CHEVROLET SILVERADO change wheel
[x] Cancel search: change wheelPage 91 of 501

Chevrolet Silverado Owner Manual (GMNA-Localizing-U.S./Canada/Mexico-
11349200) - 2018 - CRC - 2/27/18
90 Seats and Restraints
A thick layer of additional material,
such as a blanket or cushion,
or aftermarket equipment such as
seat covers, seat heaters, and seat
massagers can affect how well the
passenger sensing system
operates. We recommend that you
not use seat covers or other
aftermarket equipment except when
approved by GM for your specific
vehicle. SeeAdding Equipment to
the Airbag-Equipped Vehicle 090
for more information about
modifications that can affect how
the system operates.
The on indicator may be lit if an
object, such as a briefcase,
handbag, grocery bag, laptop,
or other electronic device, is put on
an unoccupied seat. If this is not
desired, remove the object from
the seat.
{Warning
Stowing articles under the
passenger seat or between the
passenger seat cushion and
(Continued)
Warning (Continued)
seatback may interfere with the
proper operation of the passenger
sensing system.
Servicing the
Airbag-Equipped Vehicle
Airbags affect how the vehicle
should be serviced. There are parts
of the airbag system in several
places around the vehicle. Your
dealer and the service manual have
information about servicing the
vehicle and the airbag system. To
purchase a service manual, see
Service Publications Ordering
Information0470.
{Warning
For up to 10 seconds after the
vehicle is turned off and the
battery is disconnected, an airbag
can still inflate during improper
service. You can be injured if you
(Continued)
Warning (Continued)
are close to an airbag when it
inflates. Avoid yellow connectors.
They are probably part of the
airbag system. Be sure to follow
proper service procedures, and
make sure the person performing
work for you is qualified to do so.
Adding Equipment to the
Airbag-Equipped Vehicle
Adding accessories that change the
vehicle's frame, bumper system,
height, front end, or side sheet
metal, may keep the airbag system
from working properly.
The operation of the airbag system
can also be affected by changing
any parts of the front seats, seat
belts, airbag sensing and diagnostic
module, steering wheel, instrument
panel, inner door seals including the
speakers, any of the airbag
modules, ceiling or pillar garnish
Page 92 of 501

Chevrolet Silverado Owner Manual (GMNA-Localizing-U.S./Canada/Mexico-
11349200) - 2018 - CRC - 2/27/18
Seats and Restraints 91
trim, overhead console, front
sensors, side impact sensors,
or airbag wiring.
Your dealer and the service manual
have information about the location
of the airbag sensors, sensing and
diagnostic module, and airbag
wiring.
In addition, the vehicle may have a
passenger sensing system for the
front outboard passenger position,
which includes sensors that are part
of the passenger’s seat. The
passenger sensing system may not
operate properly if the original seat
trim is replaced with non-GM
covers, upholstery, or trim; or with
GM covers, upholstery, or trim
designed for a different vehicle. Any
object, such as an aftermarket seat
heater or a comfort-enhancing pad
or device, installed under or on top
of the seat fabric, could also
interfere with the operation of the
passenger sensing system. This
could either prevent proper
deployment of the passenger
airbag(s) or prevent the passenger
sensing system from properly turning off the passenger airbag(s).
See
Passenger Sensing System
0 86.
If the vehicle has rollover roof-rail
airbags, see Different Size Tires
and Wheels 0404 for additional
important information.
If a snow plow is added to the
vehicle, the airbags should still work
properly. The airbag systems were
designed to work properly under a
wide range of conditions, including
snow plowing with vehicles that
have the optional snow plow prep
package (RPO VYU). Do not
change or defeat the snow plow's
“tripping mechanism.” If you do, it
can damage the snow plow and the
vehicle, and may cause an airbag
deployment.
If you have to modify your vehicle
because you have a disability and
you have questions about whether
the modifications will affect the
vehicle's airbag system, or if you
have questions about whether the
airbag system will be affected if the
vehicle is modified for any other reason, call Customer Assistance.
See
Customer Assistance Offices
0 463.
Airbag System Check
The airbag system does not need
regularly scheduled maintenance or
replacement. Make sure the airbag
readiness light is working. See
Airbag Readiness Light 0144.
Caution
If an airbag covering is damaged,
opened, or broken, the airbag
may not work properly. Do not
open or break the airbag
coverings. If there are any
opened or broken airbag
coverings, have the airbag
covering and/or airbag module
replaced. For the location of the
airbags, see Where Are the
Airbags? 078. See your dealer
for service.
Page 140 of 501

Chevrolet Silverado Owner Manual (GMNA-Localizing-U.S./Canada/Mexico-
11349200) - 2018 - CRC - 2/27/18
Instruments and Controls 139
Cluster Menu (Uplevel Cluster)
There is an interactive display area
in the center of the instrument
cluster.
Use the right steering wheel control
to open and scroll through the
different items and displays.
Press
oto access the cluster
applications. Use
worxto scroll
through the list of available
applications. Not all applications will
be available on all vehicles. .
Info App. This is where the
selected Driver Information
Center (DIC) displays can be
viewed. See “Driver Information
Center (DIC) (Uplevel)” in the
Index.
. Audio
. Phone
. Navigation
. Settings
Audio
Press
Vto select the Audio app,
then press
pto enter the Audio
menu. In the Audio menu browse for
music, select from the favorites,
or change the audio source. In the
main view, use
worxto change
the station or go to the next or
previous track.
Phone
Press
Vto select the Phone app,
then press
pto enter the Phone
menu. In the Phone menu, if there is
no active phone call, view recent
calls, scroll through contacts, select from the favorites, or change the
phone source. If there is an active
call, mute the phone or switch to
handset operation.
Navigation
Press
Vto select the Navigation
app, then press
pto enter the
Navigation menu. If there is no
active route, you can resume the
last route and turn the voice
prompts on/off. If there is an active
route, you can cancel the route.
Settings
Press
Vto select the Settings app.
Use
worxto scroll through items
in the Settings menu.
Units : Press
pwhile Units is
displayed to enter the Units menu.
Choose English or metric units by
pressing
Vwhile the desired item is
highlighted. A checkmark will be
displayed next to the selected item.
Info Pages : Press
pwhile Info
Pages is displayed to enter the Info
Pages menu and select the items to
Page 152 of 501

Chevrolet Silverado Owner Manual (GMNA-Localizing-U.S./Canada/Mexico-
11349200) - 2018 - CRC - 2/27/18
Instruments and Controls 151
For vehicles with the Tow/Haul
Mode feature, this light comes on
when the Tow/Haul Mode has been
activated.
SeeTow/Haul Mode 0262.
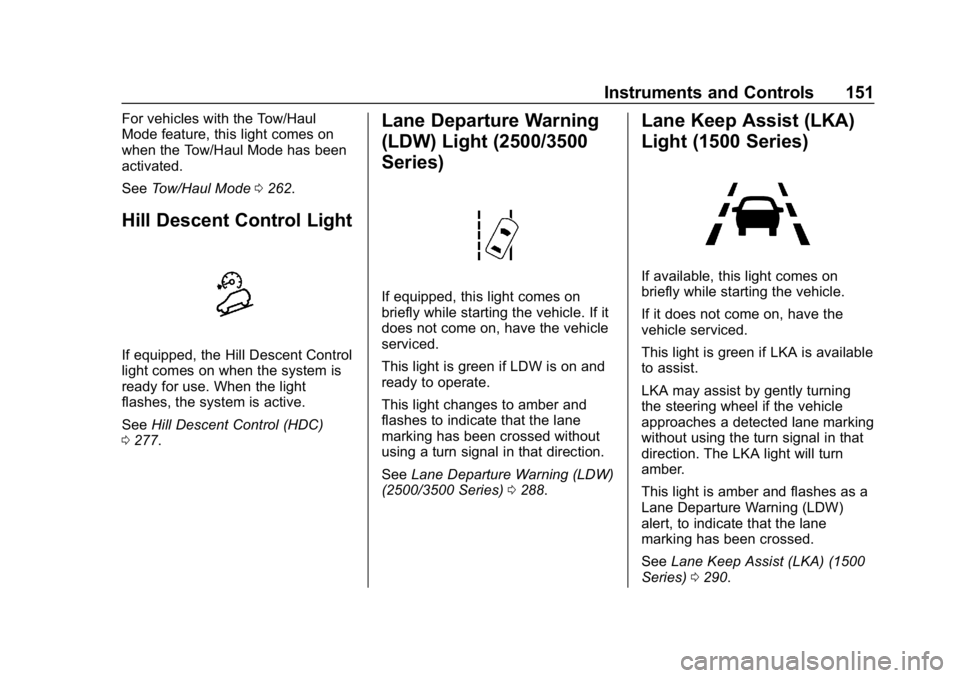
Hill Descent Control Light
If equipped, the Hill Descent Control
light comes on when the system is
ready for use. When the light
flashes, the system is active.
See Hill Descent Control (HDC)
0 277.
Lane Departure Warning
(LDW) Light (2500/3500
Series)
If equipped, this light comes on
briefly while starting the vehicle. If it
does not come on, have the vehicle
serviced.
This light is green if LDW is on and
ready to operate.
This light changes to amber and
flashes to indicate that the lane
marking has been crossed without
using a turn signal in that direction.
See Lane Departure Warning (LDW)
(2500/3500 Series) 0288.
Lane Keep Assist (LKA)
Light (1500 Series)
If available, this light comes on
briefly while starting the vehicle.
If it does not come on, have the
vehicle serviced.
This light is green if LKA is available
to assist.
LKA may assist by gently turning
the steering wheel if the vehicle
approaches a detected lane marking
without using the turn signal in that
direction. The LKA light will turn
amber.
This light is amber and flashes as a
Lane Departure Warning (LDW)
alert, to indicate that the lane
marking has been crossed.
See Lane Keep Assist (LKA) (1500
Series) 0290.
Page 157 of 501

Chevrolet Silverado Owner Manual (GMNA-Localizing-U.S./Canada/Mexico-
11349200) - 2018 - CRC - 2/27/18
156 Instruments and Controls
Remaining Oil Life
Turn the trip odometer reset stem
until REMAINING OIL LIFE
displays. An estimate of the oil's
remaining useful life is shown.
REMAINING OIL LIFE 99% means
99% of the current oil life remains.
When the remaining oil life is low,
the CHANGE ENGINE OIL SOON
message will appear on the display.
The oil should be changed as soon
as possible. SeeEngine Oil0343.
In addition to the engine oil life
system monitoring the oil life,
additional maintenance is
recommended in the Maintenance
Schedule. See Maintenance
Schedule 0443.
The Oil Life display must be reset
after each oil change. It will not
reset itself. Do not reset the Oil Life
display at any time other than when
the oil has just been changed.
It cannot be reset accurately until
the next oil change. To reset the
engine oil life system, see Engine
Oil Life System 0346. Transmission Fluid Temperature
The temperature of the automatic
transmission fluid displays in either
degrees Celsius (°C) or degrees
Fahrenheit (°F).
Trailer Brake
On vehicles with the Integrated
Trailer Brake Control (ITBC) system,
turn the trip odometer reset stem
until TRAILER GAIN and TRAILER
OUTPUT displays.
TRAILER GAIN shows the Trailer
Gain setting. This setting can be
adjusted from 0.0 to 10.0 with either
a trailer connected or disconnected.
TRAILER OUTPUT shows the
power output to the trailer anytime a
trailer with electric brakes is
connected. Output is displayed as a
bar graph. Dashes may appear in
the TRAILER OUTPUT display if a
trailer is not connected.
Hourmeter
This display shows the total number
of hours the engine has run.
Unit
This will change the displays on the
instrument cluster and DIC to either
metric or English (US)
measurements. To change the units,
press the trip odometer reset stem
when UNITS is displayed to enter
the Unit menu. Turn the trip
odometer reset stem to switch
between English and metric. Press
the trip odometer reset stem when
the desired setting is displayed.
Compass
The vehicle may have a compass in
the Driver Information Center (DIC).
See
Compass 0131.
Driver Information Center
(DIC) (Uplevel)
The DIC displays are shown in the
center of the instrument cluster in
the Info app. See Instrument Cluster
0 137. The displays show the status
of many vehicle systems. The
controls for the DIC are on the right
steering wheel control.
Page 172 of 501

Chevrolet Silverado Owner Manual (GMNA-Localizing-U.S./Canada/Mexico-
11349200) - 2018 - CRC - 2/27/18
Lighting 171
Lighting
Exterior Lighting
Exterior Lamp Controls . . . . . . . 171
Exterior Lamps OffReminder . . . . . . . . . . . . . . . . . . . 173
Headlamp High/Low-Beam Changer . . . . . . . . . . . . . . . . . . . . 173
Flash-to-Pass . . . . . . . . . . . . . . . . 174
Daytime Running Lamps (DRL) . . . . . . . . . . . . . . . 174
Automatic Headlamp System . . . . . . . . . . . . . . . . . . . . . . 174
Hazard Warning Flashers . . . . . 175
Turn and Lane-Change Signals . . . . . . . . . . . . . . . . . . . . . . 175
Fog Lamps . . . . . . . . . . . . . . . . . . . 176
Auxiliary Roof-Mounted Lamp . . . . . . . . 176
Interior Lighting
Instrument Panel IlluminationControl . . . . . . . . . . . . . . . . . . . . . . 177
Cargo Lamp . . . . . . . . . . . . . . . . . . 177
Dome Lamps . . . . . . . . . . . . . . . . . 178
Reading Lamps . . . . . . . . . . . . . . 178
Lighting Features
Entry Lighting . . . . . . . . . . . . . . . . 179
Exit Lighting . . . . . . . . . . . . . . . . . . 179
Battery Load Management . . . 179
Battery Power Protection . . . . . 180
Exterior Lighting Battery Saver . . . . . . . . . . . . . . . . . . . . . . . 180Exterior Lighting
Exterior Lamp Controls
The exterior lamp control is on the
instrument panel to the left of the
steering wheel.
O: Turns off the automatic
headlamps and Daytime Running
Lamps (DRL). Turn the headlamp
control to
Oagain to turn the
automatic headlamps or DRL
back on.
For vehicles first sold in Canada, off
will only work when the vehicle is in
P (Park).
Page 232 of 501

Chevrolet Silverado Owner Manual (GMNA-Localizing-U.S./Canada/Mexico-
11349200) - 2018 - CRC - 2/27/18
Driving and Operating 231
If the vehicle starts to slide, follow
these suggestions:
.Ease your foot off the
accelerator pedal and steer the
way you want the vehicle to go.
The vehicle may straighten out.
Be ready for a second skid if it
occurs.
. Slow down and adjust your
driving according to weather
conditions. Stopping distance
can be longer and vehicle
control can be affected when
traction is reduced by water,
snow, ice, gravel, or other
material on the road. Learn to
recognize warning clues —such
as enough water, ice, or packed
snow on the road to make a
mirrored surface —and slow
down when you have any doubt.
. Try to avoid sudden steering,
acceleration, or braking,
including reducing vehicle speed
by shifting to a lower gear. Any
sudden changes could cause
the tires to slide. Remember: Antilock brakes help
avoid only the braking skid.
Off-Road Driving
Four-wheel-drive vehicles can be
used for off-road driving. Vehicles
without four-wheel drive and
vehicles not equipped with All
Terrain (AT) or On-Off Road (OOR)
tires must not be driven off-road
except on a level, solid surface. For
contact information about the
original equipment tires, see the
warranty manual.
One of the best ways for successful
off-road driving is to control the
speed.
{Warning
When driving off-road, bouncing
and quick changes in direction
can easily throw you out of
position. This could cause you to
lose control and crash. You and
your passengers should always
wear seat belts.
Before Driving Off-Road
.
Have all necessary maintenance
and service work completed.
. Fuel the vehicle, fill fluid levels,
and check inflation pressure in
all tires, including the spare,
if equipped.
. Read all the information about
four-wheel-drive vehicles in this
manual.
. Remove any underbody air
deflector, if equipped. Re-attach
the air deflector after off-road
driving.
. Know the local laws that apply to
off-road driving.
To gain more ground clearance if
needed, it may be necessary to
remove the front fascia lower air
dam, if equipped. However, driving
without the air dam reduces fuel
economy.
Page 235 of 501

Chevrolet Silverado Owner Manual (GMNA-Localizing-U.S./Canada/Mexico-
11349200) - 2018 - CRC - 2/27/18
234 Driving and Operating
.Never try to turn the vehicle
around. If the hill is steep
enough to stall the vehicle,
it is steep enough to cause
it to roll over.
. If you cannot make it up the
hill, back straight down
the hill.
. Never back down a hill in
N (Neutral) using only the
brake. The vehicle can roll
backward quickly and you
could lose control.
. If driving downhill when the
vehicle stalls, shift to a
lower gear, release the
parking brake, and drive
straight down the hill.
3. If the vehicle cannot be restarted after stalling, set the
parking brake, shift into
P (Park), and turn the
vehicle off.
3.1. Leave the vehicle and
seek help. 3.2. Stay clear of the path the
vehicle would take if it
rolled downhill.
. Avoid turns that take the vehicle
across the incline of the hill.
A hill that can be driven straight
up or down might be too steep to
drive across. Driving across an
incline puts more weight on the
downhill wheels, which could
cause a downhill slide or a
rollover.
. Surface conditions can be a
problem. Loose gravel, muddy
spots, or even wet grass can
cause the tires to slip sideways,
downhill. If the vehicle slips
sideways, it can hit something
that will trip it —a rock, a rut,
etc. —and roll over.
. Hidden obstacles can make the
steepness of the incline more
severe. If a rock is driven across
with the uphill wheels, or if the
downhill wheels drop into a rut
or depression, the vehicle can tilt
even more. .
If an incline must be driven
across, and the vehicle starts to
slide, turn downhill. This should
help straighten out the vehicle
and prevent the side slipping.
{Warning
Getting out of the vehicle on the
downhill side when stopped
across an incline is dangerous.
If the vehicle rolls over, you could
be crushed or killed. Always get
out on the uphill side of the
vehicle and stay well clear of the
rollover path.
Driving in Mud, Sand, Snow,
or Ice
Use a low gear when driving in mud
—the deeper the mud, the lower
the gear. Keep the vehicle moving
to avoid getting stuck.
Traction changes when driving on
sand. On loose sand, such as on
beaches or sand dunes, the tires
tend to sink into the sand. This
affects steering, accelerating, and