2018 CHEVROLET SILVERADO weight
[x] Cancel search: weightPage 109 of 501

Chevrolet Silverado Owner Manual (GMNA-Localizing-U.S./Canada/Mexico-
11349200) - 2018 - CRC - 2/27/18
108 Seats and Restraints
2. Attach and tighten the lowerattachments to the lower
anchors. If the child restraint
does not have lower
attachments or the desired
seating position does not have
lower anchors, secure the child
restraint with the top tether and
the belts. Refer to your child
restraint manufacturer ’s
instructions and the
instructions in this manual.
2.1. Find the lower anchors for the desired seating
position.
2.2. Put the child restraint on the seat.
2.3. Attach and tighten the lower attachments on the
child restraint to the lower
anchors. 3. For forward-facing child
restraints, attach and tighten
the top tether to the top tether
anchor (loop). Follow the child
restraint instructions, the
vehicle LATCH anchor weight
limits described at the
beginning of this section, and
the following steps:
Example —Rear Driver Side
Position
Example —Rear Driver Side
Position
3.1. For a top tether in the rear driver side position:
3.1.1. Remove the headrest.
3.1.2. Route the top tether (4) through
the loop (3) on the
driver side under
the center
shoulder belt (2).
Page 114 of 501

Chevrolet Silverado Owner Manual (GMNA-Localizing-U.S./Canada/Mexico-
11349200) - 2018 - CRC - 2/27/18
Seats and Restraints 113
7. For forward-facing childrestraints, attach and tighten
the top tether to the top tether
anchor (loop). Refer to the child
restraint instructions, the
vehicle LATCH anchor weight
limits and instructions listed in
Lower Anchors and Tethers for
Children (LATCH System) 099.
8. Before placing a child in the child restraint, make sure it is
securely held in place. To
check, grasp the child restraint
at the seat belt path and
attempt to move it side to side
and back and forth. When the
child restraint is properly
installed, there should be no
more than 2.5 cm (1 in) of
movement.
To remove the child restraint,
unbuckle the vehicle seat belt
and let it return to the stowed
position. If the top tether is
attached to a top tether anchor,
disconnect it. Reinstall the headrest
before the seating position is used. See
“Headrest Removal and
Reinstallation” underLower Anchors
and Tethers for Children (LATCH
System) 099 for additional
information on installing the
headrest properly.
Crew Cab
1. Put the child restraint on the seat.
2. Pick up the latch plate, and run the lap and shoulder portions
of the vehicle's seat belt
through or around the restraint.
The child restraint instructions
will show you how.
3. Push the latch plate into thebuckle until it clicks.
Position the release button on
the buckle, away from the child
restraint system, so that the
seat belt could be quickly
unbuckled if necessary.
4. Pull the shoulder belt all the
way out of the retractor to set
the lock. When the retractor
lock is set, the belt can be
tightened but not pulled out of
the retractor.
Page 235 of 501

Chevrolet Silverado Owner Manual (GMNA-Localizing-U.S./Canada/Mexico-
11349200) - 2018 - CRC - 2/27/18
234 Driving and Operating
.Never try to turn the vehicle
around. If the hill is steep
enough to stall the vehicle,
it is steep enough to cause
it to roll over.
. If you cannot make it up the
hill, back straight down
the hill.
. Never back down a hill in
N (Neutral) using only the
brake. The vehicle can roll
backward quickly and you
could lose control.
. If driving downhill when the
vehicle stalls, shift to a
lower gear, release the
parking brake, and drive
straight down the hill.
3. If the vehicle cannot be restarted after stalling, set the
parking brake, shift into
P (Park), and turn the
vehicle off.
3.1. Leave the vehicle and
seek help. 3.2. Stay clear of the path the
vehicle would take if it
rolled downhill.
. Avoid turns that take the vehicle
across the incline of the hill.
A hill that can be driven straight
up or down might be too steep to
drive across. Driving across an
incline puts more weight on the
downhill wheels, which could
cause a downhill slide or a
rollover.
. Surface conditions can be a
problem. Loose gravel, muddy
spots, or even wet grass can
cause the tires to slip sideways,
downhill. If the vehicle slips
sideways, it can hit something
that will trip it —a rock, a rut,
etc. —and roll over.
. Hidden obstacles can make the
steepness of the incline more
severe. If a rock is driven across
with the uphill wheels, or if the
downhill wheels drop into a rut
or depression, the vehicle can tilt
even more. .
If an incline must be driven
across, and the vehicle starts to
slide, turn downhill. This should
help straighten out the vehicle
and prevent the side slipping.
{Warning
Getting out of the vehicle on the
downhill side when stopped
across an incline is dangerous.
If the vehicle rolls over, you could
be crushed or killed. Always get
out on the uphill side of the
vehicle and stay well clear of the
rollover path.
Driving in Mud, Sand, Snow,
or Ice
Use a low gear when driving in mud
—the deeper the mud, the lower
the gear. Keep the vehicle moving
to avoid getting stuck.
Traction changes when driving on
sand. On loose sand, such as on
beaches or sand dunes, the tires
tend to sink into the sand. This
affects steering, accelerating, and
Page 240 of 501

Chevrolet Silverado Owner Manual (GMNA-Localizing-U.S./Canada/Mexico-
11349200) - 2018 - CRC - 2/27/18
Driving and Operating 239
Rocking the Vehicle to Get
It Out
Turn the steering wheel left and
right to clear the area around the
front wheels. For four-wheel-drive
vehicles, shift into Four-Wheel Drive
High. Turn the TCS off. Shift back
and forth between R (Reverse) and
a forward gear, spinning the wheels
as little as possible. To prevent
transmission wear, wait until the
wheels stop spinning before shifting
gears. Slowly spinning the wheels in
the forward and reverse directions
causes a rocking motion that could
free the vehicle. If that does not get
the vehicle out after a few tries, it
might need to be towed out. See
Towing the Vehicle0425. Recovery
hooks can be used, if the vehicle
has them.
Recovery Hooks
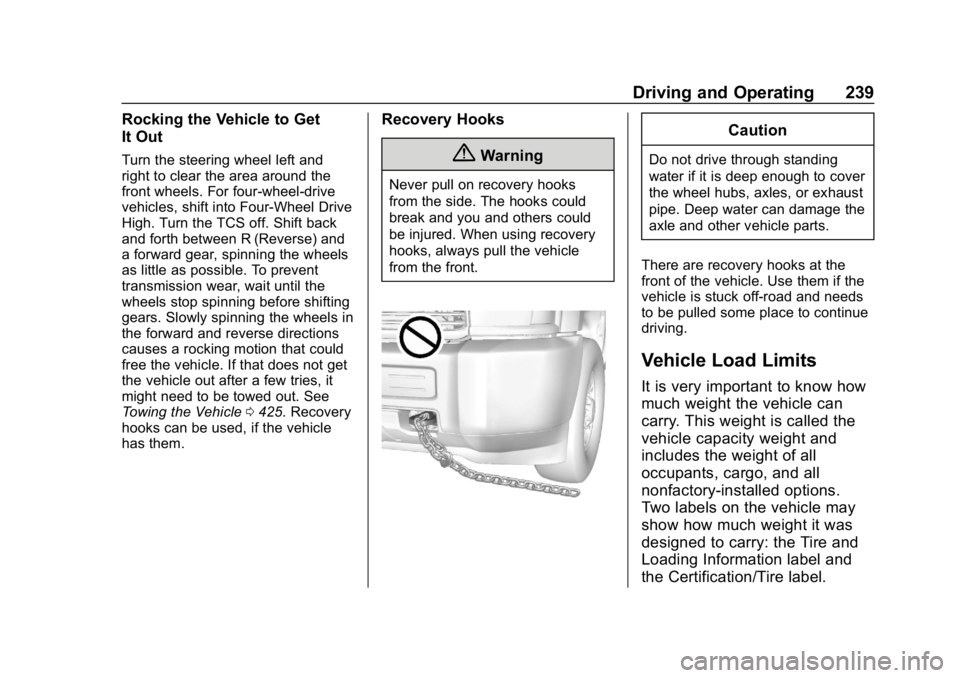
{Warning
Never pull on recovery hooks
from the side. The hooks could
break and you and others could
be injured. When using recovery
hooks, always pull the vehicle
from the front.
Caution
Do not drive through standing
water if it is deep enough to cover
the wheel hubs, axles, or exhaust
pipe. Deep water can damage the
axle and other vehicle parts.
There are recovery hooks at the
front of the vehicle. Use them if the
vehicle is stuck off-road and needs
to be pulled some place to continue
driving.
Vehicle Load Limits
It is very important to know how
much weight the vehicle can
carry. This weight is called the
vehicle capacity weight and
includes the weight of all
occupants, cargo, and all
nonfactory-installed options.
Two labels on the vehicle may
show how much weight it was
designed to carry: the Tire and
Loading Information label and
the Certification/Tire label.
Page 241 of 501

Chevrolet Silverado Owner Manual (GMNA-Localizing-U.S./Canada/Mexico-
11349200) - 2018 - CRC - 2/27/18
240 Driving and Operating
{Warning
Do not load the vehicle any
heavier than the Gross
Vehicle Weight Rating
(GVWR), or either the
maximum front or rear Gross
Axle Weight Rating (GAWR).
This can cause systems to
break and change the way the
vehicle handles. This could
cause loss of control and a
crash. Overloading can also
reduce stopping distance,
damage the tires, and shorten
the life of the vehicle.Tire and Loading Information
Label
Label Example
A vehicle-specific Tire and
Loading Information label is
attached to the center pillar
(B-pillar). The Tire and Loading
Information label shows the
number of occupant seating
positions (1), and the maximum
vehicle capacity weight (2) in
kilograms and pounds. The Tire and Loading
Information label also shows the
size of the original equipment
tires (3) and the recommended
cold tire inflation pressures (4).
For more information on tires
and inflation see
Tires0384
and Tire Pressure 0392.
There is also important loading
information on the vehicle
Certification/Tire label. It may
show the Gross Vehicle Weight
Rating (GVWR) and the Gross
Axle Weight Rating (GAWR) for
the front and rear axles. See
“Certification/Tire Label” later in
this section.
“Steps for Determining Correct
Load Limit–
1.
Locate the statement "The
combined weight of
occupants and cargo should
never exceed XXX kg or
XXX lbs." on your vehicle’s
placard.
Page 242 of 501

Chevrolet Silverado Owner Manual (GMNA-Localizing-U.S./Canada/Mexico-
11349200) - 2018 - CRC - 2/27/18
Driving and Operating 241
2.Determine the combined
weight of the driver and
passengers that will be
riding in your vehicle.
3.Subtract the combined
weight of the driver and
passengers from XXX kg or
XXX lbs.
4.The resulting figure equals
the available amount of
cargo and luggage load
capacity. For example, if the
"XXX" amount equals
1400 lbs. and there will be
five 150 lb passengers in
your vehicle, the amount of
available cargo and luggage
load capacity is 650 lbs.
(1400-750 (5 x 150) =
650 lbs.)
5.Determine the combined
weight of luggage and cargo
being loaded on the vehicle.
That weight may not safely
exceed the available cargo
and luggage load capacity
calculated in Step 4.
6.If your vehicle will be towing
a trailer, load from your
trailer will be transferred to
your vehicle. Consult this
manual to determine how
this reduces the available
cargo and luggage load
capacity of your vehicle.”
See Trailer Towing 0300 for
important information on towing
a trailer, towing safety rules, and
trailering tips.
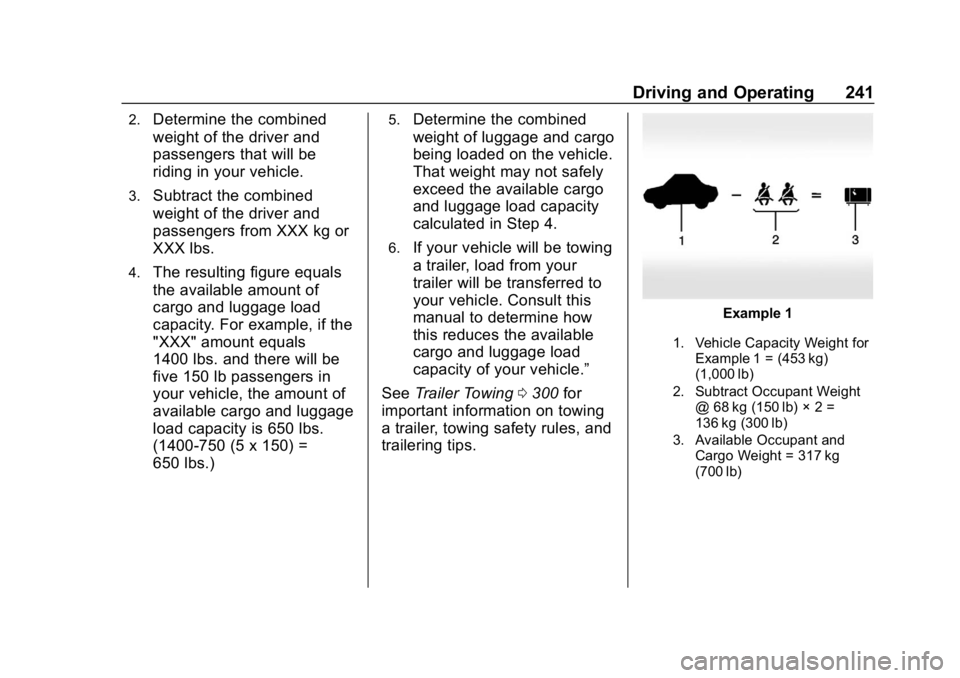
Example 1
1. Vehicle Capacity Weight for
Example 1 = (453 kg)
(1,000 lb)
2. Subtract Occupant Weight @ 68 kg (150 lb) × 2 =
136 kg (300 lb)
3. Available Occupant and Cargo Weight = 317 kg
(700 lb)
Page 243 of 501

Chevrolet Silverado Owner Manual (GMNA-Localizing-U.S./Canada/Mexico-
11349200) - 2018 - CRC - 2/27/18
242 Driving and Operating
Example 2
1. Vehicle Capacity Weight forExample 2 = 453 kg
(1,000 lb)
2. Subtract Occupant Weight @ 68 kg (150 lb) × 5 =
340 kg (750 lb)
3. Available Cargo Weight = 113 kg (250 lb)
Example 3
1. Vehicle Capacity Weight forExample 3 = 453 kg
(1,000 lb)
2. Subtract Occupant Weight @ 91 kg (200 lb) × 5 =
453 kg (1,000 lb)
3. Available Cargo Weight = 0 kg (0 lb)
Refer to the Tire and Loading
Information label for specific
information about the vehicle's
capacity weight and seating
positions. The combined weight of the driver, passengers, and
cargo should never exceed the
vehicle's capacity weight.
Certification/Tire Label
A vehicle-specific Certification/
Tire label is label is attached to
the center pillar (B-pillar). The
label may show the size of the
vehicle's original tires and the
inflation pressures needed to
obtain the gross weight capacity
of the vehicle. This is called
Gross Vehicle Weight
Rating (GVWR). The GVWR
Page 244 of 501

Chevrolet Silverado Owner Manual (GMNA-Localizing-U.S./Canada/Mexico-
11349200) - 2018 - CRC - 2/27/18
Driving and Operating 243
includes the weight of the
vehicle, all occupants, fuel, and
cargo.
The Certification/Tire label also
may show the maximum weights
for the front and rear axles,
called Gross Axle Weight
Rating (GAWR). To determine
the actual loads on the front and
rear axles, weigh the vehicle at
a weigh station. Your dealer can
help with this. Be sure to spread
the load equally on both sides of
the centerline.
The Certification/Tire label also
contains important information
about the Front Axle Reserve
Capacity. SeeAdding a Snow
Plow or Similar Equipment
0 330.{Warning
In the case of a sudden stop
or collision, things carried in
the bed of your truck could
shift forward and come into
the passenger area, injuring
you and others. If you put
things in the bed of your truck,
you should make sure they
are properly secured.
Caution
Overloading the vehicle may
cause damage. Repairs would not
be covered by the vehicle
warranty. Do not overload the
vehicle.
Using heavier suspension
components to get added
durability might not change the
weight ratings. Ask your dealer
to help load the vehicle the
right way.
{Warning
Things you put inside the
vehicle can strike and injure
people in a sudden stop or
turn, or in a crash.
.Put things in the cargo
area of the vehicle. Try to
spread the weight evenly.
.Never stack heavier
things, like suitcases,
inside the vehicle so that
some of them are above
the tops of the seats.
.Do not leave an
unsecured child restraint
in the vehicle.
.When you carry
something inside the
vehicle, secure it
whenever you can.
.Do not leave a seat
folded down unless you
need to.