2018 CHEVROLET SILVERADO tow
[x] Cancel search: towPage 345 of 501
Chevrolet Silverado Owner Manual (GMNA-Localizing-U.S./Canada/Mexico-
11349200) - 2018 - CRC - 2/27/18
344 Vehicle Care
.Always dispose of engine oil
properly. See “What to Do with
Used Oil” in this section.
Checking Engine Oil
Check the engine oil level regularly,
every 650 km (400 mi), especially
prior to a long trip. The engine oil
dipstick handle is a loop. See
Engine Compartment Overview
0338 for the location.
{Warning
The engine oil dipstick handle
may be hot; it could burn you.
Use a towel or glove to touch the
dipstick handle.
If a low oil Driver Information Center
(DIC) message displays, check the
oil level.
Follow these guidelines:
. To get an accurate reading, park
the vehicle on level ground.
Check the engine oil level after
the engine has been off for at
least two hours. Checking the engine oil level on steep grades
or too soon after engine shutoff
can result in incorrect readings.
Accuracy improves when
checking a cold engine prior to
starting. Remove the dipstick
and check the level.
. If unable to wait two hours, the
engine must be off for at least
15 minutes if the engine is
warm, or at least 30 minutes if
the engine is not warm. Pull out
the dipstick, wipe it with a clean
paper towel or cloth, then push it
back in all the way. Remove it
again, keeping the tip down, and
check the level.
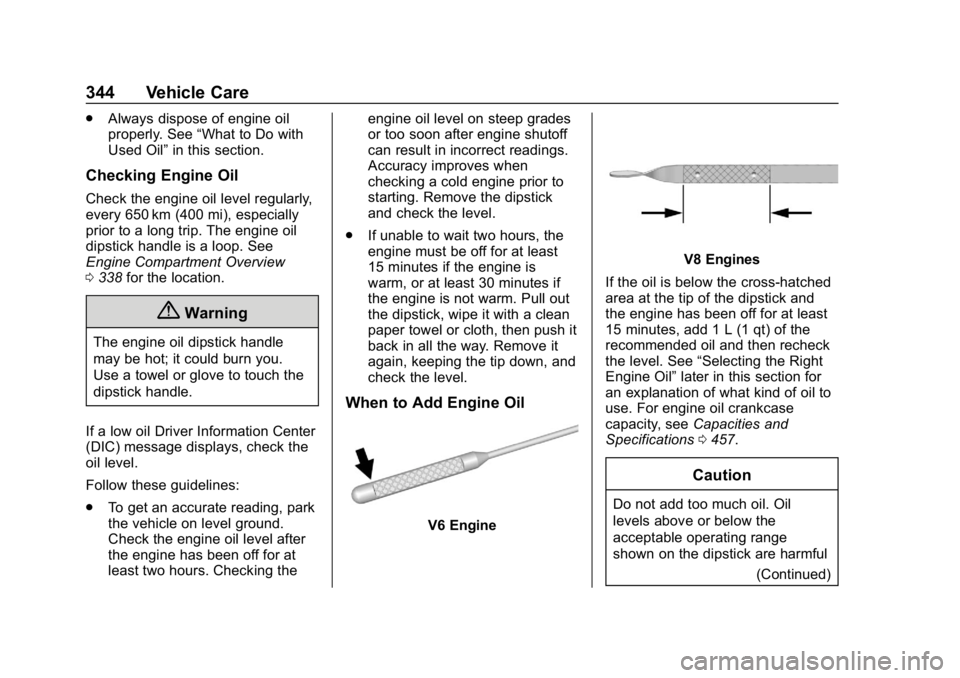
When to Add Engine Oil
V6 Engine
V8 Engines
If the oil is below the cross-hatched
area at the tip of the dipstick and
the engine has been off for at least
15 minutes, add 1 L (1 qt) of the
recommended oil and then recheck
the level. See “Selecting the Right
Engine Oil” later in this section for
an explanation of what kind of oil to
use. For engine oil crankcase
capacity, see Capacities and
Specifications 0457.
Caution
Do not add too much oil. Oil
levels above or below the
acceptable operating range
shown on the dipstick are harmful
(Continued)
Page 348 of 501

Chevrolet Silverado Owner Manual (GMNA-Localizing-U.S./Canada/Mexico-
11349200) - 2018 - CRC - 2/27/18
Vehicle Care 347
1. Display the OIL LIFEREMAINING on the DIC. If the
vehicle does not have DIC
buttons, the vehicle must be in
P (Park) to access this display.
See Driver Information Center
(DIC) (Base Level) 0155 or
Driver Information Center (DIC)
(Uplevel) 0156.
2. Press and hold
V, or the trip
odometer reset stem if the
vehicle does not have DIC
buttons, for several seconds.
The oil life will change
to 100%.
The oil life system can also be reset
as follows:
1. Display the OIL LIFE REMAINING on the DIC.
See Driver Information Center
(DIC) (Base Level) 0155 or
Driver Information Center (DIC)
(Uplevel) 0156.
2. Fully press the accelerator pedal slowly three times within
five seconds. 3. Display the OIL LIFE
REMAINING on the DIC. If the
display shows 100%, the
system is reset.
If the vehicle has a CHANGE
ENGINE OIL SOON message and it
comes back on when the vehicle is
started and/or the OIL LIFE
REMAINING is near 0%, the engine
oil life system has not been reset.
Repeat the procedure.
Automatic Transmission
Fluid (6-Speed
Transmission)
When to Check and Change
Automatic Transmission Fluid
It is usually not necessary to check
the transmission fluid level. The only
reason for fluid loss is a
transmission leak or overheated
transmission. If a small leak is
suspected, then use the following
checking procedures to check the
fluid level. However, if there is a
large leak, then it may be necessary
to have the vehicle towed to a dealer service department and have
it repaired before driving the vehicle
further.
Caution
Use of the incorrect automatic
transmission fluid may damage
the vehicle, and the damage may
not be covered by the vehicle
warranty. Always use the
automatic transmission fluid listed
in
Recommended Fluids and
Lubricants 0451.
Change the fluid and filter at the
scheduled maintenance intervals
listed in Maintenance Schedule
0 443. Be sure to use the
transmission fluid listed in
Recommended Fluids and
Lubricants 0451.
Page 350 of 501
Chevrolet Silverado Owner Manual (GMNA-Localizing-U.S./Canada/Mexico-
11349200) - 2018 - CRC - 2/27/18
Vehicle Care 349
2. Flip the handle up, then pull outthe dipstick and wipe it with a
clean rag or paper towel.
3. Install the dipstick by pushing it back in all the way; wait
three seconds, and then pull it
back out again.
4. Check both sides of the dipstick and read the lower
level. Repeat the check
procedure to verify the reading.
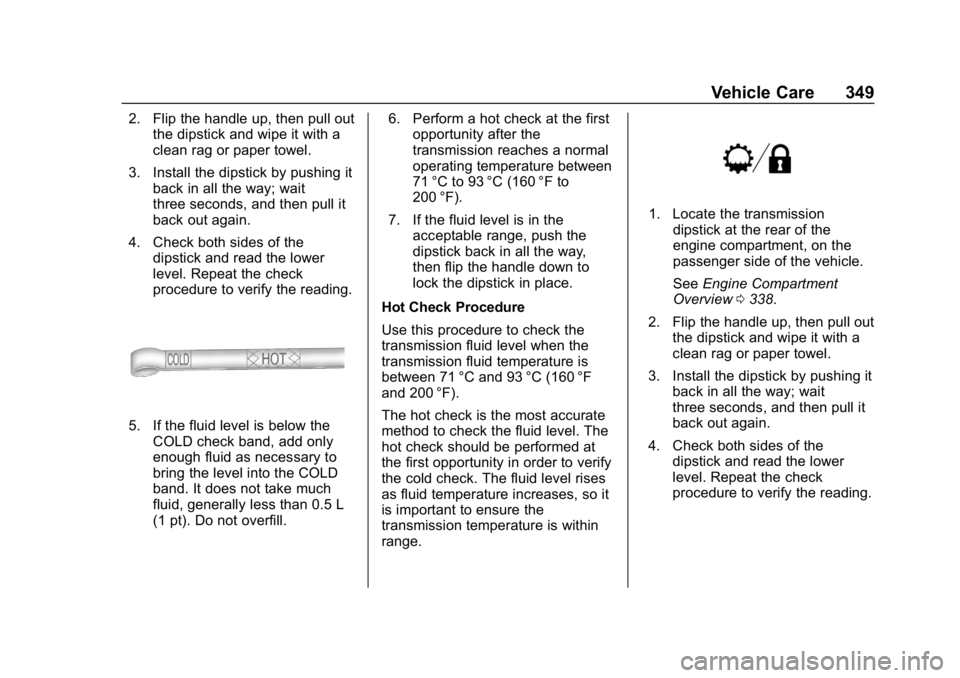
5. If the fluid level is below the
COLD check band, add only
enough fluid as necessary to
bring the level into the COLD
band. It does not take much
fluid, generally less than 0.5 L
(1 pt). Do not overfill. 6. Perform a hot check at the first
opportunity after the
transmission reaches a normal
operating temperature between
71 °C to 93 °C (160 °F to
200 °F).
7. If the fluid level is in the acceptable range, push the
dipstick back in all the way,
then flip the handle down to
lock the dipstick in place.
Hot Check Procedure
Use this procedure to check the
transmission fluid level when the
transmission fluid temperature is
between 71 °C and 93 °C (160 °F
and 200 °F).
The hot check is the most accurate
method to check the fluid level. The
hot check should be performed at
the first opportunity in order to verify
the cold check. The fluid level rises
as fluid temperature increases, so it
is important to ensure the
transmission temperature is within
range.
1. Locate the transmission dipstick at the rear of the
engine compartment, on the
passenger side of the vehicle.
See Engine Compartment
Overview 0338.
2. Flip the handle up, then pull out the dipstick and wipe it with a
clean rag or paper towel.
3. Install the dipstick by pushing it back in all the way; wait
three seconds, and then pull it
back out again.
4. Check both sides of the dipstick and read the lower
level. Repeat the check
procedure to verify the reading.
Page 358 of 501
Chevrolet Silverado Owner Manual (GMNA-Localizing-U.S./Canada/Mexico-
11349200) - 2018 - CRC - 2/27/18
Vehicle Care 357
running. If they are not, do not
continue to run the engine and have
the vehicle serviced.
If Steam is Coming from the
Engine Compartment
{Warning
Steam and scalding liquids from a
hot cooling system are under
pressure. Turning the pressure
cap, even a little, can cause them
to come out at high speed and
you could be burned. Never turn
the cap when the cooling system,
including the pressure cap, is hot.
Wait for the cooling system and
pressure cap to cool.
If No Steam is Coming from
the Engine Compartment
The ENGINE OVERHEATED STOP
ENGINE or the ENGINE
OVERHEATED IDLE ENGINE
message, along with a low coolant
condition, can indicate a serious
problem.If there is an engine overheat
warning, but no steam is seen or
heard, the problem may not be too
serious. Sometimes the engine can
get a little too hot when the vehicle:
.
Climbs a long hill on a hot day.
. Stops after high-speed driving.
. Idles for long periods in traffic.
. Tows a trailer; see Trailer Towing
0 300.
If the ENGINE OVERHEATED
STOP ENGINE or the ENGINE
OVERHEATED IDLE ENGINE
message appears with no sign of
steam, try this for a minute or so: 1. Turn the air conditioning off.
2. Turn the heater on to the highest temperature and to the
highest fan speed. Open the
windows as necessary.
3. When it is safe to do so, pull off the road, shift to P (Park) or
N (Neutral) and let the
engine idle. If the temperature overheat gauge is
no longer in the overheat zone or an
overheat warning no longer
displays, the vehicle can be driven.
Continue to drive the vehicle slowly
for about 10 minutes. Keep a safe
vehicle distance from the vehicle in
front. If the warning does not come
back on, continue to drive normally
and have the cooling system
checked for proper fill and function.
If the warning continues, pull over,
stop, and park the vehicle
right away.
If there is still no sign of steam and
the vehicle is equipped with an
engine driven cooling fan, push
down the accelerator until the
engine speed is about twice as fast
as normal idle speed for at least
five minutes while the vehicle is
parked. If the warning is still there,
turn off the engine and get everyone
out of the vehicle until it cools down.
If there is no sign of steam, idle the
engine for five minutes while
parked. If the warning is still
displayed, turn off the engine until it
cools down.
Page 359 of 501
Chevrolet Silverado Owner Manual (GMNA-Localizing-U.S./Canada/Mexico-
11349200) - 2018 - CRC - 2/27/18
358 Vehicle Care
Overheated Engine
Protection
Operating Mode
If an overheated engine condition
exists and the ENGINE POWER IS
REDUCED message displays, an
overheat protection mode which
alternates firing groups of cylinders
helps to prevent engine damage. In
this mode, a loss in power and
engine performance will be noticed.
This operating mode allows the
vehicle to be driven to a safe place
in an emergency. Driving extended
distances and/or towing a trailer in
the overheat protection mode
should be avoided.
Caution
After driving in the overheated
engine protection operating
mode, the engine oil will be
severely degraded. Any repairs
performed before the engine is
cool may cause engine damage.
Allow the engine to cool before(Continued)
Caution (Continued)
attempting any repair. Repair the
cause of coolant loss, change the
oil, and reset the oil life system.
SeeEngine Oil 0343.
Engine Fan
If the vehicle has a clutched engine
cooling fan, when the clutch is
engaged, the fan spins faster to
provide more air to cool the engine.
In most everyday driving conditions,
the fan is spinning slower and the
clutch is not fully engaged. This
improves fuel economy and reduces
fan noise. Under heavy vehicle
loading, trailer towing, and/or high
outside temperatures, the fan speed
increases as the clutch more fully
engages, so an increase in fan
noise may be heard. This is normal
and should not be mistaken as the
transmission slipping or making
extra shifts. It is merely the cooling
system functioning properly. The fan will slow down when additional
cooling is not required and the
clutch disengages.
This fan noise may also be heard
when starting the engine. It will go
away as the fan clutch partially
disengages.
If the vehicle has electric cooling
fan(s), the fans may be heard
spinning at low speed during most
everyday driving. The fans may turn
off if no cooling is required. Under
heavy vehicle loading, trailer towing,
high outside temperatures,
or operation of the air conditioning
system, the fans may change to
high speed and an increase in fan
noise may be heard. This is normal
and indicates that the cooling
system is functioning properly. The
fans will change to low speed when
additional cooling is no longer
required.
The electric engine cooling fans
may run after the engine has been
turned. off. This is normal and no
service is required.
Page 403 of 501

Chevrolet Silverado Owner Manual (GMNA-Localizing-U.S./Canada/Mexico-
11349200) - 2018 - CRC - 2/27/18
402 Vehicle Care
Warning (Continued)
wheel attaches to the vehicle. In
an emergency, a cloth or a paper
towel can be used; however, use
a scraper or wire brush later to
remove all rust or dirt.
Lightly coat the inner diameter of
the wheel hub opening with
wheel bearing grease after a
wheel change or tire rotation to
prevent corrosion or rust
build-up. Do not get grease on
the flat wheel mounting surface
or on the wheel nuts or bolts.
Reset the Tire Pressure Monitor
System (TPMS), if the vehicle
has one. SeeTire Pressure
Monitor Operation 0395.
Check that the spare tire, if the
vehicle has one, is stored
properly. Push, pull, and then try to rotate or turn the tire. If it
moves, tighten the cable. See
“Storing a Flat or Spare Tire and
Tools”
underTire Changing
0 410.
When It Is Time for New
Tires
Factors, such as maintenance,
temperatures, driving speeds,
vehicle loading, and road conditions
affect the wear rate of the tires.
Treadwear indicators are one way to
tell when it is time for new tires.
Treadwear indicators appear when
the tires have only 1.6 mm (1/16 in)
or less of tread remaining. Some
commercial truck tires may not have
treadwear indicators. See Tire
Inspection 0399 andTire Rotation
0 400 for additional information.
The rubber in tires ages over time.
This also applies to the spare tire,
if the vehicle has one, even if it is
never used. Multiple factors
including temperatures, loading
conditions, and inflation pressure
maintenance affect how fast aging
takes place. GM recommends that
tires, including the spare if
equipped, be replaced after six
years, regardless of tread wear. The
tire manufacture date is the last four
digits of the DOT Tire Identification
Number (TIN) which is molded into
one side of the tire sidewall. The
first two digits represent the week
(01-52) and the last two digits, the
year. For example, the third week of
the year 2010 would have a
four-digit DOT date of 0310.
Page 410 of 501
Chevrolet Silverado Owner Manual (GMNA-Localizing-U.S./Canada/Mexico-
11349200) - 2018 - CRC - 2/27/18
Vehicle Care 409
If a front tire fails, the flat tire
creates a drag that pulls the vehicle
toward that side. Take your foot off
the accelerator pedal and grip the
steering wheel firmly. Steer to
maintain lane position, and then
gently brake to a stop, well off the
road, if possible.
A rear blowout, particularly on a
curve, acts much like a skid and
may require the same correction as
used in a skid. Stop pressing the
accelerator pedal and steer to
straighten the vehicle. It may be
very bumpy and noisy. Gently brake
to a stop, well off the road,
if possible.
{Warning
Driving on a flat tire will cause
permanent damage to the tire.
Re-inflating a tire after it has been
driven on while severely
underinflated or flat may cause a
blowout and a serious crash.
Never attempt to re-inflate a tire(Continued)
Warning (Continued)
that has been driven on while
severely underinflated or flat.
Have your dealer or an authorized
tire service center repair or
replace the flat tire as soon as
possible.
{Warning
Lifting a vehicle and getting under
it to do maintenance or repairs is
dangerous without the
appropriate safety equipment and
training. If a jack is provided with
the vehicle, it is designed only for
changing a flat tire. If it is used for
anything else, you or others could
be badly injured or killed if the
vehicle slips off the jack. If a jack
is provided with the vehicle, only
use it for changing a flat tire. If a tire goes flat, avoid further tire
and wheel damage by driving slowly
to a level place, well off the road,
if possible. Turn on the hazard
warning flashers. See
Hazard
Warning Flashers 0175.
{Warning
Changing a tire can be
dangerous. The vehicle can slip
off the jack and roll over or fall
causing injury or death. Find a
level place to change the tire. To
help prevent the vehicle from
moving:
1. Set the parking brake firmly.
2. Put an automatictransmission in P (Park) or a
manual transmission in
1 (First) or R (Reverse).
3. For four-wheel-drive vehicles, be sure the
transfer case is in a drive
gear– not in N (Neutral).
(Continued)
Page 413 of 501
Chevrolet Silverado Owner Manual (GMNA-Localizing-U.S./Canada/Mexico-
11349200) - 2018 - CRC - 2/27/18
412 Vehicle Care
3. Insert the hoist end (openend) (10) of the extension
through the hole (9) in the rear
bumper.
Do not use the chiseled end of
the wheel wrench.
Be sure the hoist end of the
extension (10) connects to the
hoist shaft. The ribbed square
end of the extension is used to
lower the spare tire.
4. Turn the wheel wrench counterclockwise to lower the
spare tire to the ground.
Continue to turn the wheel
wrench until the spare tire can
be pulled out from under the
vehicle. 5. Pull the spare tire out from
under the vehicle.
6. Tilt the tire toward the vehiclewith some slack in the cable to
access the tire/wheel retainer.
Tilt the retainer and pull it
through the center of the wheel
along with the cable and
spring. 7. Put the spare tire near the
flat tire.
Removing the Flat Tire and
Installing the Spare Tire
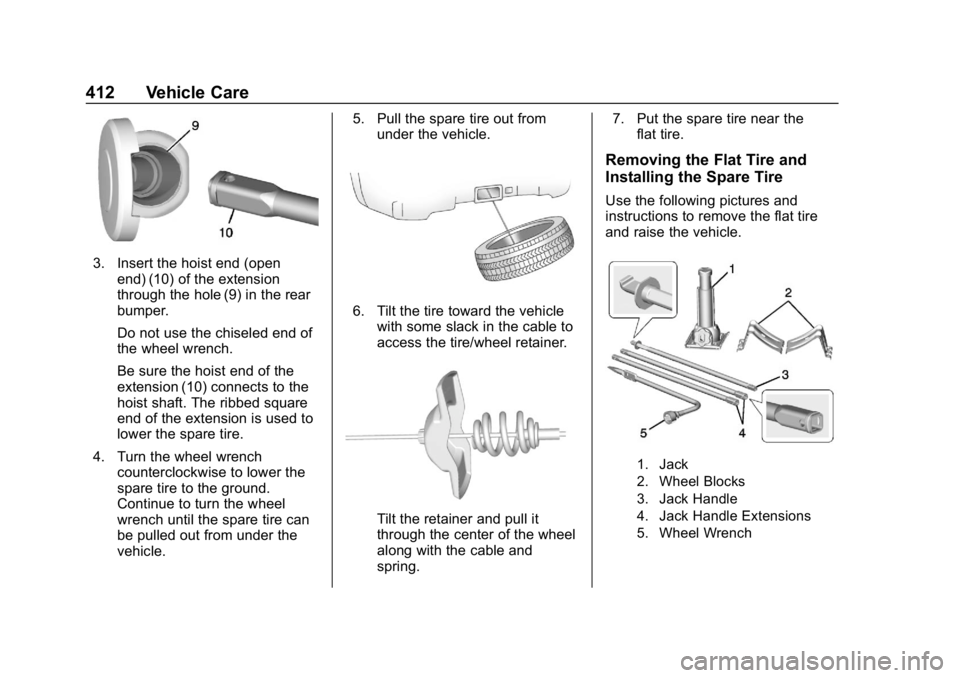
Use the following pictures and
instructions to remove the flat tire
and raise the vehicle.
1. Jack
2. Wheel Blocks
3. Jack Handle
4. Jack Handle Extensions
5. Wheel Wrench