2018 CHEVROLET SILVERADO 2500 brake
[x] Cancel search: brakePage 394 of 489
Chevrolet Silverado LD 1500 and Silverado 2500/3500 Owner Manual (GMNA-
Localizing-U.S./Canada-12162993) - 2019 - crc - 4/4/18
Vehicle Care 393
Wheel Replacement
Replace any wheel that is bent,
cracked, or badly rusted or
corroded. If wheel nuts keep coming
loose, the wheel, wheel bolts and
wheel nuts should be replaced.
If the wheel leaks air, replace it.
Some aluminum wheels can be
repaired. See your dealer if any of
these conditions exist.
Your dealer will know the kind of
wheel that is needed.
Each new wheel should have the
same load-carrying capacity,
diameter, width, offset and be
mounted the same way as the one it
replaces.
Replace wheels, wheel bolts, wheel
nuts, or Tire Pressure Monitor
System (TPMS) sensors with new
GM original equipment parts.{Warning
Using the wrong replacement
wheels, wheel bolts, or wheel
nuts can be dangerous. It could
affect the braking and handling of
the vehicle. Tires can lose air,
and cause loss of control, causing
a crash. Always use the correct
wheel, wheel bolts, and wheel
nuts for replacement.
Caution
The wrong wheel can also cause
problems with bearing life, brake
cooling, speedometer or
odometer calibration, headlamp
aim, bumper height, vehicle
ground clearance, and tire or tire
chain clearance to the body and
chassis.
Whenever a wheel, wheel bolt,
or wheel nut is replaced on a dual
wheel setup, check the wheel nut
torque after 160,1 600, and 10 000 km (100,1,000, and
6,000 mi) of driving. For proper
torque, see
“Wheel Nut Torque”
under Capacities and Specifications
0 446.
See If a Tire Goes Flat 0394 for
more information.
Used Replacement Wheels
{Warning
Replacing a wheel with a used
one is dangerous. How it has
been used or how far it has been
driven may be unknown. It could
fail suddenly and cause a crash.
When replacing wheels, use a
new GM original equipment
wheel.
Page 395 of 489
Chevrolet Silverado LD 1500 and Silverado 2500/3500 Owner Manual (GMNA-
Localizing-U.S./Canada-12162993) - 2019 - crc - 4/4/18
394 Vehicle Care
Tire Chains
{Warning
If the vehicle has dual wheels or
265/65R18, P265/65R18, P275/
55R20, LT265/70R17, LT265/
70R18, LT265/60R20, LT275/
65R18, P285/50R20, 285/45R22,
or P285/45R22 size tires, do not
use tire chains. They can damage
the vehicle because there is not
enough clearance. Tire chains
used on a vehicle without the
proper amount of clearance can
cause damage to the brakes,
suspension, or other vehicle
parts. The area damaged by the
tire chains could cause you to
lose control of the vehicle and
you or others may be injured in a
crash.
Use another type of traction
device only if its manufacturer
recommends it for use on the
vehicle and tire size combination(Continued)
Warning (Continued)
and road conditions. Follow that
manufacturer's instructions. To
help avoid damage to the vehicle,
drive slowly, readjust, or remove
the device if it is contacting the
vehicle, and do not spin the
vehicle's wheels.
If you do find traction devices that
will fit, install them on the rear
tires.
Caution
If the vehicle does not have dual
wheels and has a tire size other
than 265/65R18, P265/65R18,
P275/55R20, LT265/70R17,
LT265/70R18, LT265/60R20,
LT275/65R18, P285/50R20, 285/
45R22, or P285/45R22, use tire
chains only where legal and only
when you must. Use chains that
are the proper size for the tires.(Continued)
Caution (Continued)
Install them on the tires of the
rear axle. Do not use chains on
the tires of the front axle. Tighten
them as tightly as possible with
the ends securely fastened. Drive
slowly and follow the chain
manufacturer's instructions. If you
can hear the chains contacting
the vehicle, stop and retighten
them. If the contact continues,
slow down until it stops. Driving
too fast or spinning the wheels
with chains on will damage the
vehicle.
If a Tire Goes Flat
It is unusual for a tire to blowout
while driving, especially if the tires
are maintained properly. If air goes
out of a tire, it is much more likely to
leak out slowly. But if there ever is a
blowout, here are a few tips about
what to expect and what to do:
Page 396 of 489
Chevrolet Silverado LD 1500 and Silverado 2500/3500 Owner Manual (GMNA-
Localizing-U.S./Canada-12162993) - 2019 - crc - 4/4/18
Vehicle Care 395
If a front tire fails, the flat tire
creates a drag that pulls the vehicle
toward that side. Take your foot off
the accelerator pedal and grip the
steering wheel firmly. Steer to
maintain lane position, and then
gently brake to a stop, well off the
road, if possible.
A rear blowout, particularly on a
curve, acts much like a skid and
may require the same correction as
used in a skid. Stop pressing the
accelerator pedal and steer to
straighten the vehicle. It may be
very bumpy and noisy. Gently brake
to a stop, well off the road,
if possible.
{Warning
Driving on a flat tire will cause
permanent damage to the tire.
Re-inflating a tire after it has been
driven on while severely
underinflated or flat may cause a
blowout and a serious crash.
Never attempt to re-inflate a tire(Continued)
Warning (Continued)
that has been driven on while
severely underinflated or flat.
Have your dealer or an authorized
tire service center repair or
replace the flat tire as soon as
possible.
{Warning
Lifting a vehicle and getting under
it to do maintenance or repairs is
dangerous without the
appropriate safety equipment and
training. If a jack is provided with
the vehicle, it is designed only for
changing a flat tire. If it is used for
anything else, you or others could
be badly injured or killed if the
vehicle slips off the jack. If a jack
is provided with the vehicle, only
use it for changing a flat tire. If a tire goes flat, avoid further tire
and wheel damage by driving slowly
to a level place, well off the road,
if possible. Turn on the hazard
warning flashers. See
Hazard
Warning Flashers 0175.
{Warning
Changing a tire can be
dangerous. The vehicle can slip
off the jack and roll over or fall
causing injury or death. Find a
level place to change the tire. To
help prevent the vehicle from
moving:
1. Set the parking brake firmly.
2. Put an automatictransmission in P (Park) or a
manual transmission in
1 (First) or R (Reverse).
3. For four-wheel-drive vehicles, be sure the
transfer case is in a drive
gear– not in N (Neutral).
(Continued)
Page 404 of 489
Chevrolet Silverado LD 1500 and Silverado 2500/3500 Owner Manual (GMNA-
Localizing-U.S./Canada-12162993) - 2019 - crc - 4/4/18
Vehicle Care 403
{Warning
Wheel nuts that are improperly or
incorrectly tightened can cause
the wheels to become loose or
come off. The wheel nuts should
be tightened with a torque wrench
to the proper torque specification
after replacing. Follow the torque
specification supplied by the
aftermarket manufacturer when
using accessory locking wheel
nuts. SeeCapacities and
Specifications 0446 for original
equipment wheel nut torque
specifications.
Caution
Improperly tightened wheel nuts
can lead to brake pulsation and
rotor damage. To avoid expensive
brake repairs, evenly tighten the
wheel nuts in the proper
sequence and to the proper
(Continued)
Caution (Continued)
torque specification. See
Capacities and Specifications
0446 for the wheel nut torque
specification.
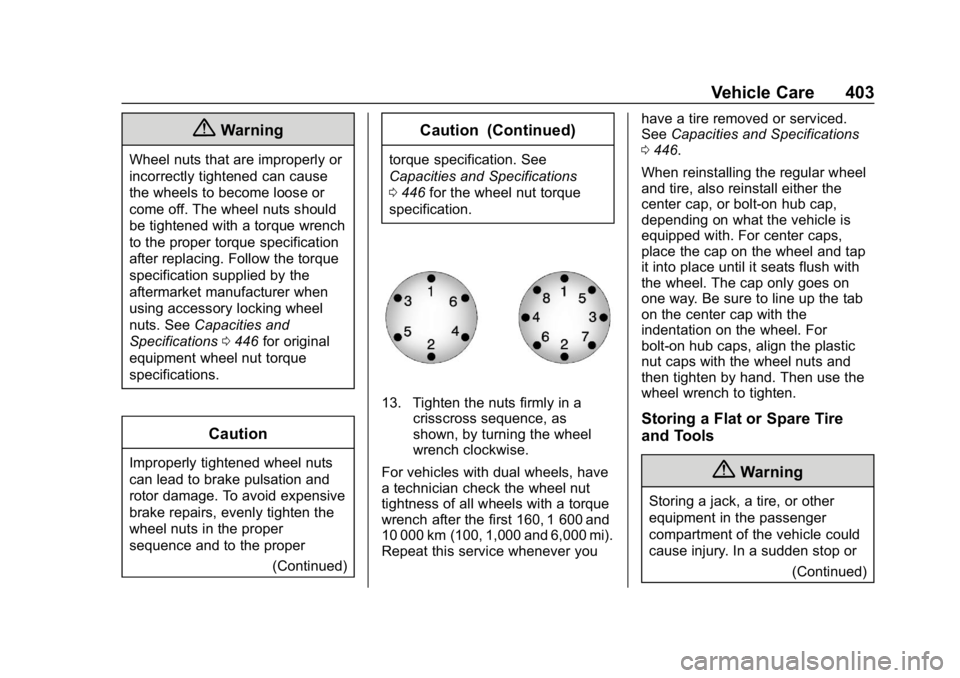
13. Tighten the nuts firmly in a crisscross sequence, as
shown, by turning the wheel
wrench clockwise.
For vehicles with dual wheels, have
a technician check the wheel nut
tightness of all wheels with a torque
wrench after the first 160, 1 600 and
10 000 km (100, 1,000 and 6,000 mi).
Repeat this service whenever you have a tire removed or serviced.
See
Capacities and Specifications
0 446.
When reinstalling the regular wheel
and tire, also reinstall either the
center cap, or bolt-on hub cap,
depending on what the vehicle is
equipped with. For center caps,
place the cap on the wheel and tap
it into place until it seats flush with
the wheel. The cap only goes on
one way. Be sure to line up the tab
on the center cap with the
indentation on the wheel. For
bolt-on hub caps, align the plastic
nut caps with the wheel nuts and
then tighten by hand. Then use the
wheel wrench to tighten.
Storing a Flat or Spare Tire
and Tools
{Warning
Storing a jack, a tire, or other
equipment in the passenger
compartment of the vehicle could
cause injury. In a sudden stop or (Continued)
Page 410 of 489
Chevrolet Silverado LD 1500 and Silverado 2500/3500 Owner Manual (GMNA-
Localizing-U.S./Canada-12162993) - 2019 - crc - 4/4/18
Vehicle Care 409
may not be able to get enough
power from a single battery in
another vehicle to start your
diesel engine. If your vehicle
has more than one battery,
using the battery that is closer
to the starter will reduce
electrical resistance. This is
located on the passenger side,
in the rear of the engine
compartment.
3. Get the vehicles close enough so the jumper cables can
reach, but be sure the vehicles
are not touching each other.
If they are, it could cause an
unwanted ground connection.
You would not be able to start
your vehicle, and the bad
grounding could damage the
electrical systems.
To avoid the possibility of the
vehicles rolling, set the parking
brake firmly on both vehicles
involved in the jump start
procedure. Put the automatic
transmission in P (Park) or a
manual transmission in Neutral
before setting the parking brake. If you have a
four-wheel-drive vehicle, be
sure the transfer case is in a
drive gear, not in N (Neutral).
Caution
If any accessories are left on or
plugged in during the jump
starting procedure, they could be
damaged. The repairs would not
be covered by the vehicle
warranty. Whenever possible, turn
off or unplug all accessories on
either vehicle when jump starting.
4. Turn the ignition off on both vehicles. Unplug unnecessary
accessories plugged into the
accessory power outlets. Turn
off the radio and all the lamps
that are not needed. This will
avoid sparks and help save
both batteries. And it could
save the radio! 5. Open the hood on the other
vehicle and locate the
positive (+) and negative (−)
terminal locations on that
vehicle.
The positive (+) terminal is
under a red plastic cover at the
positive battery post. To
uncover the positive (+)
terminal, open the red plastic
cover.
For more information on the
location of the remote
positive (+) and remote
negative (−) terminals, see
Engine Compartment Overview
0328.
{Warning
An electric fan can start up even
when the engine is not running
and can injure you. Keep hands,
clothing, and tools away from any
underhood electric fan.
Page 415 of 489
Chevrolet Silverado LD 1500 and Silverado 2500/3500 Owner Manual (GMNA-
Localizing-U.S./Canada-12162993) - 2019 - crc - 4/4/18
414 Vehicle Care
Four-Wheel-Drive Vehicles
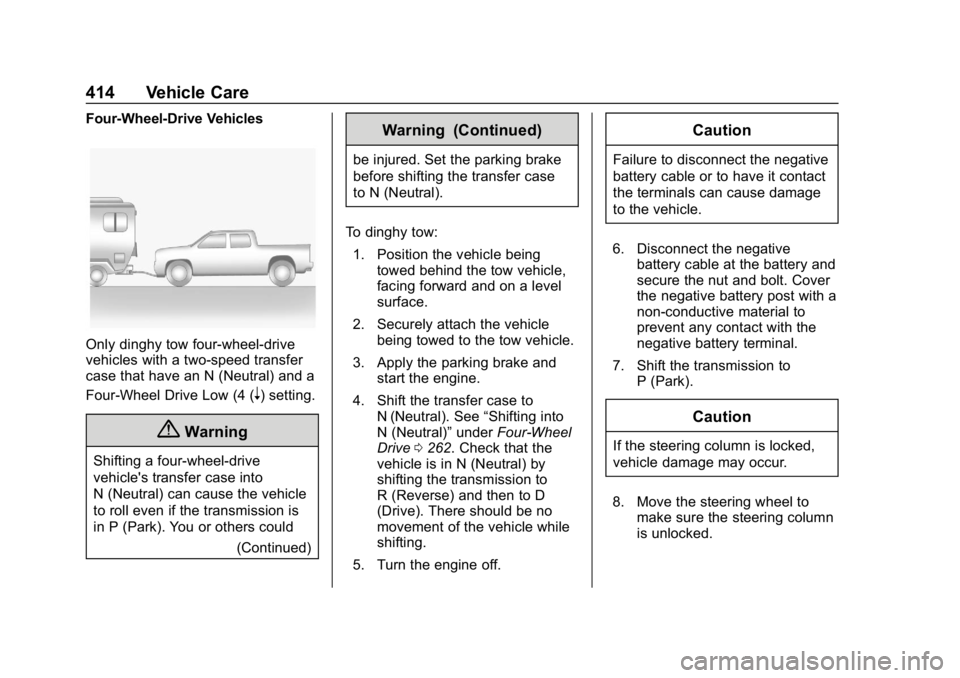
Only dinghy tow four-wheel-drive
vehicles with a two-speed transfer
case that have an N (Neutral) and a
Four-Wheel Drive Low (4 (
n) setting.
{Warning
Shifting a four-wheel-drive
vehicle's transfer case into
N (Neutral) can cause the vehicle
to roll even if the transmission is
in P (Park). You or others could(Continued)
Warning (Continued)
be injured. Set the parking brake
before shifting the transfer case
to N (Neutral).
To dinghy tow: 1. Position the vehicle being towed behind the tow vehicle,
facing forward and on a level
surface.
2. Securely attach the vehicle being towed to the tow vehicle.
3. Apply the parking brake and start the engine.
4. Shift the transfer case to N (Neutral). See “Shifting into
N (Neutral)” underFour-Wheel
Drive 0262. Check that the
vehicle is in N (Neutral) by
shifting the transmission to
R (Reverse) and then to D
(Drive). There should be no
movement of the vehicle while
shifting.
5. Turn the engine off.
Caution
Failure to disconnect the negative
battery cable or to have it contact
the terminals can cause damage
to the vehicle.
6. Disconnect the negative battery cable at the battery and
secure the nut and bolt. Cover
the negative battery post with a
non-conductive material to
prevent any contact with the
negative battery terminal.
7. Shift the transmission to P (Park).
Caution
If the steering column is locked,
vehicle damage may occur.
8. Move the steering wheel to make sure the steering column
is unlocked.
Page 416 of 489
Chevrolet Silverado LD 1500 and Silverado 2500/3500 Owner Manual (GMNA-
Localizing-U.S./Canada-12162993) - 2019 - crc - 4/4/18
Vehicle Care 415
9. With a foot on the brake pedal,release the parking brake.
Keep the ignition key in the
towed vehicle in ACC/
ACCESSORY to prevent the
steering column from locking.
Disconnecting the Towed Vehicle
Before disconnecting the towed
vehicle: 1. Park on a level surface.
2. Set the parking brake, then shift the transmission to
P (Park), and move the ignition
key to OFF.
3. Connect the battery.
4. Apply the brake pedal.
5. Turn the ignition on with the engine off. Shift the transfer
case out of N (Neutral) to
Two-Wheel Drive High. See
“Shifting out of N (Neutral)”
under Four-Wheel Drive 0262.
See your dealer if the transfer
case cannot be shifted out of
N (Neutral). 6. Check that the vehicle is in
Two-Wheel Drive High by
shifting the transmission to
R (Reverse) and then to D
(Drive). There should be
movement of the vehicle while
shifting.
7. Shift the transmission to P (Park) and turn off the
ignition.
8. Disconnect the vehicle from the tow vehicle.
9. Release the parking brake.
10. Reset any lost presets. The outside temperature
display will default to 0 °C
(32 °F) but will reset with
normal usage.Dolly Towing
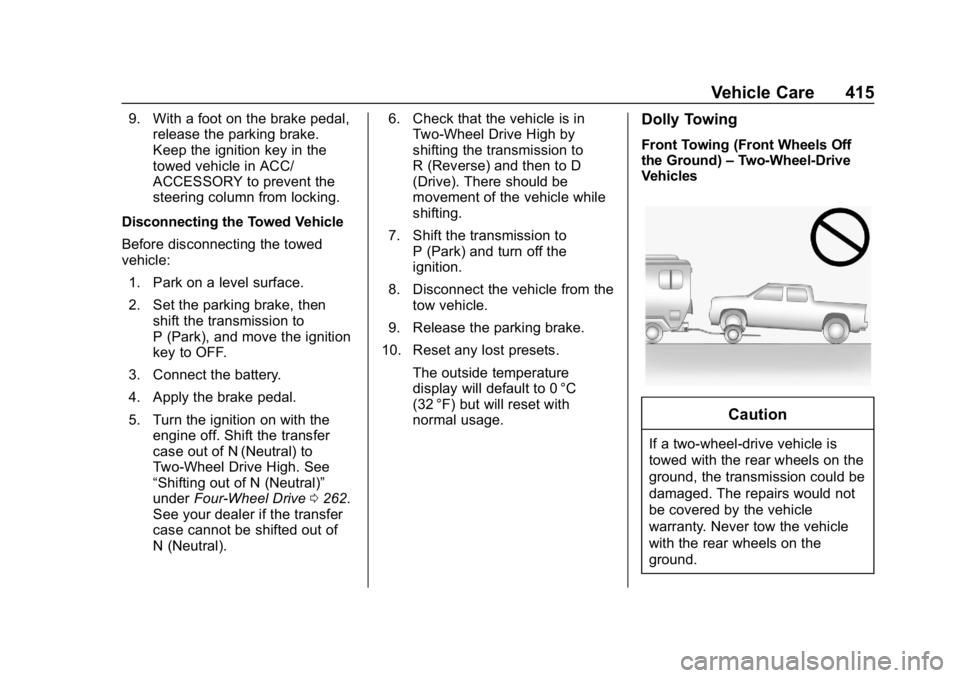
Front Towing (Front Wheels Off
the Ground) –Two-Wheel-Drive
Vehicles
Caution
If a two-wheel-drive vehicle is
towed with the rear wheels on the
ground, the transmission could be
damaged. The repairs would not
be covered by the vehicle
warranty. Never tow the vehicle
with the rear wheels on the
ground.
Page 417 of 489
Chevrolet Silverado LD 1500 and Silverado 2500/3500 Owner Manual (GMNA-
Localizing-U.S./Canada-12162993) - 2019 - crc - 4/4/18
416 Vehicle Care
Two-wheel-drive vehicles should not
be towed with the rear wheels on
the ground. Two-wheel-drive
transmissions have no provisions
for internal lubrication while being
towed.
To dolly tow a two-wheel-drive
vehicle, the vehicle must be towed
with the rear wheels on the dolly.
See“Rear Towing (Rear Wheels Off
the Ground)” later in this section.
Front Towing (Front Wheels Off
the Ground) –Four-Wheel-Drive
Vehicles
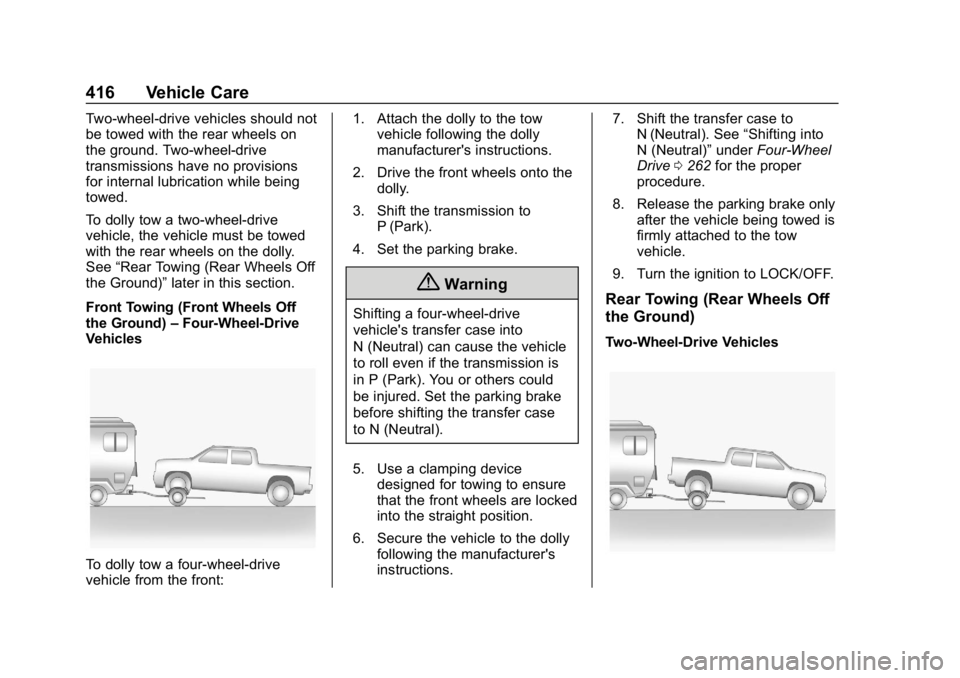
To dolly tow a four-wheel-drive
vehicle from the front: 1. Attach the dolly to the tow
vehicle following the dolly
manufacturer's instructions.
2. Drive the front wheels onto the dolly.
3. Shift the transmission to P (Park).
4. Set the parking brake.
{Warning
Shifting a four-wheel-drive
vehicle's transfer case into
N (Neutral) can cause the vehicle
to roll even if the transmission is
in P (Park). You or others could
be injured. Set the parking brake
before shifting the transfer case
to N (Neutral).
5. Use a clamping device designed for towing to ensure
that the front wheels are locked
into the straight position.
6. Secure the vehicle to the dolly following the manufacturer's
instructions. 7. Shift the transfer case to
N (Neutral). See “Shifting into
N (Neutral)” underFour-Wheel
Drive 0262 for the proper
procedure.
8. Release the parking brake only after the vehicle being towed is
firmly attached to the tow
vehicle.
9. Turn the ignition to LOCK/OFF.Rear Towing (Rear Wheels Off
the Ground)
Two-Wheel-Drive Vehicles