2018 CHEVROLET SILVERADO 1500 service
[x] Cancel search: servicePage 288 of 501
Chevrolet Silverado Owner Manual (GMNA-Localizing-U.S./Canada/Mexico-
11349200) - 2018 - CRC - 2/27/18
Driving and Operating 287
conditions when selecting the alert
timing. The range of selectable alert
timing may not be appropriate for all
drivers and driving conditions.
Unnecessary Alerts
FCA may provide unnecessary
alerts for turning vehicles, vehicles
in other lanes, objects that are not
vehicles, or shadows. These alerts
are normal operation and the
vehicle does not need service.
Cleaning the System
If the FCA system does not seem to
operate properly, this may correct
the issue:
.Clean the outside of the
windshield in front of the
rearview mirror.
. Clean the entire front of the
vehicle.
. Clean the headlamps.
Forward Automatic
Braking (FAB)
If the vehicle has Forward Collision
Alert (FCA), it also has FAB, which
includes Intelligent Brake
Assist (IBA). When the system
detects a vehicle ahead in your path
that is traveling in the same
direction that you may be about to
crash into, it can provide a boost to
braking or automatically brake the
vehicle. This can help avoid or
lessen the severity of crashes when
driving in a forward gear. Depending
on the situation, the vehicle may
automatically brake moderately or
hard. This forward automatic
braking can only occur if a vehicle is
detected. This is shown by the FCA
vehicle ahead indicator being lit.
See Forward Collision Alert (FCA)
System 0285.
The system works when driving in a
forward gear between 8 km/h
(5 mph) and 80 km/h (50 mph).
It can detect vehicles up to
approximately 60 m (197 ft).
{Warning
FAB is an emergency crash
preparation feature and is not
designed to avoid crashes. Do
not rely on FAB to brake the
vehicle. FAB will not brake
outside of its operating speed
range and only responds to
detected vehicles.
FAB may not: . Detect a vehicle ahead on
winding or hilly roads.
. Detect all vehicles,
especially vehicles with a
trailer, tractors, muddy
vehicles, etc.
. Detect a vehicle when
weather limits visibility, such
as in fog, rain, or snow.
. Detect a vehicle ahead if it
is partially blocked by
pedestrians or other objects.
(Continued)
Page 290 of 501
Chevrolet Silverado Owner Manual (GMNA-Localizing-U.S./Canada/Mexico-
11349200) - 2018 - CRC - 2/27/18
Driving and Operating 289
Warning (Continued)
.Provide enough time to
avoid a crash.
. Detect lane markings under
poor weather or visibility
conditions. This can occur if
the windshield or
headlamps are blocked by
dirt, snow, or ice; if they are
not in proper condition; or if
the sun shines directly into
the camera.
. Detect road edges.
. Detect lanes on winding or
hilly roads.
If LDW only detects lane
markings on one side of the road,
it will only warn you when
departing the lane on the side
where it has detected a lane
marking. Always keep your
attention on the road and
maintain proper vehicle position
within the lane, or vehicle
damage, injury, or death could (Continued)
Warning (Continued)
occur. Always keep the
windshield, headlamps, and
camera sensors clean and in
good repair. Do not use LDW in
bad weather conditions.
How the System Works
The LDW camera sensor is on the
windshield ahead of the rearview
mirror.
To turn LDW on and off, press
@on
the center stack. The control
indicator will light when LDW is on.
When LDW is on,@is green if
LDW is available to warn of a lane
departure. If the vehicle crosses a
detected lane marking without using
the turn signal in that direction,
@
changes to amber and flashes.
Additionally, there may be three
beeps, or the driver seat may pulse
three times on the right or left,
depending on the lane departure
direction.
When the System Does Not
Seem to Work Properly
The system may not detect lanes as
well when there are:
. Close vehicles ahead.
. Sudden lighting changes, such
as when driving through tunnels.
. Banked roads.
If the LDW system is not functioning
properly when lane markings are
clearly visible, cleaning the
windshield may help.
LDW alerts may occur due to tar
marks, shadows, cracks in the road,
temporary or construction lane
markings, or other road
imperfections. This is normal system
operation; the vehicle does not need
service. Turn LDW off if these
conditions continue.
Page 292 of 501
Chevrolet Silverado Owner Manual (GMNA-Localizing-U.S./Canada/Mexico-
11349200) - 2018 - CRC - 2/27/18
Driving and Operating 291
How the System Works
The LKA camera sensor is on the
windshield ahead of the rearview
mirror.
To turn LKA on and off, press
A
on the center stack.
When on,
Ais green if LKA is
available to assist and provide LDW
alerts. It may assist by gently
turning the steering wheel and
display
Aas amber if the vehicle
approaches a detected lane marking
without using a turn signal in that
direction. It may also provide an
LDW alert by flashing
Aamber
as the lane marking is crossed.
Additionally, there may be three
beeps, or the driver seat may pulse
three times, on the right or left,
depending on the lane departure
direction. Take Steering
The LKA system does not
continuously steer the vehicle.
If LKA does not detect active driver
steering, an alert, chime, or DIC
message may be provided. Move
the steering wheel to dismiss.
When the System Does Not
Seem to Work Properly
The system performance may be
affected by:
.
Close vehicles ahead.
. Sudden lighting changes, such
as when driving through tunnels.
. Banked roads.
. Roads with poor lane markings,
such as two-lane roads.
If the LKA system is not functioning
properly when lane markings are
clearly visible, cleaning the
windshield may help. A camera blocked message may
display if the camera is blocked.
Cleaning the outside of the
windshield behind the rearview
mirror may correct the issue. Some
driver assistance systems may have
reduced performance or not work at
all. An LKA or LDW unavailable
message may display if the systems
are temporarily unavailable. This
message could be due to a blocked
camera. The LKA system does not
need service. Clean the outside of
the windshield behind the rearview
mirror.
LKA assistance and/or LDW alerts
may occur due to tar marks,
shadows, cracks in the road,
temporary or construction lane
markings, or other road
imperfections. This is normal system
operation; the vehicle does not need
service. Turn LKA off if these
conditions continue.
Page 293 of 501
Chevrolet Silverado Owner Manual (GMNA-Localizing-U.S./Canada/Mexico-
11349200) - 2018 - CRC - 2/27/18
292 Driving and Operating
Fuel
For diesel engine vehicles, see
“Fuel for Diesel Engines”in the
Duramax diesel supplement.
GM recommends the use of TOP
TIER Detergent Gasoline to keep
the engine cleaner and reduce
engine deposits. See
www.toptiergas.com for a list of TOP
TIER Detergent Gasoline marketers
and applicable countries.
If the vehicle has a yellow sticker on
the fuel door, E85 or FlexFuel can
be used. See E85 or FlexFuel
0 293. Except the 6.2L engine, use regular
unleaded gasoline meeting ASTM
specification D4814 with a posted
octane rating of 87 or higher. Do not
use gasoline with a posted octane
rating of less than 87, as this may
cause engine knock and will lower
fuel economy.
For the 6.2L engine, premium
unleaded gasoline meeting ASTM
specification D4814 with a posted
octane rating of 93 is highly
recommended for best performance
and fuel economy. Unleaded
gasoline with an octane rated as low
as 87 can be used. Using unleaded
gasoline rated below 93 octane,
however, will lead to reduced
acceleration and fuel economy.
If knocking occurs, use a gasoline
rated at 93 octane as soon as
possible, otherwise, the engine
could be damaged. If heavy
knocking is heard when using
gasoline with a 93 octane rating, the
engine needs service.
Prohibited Fuels
Caution
Do not use fuels with any of the
following conditions; doing so
may damage the vehicle and void
its warranty:
. For vehicles which are not
FlexFuel, fuel labeled
greater than 15% ethanol by
volume, such as mid-level
ethanol blends (16 –50%
ethanol), E85, or FlexFuel.
. Fuel with any amount of
methanol, methylal, and
aniline. These fuels can
corrode metal fuel system
parts or damage plastic and
rubber parts.
. Fuel containing metals such
as methylcyclopentadienyl
manganese tricarbonyl
(MMT), which can damage
the emissions control
system and spark plugs.
(Continued)
Page 301 of 501
Chevrolet Silverado Owner Manual (GMNA-Localizing-U.S./Canada/Mexico-
11349200) - 2018 - CRC - 2/27/18
300 Driving and Operating
4. Stop and have someone pickup and store the chocks.
Maintenance when Trailer
Towing
The vehicle needs service more
often when pulling a trailer. See
Maintenance Schedule 0443.
Things that are especially important
in trailer operation are automatic
transmission fluid, engine oil, axle
lubricant, belts, cooling system, and
brake system. It is a good idea to
inspect these before and during
the trip.
Check periodically to see that all
hitch nuts and bolts are tight.
Engine Cooling When Trailer
Towing
The cooling system may temporarily
overheat during severe operating
conditions. See Engine Overheating
0 356.
Trailer Towing
If the vehicle has a diesel engine,
see the Duramax diesel
supplement.
Do not tow a trailer during break-in.
See New Vehicle Break-In 0247.
{Warning
The driver can lose control when
pulling a trailer if the correct
equipment is not used or the
vehicle is not driven properly. For
example, if the trailer is too heavy
or the trailer brakes are
inadequate for the load, the
vehicle may not stop as expected.
The driver and passengers could
be seriously injured. The vehicle
may also be damaged; the
resulting repairs would not be
covered by the vehicle warranty.
Pull a trailer only if all the steps in
this section have been followed.
Ask your dealer for advice and
information about towing a trailer
with the vehicle.
Caution
Pulling a trailer improperly can
damage the vehicle and result in
costly repairs not covered by the
vehicle warranty. To pull a trailer
correctly, follow the advice in this
section and see your dealer for
important information about
towing a trailer with the vehicle.
See Vehicle Load Limits 0239 for
more information about the vehicle's
maximum load capacity.
To identify the trailering capacity of
the vehicle, read the information in
“Weight of the Trailer” later in this
section.
Trailering is different than just
driving the vehicle by itself.
Trailering means changes in
handling, acceleration, braking,
durability, and fuel economy.
Successful, safe trailering takes
correct equipment, and it has to be
used properly.
Page 322 of 501
Chevrolet Silverado Owner Manual (GMNA-Localizing-U.S./Canada/Mexico-
11349200) - 2018 - CRC - 2/27/18
Driving and Operating 321
Trailer Wiring Harness
The vehicle is equipped with one of
the following wiring harnesses for
towing a trailer or hauling a slide-in
camper.
Basic Trailer Wiring
All regular, double cab, and crew
cab pickups have a seven-wire
trailer towing harness.
For vehicles not equipped with
heavy-duty trailering, the harness is
secured to the vehicle's frame
behind the spare tire mount. The
harness requires the installation of a
trailer connector, which is available
through your dealer.
Use only a round, seven-wire
connector with flat blade terminals
meeting SAE J2863 specifications
for proper electrical connectivity.
The seven-wire harness contains
the following trailer circuits:
.Green/Violet: Right Stop/Turn
Signal
. Yellow/Gray: Left Stop/Turn
Signal .
Gray/Brown: Taillamps/Parking
Lamps
. White/Green: Back-up Lamps
. Red/Green: Battery Feed
. White: Ground
. Blue: Electric Trailer Brake
The fuse for the electric trailer brake
circuit is installed in the underhood
electrical center, but the wires may
not be connected. They should be
connected by your dealer or a
qualified service center. To control
electric trailer brakes, a trailer brake
controller needs to be installed on
the vehicle by your dealer or a
qualified service center, see
“Electric Brake Control Wiring
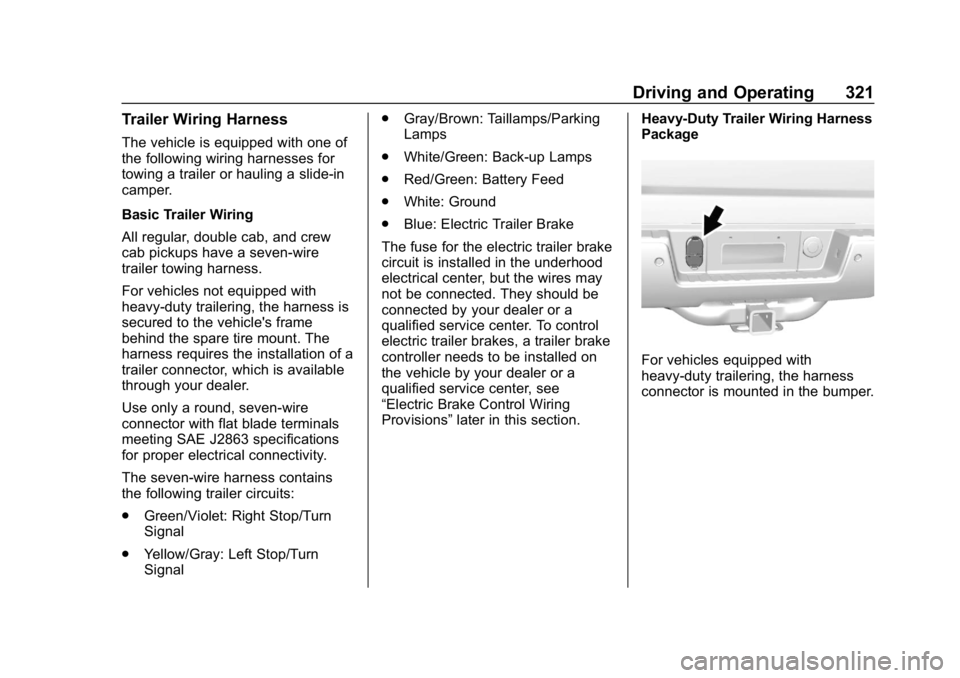
Provisions” later in this section. Heavy-Duty Trailer Wiring Harness
Package
For vehicles equipped with
heavy-duty trailering, the harness
connector is mounted in the bumper.
Page 324 of 501
Chevrolet Silverado Owner Manual (GMNA-Localizing-U.S./Canada/Mexico-
11349200) - 2018 - CRC - 2/27/18
Driving and Operating 323
.Black: Ground
Be sure to consult the aftermarket
electric brake controller owner ’s
manual to determine wire color
coding of the electric trailer brake
controller. The wire colors on the
brake controller may be different
from the vehicle.
The electric trailer brake controller
should be installed by your dealer or
a qualified service center.
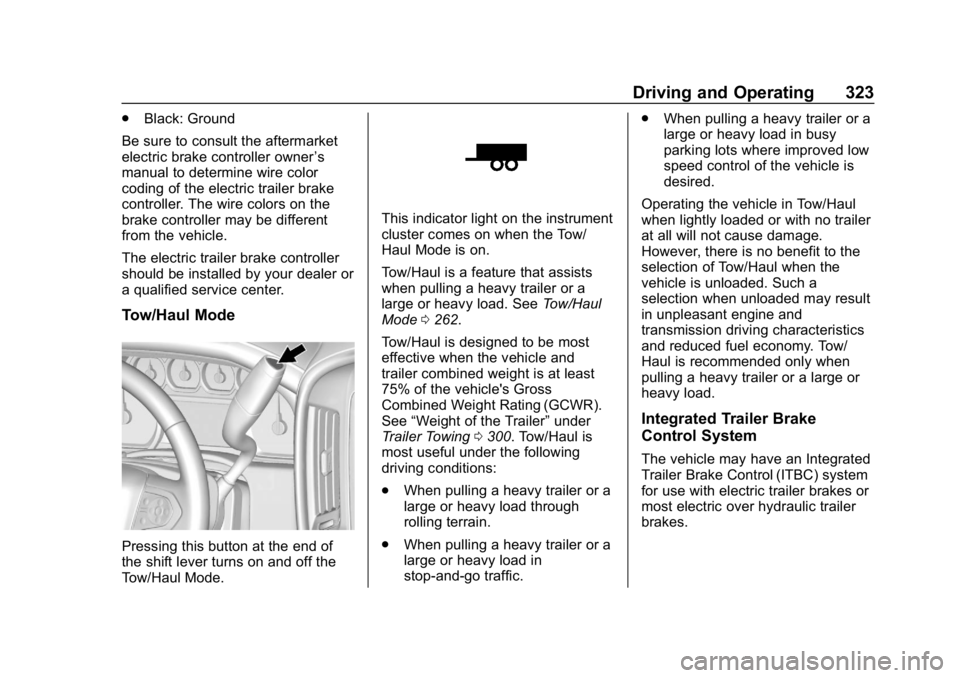
Tow/Haul Mode
Pressing this button at the end of
the shift lever turns on and off the
Tow/Haul Mode.
This indicator light on the instrument
cluster comes on when the Tow/
Haul Mode is on.
Tow/Haul is a feature that assists
when pulling a heavy trailer or a
large or heavy load. See Tow/Haul
Mode 0262.
Tow/Haul is designed to be most
effective when the vehicle and
trailer combined weight is at least
75% of the vehicle's Gross
Combined Weight Rating (GCWR).
See “Weight of the Trailer” under
Trailer Towing 0300. Tow/Haul is
most useful under the following
driving conditions:
. When pulling a heavy trailer or a
large or heavy load through
rolling terrain.
. When pulling a heavy trailer or a
large or heavy load in
stop-and-go traffic. .
When pulling a heavy trailer or a
large or heavy load in busy
parking lots where improved low
speed control of the vehicle is
desired.
Operating the vehicle in Tow/Haul
when lightly loaded or with no trailer
at all will not cause damage.
However, there is no benefit to the
selection of Tow/Haul when the
vehicle is unloaded. Such a
selection when unloaded may result
in unpleasant engine and
transmission driving characteristics
and reduced fuel economy. Tow/
Haul is recommended only when
pulling a heavy trailer or a large or
heavy load.
Integrated Trailer Brake
Control System
The vehicle may have an Integrated
Trailer Brake Control (ITBC) system
for use with electric trailer brakes or
most electric over hydraulic trailer
brakes.
Page 326 of 501
Chevrolet Silverado Owner Manual (GMNA-Localizing-U.S./Canada/Mexico-
11349200) - 2018 - CRC - 2/27/18
Driving and Operating 325
panel allows adjustment to the
amount of output, referred to as
Trailer Gain, available to the trailer
brakes and allows manual
application of the trailer brakes. The
Trailer Brake Control Panel is used
along with the Trailer Brake Display
Page on the Driver Information
Center (DIC) to adjust and display
power output to the trailer brakes.
Trailer Brake DIC Display Page
The ITBC system displays
messages in the DIC.
The display page indicates Trailer
Gain setting, power output to the
trailer brakes, trailer connection, and
system operational status.
To display the Trailer Brake Display
Page, do any of the following:
.Scroll through the DIC menu
pages.
. Press a Trailer Gain button.
If the Trailer Brake Display Page
is not currently displayed, press
a Trailer Gain button to recall the
current Trailer Gain setting. Each press and release of the
gain buttons will then change the
Trailer Gain setting.
. Activate the Manual Trailer
Brake Apply Lever.
TRAILER GAIN: This setting can be
adjusted from 0.0 to 10.0 with either
a trailer connected or disconnected.
To adjust the Trailer Gain, press one
of the Trailer Gain Adjustment
buttons. Press and hold a gain
button to continuously adjust the
Trailer Gain. To turn the output to
the trailer off, adjust the Trailer Gain
setting to 0.0 (zero).
TRAILER OUTPUT: This displays
anytime a trailer with electric brakes
is connected. Output to the trailer
brakes is based on the amount of
vehicle braking present and relative
to the Trailer Gain setting. Output is
displayed from 0 to 100% for each
gain setting.
The Trailer Output will indicate
“- - - - - -” on the Trailer Brake
Display Page whenever the
following occur:
. No trailer is connected. .
A trailer without electric brakes
is connected (no DIC message
will display).
. A trailer with electric brakes has
become disconnected (a
CHECK TRAILER WIRING
message will also display on
the DIC).
. There is a fault present in the
wiring to the trailer brakes (a
CHECK TRAILER WIRING
message will also display on
the DIC).
. The ITBC system is not working
due to a fault (a SERVICE
TRAILER BRAKE SYSTEM
message will also display in
the DIC).
Manual Trailer Brake Apply
The Manual Trailer Brake Apply
Lever is used to apply the trailer ’s
electric brakes independent of the
vehicle’s brakes. Sliding the lever to
the left will apply only the trailer
brakes. Use this lever to adjust
Trailer Gain to properly adjust the
power output to the trailer brakes.