2018 CHEVROLET SILVERADO 1500 four wheel drive
[x] Cancel search: four wheel drivePage 268 of 501
Chevrolet Silverado Owner Manual (GMNA-Localizing-U.S./Canada/Mexico-
11349200) - 2018 - CRC - 2/27/18
Driving and Operating 267
2. Shift the transmission intoN (Neutral).
3. Shift the transfer case shift lever in one continuous motion.
4. Shifting with the vehicle at a stop may be more difficult. It is
possible that the shift will not
complete and the transfer case
will remain in N (Neutral). This
is normal. To complete the
shift, with the engine running,
shift the transmission to
D (Drive) and back to
N (Neutral), and reattempt the
transfer case shift.
Shifting In or Out of N (Neutral) 1. Have the engine running.
2. Set the parking brake. Press and hold the brake pedal. See
Parking Brake 0273.
3. Place the transmission into N (Neutral).
4. Shift the transfer case lever in one continuous motion into or
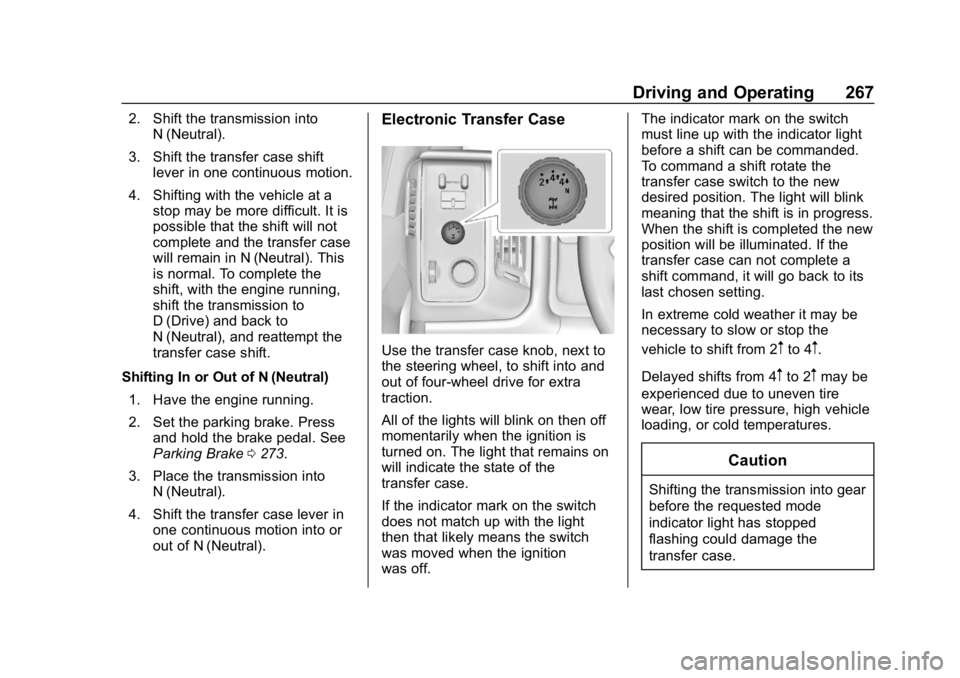
out of N (Neutral).Electronic Transfer Case
Use the transfer case knob, next to
the steering wheel, to shift into and
out of four-wheel drive for extra
traction.
All of the lights will blink on then off
momentarily when the ignition is
turned on. The light that remains on
will indicate the state of the
transfer case.
If the indicator mark on the switch
does not match up with the light
then that likely means the switch
was moved when the ignition
was off. The indicator mark on the switch
must line up with the indicator light
before a shift can be commanded.
To command a shift rotate the
transfer case switch to the new
desired position. The light will blink
meaning that the shift is in progress.
When the shift is completed the new
position will be illuminated. If the
transfer case can not complete a
shift command, it will go back to its
last chosen setting.
In extreme cold weather it may be
necessary to slow or stop the
vehicle to shift from 2mto 4m.
Delayed shifts from 4
mto 2mmay be
experienced due to uneven tire
wear, low tire pressure, high vehicle
loading, or cold temperatures.
Caution
Shifting the transmission into gear
before the requested mode
indicator light has stopped
flashing could damage the
transfer case.
Page 269 of 501
Chevrolet Silverado Owner Manual (GMNA-Localizing-U.S./Canada/Mexico-
11349200) - 2018 - CRC - 2/27/18
268 Driving and Operating
The settings are:
N (Neutral) :Use only when the
vehicle needs to be towed.
See Recreational Vehicle Towing
0 425 orTowing the Vehicle 0425.
2
m(Two-Wheel Drive High) : Use
for driving on most streets and
highways. The front axle is not
engaged. This setting provides the
best fuel economy.
4
n(Four-Wheel Drive Low) : This
setting engages the front axle and
delivers extra torque. Choose 4
nif
driving off-road in deep sand, deep
mud, or deep snow, and while
climbing or descending steep hills.
When engaged, keep vehicle speed
below 72 km/h (45 mph).
Shifting into 4
nwill turn Traction
Control and StabiliTrak off. See
Traction Control/Electronic Stability
Control 0276.
4
m(Four-Wheel Drive High) : Use
when extra traction is needed. The
front axle engages and helps when
driving on snowy or icy roads, when off-roading, or when plowing snow.
The vehicle can be shifted from 2
m
to 4mwhile the vehicle is moving.
Shifting Into 4
m
Turn the knob to 4mat any speed
up to 121 km/h (75 mph), except
from 4
n. The indicator light will flash
while shifting and will remain on the
selected setting.
Shifting Into 2
m
Turn the knob to 2mat any speed,
except when shifting from 4
n.
Shifting Into 4
n
When 4nis engaged, vehicle speed
should be kept below 72 km/h
(45 mph).
1. The ignition must be on and the vehicle must be stopped or
moving less than 5 km/h
(3 mph) with the transmission
in N (Neutral). It is best for the
vehicle to be moving
1.6 to 3.2 km/h (1 to 2 mph). 2. Turn the knob to 4
n. Wait for
the 4
nindicator light to stop
flashing before shifting the
transmission into gear.
If the transmission is in gear and/or
moving more than 5 km/h (3 mph),
the 4
nindicator light will flash for
30 seconds and not complete the
shift. After 30 seconds the transfer
case will shift to 4
m. Turn the knob
to 4
mto see the indicator. With the
vehicle moving less than 5 km/h
(3 mph), and the transmission in
N (Neutral), attempt the shift again.
Shifting Out of 4
n
1. To shift out of 4nthe vehicle
must be stopped or moving
less than 5 km/h (3 mph) with
the transmission in N (Neutral)
and the ignition in on. It is best
for the vehicle to be moving
1.6 to 3.2 km/h (1 to 2 mph).
Page 271 of 501
Chevrolet Silverado Owner Manual (GMNA-Localizing-U.S./Canada/Mexico-
11349200) - 2018 - CRC - 2/27/18
270 Driving and Operating
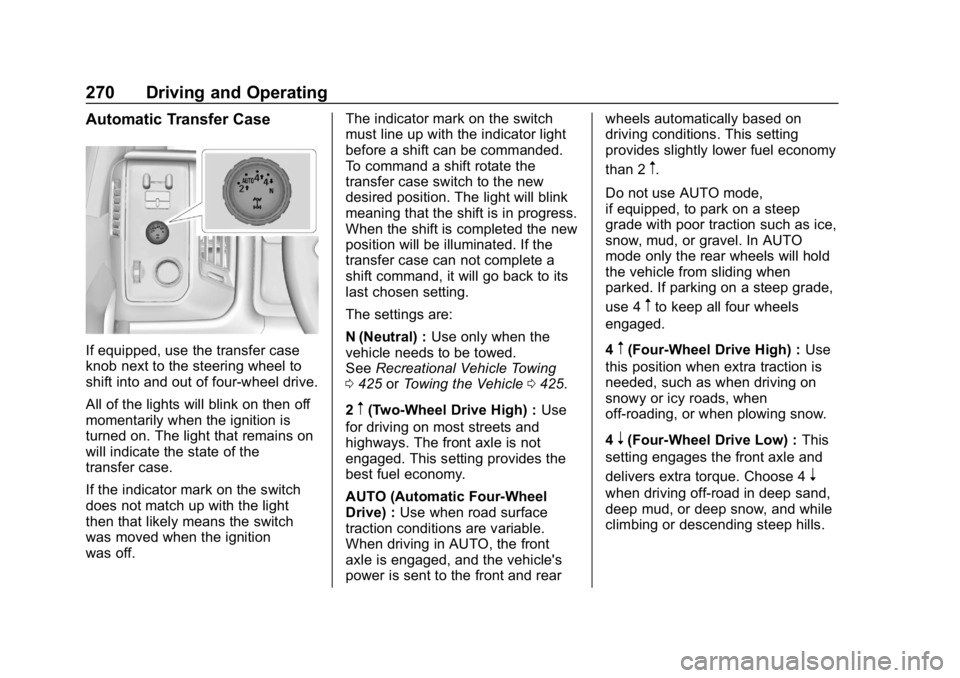
Automatic Transfer Case
If equipped, use the transfer case
knob next to the steering wheel to
shift into and out of four-wheel drive.
All of the lights will blink on then off
momentarily when the ignition is
turned on. The light that remains on
will indicate the state of the
transfer case.
If the indicator mark on the switch
does not match up with the light
then that likely means the switch
was moved when the ignition
was off.The indicator mark on the switch
must line up with the indicator light
before a shift can be commanded.
To command a shift rotate the
transfer case switch to the new
desired position. The light will blink
meaning that the shift is in progress.
When the shift is completed the new
position will be illuminated. If the
transfer case can not complete a
shift command, it will go back to its
last chosen setting.
The settings are:
N (Neutral) :
Use only when the
vehicle needs to be towed.
See Recreational Vehicle Towing
0 425 orTowing the Vehicle 0425.
2
m(Two-Wheel Drive High) : Use
for driving on most streets and
highways. The front axle is not
engaged. This setting provides the
best fuel economy.
AUTO (Automatic Four-Wheel
Drive) : Use when road surface
traction conditions are variable.
When driving in AUTO, the front
axle is engaged, and the vehicle's
power is sent to the front and rear wheels automatically based on
driving conditions. This setting
provides slightly lower fuel economy
than 2
m.
Do not use AUTO mode,
if equipped, to park on a steep
grade with poor traction such as ice,
snow, mud, or gravel. In AUTO
mode only the rear wheels will hold
the vehicle from sliding when
parked. If parking on a steep grade,
use 4
mto keep all four wheels
engaged.
4
m(Four-Wheel Drive High) : Use
this position when extra traction is
needed, such as when driving on
snowy or icy roads, when
off-roading, or when plowing snow.
4
n(Four-Wheel Drive Low) : This
setting engages the front axle and
delivers extra torque. Choose 4
n
when driving off-road in deep sand,
deep mud, or deep snow, and while
climbing or descending steep hills.
Page 277 of 501
Chevrolet Silverado Owner Manual (GMNA-Localizing-U.S./Canada/Mexico-
11349200) - 2018 - CRC - 2/27/18
276 Driving and Operating
Ride Control Systems
Traction Control/
Electronic Stability
Control
System Operation
The vehicle has a Traction Control
System (TCS) and StabiliTrak®, an
electronic stability control system.
These systems help limit wheel spin
and assist the driver in maintaining
control, especially on slippery road
conditions.
TCS activates if it senses any of the
drive wheels are spinning or
beginning to lose traction. When this
happens, TCS applies the brakes to
the spinning wheels and reduces
engine power to limit wheel spin.
StabiliTrak activates when the
vehicle senses a difference between
the intended path and the direction
the vehicle is actually traveling.
StabiliTrak selectively applies
braking pressure to any one of the
vehicle wheel brakes to assist the
driver in keeping the vehicle on the intended path. Trailer Sway Control
(TSC) is also on automatically when
the vehicle is started. See
Trailer
Sway Control (TSC) 0327.
If cruise control is being used and
traction control or StabiliTrak begins
to limit wheel spin, cruise control will
disengage. Cruise control may be
turned back on when road
conditions allow.
Both systems come on
automatically when the vehicle is
started and begins to move. The
systems may be heard or felt while
they are operating or while
performing diagnostic checks. This
is normal and does not mean there
is a problem with the vehicle.
It is recommended to leave both
systems on for normal driving
conditions, but it may be necessary
to turn TCS off if the vehicle gets
stuck in sand, mud, ice, or snow.
See If the Vehicle Is Stuck 0238
and “Turning the Systems Off and
On” later in this section. When the transfer case (if equipped)
is in Four-Wheel Drive Low, the
stability system is automatically
disabled,
gcomes on, and the
appropriate message will appear on
the DIC. Both traction control and
StabiliTrak are automatically
disabled in this condition.
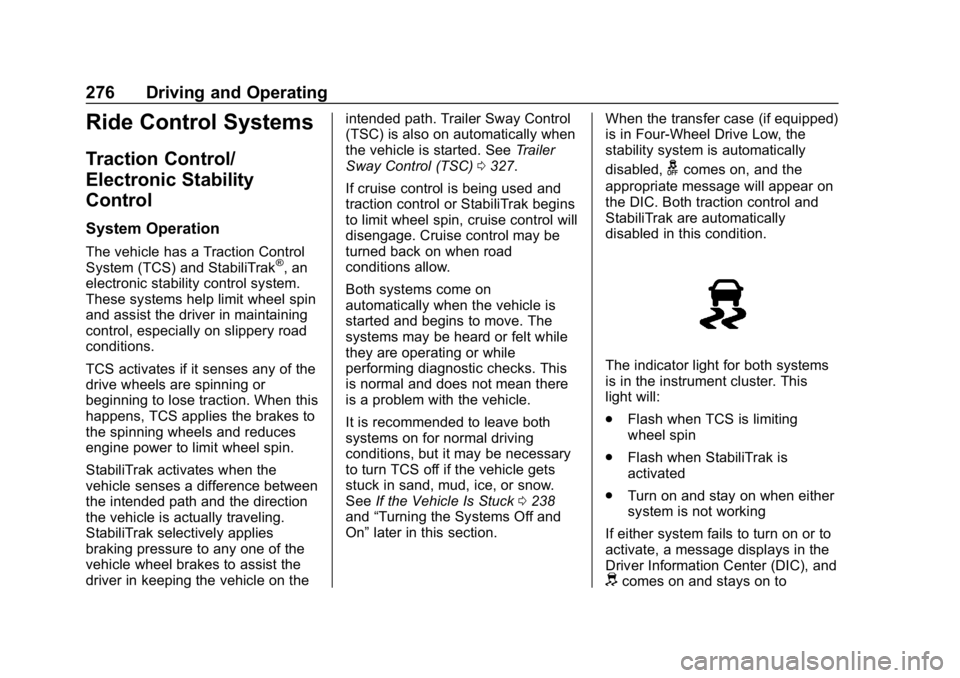
The indicator light for both systems
is in the instrument cluster. This
light will:
. Flash when TCS is limiting
wheel spin
. Flash when StabiliTrak is
activated
. Turn on and stay on when either
system is not working
If either system fails to turn on or to
activate, a message displays in the
Driver Information Center (DIC), and
dcomes on and stays on to
Page 279 of 501
Chevrolet Silverado Owner Manual (GMNA-Localizing-U.S./Canada/Mexico-
11349200) - 2018 - CRC - 2/27/18
278 Driving and Operating
grades in a forward or reverse gear.
The HDC switch is on the center
stack, below the climate controls.
Press
5to enable or disable HDC.
Vehicle speed must be below
50 km/h (31 mph).
When enabled, the HDC light
displays on the instrument cluster.
A blinking HDC light indicates the
system is actively applying the
brakes to maintain vehicle speed.
HDC can maintain vehicle speeds
between 1 and 30 km/h (1 and
19 mph) on grades greater than or
equal to 10%. If HDC is to be used for more than
three minutes or on grades steeper
than 25%, the transfer case should
be put into Four-Wheel Drive Low
(4
n) to reduce the possibility of
brake overheating.
Noise from the hydraulic brake
control module is normal when HDC
is active.
When HDC is activated, the initial
HDC speed is set to the current
driving speed. It can be increased or
decreased by pressing +RES or
SET- on the steering wheel, or by
applying the accelerator or brake
pedal. This adjusted speed
becomes the new set speed.
HDC will remain enabled between
30 and 60 km/h (19 and 37 mph);
however, vehicle speed cannot be
set or maintained in this range. HDC
will automatically disable if the
vehicle speed is above 80 km/h
(50 mph) or above 60 km/h
(37 mph) for at least 30 seconds.
5must be pressed again to
re-enable HDC. HDC may disable
after an extended period of use.
If this happens, HDC will require
time to cool down. The length of
time HDC remains active depends
on road conditions, grade, set
speed, vehicle loading, and outside
temperature.
When enabled, if the vehicle speed
is above 30 km/h (19 mph) and
below 60 km/h (37 mph), a DIC
message will display.
Locking Rear Axle
Vehicles with a locking rear axle can
give more traction on snow, mud,
ice, sand, or gravel. It works like a
standard axle most of the time, but
when traction is low, this feature will
allow the rear wheel with the most
traction to move the vehicle.
Page 335 of 501
Chevrolet Silverado Owner Manual (GMNA-Localizing-U.S./Canada/Mexico-
11349200) - 2018 - CRC - 2/27/18
334 Vehicle Care
Vehicle Care
General Information
General Information . . . . . . . . . . 335
California Proposition65 Warning . . . . . . . . . . . . . . . . . 336
California Perchlorate Materials Requirements . . . . . 336
Accessories and Modifications . . . . . . . . . . . . . . . . 336
Vehicle Checks
Doing Your OwnService Work . . . . . . . . . . . . . . . 337
Hood . . . . . . . . . . . . . . . . . . . . . . . . . 337
Engine Compartment Overview . . . . . . . . . . . . . . . . . . . . 338
Engine Oil . . . . . . . . . . . . . . . . . . . . 343
Engine Oil Life System . . . . . . . 346
Automatic Transmission Fluid (6-Speed Transmission) . . . . . 347
Automatic Transmission Fluid (8-Speed Transmission) . . . . . 350
Manual Transmission Fluid . . . 350
Hydraulic Clutch . . . . . . . . . . . . . . 351
Engine Air Cleaner/Filter . . . . . . 351
Cooling System . . . . . . . . . . . . . . 352
Engine Overheating . . . . . . . . . . 356 Overheated Engine Protection
Operating Mode . . . . . . . . . . . . . 358
Engine Fan . . . . . . . . . . . . . . . . . . . 358
Power Steering Fluid (1500 Series) . . . . . . . . . . . . . . . . . . . . . . 359
Power Steering Fluid (2500/ 3500 Series) . . . . . . . . . . . . . . . . 359
Washer Fluid . . . . . . . . . . . . . . . . . 359
Brakes . . . . . . . . . . . . . . . . . . . . . . . 360
Brake Fluid . . . . . . . . . . . . . . . . . . . 361
Battery - North America . . . . . . 362
Four-Wheel Drive . . . . . . . . . . . . . 363
Front Axle . . . . . . . . . . . . . . . . . . . . 364
Rear Axle . . . . . . . . . . . . . . . . . . . . 365
Noise Control System . . . . . . . . 366
Starter Switch Check . . . . . . . . . 367
Automatic Transmission Shift Lock Control Function
Check . . . . . . . . . . . . . . . . . . . . . . . 368
Ignition Transmission Lock Check . . . . . . . . . . . . . . . . . . . . . . . 368
Park Brake and P (Park) Mechanism Check . . . . . . . . . . 368
Wiper Blade Replacement . . . . 369
Windshield Replacement . . . . . 369
Gas Strut(s) . . . . . . . . . . . . . . . . . . 370
Headlamp Aiming
Headlamp Aiming . . . . . . . . . . . . 371
Bulb Replacement
Bulb Replacement . . . . . . . . . . . . 371
Halogen Bulbs . . . . . . . . . . . . . . . . 371
High Intensity Discharge (HID) Lighting . . . . . . . . . . . . . . . . . . . . . 371
LED Lighting . . . . . . . . . . . . . . . . . 371
Headlamps, Front Turn Signal,
Sidemarker, and Parking
Lamps . . . . . . . . . . . . . . . . . . . . . . 372
Fog Lamps . . . . . . . . . . . . . . . . . . . 373
Taillamps (Chassis Cab Models) . . . . . . . . . . . . . . . . . . . . . 373
Taillamps, Turn Signal, Stoplamps, and Back-Up
Lamps . . . . . . . . . . . . . . . . . . . . . . 373
Center High-Mounted Stoplamp (CHMSL) and
Cargo Lamp . . . . . . . . . . . . . . . . . 375
Electrical System
High Voltage Devices andWiring . . . . . . . . . . . . . . . . . . . . . . . 375
Electrical System Overload . . . 375
Fuses and Circuit Breakers . . . 376
Engine Compartment Fuse Block . . . . . . . . . . . . . . . . . . . . . . . . 376
Instrument Panel Fuse Block (Right) . . . . . . . . . . . . . . . . . . . . . . 380
Instrument Panel Fuse Block (Left) . . . . . . . . . . . . . . . . . 381
Page 364 of 501
Chevrolet Silverado Owner Manual (GMNA-Localizing-U.S./Canada/Mexico-
11349200) - 2018 - CRC - 2/27/18
Vehicle Care 363
{Warning
WARNING:Battery posts,
terminals, and related
accessories contain lead and lead
compounds, chemicals known to
the State of California to cause
cancer and birth defects or other
reproductive harm. Batteries also
contain other chemicals known to
the State of California to cause
cancer. WASH HANDS AFTER
HANDLING. For more information
go to www.P65Warnings.ca.gov/
passenger-vehicle.
See California Proposition
65 Warning 0336 and the back
cover.
Vehicle Storage
{Warning
Batteries have acid that can burn
you and gas that can explode.
You can be badly hurt if you are
(Continued)
Warning (Continued)
not careful. SeeJump Starting -
North America 0421 for tips on
working around a battery without
getting hurt.
Infrequent Usage: Remove the
black, negative (−) cable from the
battery to keep the battery from
running down.
Extended Storage: Remove the
black, negative (−) cable from the
battery or use a battery trickle
charger.
Four-Wheel Drive
Transfer Case
When to Check Lubricant
Refer to Maintenance Schedule
0 443 to determine when to check
the lubricant.
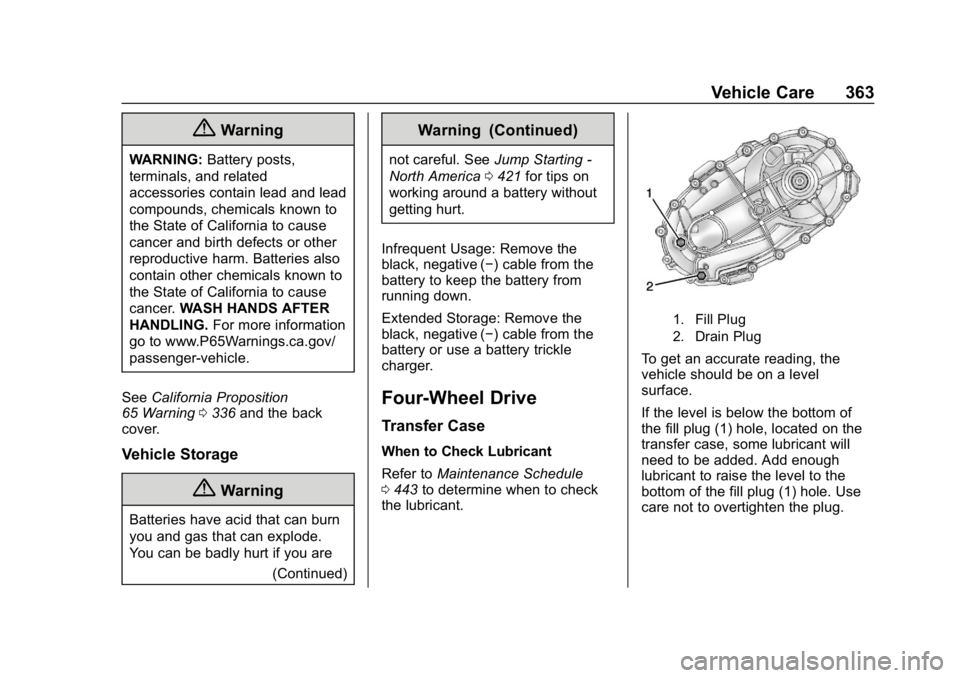
1. Fill Plug
2. Drain Plug
To get an accurate reading, the
vehicle should be on a level
surface.
If the level is below the bottom of
the fill plug (1) hole, located on the
transfer case, some lubricant will
need to be added. Add enough
lubricant to raise the level to the
bottom of the fill plug (1) hole. Use
care not to overtighten the plug.
Page 399 of 501

Chevrolet Silverado Owner Manual (GMNA-Localizing-U.S./Canada/Mexico-
11349200) - 2018 - CRC - 2/27/18
398 Vehicle Care
If the hazard warning flashers are
on, the tire fill alert visual feedback
will not work properly.
The TPMS will not activate the tire
fill alert properly under the following
conditions:
.There is interference from an
external device or transmitter.
. The air pressure from the
inflation device is not sufficient
to inflate the tire.
. There is a malfunction in
the TPMS.
. There is a malfunction in the
horn or turn signal lamps.
. The identification code of the
TPMS sensor is not registered to
the system.
. The battery of the TPMS sensor
is low.
If the tire fill alert does not operate
due to TPMS interference, move the
vehicle about 1 m (3 ft) back or
forward and try again. If the tire fill
alert feature is not working, use a
tire pressure gauge.TPMS Sensor Matching
Process
Each TPMS sensor has a unique
identification code. The identification
code needs to be matched to a new
tire/wheel position after rotating the
vehicle’s tires or replacing one or
more of the TPMS sensors. Also,
the TPMS sensor matching process
should be performed after replacing
a spare tire with a road tire
containing the TPMS sensor. The
malfunction light and the DIC
message should go off at the next
ignition cycle. The sensors are
matched to the tire/wheel positions,
using a TPMS relearn tool, in the
following order: driver side front tire,
passenger side front tire, passenger
side rear tire, and driver side rear.
See your dealer for service or to
purchase a relearn tool. A TPMS
relearn tool can also be purchased.
See Tire Pressure Monitor
Sensor Activation Tool at
www.gmtoolsandequipment.com or
call 1-800-GM TOOLS
(1-800-468-6657). There are two minutes to match the
first tire/wheel position, and
five minutes overall to match all four
tire/wheel positions. If it takes
longer, the matching process stops
and must be restarted.
The TPMS sensor matching
process is:
1. Set the parking brake.
2. Turn the ignition on without starting the vehicle.
3. Uplevel DIC Only: Make sure the Tire Pressure info page
option is turned on. The info
pages on the DIC can be
turned on and off through the
Settings menu. See Driver
Information Center (DIC) (Base
Level) 0155 orDriver
Information Center (DIC)
(Uplevel) 0156.
4. If the vehicle has an uplevel DIC, use the DIC controls on
the right side of the steering
wheel to scroll to the Tire
Pressure screen under the DIC
info page.