2018 CHEVROLET SILVERADO 1500 maintenance schedule
[x] Cancel search: maintenance schedulePage 348 of 501
Chevrolet Silverado Owner Manual (GMNA-Localizing-U.S./Canada/Mexico-
11349200) - 2018 - CRC - 2/27/18
Vehicle Care 347
1. Display the OIL LIFEREMAINING on the DIC. If the
vehicle does not have DIC
buttons, the vehicle must be in
P (Park) to access this display.
See Driver Information Center
(DIC) (Base Level) 0155 or
Driver Information Center (DIC)
(Uplevel) 0156.
2. Press and hold
V, or the trip
odometer reset stem if the
vehicle does not have DIC
buttons, for several seconds.
The oil life will change
to 100%.
The oil life system can also be reset
as follows:
1. Display the OIL LIFE REMAINING on the DIC.
See Driver Information Center
(DIC) (Base Level) 0155 or
Driver Information Center (DIC)
(Uplevel) 0156.
2. Fully press the accelerator pedal slowly three times within
five seconds. 3. Display the OIL LIFE
REMAINING on the DIC. If the
display shows 100%, the
system is reset.
If the vehicle has a CHANGE
ENGINE OIL SOON message and it
comes back on when the vehicle is
started and/or the OIL LIFE
REMAINING is near 0%, the engine
oil life system has not been reset.
Repeat the procedure.
Automatic Transmission
Fluid (6-Speed
Transmission)
When to Check and Change
Automatic Transmission Fluid
It is usually not necessary to check
the transmission fluid level. The only
reason for fluid loss is a
transmission leak or overheated
transmission. If a small leak is
suspected, then use the following
checking procedures to check the
fluid level. However, if there is a
large leak, then it may be necessary
to have the vehicle towed to a dealer service department and have
it repaired before driving the vehicle
further.
Caution
Use of the incorrect automatic
transmission fluid may damage
the vehicle, and the damage may
not be covered by the vehicle
warranty. Always use the
automatic transmission fluid listed
in
Recommended Fluids and
Lubricants 0451.
Change the fluid and filter at the
scheduled maintenance intervals
listed in Maintenance Schedule
0 443. Be sure to use the
transmission fluid listed in
Recommended Fluids and
Lubricants 0451.
Page 351 of 501
Chevrolet Silverado Owner Manual (GMNA-Localizing-U.S./Canada/Mexico-
11349200) - 2018 - CRC - 2/27/18
350 Vehicle Care
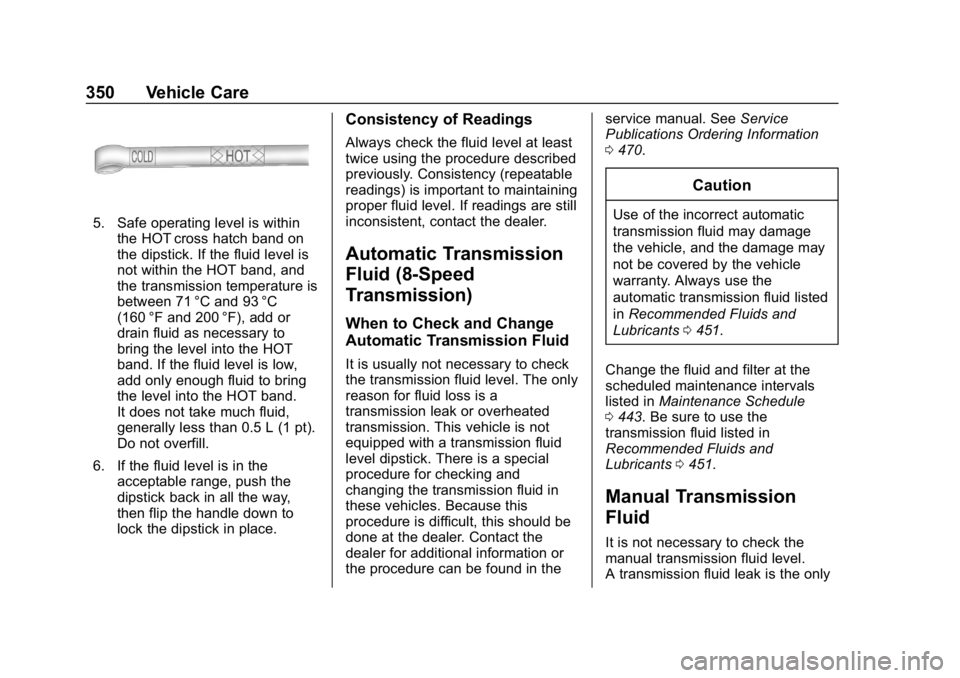
5. Safe operating level is withinthe HOT cross hatch band on
the dipstick. If the fluid level is
not within the HOT band, and
the transmission temperature is
between 71 °C and 93 °C
(160 °F and 200 °F), add or
drain fluid as necessary to
bring the level into the HOT
band. If the fluid level is low,
add only enough fluid to bring
the level into the HOT band.
It does not take much fluid,
generally less than 0.5 L (1 pt).
Do not overfill.
6. If the fluid level is in the acceptable range, push the
dipstick back in all the way,
then flip the handle down to
lock the dipstick in place.
Consistency of Readings
Always check the fluid level at least
twice using the procedure described
previously. Consistency (repeatable
readings) is important to maintaining
proper fluid level. If readings are still
inconsistent, contact the dealer.
Automatic Transmission
Fluid (8-Speed
Transmission)
When to Check and Change
Automatic Transmission Fluid
It is usually not necessary to check
the transmission fluid level. The only
reason for fluid loss is a
transmission leak or overheated
transmission. This vehicle is not
equipped with a transmission fluid
level dipstick. There is a special
procedure for checking and
changing the transmission fluid in
these vehicles. Because this
procedure is difficult, this should be
done at the dealer. Contact the
dealer for additional information or
the procedure can be found in the service manual. See
Service
Publications Ordering Information
0 470.
Caution
Use of the incorrect automatic
transmission fluid may damage
the vehicle, and the damage may
not be covered by the vehicle
warranty. Always use the
automatic transmission fluid listed
in Recommended Fluids and
Lubricants 0451.
Change the fluid and filter at the
scheduled maintenance intervals
listed in Maintenance Schedule
0 443. Be sure to use the
transmission fluid listed in
Recommended Fluids and
Lubricants 0451.
Manual Transmission
Fluid
It is not necessary to check the
manual transmission fluid level.
A transmission fluid leak is the only
Page 352 of 501
Chevrolet Silverado Owner Manual (GMNA-Localizing-U.S./Canada/Mexico-
11349200) - 2018 - CRC - 2/27/18
Vehicle Care 351
reason for fluid loss. If a leak
occurs, take the vehicle to your
dealer service department and have
it repaired as soon as possible. See
Recommended Fluids and
Lubricants0451 for the proper fluid
to use.
Hydraulic Clutch
For vehicles with a manual
transmission, it is not necessary to
regularly check clutch fluid unless
you suspect there is a leak in the
system. Adding fluid will not correct
a leak. A fluid loss in this system
could indicate a problem. Have the
system inspected and repaired.
When to Check and What
to Use
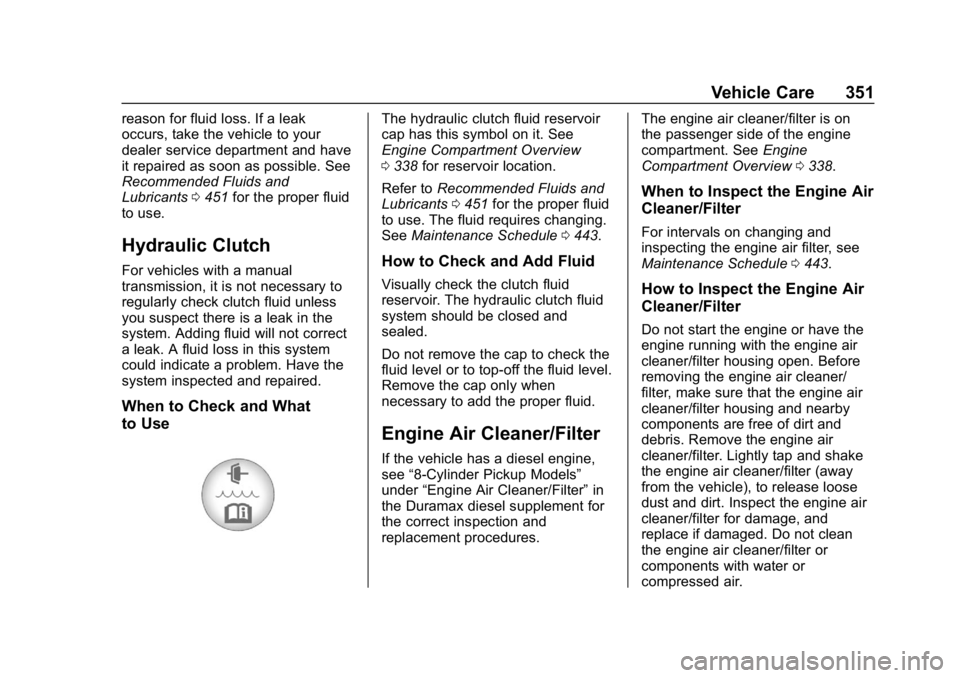
The hydraulic clutch fluid reservoir
cap has this symbol on it. See
Engine Compartment Overview
0 338 for reservoir location.
Refer to Recommended Fluids and
Lubricants 0451 for the proper fluid
to use. The fluid requires changing.
See Maintenance Schedule 0443.
How to Check and Add Fluid
Visually check the clutch fluid
reservoir. The hydraulic clutch fluid
system should be closed and
sealed.
Do not remove the cap to check the
fluid level or to top-off the fluid level.
Remove the cap only when
necessary to add the proper fluid.
Engine Air Cleaner/Filter
If the vehicle has a diesel engine,
see “8-Cylinder Pickup Models”
under “Engine Air Cleaner/Filter” in
the Duramax diesel supplement for
the correct inspection and
replacement procedures. The engine air cleaner/filter is on
the passenger side of the engine
compartment. See
Engine
Compartment Overview 0338.
When to Inspect the Engine Air
Cleaner/Filter
For intervals on changing and
inspecting the engine air filter, see
Maintenance Schedule 0443.
How to Inspect the Engine Air
Cleaner/Filter
Do not start the engine or have the
engine running with the engine air
cleaner/filter housing open. Before
removing the engine air cleaner/
filter, make sure that the engine air
cleaner/filter housing and nearby
components are free of dirt and
debris. Remove the engine air
cleaner/filter. Lightly tap and shake
the engine air cleaner/filter (away
from the vehicle), to release loose
dust and dirt. Inspect the engine air
cleaner/filter for damage, and
replace if damaged. Do not clean
the engine air cleaner/filter or
components with water or
compressed air.
Page 363 of 501
Chevrolet Silverado Owner Manual (GMNA-Localizing-U.S./Canada/Mexico-
11349200) - 2018 - CRC - 2/27/18
362 Vehicle Care
Warning (Continued)
Add brake fluid only when work is
done on the brake hydraulic
system.
When the brake fluid falls to a low
level, the brake warning light comes
on. See Brake System Warning
Light 0149.
Brake fluid absorbs water over time.
Replace brake fluid at the specified
intervals to prevent increased
stopping distance. See Maintenance
Schedule 0443.
Checking Brake Fluid
Check brake fluid by looking at the
brake fluid reservoir. See Engine
Compartment Overview 0338.
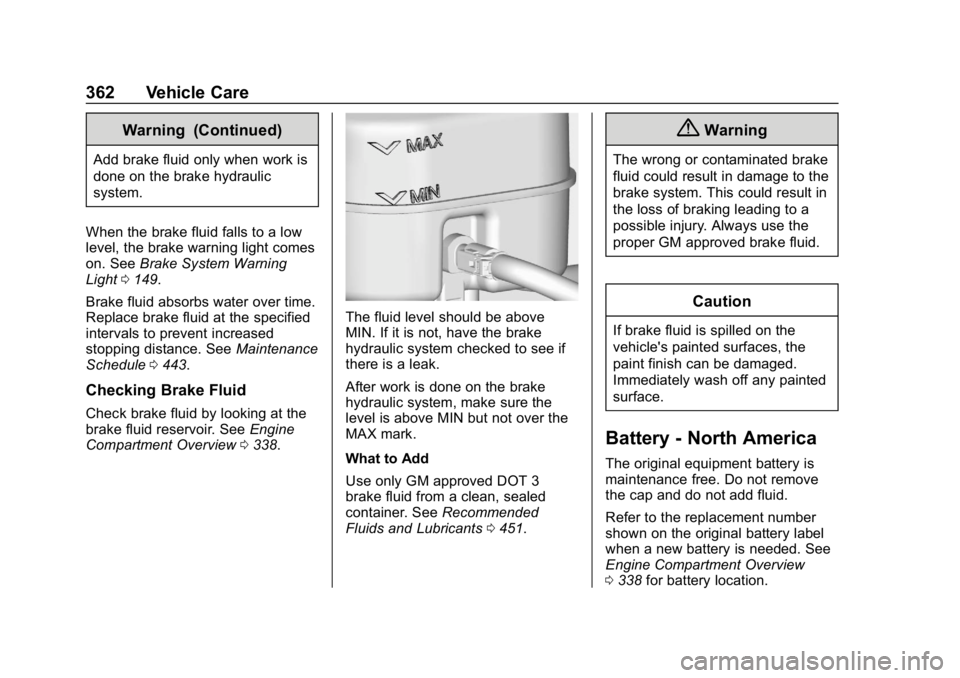
The fluid level should be above
MIN. If it is not, have the brake
hydraulic system checked to see if
there is a leak.
After work is done on the brake
hydraulic system, make sure the
level is above MIN but not over the
MAX mark.
What to Add
Use only GM approved DOT 3
brake fluid from a clean, sealed
container. See Recommended
Fluids and Lubricants 0451.
{Warning
The wrong or contaminated brake
fluid could result in damage to the
brake system. This could result in
the loss of braking leading to a
possible injury. Always use the
proper GM approved brake fluid.
Caution
If brake fluid is spilled on the
vehicle's painted surfaces, the
paint finish can be damaged.
Immediately wash off any painted
surface.
Battery - North America
The original equipment battery is
maintenance free. Do not remove
the cap and do not add fluid.
Refer to the replacement number
shown on the original battery label
when a new battery is needed. See
Engine Compartment Overview
0338 for battery location.
Page 364 of 501
Chevrolet Silverado Owner Manual (GMNA-Localizing-U.S./Canada/Mexico-
11349200) - 2018 - CRC - 2/27/18
Vehicle Care 363
{Warning
WARNING:Battery posts,
terminals, and related
accessories contain lead and lead
compounds, chemicals known to
the State of California to cause
cancer and birth defects or other
reproductive harm. Batteries also
contain other chemicals known to
the State of California to cause
cancer. WASH HANDS AFTER
HANDLING. For more information
go to www.P65Warnings.ca.gov/
passenger-vehicle.
See California Proposition
65 Warning 0336 and the back
cover.
Vehicle Storage
{Warning
Batteries have acid that can burn
you and gas that can explode.
You can be badly hurt if you are
(Continued)
Warning (Continued)
not careful. SeeJump Starting -
North America 0421 for tips on
working around a battery without
getting hurt.
Infrequent Usage: Remove the
black, negative (−) cable from the
battery to keep the battery from
running down.
Extended Storage: Remove the
black, negative (−) cable from the
battery or use a battery trickle
charger.
Four-Wheel Drive
Transfer Case
When to Check Lubricant
Refer to Maintenance Schedule
0 443 to determine when to check
the lubricant.
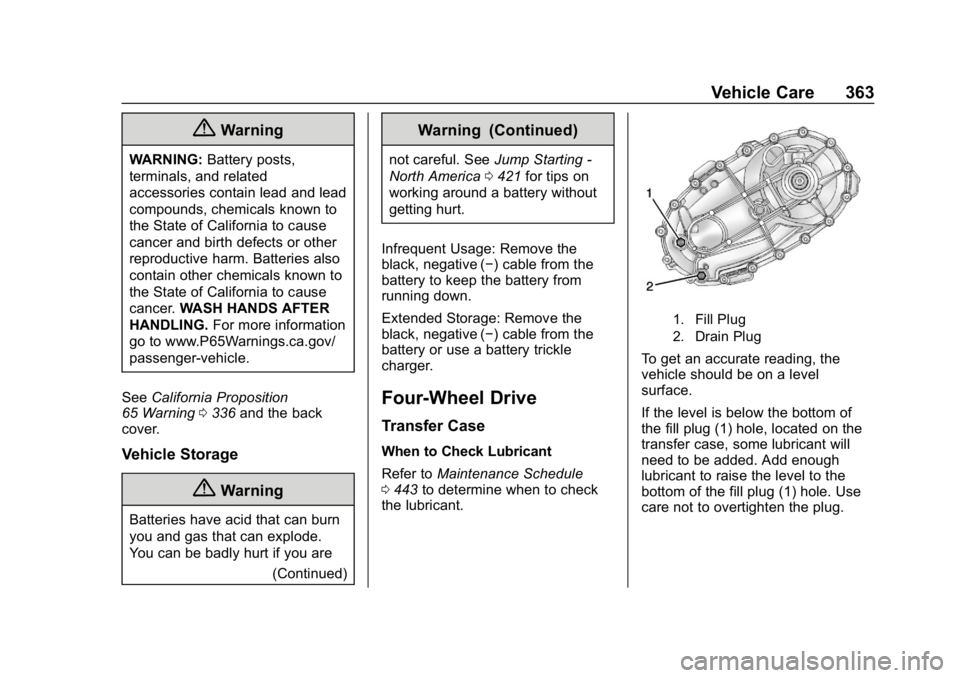
1. Fill Plug
2. Drain Plug
To get an accurate reading, the
vehicle should be on a level
surface.
If the level is below the bottom of
the fill plug (1) hole, located on the
transfer case, some lubricant will
need to be added. Add enough
lubricant to raise the level to the
bottom of the fill plug (1) hole. Use
care not to overtighten the plug.
Page 365 of 501
Chevrolet Silverado Owner Manual (GMNA-Localizing-U.S./Canada/Mexico-
11349200) - 2018 - CRC - 2/27/18
364 Vehicle Care
When to Change Lubricant
Refer toMaintenance Schedule
0 443 to determine how often to
change the lubricant.
What to Use
Refer to Recommended Fluids and
Lubricants 0451 to determine what
kind of lubricant to use.
Front Axle
When to Check and Change
Lubricant
It is not necessary to regularly
check front axle fluid unless a leak
is suspected, or an unusual noise is
heard. A fluid loss could indicate a
problem. Have it inspected and
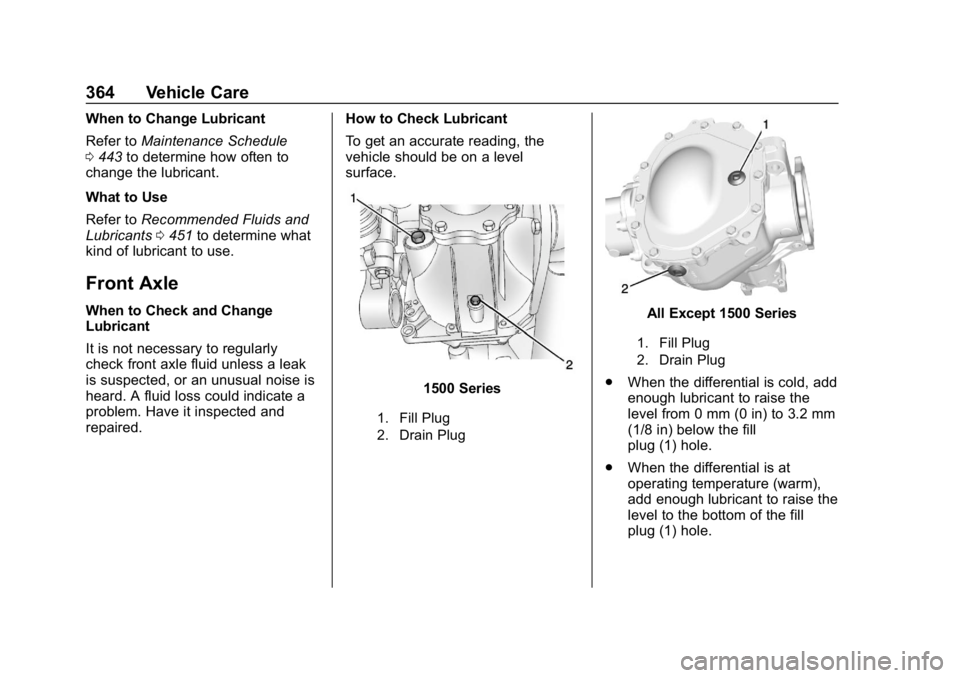
repaired. How to Check Lubricant
To get an accurate reading, the
vehicle should be on a level
surface.
1500 Series
1. Fill Plug
2. Drain Plug
All Except 1500 Series
1. Fill Plug
2. Drain Plug
.
When the differential is cold, add
enough lubricant to raise the
level from 0 mm (0 in) to 3.2 mm
(1/8 in) below the fill
plug (1) hole.
. When the differential is at
operating temperature (warm),
add enough lubricant to raise the
level to the bottom of the fill
plug (1) hole.
Page 367 of 501
Chevrolet Silverado Owner Manual (GMNA-Localizing-U.S./Canada/Mexico-
11349200) - 2018 - CRC - 2/27/18
366 Vehicle Care
fill plug hole, located on the rear
axle. Add only enough fluid to
reach the proper level.
. For all 6.0L 2500HD Series
applications, the proper level is
from 0 mm to 13 mm (0 to 0.5 in)
below the bottom of the fill plug
hole, located on the rear axle.
Add only enough fluid to reach
the proper level.
. For all 6.6L Duramax Diesel
2500HD Series applications and
all 3500 Series applications, the
proper level is from 17 mm to
21 mm (0.6 in to 0.8 in) below
the bottom of the fill plug hole,
located on the rear axle. Add
only enough fluid to reach the
proper level.
What to Use
Refer to Recommended Fluids and
Lubricants 0451 to determine what
kind of lubricant to use.
Noise Control System
Noise Emissions Warranty
General Motors warrants to the first
person who purchases this vehicle
for purposes other than resale and
to each subsequent purchaser that
this vehicle as manufactured by
General Motors, was designed, built
and equipped to conform at the time
it left General Motors’ s control with
all applicable U.S. EPA Noise
Control Regulations. This warranty
covers this vehicle as designed,
built and equipped by General
Motors, and is not limited to any
particular part, component or
system of the vehicle manufactured
by General Motors. Defects in
design, assembly or in any part,
component or system of the vehicle
as manufactured by General
Motors, which, at the time it left
General Motors’s control, caused
noise emissions to exceed Federal
standards, are covered by this
warranty for the life of the vehicle. The following information relates to
compliance with federal noise
emission standards for vehicles with
a Gross Vehicle Weight Rating
(GVWR) of more than 4 536 kg
(10,000 lb). The Maintenance
Schedule provides information on
maintaining the noise control system
to minimize degradation of the noise
emission control system during the
life of the vehicle. The noise control
system warranty is given in the
warranty manual.
These standards apply only to
vehicles sold in the United States.
TAMPERING WITH NOISE
CONTROL SYSTEM
PROHIBITED
Federal law prohibits the following
acts or the causing thereof:
1. The removal or rendering inoperative by any person,
other than for purposes of
maintenance, repair,
or replacement, of any device
or element of design
incorporated into any new
vehicle for the purpose of noise
Page 371 of 501
Chevrolet Silverado Owner Manual (GMNA-Localizing-U.S./Canada/Mexico-
11349200) - 2018 - CRC - 2/27/18
370 Vehicle Care
Gas Strut(s)
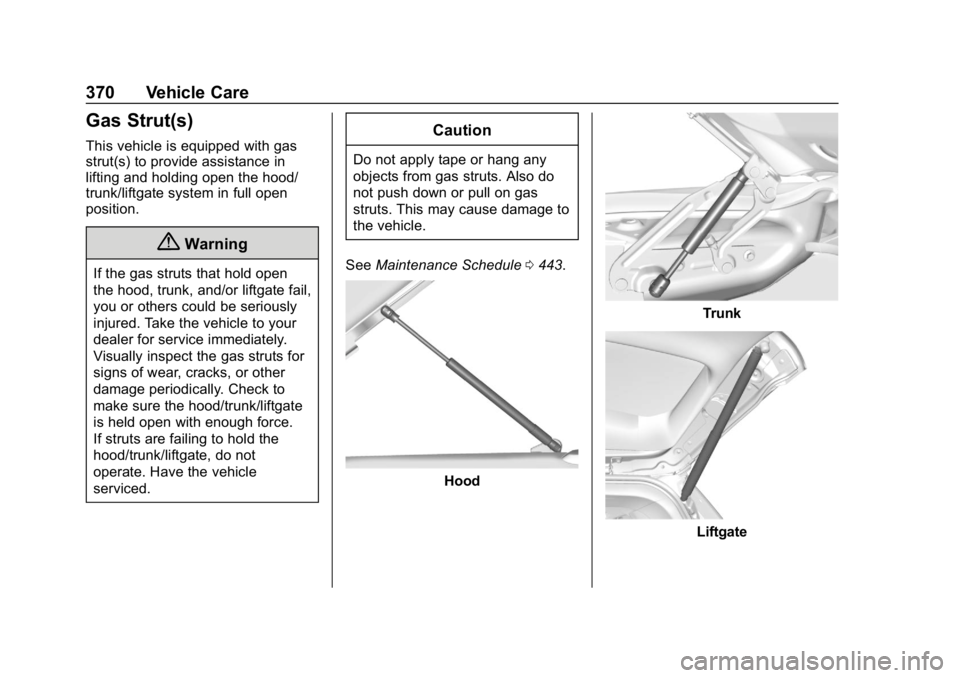
This vehicle is equipped with gas
strut(s) to provide assistance in
lifting and holding open the hood/
trunk/liftgate system in full open
position.
{Warning
If the gas struts that hold open
the hood, trunk, and/or liftgate fail,
you or others could be seriously
injured. Take the vehicle to your
dealer for service immediately.
Visually inspect the gas struts for
signs of wear, cracks, or other
damage periodically. Check to
make sure the hood/trunk/liftgate
is held open with enough force.
If struts are failing to hold the
hood/trunk/liftgate, do not
operate. Have the vehicle
serviced.
Caution
Do not apply tape or hang any
objects from gas struts. Also do
not push down or pull on gas
struts. This may cause damage to
the vehicle.
See Maintenance Schedule 0443.
Hood
Trunk
Liftgate