2018 CHEVROLET SILVERADO 1500 battery
[x] Cancel search: batteryPage 150 of 501
Chevrolet Silverado Owner Manual (GMNA-Localizing-U.S./Canada/Mexico-
11349200) - 2018 - CRC - 2/27/18
Instruments and Controls 149
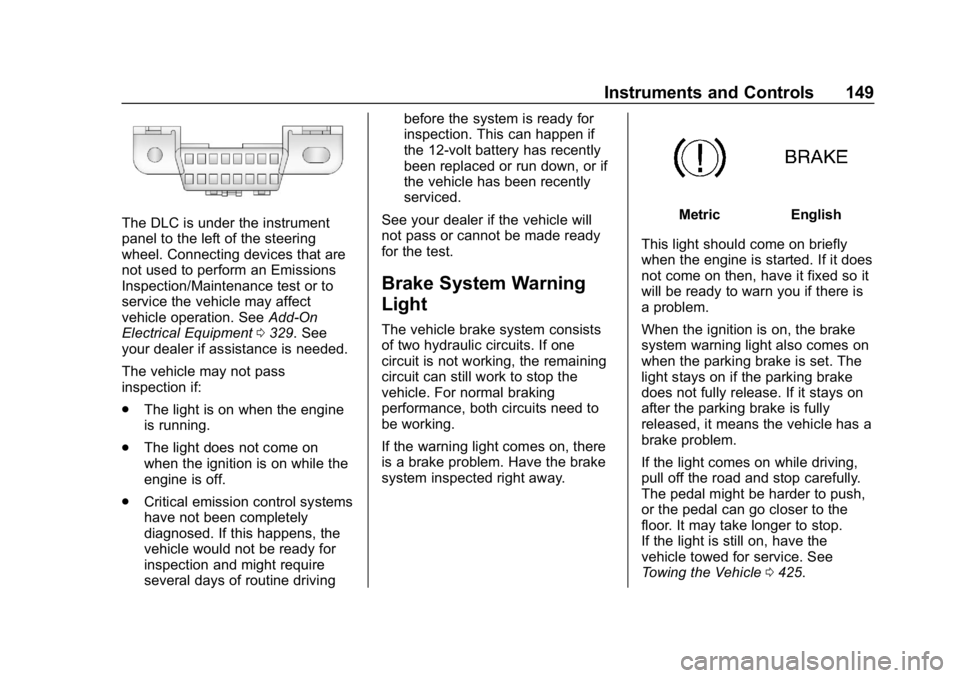
The DLC is under the instrument
panel to the left of the steering
wheel. Connecting devices that are
not used to perform an Emissions
Inspection/Maintenance test or to
service the vehicle may affect
vehicle operation. SeeAdd-On
Electrical Equipment 0329. See
your dealer if assistance is needed.
The vehicle may not pass
inspection if:
. The light is on when the engine
is running.
. The light does not come on
when the ignition is on while the
engine is off.
. Critical emission control systems
have not been completely
diagnosed. If this happens, the
vehicle would not be ready for
inspection and might require
several days of routine driving before the system is ready for
inspection. This can happen if
the 12-volt battery has recently
been replaced or run down, or if
the vehicle has been recently
serviced.
See your dealer if the vehicle will
not pass or cannot be made ready
for the test.
Brake System Warning
Light
The vehicle brake system consists
of two hydraulic circuits. If one
circuit is not working, the remaining
circuit can still work to stop the
vehicle. For normal braking
performance, both circuits need to
be working.
If the warning light comes on, there
is a brake problem. Have the brake
system inspected right away.
MetricEnglish
This light should come on briefly
when the engine is started. If it does
not come on then, have it fixed so it
will be ready to warn you if there is
a problem.
When the ignition is on, the brake
system warning light also comes on
when the parking brake is set. The
light stays on if the parking brake
does not fully release. If it stays on
after the parking brake is fully
released, it means the vehicle has a
brake problem.
If the light comes on while driving,
pull off the road and stop carefully.
The pedal might be harder to push,
or the pedal can go closer to the
floor. It may take longer to stop.
If the light is still on, have the
vehicle towed for service. See
Towing the Vehicle 0425.
Page 161 of 501
Chevrolet Silverado Owner Manual (GMNA-Localizing-U.S./Canada/Mexico-
11349200) - 2018 - CRC - 2/27/18
160 Instruments and Controls
.Brakes
. Ride Control Systems
. Driver Assistance Systems
. Cruise Control
. Lighting and Bulb Replacement
. Wiper/Washer Systems
. Doors and Windows
. Seat Belts
. Airbag Systems
. Engine and Transmission
. Tire Pressure
. Battery
Engine Power Messages
ENGINE POWER IS REDUCED
This message displays when the
vehicle's propulsion power is
reduced. Reduced propulsion power
can affect the vehicle's ability to
accelerate. If this message is on,
but there is no observed reduction in performance, proceed to your
destination. The performance may
be reduced the next time the vehicle
is driven. The vehicle may be driven
while this message is on, but
maximum acceleration and speed
may be reduced. Anytime this
message stays on, or displays
repeatedly, the vehicle should be
taken to your dealer for service as
soon as possible.
Vehicle Speed Messages
SPEED LIMITED TO
XXX KM/H (MPH)
This message shows that the
vehicle speed has been limited to
the speed displayed. The limited
speed is a protection for various
propulsion and vehicle systems,
such as lubrication, thermal,
suspension, Teen Driver if
equipped, or tires.
Vehicle
Personalization
Use the audio system controls to
access the personalization menus
for customizing vehicle features.
The following are all possible
personalization features. Depending
on the vehicle, some may not be
available.
Base Radio Audio System
Controls
{:
Press to access the Home
Page Menu.
QorR: Touch to scroll through the
menus or setup items.
0: Touch to exit or return to the
previous screen or menu.
Uplevel Radio Audio System
Controls
1. Touch the desired feature to display a list of available
options.
2. Select the desired feature setting.
Page 169 of 501
Chevrolet Silverado Owner Manual (GMNA-Localizing-U.S./Canada/Mexico-
11349200) - 2018 - CRC - 2/27/18
168 Instruments and Controls
Universal Remote
System
SeeRadio Frequency Statement
0 471.
Universal Remote System
Programming
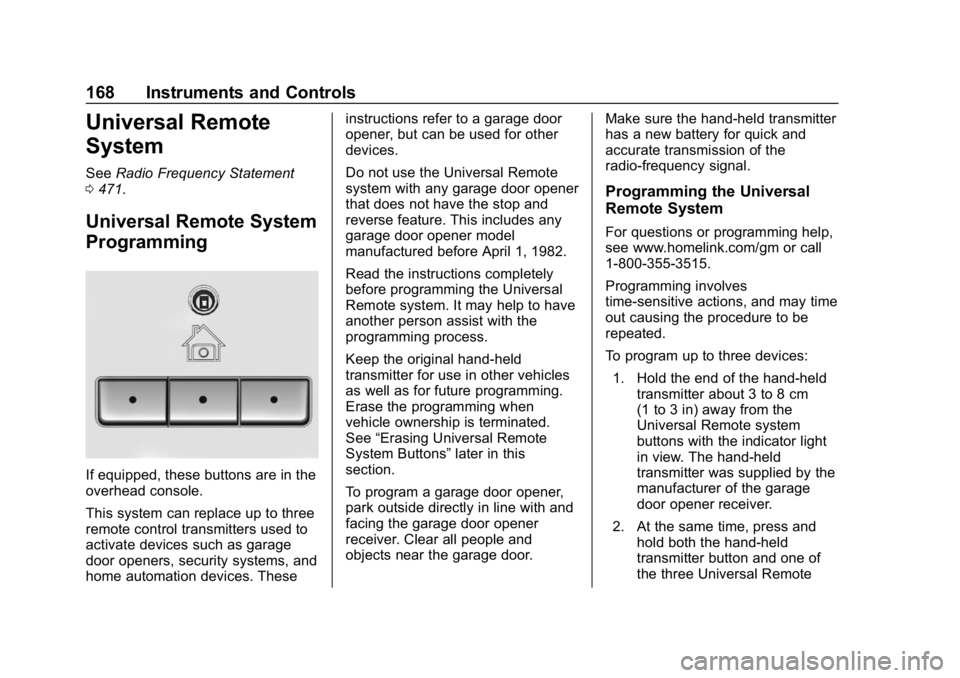
If equipped, these buttons are in the
overhead console.
This system can replace up to three
remote control transmitters used to
activate devices such as garage
door openers, security systems, and
home automation devices. These instructions refer to a garage door
opener, but can be used for other
devices.
Do not use the Universal Remote
system with any garage door opener
that does not have the stop and
reverse feature. This includes any
garage door opener model
manufactured before April 1, 1982.
Read the instructions completely
before programming the Universal
Remote system. It may help to have
another person assist with the
programming process.
Keep the original hand-held
transmitter for use in other vehicles
as well as for future programming.
Erase the programming when
vehicle ownership is terminated.
See
“Erasing Universal Remote
System Buttons” later in this
section.
To program a garage door opener,
park outside directly in line with and
facing the garage door opener
receiver. Clear all people and
objects near the garage door. Make sure the hand-held transmitter
has a new battery for quick and
accurate transmission of the
radio-frequency signal.
Programming the Universal
Remote System
For questions or programming help,
see www.homelink.com/gm or call
1-800-355-3515.
Programming involves
time-sensitive actions, and may time
out causing the procedure to be
repeated.
To program up to three devices:
1. Hold the end of the hand-held transmitter about 3 to 8 cm
(1 to 3 in) away from the
Universal Remote system
buttons with the indicator light
in view. The hand-held
transmitter was supplied by the
manufacturer of the garage
door opener receiver.
2. At the same time, press and hold both the hand-held
transmitter button and one of
the three Universal Remote
Page 172 of 501
Chevrolet Silverado Owner Manual (GMNA-Localizing-U.S./Canada/Mexico-
11349200) - 2018 - CRC - 2/27/18
Lighting 171
Lighting
Exterior Lighting
Exterior Lamp Controls . . . . . . . 171
Exterior Lamps OffReminder . . . . . . . . . . . . . . . . . . . 173
Headlamp High/Low-Beam Changer . . . . . . . . . . . . . . . . . . . . 173
Flash-to-Pass . . . . . . . . . . . . . . . . 174
Daytime Running Lamps (DRL) . . . . . . . . . . . . . . . 174
Automatic Headlamp System . . . . . . . . . . . . . . . . . . . . . . 174
Hazard Warning Flashers . . . . . 175
Turn and Lane-Change Signals . . . . . . . . . . . . . . . . . . . . . . 175
Fog Lamps . . . . . . . . . . . . . . . . . . . 176
Auxiliary Roof-Mounted Lamp . . . . . . . . 176
Interior Lighting
Instrument Panel IlluminationControl . . . . . . . . . . . . . . . . . . . . . . 177
Cargo Lamp . . . . . . . . . . . . . . . . . . 177
Dome Lamps . . . . . . . . . . . . . . . . . 178
Reading Lamps . . . . . . . . . . . . . . 178
Lighting Features
Entry Lighting . . . . . . . . . . . . . . . . 179
Exit Lighting . . . . . . . . . . . . . . . . . . 179
Battery Load Management . . . 179
Battery Power Protection . . . . . 180
Exterior Lighting Battery Saver . . . . . . . . . . . . . . . . . . . . . . . 180Exterior Lighting
Exterior Lamp Controls
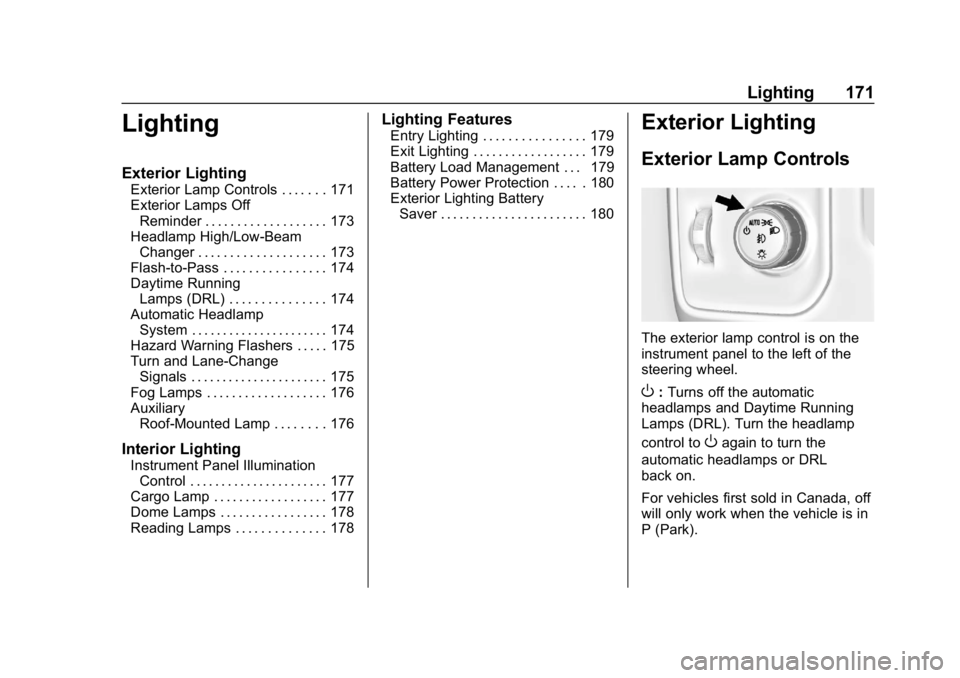
The exterior lamp control is on the
instrument panel to the left of the
steering wheel.
O: Turns off the automatic
headlamps and Daytime Running
Lamps (DRL). Turn the headlamp
control to
Oagain to turn the
automatic headlamps or DRL
back on.
For vehicles first sold in Canada, off
will only work when the vehicle is in
P (Park).
Page 173 of 501
Chevrolet Silverado Owner Manual (GMNA-Localizing-U.S./Canada/Mexico-
11349200) - 2018 - CRC - 2/27/18
172 Lighting
AUTO :Automatically turns on the
headlamps, parking lamps,
taillamps, instrument panel lights,
roof marker lamps (if equipped),
front/rear sidemarker lamps, and
license plate lamps.
When the vehicle is turned off and
the headlamps are in AUTO, the
headlamps turn off. When the key is
removed, they automatically turn on
for a set time. The time of the delay
can be changed using the DIC.
See Driver Information Center (DIC)
(Base Level) 0155 orDriver
Information Center (DIC) (Uplevel)
0 156.
;:Turns on the parking lamps
including all lamps, except the
headlamps.
2: Turns on the headlamps
together with the parking lamps and
instrument panel lights.
When the headlamps are turned on
while the vehicle is on, the
headlamps turn off automatically
10 minutes after the ignition is
turned off. When the headlamps are
turned on while the vehicle is off, the headlamps will stay on for
10 minutes before turning off to
prevent the battery from being
drained. Turn the headlamp control
off and then back to the headlamp
on position to make the headlamps
stay on for an additional 10 minutes.
To keep the lamps on for more than
10 minutes, the ignition must be on
or in ACC/ACCESSORY.
#:
If equipped, turns on the fog
lamps. See Fog Lamps0176.
IntelliBeam System
If equipped, this system turns the
vehicle's high-beam headlamps on
and off according to surrounding
traffic conditions.
The system turns the high-beam
headlamps on when it is dark
enough and there is no other traffic
present.
This light comes on in the
instrument cluster when the
IntelliBeam system is enabled.
Turning On and Enabling
IntelliBeam
To enable the IntelliBeam system,
with the turn signal lever in the
neutral position, turn the exterior
lamp control to AUTO. The blue
high-beam on light appears on the
instrument cluster when the high
beams are on.
Driving with IntelliBeam
The system only activates the high
beams when driving over 40 km/h
(25 mph).
There is a sensor near the top
center of the windshield that
automatically controls the system.
Keep this area of the windshield
clear of debris to allow for best
system performance.
The high-beam headlamps remain
on, under the automatic control,
until one of the following situations
occurs:
Page 180 of 501
Chevrolet Silverado Owner Manual (GMNA-Localizing-U.S./Canada/Mexico-
11349200) - 2018 - CRC - 2/27/18
Lighting 179
Lighting Features
Entry Lighting
Some exterior lamps and the interior
lamps turn on briefly at night, or in
areas with limited lighting, when
K
is pressed on the Remote Keyless
Entry (RKE) transmitter. When a
door is opened, the interior lamps
come on if the dome lamp control is
in the DOOR position. After about
30 seconds the exterior lamps turn
off. Entry lighting can be disabled
manually by changing the ignition
out of the OFF position, or by
pressing the RKE transmitter
Q
button.
This feature can be changed. See
“Vehicle Locator Lights”under
Vehicle Personalization 0160.
Exit Lighting
Some exterior lamps and the interior
lamps come on at night, or in areas
with limited lighting when the key is
removed from the ignition. The
exterior and interior lamps remain on for a set amount of time and then
automatically turn off. The interior
lamps do not come on if the dome
lamp control is in the Off position.
The exterior lamps turn off
immediately by turning the exterior
lamps control off.
This feature can be changed. See
Vehicle Personalization
0160.
Battery Load
Management
The vehicle has Electric Power
Management (EPM), which
estimates the battery's temperature
and state of charge. It then adjusts
the voltage for best performance
and extended life of the battery.
When the battery's state of charge
is low, the voltage is raised slightly
to quickly bring the charge back up.
When the state of charge is high,
the voltage is lowered slightly to
prevent overcharging. The voltmeter
gauge or the voltage display on the
Driver Information Center (DIC),
if equipped, may show the voltage moving up or down. This is normal.
If there is a problem, an alert will be
displayed.
The battery can be discharged at
idle if the electrical loads are very
high. This is true for all vehicles.
This is because the generator
(alternator) may not be spinning fast
enough at idle to produce all the
power that is needed for very high
electrical loads.
A high electrical load occurs when
several of the following are on, such
as: headlamps, high beams, fog
lamps, rear window defogger,
climate control fan at high speed,
heated seats, engine cooling fans,
trailer loads, and loads plugged into
accessory power outlets.
EPM works to prevent excessive
discharge of the battery. It does this
by balancing the generator's output
and the vehicle's electrical needs.
It can increase engine idle speed to
generate more power, whenever
needed. It can temporarily reduce
the power demands of some
accessories.
Page 181 of 501
Chevrolet Silverado Owner Manual (GMNA-Localizing-U.S./Canada/Mexico-
11349200) - 2018 - CRC - 2/27/18
180 Lighting
Normally, these actions occur in
steps or levels, without being
noticeable. In rare cases at the
highest levels of corrective action,
this action may be noticeable to the
driver. If so, a DIC message might
be displayed and it is recommended
that the driver reduce the electrical
loads as much as possible.
Battery Power Protection
This feature shuts off the dome and
reading lamps, if they are left on for
more than 10 minutes after the
ignition is turned off. The cargo
lamp shuts off after 20 minutes. This
prevents the battery from
running down.
Exterior Lighting Battery
Saver
The exterior lamps turn off about
10 minutes after the ignition is
turned off, if the parking lamps or
headlamps have been manually left
on. This protects against draining
the battery. To restart the 10-minutetimer, turn the exterior lamp control
to the
Oposition and then back to
the
;or2position.
To keep the lamps on for more than
10 minutes, the ignition must be on
or in ACC/ACCESSORY.
Page 192 of 501
Chevrolet Silverado Owner Manual (GMNA-Localizing-U.S./Canada/Mexico-
11349200) - 2018 - CRC - 2/27/18
Infotainment System 191
automatically powers off and will not
charge or draw power from the
vehicle's battery.
For more information on USB
usage, see“Audio System
Information” following.
Audio System Information
The infotainment system can play
the music files contained in the USB
storage device or iPod/iPhone
products.
Using MP3/WMA/OGG/WAV Files
.
Music files with .mp3, .wma,
.ogg, and .wav file name
extensions can be played.
. MP3 files that can be played: Bit
rate: 8 kbps to 320 kbps.
Sampling frequency: 48 kHz,
44.1 kHz, 32 kHz, 24 kHz, 22.05
kHz, and 16 kHz.
. Files with a bit rate above
128 kbps will result in higher
quality sound.
. ID3 Tag information for MP3
files, such as the album name
and the artist, can be played. .
To display album title, track title,
and artist information, the file
should be compatible with the
ID3 Tag V1 and V2 formats.
Using USB Storage Devices and
iPod/iPhone
. Use a USB or flash memory type
storage device. Do not connect
using a USB adaptor.
. Do not connect and reconnect
the USB device repeatedly in a
short time, as this may cause
static electricity and problems
using the device.
. Use a USB device with a metal
connecting terminal.
. Connection with i-Stick Type
USB storage devices may be
faulty due to vehicle vibration.
. Do not touch the USB
connecting terminal.
. Only USB storage devices
formatted in FAT16/32 or exFAT
file systems are recognized.
NTFS and other file systems are
not recognized. .
The time it takes to process files
will depend on the USB storage
device type and capacity, and
the type of files stored.
. Some USB storage device files
may not be compatible.
. Up to two USB devices and one
iPod can be played through a
USB hub. All devices may not be
supported, depending on the
performance of the USB hub.
If there is not enough power
supply, it may not operate
normally.
. Do not disconnect the USB
storage device while it is playing.
This may cause damage to the
product or affect the
performance of the USB device.
. Disconnect the USB storage
device when the ignition is
turned off. If the ignition is turned
on while the USB device is
connected, the USB device may
be damaged or may not operate
normally.