2018 CHEVROLET MALIBU buttons
[x] Cancel search: buttonsPage 8 of 413

Chevrolet Malibu Owner Manual (GMNA-Localizing-U.S./Canada/Mexico-
11348460) - 2018 - crc - 5/3/17
In Brief 7
1.Air Vents 0203.
2. Turn Signal Lever. See Turn
and Lane-Change Signals
0 158.
IntelliBeam System Button
(If Equipped). See Exterior
Lamp Controls 0154.
3. Instrument Cluster (Base
Level) 0112 orInstrument
Cluster (Uplevel) 0114.
Driver Information Center (DIC)
(Uplevel) 0134 orDriver
Information Center (DIC) (Base
Level) 0131.
4. Windshield Wiper/Washer
0106.
5. Light Sensor. See Automatic
Headlamp System 0157.
6. Infotainment 0162.
7. Climate Control Systems
0196.
Dual Automatic Climate Control
System 0199 (If Equipped).
8. Hazard Warning Flashers
0157.
9. Power Outlets 0109. 10.
Traction Control/Electronic
Stability Control 0231.
Assistance Systems for
Parking or Backing 0243
(If Equipped).
11. Shift Lever. See Automatic
Transmission 0224.
12. Electric Parking Brake 0228.
13. USB Port 0176.
14. ENGINE START/STOP Button. SeeIgnition Positions 0216.
15. Steering Wheel Controls 0105.
Driver Information Center
Buttons.
See Driver Information Center
(DIC) (Uplevel) 0134 orDriver
Information Center (DIC) (Base
Level) 0131.
16. Horn 0106.
17. Steering Wheel Adjustment
0105.
18. Cruise Control 0233.
Adaptive Cruise Control 0235
(If Equipped). Heated Steering Wheel
0106
(If Equipped).
Forward Collision Alert (FCA)
System 0247 (If Equipped).
Lane Keep Assist (LKA) 0255
(If Equipped).
19. Hood Release. See Hood
0 271.
20. Data Link Connector (Out of View). See Malfunction
Indicator Lamp (Check Engine
Light) 0122.
21. Exterior Lamp Controls 0154.
22. Instrument Panel Illumination
Control 0158.
Page 13 of 413
Chevrolet Malibu Owner Manual (GMNA-Localizing-U.S./Canada/Mexico-
11348460) - 2018 - crc - 5/3/17
12 In Brief
SeeReclining Seatbacks 057.
Memory Features
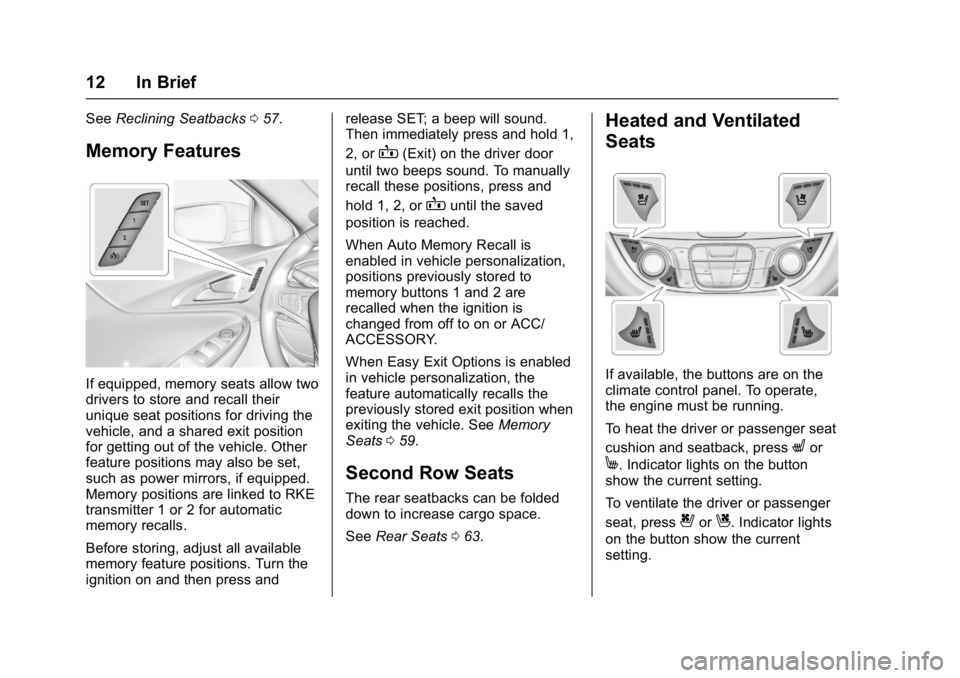
If equipped, memory seats allow two
drivers to store and recall their
unique seat positions for driving the
vehicle, and a shared exit position
for getting out of the vehicle. Other
feature positions may also be set,
such as power mirrors, if equipped.
Memory positions are linked to RKE
transmitter 1 or 2 for automatic
memory recalls.
Before storing, adjust all available
memory feature positions. Turn the
ignition on and then press and release SET; a beep will sound.
Then immediately press and hold 1,
2, or
B(Exit) on the driver door
until two beeps sound. To manually
recall these positions, press and
hold 1, 2, or
Buntil the saved
position is reached.
When Auto Memory Recall is
enabled in vehicle personalization,
positions previously stored to
memory buttons 1 and 2 are
recalled when the ignition is
changed from off to on or ACC/
ACCESSORY.
When Easy Exit Options is enabled
in vehicle personalization, the
feature automatically recalls the
previously stored exit position when
exiting the vehicle. See Memory
Seats 059.
Second Row Seats
The rear seatbacks can be folded
down to increase cargo space.
See Rear Seats 063.
Heated and Ventilated
Seats
If available, the buttons are on the
climate control panel. To operate,
the engine must be running.
To heat the driver or passenger seat
cushion and seatback, press
Lor
M. Indicator lights on the button
show the current setting.
To ventilate the driver or passenger
seat, press
{orC. Indicator lights
on the button show the current
setting.
Page 16 of 413
Chevrolet Malibu Owner Manual (GMNA-Localizing-U.S./Canada/Mexico-
11348460) - 2018 - crc - 5/3/17
In Brief 15
Interior Lighting
Dome Lamps
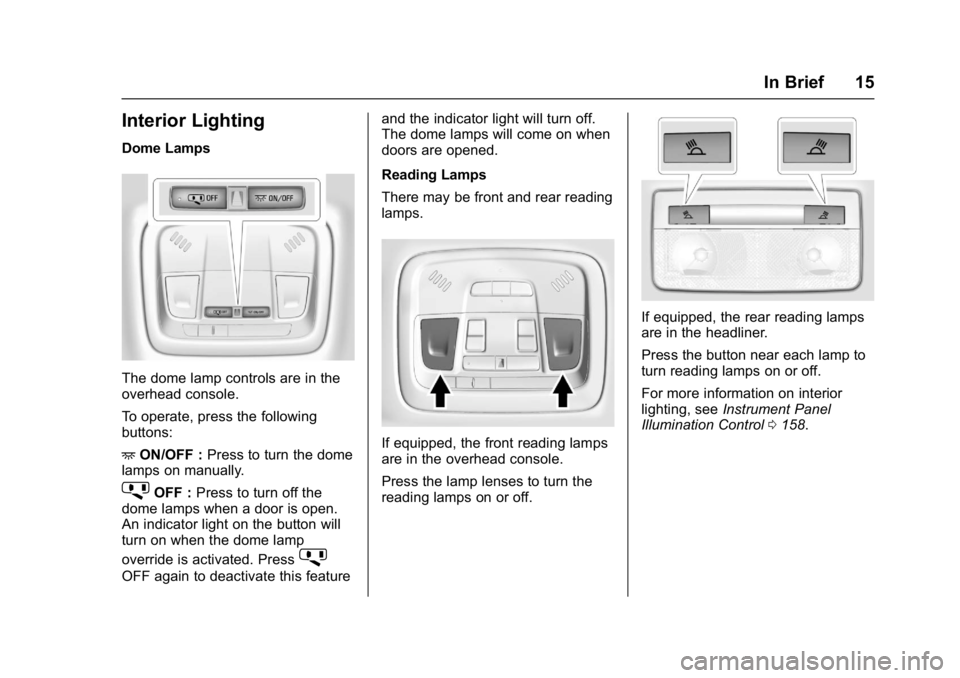
The dome lamp controls are in the
overhead console.
To operate, press the following
buttons:
+ON/OFF : Press to turn the dome
lamps on manually.
jOFF : Press to turn off the
dome lamps when a door is open.
An indicator light on the button will
turn on when the dome lamp
override is activated. Press
j
OFF again to deactivate this feature and the indicator light will turn off.
The dome lamps will come on when
doors are opened.
Reading Lamps
There may be front and rear reading
lamps.
If equipped, the front reading lamps
are in the overhead console.
Press the lamp lenses to turn the
reading lamps on or off.
If equipped, the rear reading lamps
are in the headliner.
Press the button near each lamp to
turn reading lamps on or off.
For more information on interior
lighting, see
Instrument Panel
Illumination Control 0158.
Page 34 of 413
Chevrolet Malibu Owner Manual (GMNA-Localizing-U.S./Canada/Mexico-
11348460) - 2018 - crc - 5/3/17
Keys, Doors, and Windows 33
With Remote Start Shown
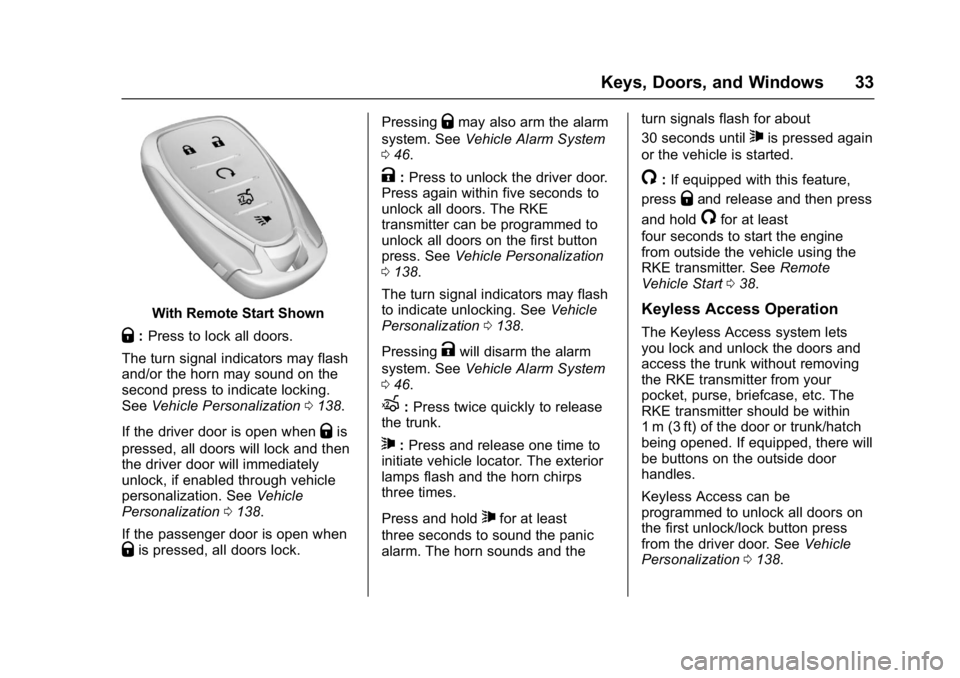
Q:Press to lock all doors.
The turn signal indicators may flash
and/or the horn may sound on the
second press to indicate locking.
See Vehicle Personalization 0138.
If the driver door is open when
Qis
pressed, all doors will lock and then
the driver door will immediately
unlock, if enabled through vehicle
personalization. See Vehicle
Personalization 0138.
If the passenger door is open when
Qis pressed, all doors lock. Pressing
Qmay also arm the alarm
system. See Vehicle Alarm System
0 46.
K:Press to unlock the driver door.
Press again within five seconds to
unlock all doors. The RKE
transmitter can be programmed to
unlock all doors on the first button
press. See Vehicle Personalization
0 138.
The turn signal indicators may flash
to indicate unlocking. See Vehicle
Personalization 0138.
Pressing
Kwill disarm the alarm
system. See Vehicle Alarm System
0 46.
X:Press twice quickly to release
the trunk.
7: Press and release one time to
initiate vehicle locator. The exterior
lamps flash and the horn chirps
three times.
Press and hold
7for at least
three seconds to sound the panic
alarm. The horn sounds and the turn signals flash for about
30 seconds until
7is pressed again
or the vehicle is started.
/: If equipped with this feature,
press
Qand release and then press
and hold
/for at least
four seconds to start the engine
from outside the vehicle using the
RKE transmitter. See Remote
Vehicle Start 038.
Keyless Access Operation
The Keyless Access system lets
you lock and unlock the doors and
access the trunk without removing
the RKE transmitter from your
pocket, purse, briefcase, etc. The
RKE transmitter should be within
1 m (3 ft) of the door or trunk/hatch
being opened. If equipped, there will
be buttons on the outside door
handles.
Keyless Access can be
programmed to unlock all doors on
the first unlock/lock button press
from the driver door. See Vehicle
Personalization 0138.
Page 37 of 413
Chevrolet Malibu Owner Manual (GMNA-Localizing-U.S./Canada/Mexico-
11348460) - 2018 - crc - 5/3/17
36 Keys, Doors, and Windows
3. Place the first new transmitterinto the transmitter pocket with
the buttons facing the rear of
the vehicle. The transmitter
pocket is inside the center
console storage area.
4. Press ENGINE START/STOP. When the transmitter is
learned, the DIC will show that
it is ready to program the next
transmitter.
5. Remove the transmitter from the transmitter pocket and
press
KorQ.
To program additional
transmitters, repeat Steps 3–5
for each new transmitter.
When all additional transmitters
are programmed, press and
hold ENGINE START/STOP for
12 seconds to exit
programming mode.
6. Put the key back into the transmitter. Programming without Recognized
Transmitters
If two currently recognized
transmitters are not available, follow
this procedure to program up to
eight transmitters. This feature is
not available in Canada. This
procedure will take approximately
30 minutes to complete. The vehicle
must be off and all of the
transmitters to be programmed must
be with you.
1. Remove the key lock cylinder cap on the driver door handle.
See Door Locks 040. Insert
the vehicle key of the
transmitter into the key lock
cylinder on the outside of the
driver door and turn the key
counterclockwise five times
within 10 seconds.
The Driver Information Center
(DIC) displays REMOTE
LEARN PENDING,
PLEASE WAIT. 2. Wait for 10 minutes until the
DIC displays PRESS ENGINE
START BUTTON TO LEARN
and then press ENGINE
START/STOP.
The DIC will again display
REMOTE LEARN PENDING,
PLEASE WAIT.
3. Repeat Step 2 two additional times. After the third time, all
previously known transmitters
will no longer work with the
vehicle. Remaining transmitters
can be relearned during the
next steps.
The DIC display should now
show READY FOR REMOTE
# 1.
Page 38 of 413
Chevrolet Malibu Owner Manual (GMNA-Localizing-U.S./Canada/Mexico-
11348460) - 2018 - crc - 5/3/17
Keys, Doors, and Windows 37
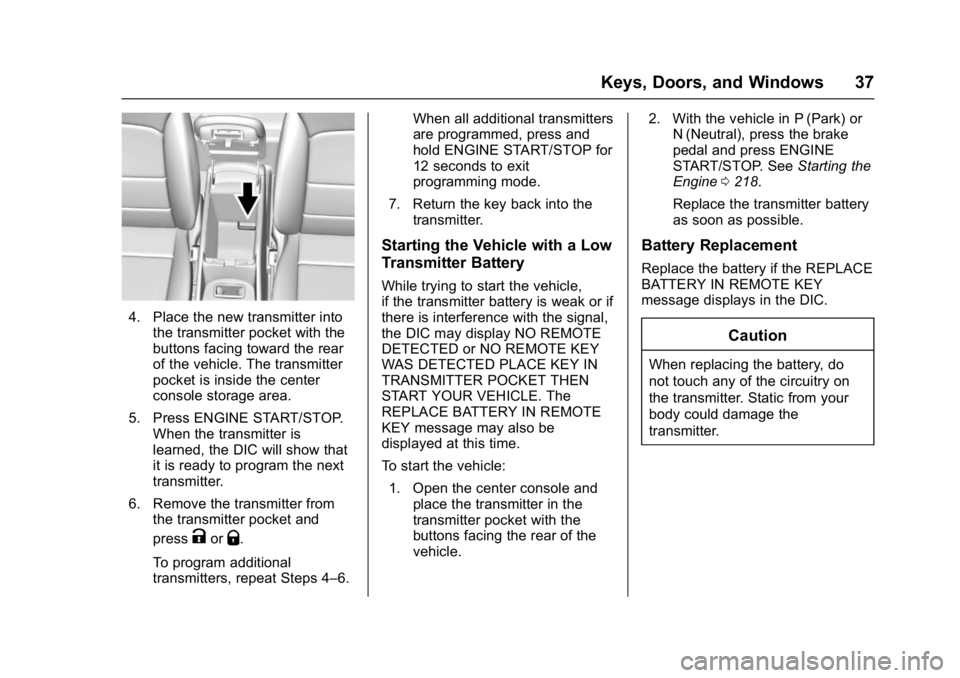
4. Place the new transmitter intothe transmitter pocket with the
buttons facing toward the rear
of the vehicle. The transmitter
pocket is inside the center
console storage area.
5. Press ENGINE START/STOP. When the transmitter is
learned, the DIC will show that
it is ready to program the next
transmitter.
6. Remove the transmitter from the transmitter pocket and
press
KorQ.
To program additional
transmitters, repeat Steps 4–6. When all additional transmitters
are programmed, press and
hold ENGINE START/STOP for
12 seconds to exit
programming mode.
7. Return the key back into the transmitter.
Starting the Vehicle with a Low
Transmitter Battery
While trying to start the vehicle,
if the transmitter battery is weak or if
there is interference with the signal,
the DIC may display NO REMOTE
DETECTED or NO REMOTE KEY
WAS DETECTED PLACE KEY IN
TRANSMITTER POCKET THEN
START YOUR VEHICLE. The
REPLACE BATTERY IN REMOTE
KEY message may also be
displayed at this time.
To start the vehicle:
1. Open the center console and place the transmitter in the
transmitter pocket with the
buttons facing the rear of the
vehicle. 2. With the vehicle in P (Park) or
N (Neutral), press the brake
pedal and press ENGINE
START/STOP. See Starting the
Engine 0218.
Replace the transmitter battery
as soon as possible.
Battery Replacement
Replace the battery if the REPLACE
BATTERY IN REMOTE KEY
message displays in the DIC.
Caution
When replacing the battery, do
not touch any of the circuitry on
the transmitter. Static from your
body could damage the
transmitter.
Page 63 of 413
Chevrolet Malibu Owner Manual (GMNA-Localizing-U.S./Canada/Mexico-
11348460) - 2018 - crc - 5/3/17
62 Seats and Restraints
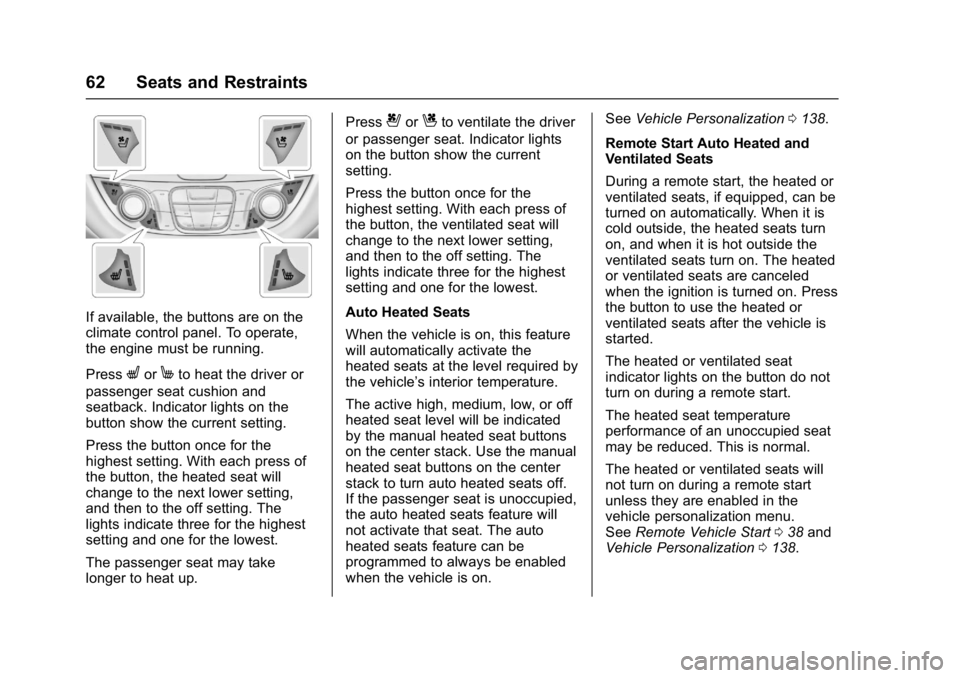
If available, the buttons are on the
climate control panel. To operate,
the engine must be running.
Press
LorMto heat the driver or
passenger seat cushion and
seatback. Indicator lights on the
button show the current setting.
Press the button once for the
highest setting. With each press of
the button, the heated seat will
change to the next lower setting,
and then to the off setting. The
lights indicate three for the highest
setting and one for the lowest.
The passenger seat may take
longer to heat up. Press
{orCto ventilate the driver
or passenger seat. Indicator lights
on the button show the current
setting.
Press the button once for the
highest setting. With each press of
the button, the ventilated seat will
change to the next lower setting,
and then to the off setting. The
lights indicate three for the highest
setting and one for the lowest.
Auto Heated Seats
When the vehicle is on, this feature
will automatically activate the
heated seats at the level required by
the vehicle’ s interior temperature.
The active high, medium, low, or off
heated seat level will be indicated
by the manual heated seat buttons
on the center stack. Use the manual
heated seat buttons on the center
stack to turn auto heated seats off.
If the passenger seat is unoccupied,
the auto heated seats feature will
not activate that seat. The auto
heated seats feature can be
programmed to always be enabled
when the vehicle is on. See
Vehicle Personalization 0138.
Remote Start Auto Heated and
Ventilated Seats
During a remote start, the heated or
ventilated seats, if equipped, can be
turned on automatically. When it is
cold outside, the heated seats turn
on, and when it is hot outside the
ventilated seats turn on. The heated
or ventilated seats are canceled
when the ignition is turned on. Press
the button to use the heated or
ventilated seats after the vehicle is
started.
The heated or ventilated seat
indicator lights on the button do not
turn on during a remote start.
The heated seat temperature
performance of an unoccupied seat
may be reduced. This is normal.
The heated or ventilated seats will
not turn on during a remote start
unless they are enabled in the
vehicle personalization menu.
See Remote Vehicle Start 038 and
Vehicle Personalization 0138.
Page 151 of 413
Chevrolet Malibu Owner Manual (GMNA-Localizing-U.S./Canada/Mexico-
11348460) - 2018 - crc - 5/3/17
150 Instruments and Controls
Rear Park Assist Symbols
Select to turn Off or On. See
Assistance Systems for Parking or
Backing0243.
Return to Factory Settings
Select and the following may
display:
.
Restore Vehicle Settings
. Clear All Private Data
. Restore Radio Settings
Restore Vehicle Settings
This allows vehicle settings to be
restored.
Select Restore or Cancel.
Clear All Private Data
This allows all private information to
be deleted from the vehicle.
Select Delete or Cancel.
Restore Radio Settings
This allows radio settings to be
restored.
Select Restore or Cancel.
Software Information
Select to view the infotainment
system current software information.
Wi-Fi
Select and the following may
display:
. Wi-Fi
. Manage Wi-Fi Networks
Wi-Fi
This feature allows Wi-Fi networks
to be turned off or on.
Select Off or On.
Manage Wi-Fi Networks
Select to manage Wi-Fi networks.
Wi-Fi must be on for this feature to
be accessed.
Universal Remote
System
See Radio Frequency Statement
0 385.
Universal Remote System
Programming
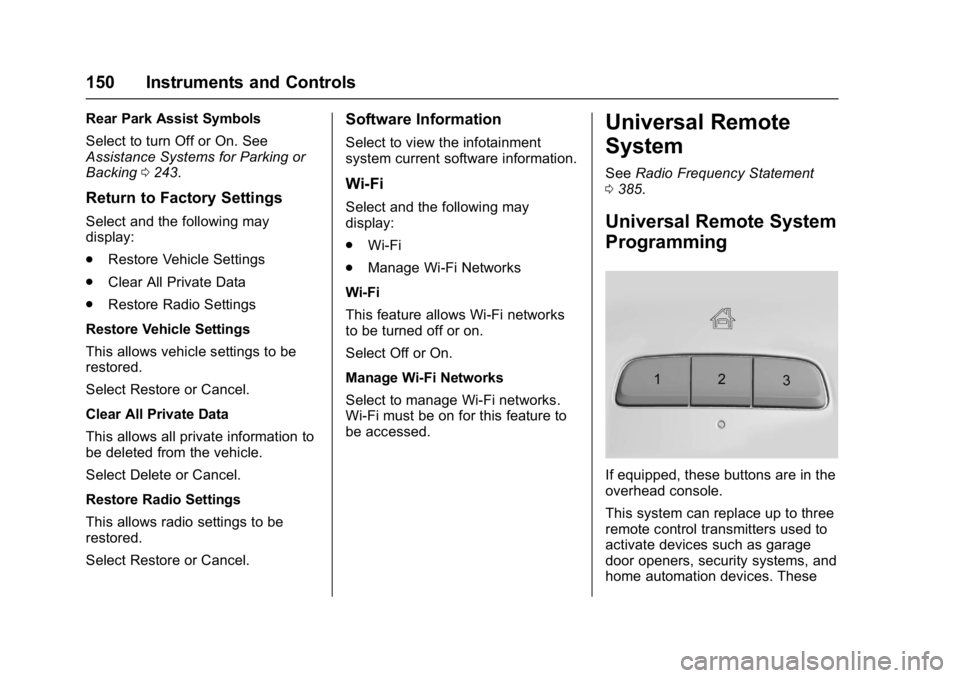
If equipped, these buttons are in the
overhead console.
This system can replace up to three
remote control transmitters used to
activate devices such as garage
door openers, security systems, and
home automation devices. These