2018 CHEVROLET MALIBU door lock
[x] Cancel search: door lockPage 147 of 413
Chevrolet Malibu Owner Manual (GMNA-Localizing-U.S./Canada/Mexico-
11348460) - 2018 - crc - 5/3/17
146 Instruments and Controls
Auto Memory Recall
This feature automatically recalls
the current driver’s previously stored
1 or 2 button positions when the
ignition is changed from off to on or
ACC/ACCESSORY. See Memory
Seats 059.
Select Off or On.
Easy Exit Options
This feature automatically recalls
the previously stored Exit button
position when exiting the vehicle.
See Memory Seats 059.
Select Off or On.
Chime Volume
This allows the selection of the
chime volume level.
Touch + or −to adjust the volume.
Reverse Tilt Mirror
When on, driver, passenger, or both
driver and passenger outside
mirrors will tilt downward when the
vehicle is shifted to R (Reverse) to
improve visibility of the ground near
the rear wheels. They will return to
their previous driving position when the vehicle is shifted out of
R (Reverse) or the engine is turned
off. See
Reverse Tilt Mirrors 049.
Select Off, On - Driver and
Passenger, On - Driver, or On -
Passenger.
Extended Hill Start Assist
This allows the duration of the Hill
Start Assist to be changed.
Select Extended Hold or
Standard Hold.
Lighting
Select and the following may
display:
. Vehicle Locator Lights
. Exit Lighting
Vehicle Locator Lights
This feature will flash the exterior
lamps and allows the headlamps,
parking lamps, taillamps, and most
of the interior lamps to turn on
briefly when
Kon the Remote
Keyless Entry (RKE) transmitter is
pressed to locate the vehicle.
Select Off or On. Exit Lighting
This allows the selection of how
long the exterior lamps stay on
when leaving the vehicle when it is
dark outside.
Select Off, 30 Seconds, 60
Seconds, or 120 Seconds.
Power Door Locks
Select and the following may
display:
.
Unlocked Door Anti Lock Out
. Auto Door Unlock
. Delayed Door Lock
Unlocked Door Anti Lock Out
When on, this feature will keep the
driver door from locking when the
door is open. If this feature is turned
on, the Delayed Door Lock menu
will not be available.
Select Off or On.
Auto Door Unlock
This allows selection of which of the
doors will automatically unlock when
the vehicle is shifted into P (Park).
Select Off, All Doors, or Driver Door.
Page 148 of 413
Chevrolet Malibu Owner Manual (GMNA-Localizing-U.S./Canada/Mexico-
11348460) - 2018 - crc - 5/3/17
Instruments and Controls 147
Delayed Door Lock
When on, this feature will delay the
locking of the doors. To override the
delay, press the power door lock
switch on the door.
Select Off or On.
Remote Lock, Unlock, Start
Select and the following may
display:
.Remote Unlock Light Feedback
. Remote Lock Feedback
. Remote Door Unlock
. Remote Start Auto Cool Seats
. Remote Start Auto Heat Seats
. Passive Door Unlock
. Passive Door Lock
. Remote Left in Vehicle Alert
Remote Unlock Light Feedback
When on, the exterior lamps will
flash when unlocking the vehicle
with the RKE transmitter.
Select Off or Flash Lights. Remote Lock Feedback
This allows selection of what type of
feedback is given when locking the
vehicle with the RKE transmitter.
Select Off, Lights and Horn, Lights
Only, or Horn Only.
Remote Door Unlock
This allows selection of which doors
will unlock when pressing
Kon the
RKE transmitter.
Select All Doors or Driver Door.
Remote Start Auto Cool Seats
If equipped and turned on, this
feature will turn the ventilated seats
on when using remote start on
warm days.
Select Off, On-Driver and
Passenger, or On-Driver.
Remote Start Auto Heat Seats
If equipped and turned on, this
feature will turn the heated seats on
when using remote start on
cold days.
Select Off, On-Driver and
Passenger, or On-Driver. Passive Door Unlock
Select to set which doors will unlock
when the RKE transmitter is within
range and the button on the outside
driver door handle is being used to
unlock the vehicle. See
Remote
Keyless Entry (RKE) System
Operation 032.
Select All Doors or Driver Door.
Passive Door Lock
This allows passive locking to be
turned on or off and selects
feedback. See Remote Keyless
Entry (RKE) System Operation 032.
Select Off, On with Horn
Chirp, or On.
Remote Left in Vehicle Alert
This feature sounds an alert when
the RKE transmitter is left in the
vehicle. This menu also enables the
Remote No Longer Left in Vehicle
alert.
Select Off or On.
Page 157 of 413
Chevrolet Malibu Owner Manual (GMNA-Localizing-U.S./Canada/Mexico-
11348460) - 2018 - crc - 5/3/17
156 Lighting
The high beams may not turn off
automatically if the system cannot
detect another vehicle's lamps
because of any of the following:
.The other vehicle's lamps are
missing, damaged, obstructed
from view, or otherwise
undetected.
. The other vehicle's lamps are
covered with dirt, snow, and/or
road spray.
. The other vehicle's lamps cannot
be detected due to dense
exhaust, smoke, fog, snow, road
spray, mist, or other airborne
obstructions.
. The vehicle's windshield is dirty,
cracked, or obstructed by
something that blocks the view
of the light sensor.
. The vehicle is loaded such that
the front end points upward,
causing the light sensor to aim
high and not detect headlamps
and taillamps.
. Driving on winding or hilly roads. The IntelliBeam system may need to
be disabled if any of the above
conditions exist.
Exterior Lamps Off
Reminder
A warning chime sounds if the driver
door is opened while the ignition is
off and the exterior lamps are on.
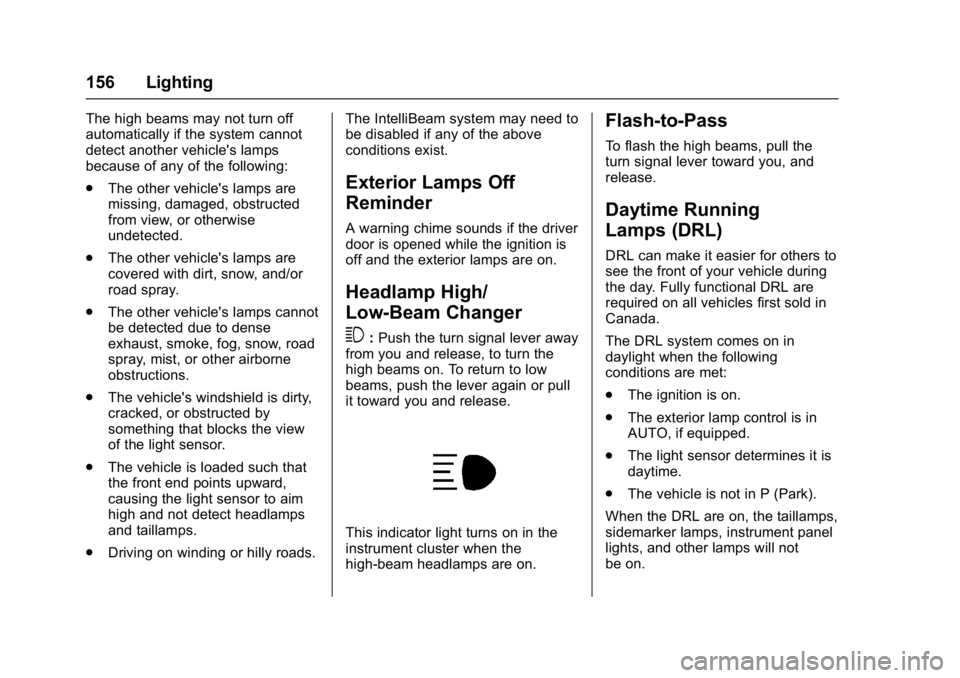
Headlamp High/
Low-Beam Changer
3
:
Push the turn signal lever away
from you and release, to turn the
high beams on. To return to low
beams, push the lever again or pull
it toward you and release.
This indicator light turns on in the
instrument cluster when the
high-beam headlamps are on.
Flash-to-Pass
To flash the high beams, pull the
turn signal lever toward you, and
release.
Daytime Running
Lamps (DRL)
DRL can make it easier for others to
see the front of your vehicle during
the day. Fully functional DRL are
required on all vehicles first sold in
Canada.
The DRL system comes on in
daylight when the following
conditions are met:
. The ignition is on.
. The exterior lamp control is in
AUTO, if equipped.
. The light sensor determines it is
daytime.
. The vehicle is not in P (Park).
When the DRL are on, the taillamps,
sidemarker lamps, instrument panel
lights, and other lamps will not
be on.
Page 222 of 413
Chevrolet Malibu Owner Manual (GMNA-Localizing-U.S./Canada/Mexico-
11348460) - 2018 - crc - 5/3/17
Driving and Operating 221
Retained Accessory
Power (RAP)
Some vehicle accessories may be
used after the ignition is turned off.
The power windows and sunroof,
if equipped, will continue to work for
up to 10 minutes or until any door is
opened.
The infotainment system will
continue to work for 10 minutes,
until the driver door is opened,
or until the ignition is turned on or
placed in ACC/ACCESSORY.
Shifting Into Park
1. Hold the brake pedal down andset the parking brake. See
Parking Brake 0227 and
Electric Parking Brake 0228.
2. Move the shift lever into P (Park) by holding in the
button on the shift lever and
pushing the shift lever all the
way toward the front of the
vehicle.
3. Turn the ignition off.
Leaving the Vehicle with the
Engine Running
{Warning
It can be dangerous to leave the
vehicle with the engine running.
It could overheat and catch fire.
It is dangerous to get out of the
vehicle if the shift lever is not fully
in P (Park) with the parking brake
firmly set. The vehicle can roll.
Do not leave the vehicle when the
engine is running. If you have left
the engine running, the vehicle
can move suddenly. You or others
could be injured. To be sure the
vehicle will not move, even when
you are on fairly level ground,
always set the parking brake and
move the shift lever to P (Park).
See Shifting Into Park 0221.
If you have to leave the vehicle with
the engine running, be sure the
vehicle is in P (Park) and the
parking brake is firmly set before
you leave it. After you have moved the shift lever into P (Park), hold the
regular brake pedal down. Then,
see if you can move the shift lever
away from P (Park) without first
pressing the button.
If you can, it means that the shift
lever was not fully locked in
P (Park).
Torque Lock
Torque lock is when the weight of
the vehicle puts too much force on
the parking pawl in the
transmission. This happens when
parking on a hill and shifting the
transmission into P (Park) is not
done properly, then it is difficult to
shift out of P (Park). To prevent
torque lock, set the parking brake
and then shift into P (Park). To find
out how, see
“Shifting Into Park”
listed previously.
If torque lock does occur, your
vehicle may need to be pushed
uphill by another vehicle to relieve
the parking pawl pressure, so you
can shift out of P (Park).
Page 293 of 413
Chevrolet Malibu Owner Manual (GMNA-Localizing-U.S./Canada/Mexico-
11348460) - 2018 - crc - 5/3/17
292 Vehicle Care
test, or replace the high voltage
battery. See your dealer if the high
voltage battery needs service. The
dealer has information on how to
recycle the high voltage battery.
The hybrid high voltage battery is
cooled with air drawn from the
vehicle interior. The cold air intake
for the battery is under the rear
seat. Do not block the area in front
of the cold air intake.
{Warning
Damage to the high voltage
battery or high voltage system
can create a risk of electric shock,
overheating, or fire.
If the vehicle is damaged from a
moderate to severe crash, flood,
fire, or other event, the vehicle
should be inspected as soon as
possible. Until the vehicle has
been inspected, store it outside at
least 15 m (50 ft) from any(Continued)
Warning (Continued)
structure or anything that can
burn. Ventilate the vehicle by
opening a window or a door.
Contact Customer Assistance as
soon as possible to determine
whether an inspection is needed.
SeeCustomer Assistance Offices
0 377.
Stop/Start System
If equipped with the 1.5L L4 engine,
the vehicle has a Stop/Start system
to shut off the engine to help
conserve fuel. See Starting the
Engine 0218.
Vehicles with a 1.5L engine have an
Absorbed Glass Mat (AGM) 12-volt
battery. Installation of a standard
12-volt battery will result in reduced
12-volt battery life.
When using a 12-volt battery
charger on the 12-volt AGM battery,
some chargers have an AGM
battery setting on the charger. If available, use the AGM setting on
the charger, to limit charge voltage
to 14.8 volts.
{Warning
WARNING:
Battery posts,
terminals, and related
accessories contain lead and lead
compounds, chemicals known to
the State of California to cause
cancer and birth defects or other
reproductive harm. Batteries also
contain other chemicals known to
the State of California to cause
cancer. WASH HANDS AFTER
HANDLING. For more information
go to www.P65Warnings.ca.gov/
passenger-vehicle.
See California Proposition
65 Warning 0269 and the back
cover.
Page 334 of 413
Chevrolet Malibu Owner Manual (GMNA-Localizing-U.S./Canada/Mexico-
11348460) - 2018 - crc - 5/3/17
Vehicle Care 333
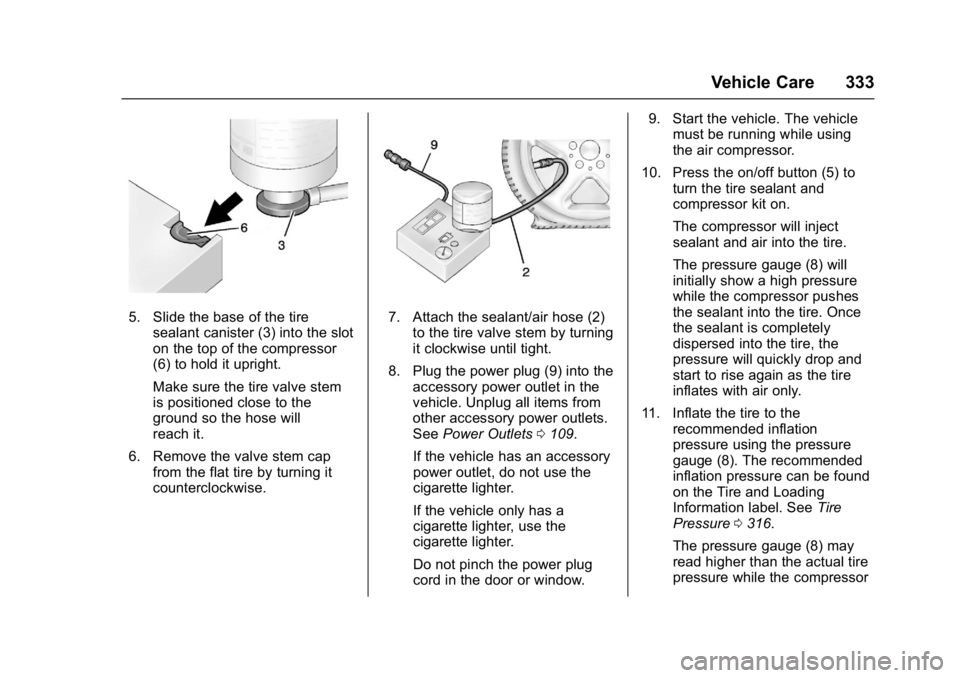
5. Slide the base of the tiresealant canister (3) into the slot
on the top of the compressor
(6) to hold it upright.
Make sure the tire valve stem
is positioned close to the
ground so the hose will
reach it.
6. Remove the valve stem cap from the flat tire by turning it
counterclockwise.7. Attach the sealant/air hose (2)
to the tire valve stem by turning
it clockwise until tight.
8. Plug the power plug (9) into the accessory power outlet in the
vehicle. Unplug all items from
other accessory power outlets.
See Power Outlets 0109.
If the vehicle has an accessory
power outlet, do not use the
cigarette lighter.
If the vehicle only has a
cigarette lighter, use the
cigarette lighter.
Do not pinch the power plug
cord in the door or window. 9. Start the vehicle. The vehicle
must be running while using
the air compressor.
10. Press the on/off button (5) to turn the tire sealant and
compressor kit on.
The compressor will inject
sealant and air into the tire.
The pressure gauge (8) will
initially show a high pressure
while the compressor pushes
the sealant into the tire. Once
the sealant is completely
dispersed into the tire, the
pressure will quickly drop and
start to rise again as the tire
inflates with air only.
11. Inflate the tire to the recommended inflation
pressure using the pressure
gauge (8). The recommended
inflation pressure can be found
on the Tire and Loading
Information label. See Tire
Pressure 0316.
The pressure gauge (8) may
read higher than the actual tire
pressure while the compressor
Page 337 of 413
Chevrolet Malibu Owner Manual (GMNA-Localizing-U.S./Canada/Mexico-
11348460) - 2018 - crc - 5/3/17
336 Vehicle Care
SeeIf a Tire Goes Flat 0329 for
other important safety warnings.
1. Remove the compressor from its storage location. See
Storing the Tire Sealant and
Compressor Kit 0337.
2. Remove the air only hose (10) and the power plug (9) from the
bottom of the compressor.
3. Place the compressor on the ground near the flat tire.
Make sure the tire valve stem
is positioned close to the
ground so the hose will
reach it.
4. Remove the valve stem cap from the flat tire by turning it
counterclockwise.
5. Attach the air only hose (10) to the tire valve stem by turning it
clockwise until tight.
6. Plug the power plug (9) into the accessory power outlet in the
vehicle. Unplug all items from
other accessory power outlets.
See Power Outlets 0109. If the vehicle has an accessory
power outlet, do not use the
cigarette lighter.
If the vehicle only has a
cigarette lighter, use the
cigarette lighter.
Do not pinch the power plug
cord in the door or window.
7. Start the vehicle. The vehicle must be running while using
the air compressor.
8. Press the on/off button (5) to turn the tire sealant and
compressor kit on.
The compressor will inflate the
tire with air only.
9. Inflate the tire to the recommended inflation
pressure using the pressure
gauge (8). The recommended
inflation pressure can be found
on the Tire and Loading
Information label. See Tire
Pressure 0316.
The pressure gauge (8) may
read higher than the actual tire
pressure while the compressor
is on. Turn the compressor off to get an accurate pressure
reading. The compressor may
be turned on/off until the
correct pressure is reached.
Caution
If the recommended pressure
cannot be reached after
approximately 25 minutes, the
vehicle should not be driven
farther. The tire is too severely
damaged and the tire sealant and
compressor kit cannot inflate the
tire. Remove the power plug from
the accessory power outlet and
unscrew the inflating hose from
the tire valve. See
Roadside
Assistance Program 0379.
10. Press the on/off button (5) to turn the tire sealant and
compressor kit off.
Be careful while handling the
compressor as it could be
warm after usage.
11. Unplug the power plug (9) from the accessory power outlet in
the vehicle.
Page 354 of 413
Chevrolet Malibu Owner Manual (GMNA-Localizing-U.S./Canada/Mexico-
11348460) - 2018 - crc - 5/3/17
Vehicle Care 353
Tires
Use a stiff brush with tire cleaner to
clean the tires.
Caution
Using petroleum-based tire
dressing products on the vehicle
may damage the paint finish and/
or tires. When applying a tire
dressing, always wipe off any
overspray from all painted
surfaces on the vehicle.
Wheels and Trim—Aluminum
or Chrome
Use a soft, clean cloth with mild
soap and water to clean the wheels.
After rinsing thoroughly with clean
water, dry with a soft, clean towel.
A wax may then be applied.
Caution
Chrome wheels and other chrome
trim may be damaged if the
vehicle is not washed after driving
(Continued)
Caution (Continued)
on roads that have been sprayed
with magnesium, calcium,
or sodium chloride. These
chlorides are used on roads for
conditions such as ice and dust.
Always wash the chrome with
soap and water after exposure.
Caution
To avoid surface damage, do not
use strong soaps, chemicals,
abrasive polishes, cleaners,
brushes, or cleaners that contain
acid on aluminum or
chrome-plated wheels. Use only
approved cleaners. Also, never
drive a vehicle with aluminum or
chrome-plated wheels through an
automatic car wash that uses
silicone carbide tire cleaning
brushes. Damage could occur
and the repairs would not be
covered by the vehicle warranty.
Brake System
Visually inspect brake lines and
hoses for proper hook-up, binding,
leaks, cracks, chafing, etc. Inspect
disc brake pads for wear and rotors
for surface condition. Inspect drum
brake linings/shoes for wear or
cracks. Inspect all other brake parts.
Steering, Suspension, and
Chassis Components
Visually inspect steering,
suspension, and chassis
components for damaged, loose,
or missing parts or signs of wear at
least once a year.
Inspect power steering for proper
attachment, connections, binding,
leaks, cracks, chafing, etc.
Visually check constant velocity joint
boots and axle seals for leaks.
Body Component Lubrication
Lubricate all key lock cylinders,
hood hinges, decklid hinges, steel
fuel door hinge, unless the
components are plastic. Applying
silicone grease on weatherstrips