2018 CHEVROLET MALIBU instrument cluster
[x] Cancel search: instrument clusterPage 156 of 413
Chevrolet Malibu Owner Manual (GMNA-Localizing-U.S./Canada/Mexico-
11348460) - 2018 - crc - 5/3/17
Lighting 155
;:Turns on the parking lamps
including all lamps, except the
headlamps.
5: Turns on the headlamps
together with the parking lamps and
instrument panel lights.
IntelliBeam®System
If equipped, this system turns the
vehicle's high-beam headlamps on
and off according to surrounding
traffic conditions.
The system turns the high-beam
headlamps on when it is dark
enough and there is no other traffic
present.
This light
bcomes on in the
instrument cluster when the
IntelliBeam system is enabled. Turning On and Enabling
IntelliBeam
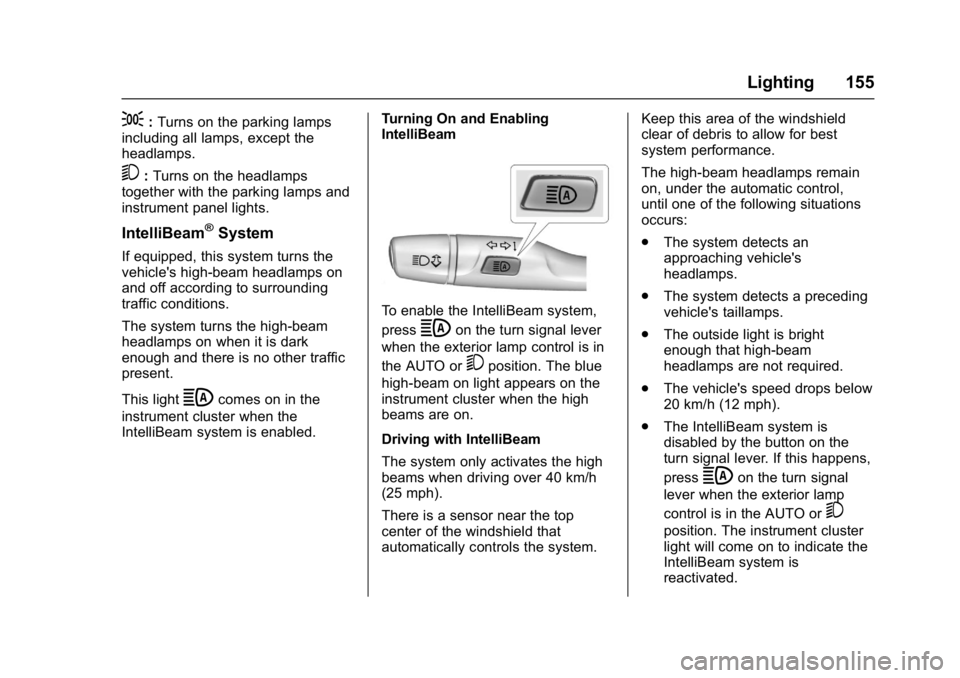
To enable the IntelliBeam system,
press
bon the turn signal lever
when the exterior lamp control is in
the AUTO or
5position. The blue
high-beam on light appears on the
instrument cluster when the high
beams are on.
Driving with IntelliBeam
The system only activates the high
beams when driving over 40 km/h
(25 mph).
There is a sensor near the top
center of the windshield that
automatically controls the system. Keep this area of the windshield
clear of debris to allow for best
system performance.
The high-beam headlamps remain
on, under the automatic control,
until one of the following situations
occurs:
.
The system detects an
approaching vehicle's
headlamps.
. The system detects a preceding
vehicle's taillamps.
. The outside light is bright
enough that high-beam
headlamps are not required.
. The vehicle's speed drops below
20 km/h (12 mph).
. The IntelliBeam system is
disabled by the button on the
turn signal lever. If this happens,
press
bon the turn signal
lever when the exterior lamp
control is in the AUTO or
5
position. The instrument cluster
light will come on to indicate the
IntelliBeam system is
reactivated.
Page 157 of 413
Chevrolet Malibu Owner Manual (GMNA-Localizing-U.S./Canada/Mexico-
11348460) - 2018 - crc - 5/3/17
156 Lighting
The high beams may not turn off
automatically if the system cannot
detect another vehicle's lamps
because of any of the following:
.The other vehicle's lamps are
missing, damaged, obstructed
from view, or otherwise
undetected.
. The other vehicle's lamps are
covered with dirt, snow, and/or
road spray.
. The other vehicle's lamps cannot
be detected due to dense
exhaust, smoke, fog, snow, road
spray, mist, or other airborne
obstructions.
. The vehicle's windshield is dirty,
cracked, or obstructed by
something that blocks the view
of the light sensor.
. The vehicle is loaded such that
the front end points upward,
causing the light sensor to aim
high and not detect headlamps
and taillamps.
. Driving on winding or hilly roads. The IntelliBeam system may need to
be disabled if any of the above
conditions exist.
Exterior Lamps Off
Reminder
A warning chime sounds if the driver
door is opened while the ignition is
off and the exterior lamps are on.
Headlamp High/
Low-Beam Changer
3
:
Push the turn signal lever away
from you and release, to turn the
high beams on. To return to low
beams, push the lever again or pull
it toward you and release.
This indicator light turns on in the
instrument cluster when the
high-beam headlamps are on.
Flash-to-Pass
To flash the high beams, pull the
turn signal lever toward you, and
release.
Daytime Running
Lamps (DRL)
DRL can make it easier for others to
see the front of your vehicle during
the day. Fully functional DRL are
required on all vehicles first sold in
Canada.
The DRL system comes on in
daylight when the following
conditions are met:
. The ignition is on.
. The exterior lamp control is in
AUTO, if equipped.
. The light sensor determines it is
daytime.
. The vehicle is not in P (Park).
When the DRL are on, the taillamps,
sidemarker lamps, instrument panel
lights, and other lamps will not
be on.
Page 159 of 413
Chevrolet Malibu Owner Manual (GMNA-Localizing-U.S./Canada/Mexico-
11348460) - 2018 - crc - 5/3/17
158 Lighting
Turn and Lane-Change
Signals
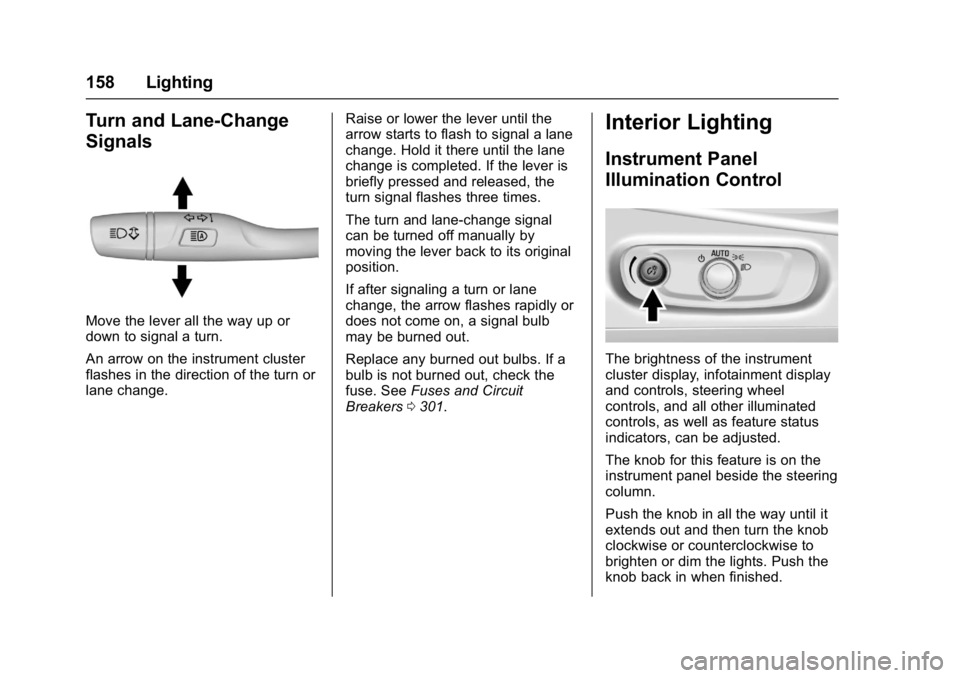
Move the lever all the way up or
down to signal a turn.
An arrow on the instrument cluster
flashes in the direction of the turn or
lane change.Raise or lower the lever until the
arrow starts to flash to signal a lane
change. Hold it there until the lane
change is completed. If the lever is
briefly pressed and released, the
turn signal flashes three times.
The turn and lane-change signal
can be turned off manually by
moving the lever back to its original
position.
If after signaling a turn or lane
change, the arrow flashes rapidly or
does not come on, a signal bulb
may be burned out.
Replace any burned out bulbs. If a
bulb is not burned out, check the
fuse. See
Fuses and Circuit
Breakers 0301.
Interior Lighting
Instrument Panel
Illumination Control
The brightness of the instrument
cluster display, infotainment display
and controls, steering wheel
controls, and all other illuminated
controls, as well as feature status
indicators, can be adjusted.
The knob for this feature is on the
instrument panel beside the steering
column.
Push the knob in all the way until it
extends out and then turn the knob
clockwise or counterclockwise to
brighten or dim the lights. Push the
knob back in when finished.
Page 164 of 413
Chevrolet Malibu Owner Manual (GMNA-Localizing-U.S./Canada/Mexico-
11348460) - 2018 - crc - 5/3/17
Infotainment System 163
functions may gray out when they
are unavailable. Many infotainment
features are also available through
the instrument cluster and steering
wheel controls.
Before driving:
.Become familiar with the
operation, center stack controls,
and infotainment display
controls.
. Set up the audio by presetting
favorite stations, setting the
tone, and adjusting the
speakers.
. Set up phone numbers in
advance so they can be called
easily by pressing a single
control or by using a single voice
command if equipped with
Bluetooth phone capability.
See Defensive Driving 0207.
To play the infotainment system with
the ignition off, see Retained
Accessory Power (RAP) 0221.Theft-Deterrent Feature
The infotainment system has an
electronic security system installed
to prevent theft.
The infotainment system only works
in the vehicle in which it was first
installed, and cannot be used in
another vehicle.
Page 226 of 413
Chevrolet Malibu Owner Manual (GMNA-Localizing-U.S./Canada/Mexico-
11348460) - 2018 - crc - 5/3/17
Driving and Operating 225
{Warning
Shifting into a drive gear while the
engine is running at high speed is
dangerous. Unless your foot is
firmly on the brake pedal, the
vehicle could move very rapidly.
You could lose control and hit
people or objects. Do not shift
into a drive gear while the engine
is running at high speed.
Caution
Shifting out of P (Park) or
N (Neutral) with the engine
running at high speed may
damage the transmission. The
repairs would not be covered by
the vehicle warranty. Be sure the
engine is not running at high
speed when shifting the vehicle.
For hybrid vehicles, the engine will
always be off while in N (Neutral).
The vehicle cannot charge the high
voltage battery while the shift lever is in N (Neutral). Only use
N (Neutral) when required. If the
high voltage battery state of charge
is low, the Driver Information
Center (DIC) will display a message
to shift out of N (Neutral). Shift to
P (Park), R (Reverse), D (Drive),
or L (Low) depending on the
situation. If the high voltage battery
is depleted too far, the vehicle will
shut down, requiring a shift to
P (Park) to restart the vehicle.
Caution
A transmission hot message may
display if the automatic
transmission fluid is too hot.
Driving under this condition can
damage the vehicle. Stop and idle
the engine to cool the automatic
transmission fluid. This message
clears when the transmission fluid
has cooled sufficiently.
D : This position is for normal
driving. If more power is needed for
passing, press the accelerator
pedal down. L :
This position allows you to
change gears similar to a manual
transmission. If the vehicle has this
feature, see Manual Mode 0225.
Operating Modes
The transmission may operate in a
lower gear than normal to improve
vehicle performance. The engine
speed may be higher and there may
be an increase in noise during the
following conditions:
. When climbing a grade.
. When driving downhill.
. When driving in hot
temperatures or at high altitude.
Manual Mode
Electronic Range Select
(ERS) Mode
ERS mode allows you to choose the
top-gear limit of the transmission
and the vehicle's speed while
driving downhill or towing a trailer.
The vehicle has an electronic shift
position indicator within the
instrument cluster. When using the
Page 233 of 413
Chevrolet Malibu Owner Manual (GMNA-Localizing-U.S./Canada/Mexico-
11348460) - 2018 - crc - 5/3/17
232 Driving and Operating
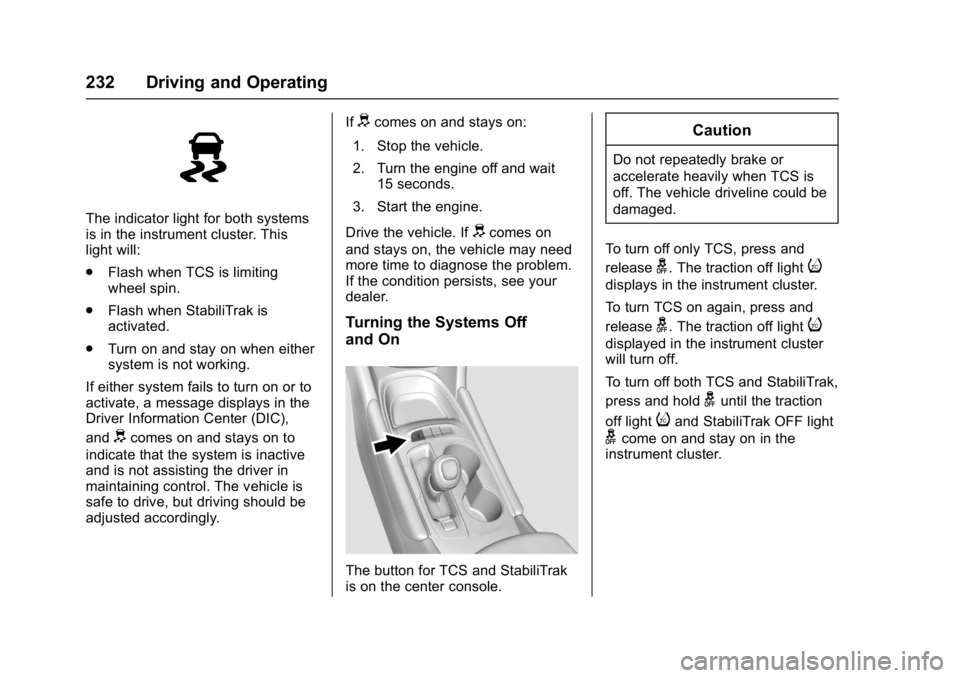
The indicator light for both systems
is in the instrument cluster. This
light will:
.Flash when TCS is limiting
wheel spin.
. Flash when StabiliTrak is
activated.
. Turn on and stay on when either
system is not working.
If either system fails to turn on or to
activate, a message displays in the
Driver Information Center (DIC),
and
dcomes on and stays on to
indicate that the system is inactive
and is not assisting the driver in
maintaining control. The vehicle is
safe to drive, but driving should be
adjusted accordingly. If
dcomes on and stays on:
1. Stop the vehicle.
2. Turn the engine off and wait 15 seconds.
3. Start the engine.
Drive the vehicle. If
dcomes on
and stays on, the vehicle may need
more time to diagnose the problem.
If the condition persists, see your
dealer.
Turning the Systems Off
and On
The button for TCS and StabiliTrak
is on the center console.
Caution
Do not repeatedly brake or
accelerate heavily when TCS is
off. The vehicle driveline could be
damaged.
To turn off only TCS, press and
release
g. The traction off lighti
displays in the instrument cluster.
To turn TCS on again, press and
release
g. The traction off lighti
displayed in the instrument cluster
will turn off.
To turn off both TCS and StabiliTrak,
press and hold
guntil the traction
off light
iand StabiliTrak OFF light
gcome on and stay on in the
instrument cluster.
Page 234 of 413
Chevrolet Malibu Owner Manual (GMNA-Localizing-U.S./Canada/Mexico-
11348460) - 2018 - crc - 5/3/17
Driving and Operating 233
To turn TCS and StabiliTrak on
again, press and release
g. The
traction off light
iand StabiliTrak
OFF light
gin the instrument cluster
turn off.
Adding accessories can affect the
vehicle performance. See
Accessories and Modifications
0 270.
Cruise Control
Cruise control lets the vehicle
maintain a speed of about 40 km/h
(25 mph) or more without keeping
your foot on the accelerator. Cruise
control does not work at speeds
below 40 km/h (25 mph).
{Warning
Cruise control can be dangerous
where you cannot drive safely at
a steady speed. Do not use
cruise control on winding roads or
in heavy traffic.
Cruise control can be dangerous
on slippery roads. On such roads,
fast changes in tire traction can
cause excessive wheel slip, and
you could lose control. Do not use
cruise control on slippery roads.
With the Traction Control System
(TCS) or Electronic Stability Control
(ESC), the system may begin to
limit wheel spin while you are using
cruise control. If this happens,
cruise control will automatically disengage. See
Traction Control/
Electronic Stability Control 0231.
If a collision alert occurs when
cruise control is activated, cruise
control is disengaged. See Forward
Collision Alert (FCA) System 0247.
When road conditions allow you to
safely use it again, cruise control
can be turned back on.
Cruise control will disengage if
either TCS or StabiliTrak is
turned off.
If the brakes are applied, cruise
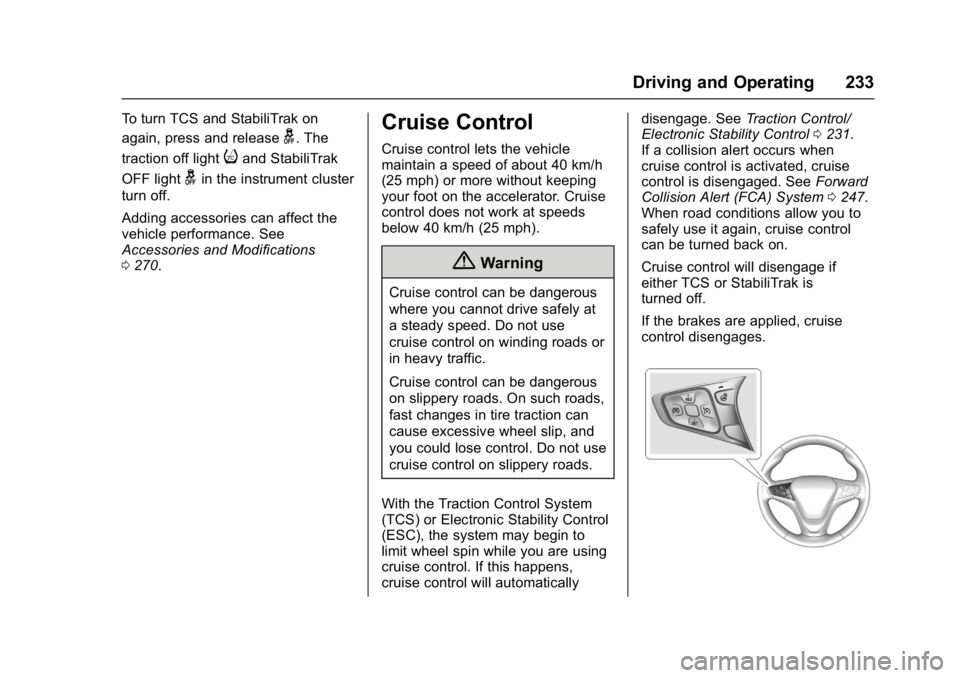
control disengages.
Page 235 of 413
Chevrolet Malibu Owner Manual (GMNA-Localizing-U.S./Canada/Mexico-
11348460) - 2018 - crc - 5/3/17
234 Driving and Operating
5:Press to turn the cruise control
system on and off. A white indicator
comes on in the instrument cluster
when cruise is turned on.
*: Press to disengage cruise
control without erasing the set
speed from memory.
+RES : If there is a set speed in
memory, press to resume that
speed or press and hold to
accelerate. If cruise control is
already active, use to increase
vehicle speed.
−SET : Press briefly to set the
speed and activate cruise control.
If cruise control is already active,
use to decrease vehicle speed.
Setting Cruise Control
If
5is on when not in use, -SET or
+RES could get bumped and go into
cruise when not desired. Keep
5
off when cruise is not being used.
To set a speed:
1. Press
5to turn the cruise
system on.
2. Get up to the desired speed. 3. Press and release -SET. The
desired set speed briefly
appears in the instrument
cluster.
4. Remove your foot from the accelerator pedal.
The cruise control indicator on the
instrument cluster turns green after
cruise control has been set to the
desired speed.
See Instrument Cluster (Base Level)
0 112 orInstrument Cluster
(Uplevel) 0114.
Resuming a Set Speed
If cruise control is set at a desired
speed and then the brakes are
applied, cruise control is
disengaged without erasing the set
speed from memory.
Once the vehicle speed reaches
about 40 km/h (25 mph) or more,
briefly press +RES. The vehicle
returns to the previous set speed. Increasing Speed While Using
Cruise Control
If the cruise control system is
already activated:
.
Press and hold +RES until the
vehicle accelerates to the
desired speed, then release it.
. To increase the speed in small
increments, briefly press +RES.
For each press, the vehicle goes
about 1 km/h (1 mph) faster.
The speedometer reading can be
displayed in either English or metric
units.
See Driver Information Center (DIC)
(Uplevel) 0134 orDriver Information
Center (DIC) (Base Level) 0131.
The increment value used depends
on the units displayed.
Reducing Speed While Using
Cruise Control
If the cruise control system is
already activated:
. Press and hold -SET until the
desired lower speed is reached,
then release it.