2018 CHEVROLET MALIBU radio
[x] Cancel search: radioPage 109 of 413
Chevrolet Malibu Owner Manual (GMNA-Localizing-U.S./Canada/Mexico-
11348460) - 2018 - crc - 5/3/17
108 Instruments and Controls
Auto Set
When Auto Set is enabled, the time
cannot be manually set.
From the Set Time or Set
Date menu:1. Press the preset button under Auto Set.
2. Turn MENU to select Off (Manual) or On-Cell Network,
then press MENU to select it
and return to the Time and
Date menu.
3. To exit without saving, press BACK at any time.
Setting the 12/24 Hour Format
From the Set Time menu:
1. Press the preset button under 12-24 HR to change between
12 hour and 24 hour modes.
2. To return to the Time and Date menu, press BACK at any time.
Radio with Touchscreen
The infotainment system controls
are used to access the time and
date settings through the menu
system. See Operation0167 on
how to use the menu system.
Setting the Time and Date
When Auto Set is enabled the time
cannot be manually set.
1. Press
{, then touch Settings.
2. Touch Time and Date, then Set Time or Set Date.
3. Touch + or −to adjust the
value.
4. Touch
RorQto adjust AM or
PM for 12 hour format.
5. Touch
0to return to the
Time and Date menu.
Auto Set
1. Press{, then touch Settings.
2. Touch Time and Date, then Auto Set.
3. Select from the available selections. 4. Touch
0to return to the
Time and Date menu.
Setting the 12/24 Hour Format
1. Press{, then touch Settings.
2. Touch Time and Date, then select 12h or 24h format.
3. Touch
0to return to the
Time and Date menu.
Setting the Month and Day
Format
1. Press{, then touch Settings.
2. Touch Time and Date, then Set Date Format.
3. Select DD/MM/YYYY (day/ month/year), MM/DD/YYYY
(month/day/year), or YYYY/
MM/DD (year/month/day)
format.
4. Touch
0to return to the
Time and Date menu.
Page 111 of 413
Chevrolet Malibu Owner Manual (GMNA-Localizing-U.S./Canada/Mexico-
11348460) - 2018 - crc - 5/3/17
110 Instruments and Controls
operate briefly then turn off.
A protection circuit shuts off the
power supply and the indicator light
turns off. To reset the circuit, unplug
the item and plug it back in or turn
the Retained Accessory Power
(RAP) off and then back on. See
Retained Accessory Power (RAP)
0221. The power restarts when
equipment using 150 watts or less is
plugged into the outlet and a system
fault is not detected.
The power outlet is not designed for
the following, and may not work
properly if they are plugged in:
. Equipment with high initial peak
wattage, such as
compressor-driven refrigerators
and electric power tools
. Other equipment requiring an
extremely stable power supply,
such as
microcomputer-controlled
electric blankets and touch
sensor lamps
. Medical equipment
See High Voltage Devices and
Wiring 0300.Wireless Charging
The vehicle may have a wireless
charging pocket outside the armrest
of the center console. The system
operates at 145 kHz and wirelessly
charges one PMA or Qi compatible
mobile device. The power output of
the system is capable of charging at
a rate up to 1 amp (5W), as
requested by the compatible mobile
device. See Radio Frequency
Statement 0385.
To check for phone or other device
compatibility:
. In the U.S., see
my.chevrolet.com/learn.
. In Canada, see
gmtotalconnect.ca.
. Or, see your dealer for details.
{Warning
Wireless charging can affect the
operation of an implanted
pacemaker or other medical
devices. If you have one, it is
(Continued)
Warning (Continued)
recommended to consult with
your doctor before using the
wireless charging system.
The vehicle must be on, in ACC/
ACCESSORY, or Retained
Accessory Power (RAP) must be
active. The wireless charging
feature may not correctly indicate
charging when the vehicle is in RAP.
See Retained Accessory Power
(RAP) 0221.
The operating temperature is −20 °C
(−4 °F) to 60 °C (140 °F) for the
charging system and 0 °C (32 °F) to
35 °C (95 °F) for the mobile device.
{Warning
Remove all objects from the
charging pocket before charging
your mobile phone. Objects, such
as coins, keys, rings, paper clips,
or cards, between the mobile
phone and the charger will
(Continued)
Page 117 of 413

Chevrolet Malibu Owner Manual (GMNA-Localizing-U.S./Canada/Mexico-
11348460) - 2018 - crc - 5/3/17
116 Instruments and Controls
Cluster Menu
There is an interactive display area
in the center of the instrument
cluster.
Use the right steering wheel control
to open and scroll through the
different items and displays.
Press
oto access the cluster
applications. Use
worxto scroll
through the list of available
applications. Not all applications will
be available on all vehicles.
. Info app. This is where you can
view the selected Driver
Information Center (DIC) displays.
See
Driver Information Center
(DIC) (Uplevel) 0134 orDriver
Information Center (DIC) (Base
Level) 0131.
. Audio
. Phone
. Navigation
. Options
Audio
In the main view of the Audio app,
press
worxto scroll through
radio stations or move to the next/
previous track of a CD/USB/
Bluetooth device that is connected
to the vehicle. Press
Vto select the
Audio app, then press
pto enter
the Audio menu. In the Audio menu
browse for music, select from the
favorites, or change the audio
source.
Phone
Press
Vto select the Phone app,
then press
pto enter the Phone
menu. In the Phone menu, if there is no active phone call, view recent
calls, scroll through contacts,
or select from the favorites. If there
is an active call, mute or unmute the
phone or switch to handset or
handsfree operation.
Navigation
Press
Vto select the Navigation
app, then press
pto enter the
Navigation menu. If there is no
active route, you can resume the
last route and turn the voice
prompts on/off. If there is an active
route, press
Vto cancel route
guidance or turn the voice prompts
on/off.
Options
Press
Vto select the Options app.
Use
worxto scroll through the
items in the Options menu.
Units : Press
pwhile Units is
displayed to enter the Units menu.
Choose U.S. or metric units by
pressing
Vwhile the desired item is
highlighted.
Page 123 of 413
Chevrolet Malibu Owner Manual (GMNA-Localizing-U.S./Canada/Mexico-
11348460) - 2018 - crc - 5/3/17
122 Instruments and Controls
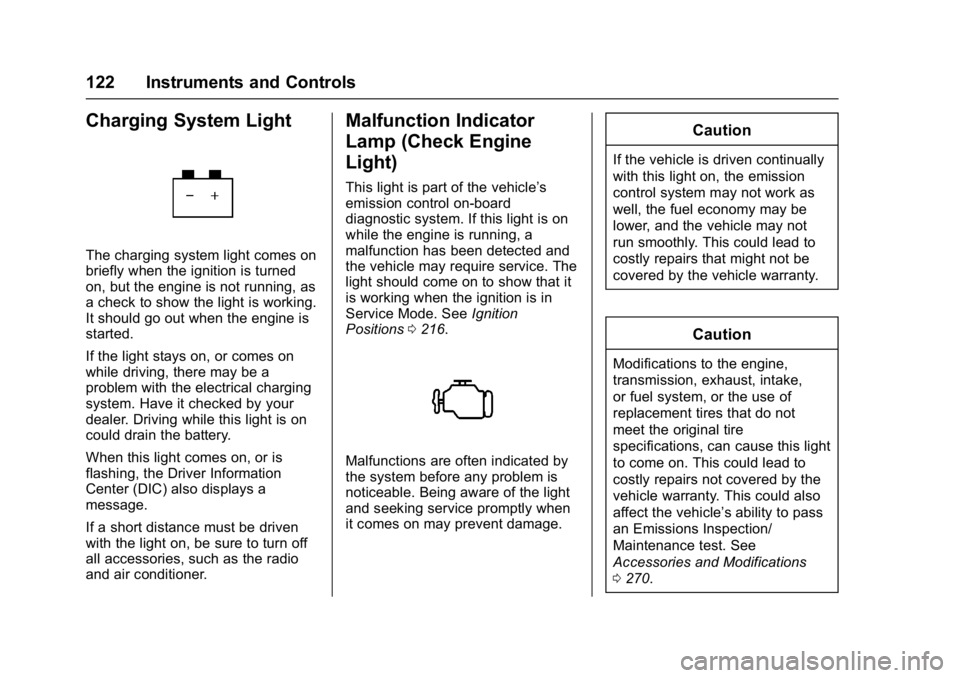
Charging System Light
The charging system light comes on
briefly when the ignition is turned
on, but the engine is not running, as
a check to show the light is working.
It should go out when the engine is
started.
If the light stays on, or comes on
while driving, there may be a
problem with the electrical charging
system. Have it checked by your
dealer. Driving while this light is on
could drain the battery.
When this light comes on, or is
flashing, the Driver Information
Center (DIC) also displays a
message.
If a short distance must be driven
with the light on, be sure to turn off
all accessories, such as the radio
and air conditioner.
Malfunction Indicator
Lamp (Check Engine
Light)
This light is part of the vehicle’s
emission control on-board
diagnostic system. If this light is on
while the engine is running, a
malfunction has been detected and
the vehicle may require service. The
light should come on to show that it
is working when the ignition is in
Service Mode. SeeIgnition
Positions 0216.
Malfunctions are often indicated by
the system before any problem is
noticeable. Being aware of the light
and seeking service promptly when
it comes on may prevent damage.
Caution
If the vehicle is driven continually
with this light on, the emission
control system may not work as
well, the fuel economy may be
lower, and the vehicle may not
run smoothly. This could lead to
costly repairs that might not be
covered by the vehicle warranty.
Caution
Modifications to the engine,
transmission, exhaust, intake,
or fuel system, or the use of
replacement tires that do not
meet the original tire
specifications, can cause this light
to come on. This could lead to
costly repairs not covered by the
vehicle warranty. This could also
affect the vehicle’s ability to pass
an Emissions Inspection/
Maintenance test. See
Accessories and Modifications
0270.
Page 139 of 413
Chevrolet Malibu Owner Manual (GMNA-Localizing-U.S./Canada/Mexico-
11348460) - 2018 - crc - 5/3/17
138 Instruments and Controls
.Brakes
. Ride Control Systems
. Driver Assistance Systems
. Cruise Control
. Lighting and Bulb Replacement
. Wiper/Washer Systems
. Doors and Windows
. Seat Belts
. Airbag Systems
. Engine and Transmission
. Tire Pressure
. Battery
Engine Power Messages
ENGINE/PROPULSION POWER
IS REDUCED
This message displays when the
vehicle's propulsion power is
reduced. Reduced propulsion power
can affect the vehicle's ability to
accelerate. If this message is on,
but there is no observed reduction
in performance, proceed to your
destination. The performance may be reduced the next time the vehicle
is driven. The vehicle may be driven
while this message is on, but
maximum acceleration and speed
may be reduced. Anytime this
message stays on, or displays
repeatedly, the vehicle should be
taken to your dealer for service as
soon as possible.
Vehicle Speed Messages
SPEED LIMITED TO
XXX KM/H (MPH)
This message shows that the
vehicle speed has been limited to
the speed displayed. The limited
speed is a protection for various
propulsion and vehicle systems,
such as lubrication, thermal,
suspension, Teen Driver if
equipped, or tires.
Vehicle
Personalization
Personalization Menu (Radio
without Touchscreen)
The audio system controls are used
to access the personalization
menus for customizing vehicle
features.
The following are all possible
personalization features. Depending
on the vehicle, some may not be
available.
MENU :
Turn to scroll through the
menus or setup items. Press to
enter the menus and select the
menu items.
BACK : Press to exit or return to
the previous screen or menu.
To access a menu:
1. Press MENU.
2. Turn MENU to the desired menu.
3. Press MENU to select.
Menus and functions may vary
depending on vehicle options.
Page 140 of 413
Chevrolet Malibu Owner Manual (GMNA-Localizing-U.S./Canada/Mexico-
11348460) - 2018 - crc - 5/3/17
Instruments and Controls 139
Entering the Personalization
Menus
Select Settings from the
Home Page.
The following menus may be
available:
.Phone Connection (MTP Only)
. Time and Date
. Tone Settings
. Auto Volume Control
. Maximum Startup Volume
. Vehicle Settings
Phone Connection (MTP Only)
Select and the following may
display:
.
Charging Only
. Scan Music Folder Only
. Scan All Folders
Charging Only
This feature will charge a Media
Transfer Protocol (MTP) device
when connected to the USB port.
Bluetooth audio will be unavailable. Turn MENU to highlight, then press
to select.
Scan Music Folder Only
This feature will scan and index
music folders on an MTP device
when connected to the USB port.
Turn MENU to highlight, then press
to select.
Scan All Folders
This feature will scan and index all
folders on an MTP device when
connected to the USB port.
Turn MENU to highlight, then press
to select.Time and Date
Select Time and Date to adjust the
clock. See
Clock0107.
Tone Settings
Select to set the radio tone. See
“Tone Settings” under“Radio
Controls without Touchscreen” in
Operation 0167.
Auto Volume Control
This feature automatically adjusts
the radio volume based on the
speed of the vehicle.
Select the desired value.
Maximum Startup Volume
When the vehicle is started and the
radio volume is greater than this set
level, the volume is adjusted to this
level.
Select the desired value.
Vehicle Settings
Select and the following may
display:
.
Climate and Air Quality
. Comfort and Convenience
. Languages
. Lighting
. Power Door Locks
. Remote Lock, Unlock, Start
. Return to Factory Settings
. Software Information
. Valet Mode
Page 143 of 413
Chevrolet Malibu Owner Manual (GMNA-Localizing-U.S./Canada/Mexico-
11348460) - 2018 - crc - 5/3/17
142 Instruments and Controls
Remote Door Unlock
Select to set which doors will unlock
when pressing
Kon the RKE
transmitter. See Remote Keyless
Entry (RKE) System Operation 032.
Select Driver Door or All Doors.
Remote Start Auto Cool Seats
If equipped and turned on, this
feature will turn the ventilated seats
on when using remote start on
warm days.
Select Off, On-Driver and
Passenger, or On-Driver.
Remote Start Auto Heat Seats
Select to enable or disable which
seat will come on when remote start
is used. See Heated and Ventilated
Front Seats 061.
Select Off, On-Driver and
Passenger, or On-Driver.
Passive Door Unlock
Select to set which doors will unlock
when the RKE transmitter is within
range and the button on the outside
driver door handle is being used to unlock the vehicle. See
Remote
Keyless Entry (RKE) System
Operation 032.
Select Driver Door Only or All
Doors.
Passive Door Lock
This allows passive locking to be
turned on or off and selects
feedback. See Remote Keyless
Entry (RKE) System Operation 032.
Select Off, On, or On With Horn
Chirp.
Remote Left in Vehicle Reminder
This feature sounds an alert when
the RKE transmitter is left in the
vehicle. This menu also enables the
Remote No Longer Left in Vehicle
alert.
Select Off or On.
Return to Factory Settings
Select to return all vehicle
personalizations to the default
settings.
Select Yes or No.
Software Information
Select to view the radio software
information.
Valet Mode (If Equipped)
This will lock the infotainment
system and steering wheel controls.
It may also limit access to vehicle
storage locations, if equipped.
To enable valet mode: 1. Enter a four-digit code on the keypad.
2. Select Enter to go to the confirmation screen.
3. Re-enter the four-digit code.
Select Lock or Unlock to lock or
unlock the system. Select BACK to
go back to the previous menu.
Personalization Menu (Radio
with Touchscreen)
Settings can be made with the
ignition on and the vehicle not
moving.
Page 144 of 413
Chevrolet Malibu Owner Manual (GMNA-Localizing-U.S./Canada/Mexico-
11348460) - 2018 - crc - 5/3/17
Instruments and Controls 143
The following are all possible
personalization features. Depending
on the vehicle, some may not be
available.
{:Press to access the Home
Page Menu.
QorR: Touch to scroll through the
menus or setup items.
0: Touch to exit or return to the
previous screen or menu.
To access the menu:
1. Press
{.
2. Touch Settings.
Touch the menu item to select it.
Each of the menus is detailed in the
following information.
Settings menus and functions may
vary depending on vehicle options.
The following list of menu items may
be available:
. Time and Date
. Rear Seat Reminder
. Language
. Valet Mode .
Teen Driver
. Radio
. Vehicle
. Bluetooth
. Apple CarPlay
. Android Auto
. USB Auto Launch
. Voice
. Display
. Rear Camera
. Return to Factory Settings
. Software Information
. Wi-Fi
Time and Date
Select Time and Date to adjust the
clock. See Clock0107.
Rear Seat Reminder
This allows for a chime and a
message when the rear door has
been opened before or during
operation of the vehicle.
Select Off or On.
Language
Select, then select from the
available language(s).
Valet Mode
This will lock the infotainment
system and steering wheel controls.
It may also limit access to vehicle
storage locations, if equipped.
To enable valet mode:
1. Enter a four-digit code on the keypad.
2. Touch Enter to go to the confirmation screen.
3. Re-enter the four-digit code.
Touch Lock or Unlock to lock or
unlock the system. Touch Back to
go back to the previous menu.
Teen Driver
See “Teen Driver” under“Settings”
in the infotainment manual.
Radio
Select and the following may
display:
. Manage Favorites