2018 CHEVROLET MALIBU low beam
[x] Cancel search: low beamPage 4 of 413
Chevrolet Malibu Owner Manual (GMNA-Localizing-U.S./Canada/Mexico-
11348460) - 2018 - crc - 5/3/17
Introduction 3
{Danger
Danger indicates a hazard with a
high level of risk which will result
in serious injury or death.
{Warning
Warning indicates a hazard that
could result in injury or death.
Caution
Caution indicates a hazard that
could result in property or vehicle
damage.
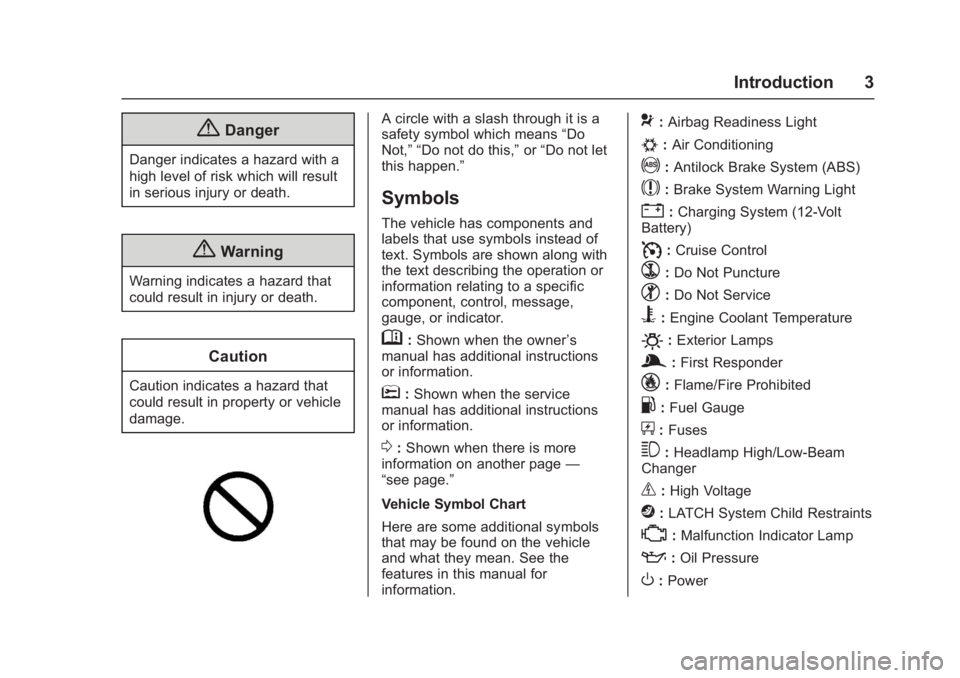
A circle with a slash through it is a
safety symbol which means“Do
Not,” “Do not do this,” or“Do not let
this happen.”
Symbols
The vehicle has components and
labels that use symbols instead of
text. Symbols are shown along with
the text describing the operation or
information relating to a specific
component, control, message,
gauge, or indicator.
M: Shown when the owner ’s
manual has additional instructions
or information.
*: Shown when the service
manual has additional instructions
or information.
0: Shown when there is more
information on another page —
“see page.”
Vehicle Symbol Chart
Here are some additional symbols
that may be found on the vehicle
and what they mean. See the
features in this manual for
information.
9: Airbag Readiness Light
#:Air Conditioning
!:Antilock Brake System (ABS)
$:Brake System Warning Light
":Charging System (12-Volt
Battery)
I: Cruise Control
`:Do Not Puncture
^:Do Not Service
B:Engine Coolant Temperature
O:Exterior Lamps
g: First Responder
_:Flame/Fire Prohibited
.:Fuel Gauge
+: Fuses
3:Headlamp High/Low-Beam
Changer
_: High Voltage
j: LATCH System Child Restraints
*:Malfunction Indicator Lamp
::Oil Pressure
O:Power
Page 105 of 413

Chevrolet Malibu Owner Manual (GMNA-Localizing-U.S./Canada/Mexico-
11348460) - 2018 - crc - 5/3/17
104 Instruments and Controls
Instruments and
Controls
Controls
Steering Wheel Adjustment . . . 105
Steering Wheel Controls . . . . . . 105
Heated Steering Wheel . . . . . . . 106
Horn . . . . . . . . . . . . . . . . . . . . . . . . . . 106
Windshield Wiper/Washer . . . . 106
Compass . . . . . . . . . . . . . . . . . . . . . 107
Clock . . . . . . . . . . . . . . . . . . . . . . . . . 107
Power Outlets . . . . . . . . . . . . . . . . 109
Wireless Charging . . . . . . . . . . . . 110
Warning Lights, Gauges, and
Indicators
Warning Lights, Gauges, andIndicators . . . . . . . . . . . . . . . . . . . . 111
Instrument Cluster (Base Level) . . . . . . . . . . . . . . . . . . . . . . . 112
Instrument Cluster
(Uplevel) . . . . . . . . . . . . . . . . . . . . 114
Speedometer . . . . . . . . . . . . . . . . . 117
Odometer . . . . . . . . . . . . . . . . . . . . . 117
Trip Odometer . . . . . . . . . . . . . . . . 117
Tachometer (Non-Hybrid) . . . . . 117
Fuel Gauge . . . . . . . . . . . . . . . . . . . 118
Power Indicator Gauge (Hybrid) . . . . . . . . . . . . . . . . . . . . . 119 Engine Coolant Temperature
Gauge . . . . . . . . . . . . . . . . . . . . . . 119
Seat Belt Reminders . . . . . . . . . 120
Airbag Readiness Light . . . . . . . 120
Passenger Airbag Status Indicator . . . . . . . . . . . . . . . . . . . . 121
Charging System Light . . . . . . . 122
Malfunction Indicator Lamp (Check Engine Light) . . . . . . . . 122
Brake System Warning Light . . . . . . . . . . . . . . . . . . . . . . . . 124
Electric Parking Brake Light . . . . . . . . . . . . . . . . . . . . . . . . 124
Service Electric Parking Brake Light . . . . . . . . . . . . . . . . . . . . . . . . 125
Antilock Brake System (ABS) Warning Light . . . . . . . . . . . . . . . 125
Lane Keep Assist (LKA) Light . . . . . . . . . . . . . . . . . . . . . . . . 125
Vehicle Ahead Indicator . . . . . . 126
Pedestrian Ahead Indicator . . . 126
Traction Off Light . . . . . . . . . . . . . 126
StabiliTrak OFF Light . . . . . . . . . 127
Traction Control System (TCS)/ StabiliTrak Light . . . . . . . . . . . . . 127
Tire Pressure Light . . . . . . . . . . . 127
Engine Oil Pressure Light . . . . 128
Low Fuel Warning Light (Uplevel) . . . . . . . . . . . . . . . . . . . . 128
Low Fuel Warning Light (Base Level) . . . . . . . . . . . . . . . . . . . . . . . 129 Security Light . . . . . . . . . . . . . . . . . 129
Vehicle Ready Light
(Hybrid) . . . . . . . . . . . . . . . . . . . . . 129
High-Beam On Light . . . . . . . . . . 129
Lamps On Reminder . . . . . . . . . 130
Cruise Control Light . . . . . . . . . . 130
Door Ajar Light (Uplevel) . . . . . 130
Information Displays
Power Flows (Hybrid) . . . . . . . . . 130
Energy Information (Hybrid) . . . . . . . . . . . . . . . . . . . . . 131
Driver Information Center (DIC) (Base Level) . . . . . . . . . . . . . . . . 131
Driver Information Center (DIC) (Uplevel) . . . . . . . . . . . . . . . . . . . . 134
Vehicle Messages
Vehicle Messages . . . . . . . . . . . . 137
Engine Power Messages . . . . . 138
Vehicle Speed Messages . . . . . 138
Vehicle Personalization
Vehicle Personalization . . . . . . . 138
Universal Remote System
Universal Remote System . . . . 150
Universal Remote SystemProgramming . . . . . . . . . . . . . . . 150
Universal Remote System Operation . . . . . . . . . . . . . . . . . . . 153
Page 130 of 413
Chevrolet Malibu Owner Manual (GMNA-Localizing-U.S./Canada/Mexico-
11348460) - 2018 - crc - 5/3/17
Instruments and Controls 129
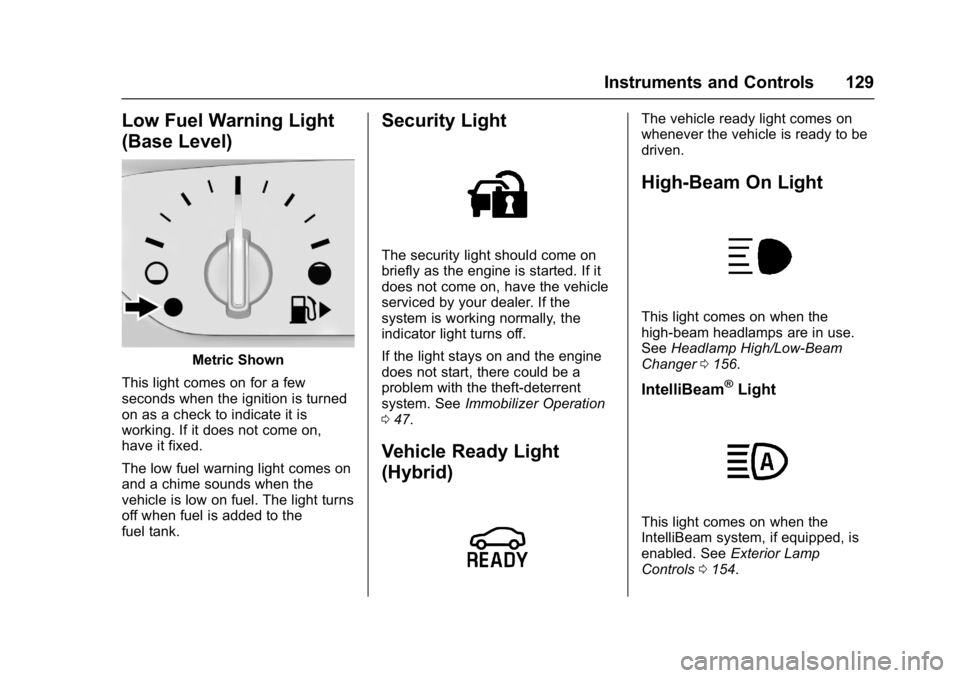
Low Fuel Warning Light
(Base Level)
Metric Shown
This light comes on for a few
seconds when the ignition is turned
on as a check to indicate it is
working. If it does not come on,
have it fixed.
The low fuel warning light comes on
and a chime sounds when the
vehicle is low on fuel. The light turns
off when fuel is added to the
fuel tank.
Security Light
The security light should come on
briefly as the engine is started. If it
does not come on, have the vehicle
serviced by your dealer. If the
system is working normally, the
indicator light turns off.
If the light stays on and the engine
does not start, there could be a
problem with the theft-deterrent
system. See Immobilizer Operation
0 47.
Vehicle Ready Light
(Hybrid)
The vehicle ready light comes on
whenever the vehicle is ready to be
driven.
High-Beam On Light
This light comes on when the
high-beam headlamps are in use.
See Headlamp High/Low-Beam
Changer 0156.
IntelliBeam®Light
This light comes on when the
IntelliBeam system, if equipped, is
enabled. See Exterior Lamp
Controls 0154.
Page 155 of 413
Chevrolet Malibu Owner Manual (GMNA-Localizing-U.S./Canada/Mexico-
11348460) - 2018 - crc - 5/3/17
154 Lighting
Lighting
Exterior Lighting
Exterior Lamp Controls . . . . . . . 154
Exterior Lamps OffReminder . . . . . . . . . . . . . . . . . . . 156
Headlamp High/Low-Beam Changer . . . . . . . . . . . . . . . . . . . . 156
Flash-to-Pass . . . . . . . . . . . . . . . . 156
Daytime Running Lamps (DRL) . . . . . . . . . . . . . . . 156
Automatic Headlamp System . . . . . . . . . . . . . . . . . . . . . . 157
Hazard Warning Flashers . . . . . 157
Turn and Lane-Change Signals . . . . . . . . . . . . . . . . . . . . . . 158
Interior Lighting
Instrument Panel IlluminationControl . . . . . . . . . . . . . . . . . . . . . . 158
Courtesy Lamps . . . . . . . . . . . . . . 159
Dome Lamps . . . . . . . . . . . . . . . . . 159
Reading Lamps . . . . . . . . . . . . . . 159
Lighting Features
Entry Lighting . . . . . . . . . . . . . . . . 160
Exit Lighting . . . . . . . . . . . . . . . . . . 160
Battery Load Management . . . 160
Battery Power Protection . . . . . 161
Exterior Lighting Battery Saver . . . . . . . . . . . . . . . . . . . . . . . 161
Exterior Lighting
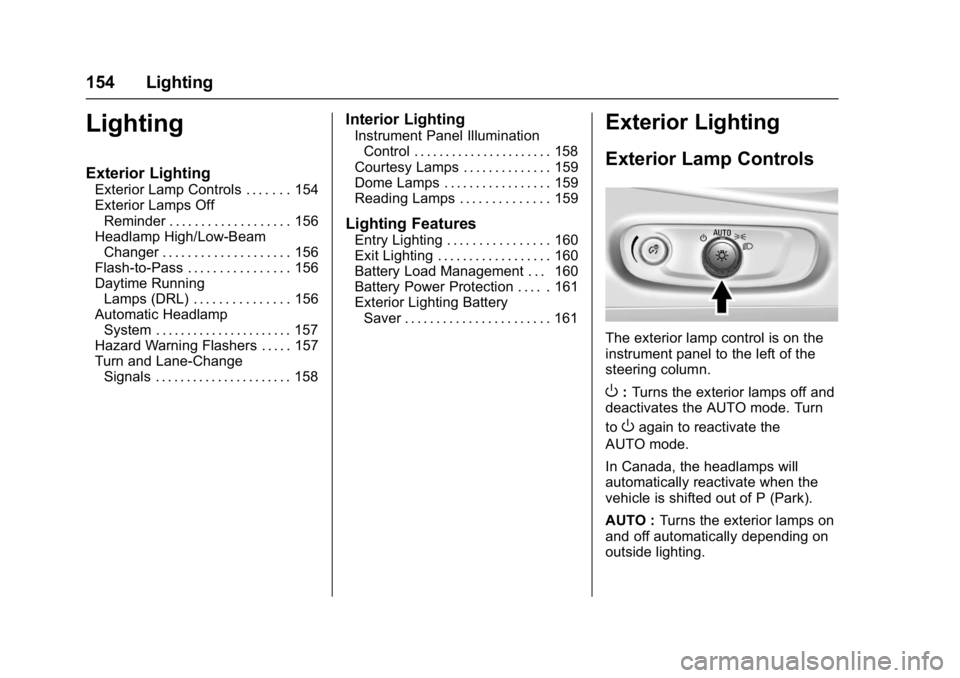
Exterior Lamp Controls
The exterior lamp control is on the
instrument panel to the left of the
steering column.
O: Turns the exterior lamps off and
deactivates the AUTO mode. Turn
to
Oagain to reactivate the
AUTO mode.
In Canada, the headlamps will
automatically reactivate when the
vehicle is shifted out of P (Park).
AUTO : Turns the exterior lamps on
and off automatically depending on
outside lighting.
Page 156 of 413
Chevrolet Malibu Owner Manual (GMNA-Localizing-U.S./Canada/Mexico-
11348460) - 2018 - crc - 5/3/17
Lighting 155
;:Turns on the parking lamps
including all lamps, except the
headlamps.
5: Turns on the headlamps
together with the parking lamps and
instrument panel lights.
IntelliBeam®System
If equipped, this system turns the
vehicle's high-beam headlamps on
and off according to surrounding
traffic conditions.
The system turns the high-beam
headlamps on when it is dark
enough and there is no other traffic
present.
This light
bcomes on in the
instrument cluster when the
IntelliBeam system is enabled. Turning On and Enabling
IntelliBeam
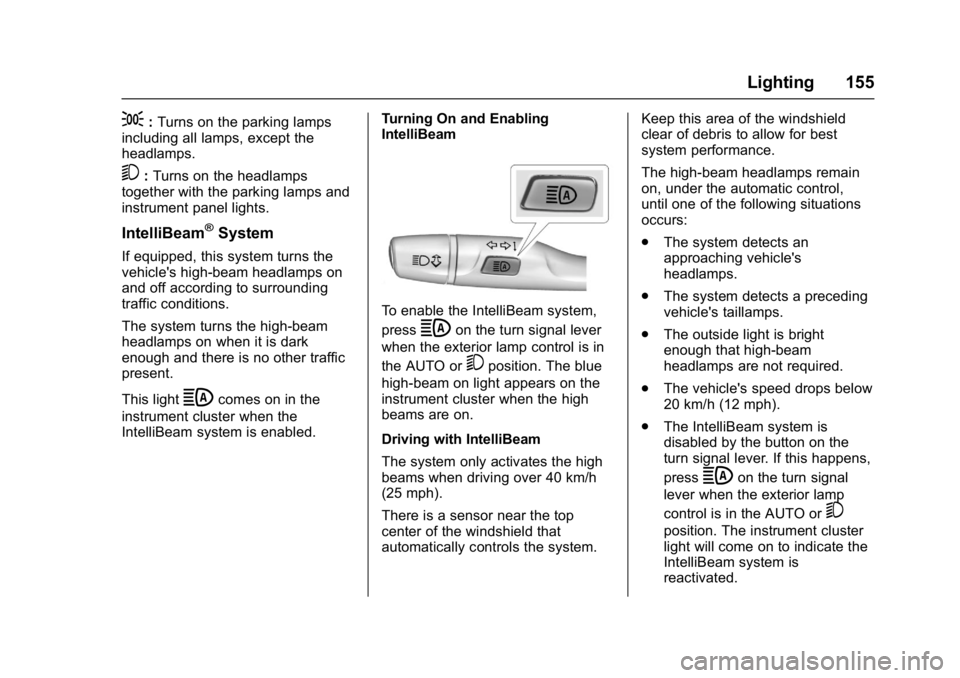
To enable the IntelliBeam system,
press
bon the turn signal lever
when the exterior lamp control is in
the AUTO or
5position. The blue
high-beam on light appears on the
instrument cluster when the high
beams are on.
Driving with IntelliBeam
The system only activates the high
beams when driving over 40 km/h
(25 mph).
There is a sensor near the top
center of the windshield that
automatically controls the system. Keep this area of the windshield
clear of debris to allow for best
system performance.
The high-beam headlamps remain
on, under the automatic control,
until one of the following situations
occurs:
.
The system detects an
approaching vehicle's
headlamps.
. The system detects a preceding
vehicle's taillamps.
. The outside light is bright
enough that high-beam
headlamps are not required.
. The vehicle's speed drops below
20 km/h (12 mph).
. The IntelliBeam system is
disabled by the button on the
turn signal lever. If this happens,
press
bon the turn signal
lever when the exterior lamp
control is in the AUTO or
5
position. The instrument cluster
light will come on to indicate the
IntelliBeam system is
reactivated.
Page 157 of 413
Chevrolet Malibu Owner Manual (GMNA-Localizing-U.S./Canada/Mexico-
11348460) - 2018 - crc - 5/3/17
156 Lighting
The high beams may not turn off
automatically if the system cannot
detect another vehicle's lamps
because of any of the following:
.The other vehicle's lamps are
missing, damaged, obstructed
from view, or otherwise
undetected.
. The other vehicle's lamps are
covered with dirt, snow, and/or
road spray.
. The other vehicle's lamps cannot
be detected due to dense
exhaust, smoke, fog, snow, road
spray, mist, or other airborne
obstructions.
. The vehicle's windshield is dirty,
cracked, or obstructed by
something that blocks the view
of the light sensor.
. The vehicle is loaded such that
the front end points upward,
causing the light sensor to aim
high and not detect headlamps
and taillamps.
. Driving on winding or hilly roads. The IntelliBeam system may need to
be disabled if any of the above
conditions exist.
Exterior Lamps Off
Reminder
A warning chime sounds if the driver
door is opened while the ignition is
off and the exterior lamps are on.
Headlamp High/
Low-Beam Changer
3
:
Push the turn signal lever away
from you and release, to turn the
high beams on. To return to low
beams, push the lever again or pull
it toward you and release.
This indicator light turns on in the
instrument cluster when the
high-beam headlamps are on.
Flash-to-Pass
To flash the high beams, pull the
turn signal lever toward you, and
release.
Daytime Running
Lamps (DRL)
DRL can make it easier for others to
see the front of your vehicle during
the day. Fully functional DRL are
required on all vehicles first sold in
Canada.
The DRL system comes on in
daylight when the following
conditions are met:
. The ignition is on.
. The exterior lamp control is in
AUTO, if equipped.
. The light sensor determines it is
daytime.
. The vehicle is not in P (Park).
When the DRL are on, the taillamps,
sidemarker lamps, instrument panel
lights, and other lamps will not
be on.
Page 161 of 413
Chevrolet Malibu Owner Manual (GMNA-Localizing-U.S./Canada/Mexico-
11348460) - 2018 - crc - 5/3/17
160 Lighting
Lighting Features
Entry Lighting
Some exterior lamps and most of
the interior lamps turn on briefly at
night or in areas with limited lighting
when the Remote Keyless Entry
(RKE) transmitter
Kbutton is
pressed. See Remote Keyless Entry
(RKE) System Operation 032. After
about 30 seconds the exterior lamps
turn off, then the dome lamps and
remaining interior lamps dim to off.
Entry lighting can be disabled
manually by turning the ignition on
or to ACC/ACCESSORY, or by
pressing
Qon the RKE transmitter.
This feature can be changed. See
Vehicle Personalization 0138.
Exit Lighting
Some exterior lamps and interior
lights come on at night, or in areas
with limited lighting, when the driver
door is opened after the ignition is
turned off. The dome lamp comes
on after the ignition is turned off. The exterior lamps and dome lamp
remain on for a set amount of time,
then automatically turn off.
The exterior lamps turn off
immediately by turning the exterior
lamp control off.
This feature can be changed. See
Vehicle Personalization
0138.
Battery Load
Management
The vehicle has Electric Power
Management (EPM) that estimates
the battery's temperature and state
of charge. It then adjusts the voltage
for best performance and extended
life of the battery.
When the battery's state of charge
is low, the voltage is raised slightly
to quickly bring the charge back up.
When the state of charge is high,
the voltage is lowered slightly to
prevent overcharging. If the vehicle
has a voltmeter gauge or a voltage
display on the Driver Information
Center (DIC), you may see the voltage move up or down. This is
normal. If there is a problem, an
alert will be displayed.
The battery can be discharged at
idle if the electrical loads are very
high. This is true for all vehicles.
This is because the generator
(alternator) may not be spinning fast
enough at idle to produce all of the
power needed for very high
electrical loads.
A high electrical load occurs when
several of the following are on, such
as: headlamps, high beams, rear
window defogger, climate control fan
at high speed, heated seats, engine
cooling fans, trailer loads, and loads
plugged into accessory power
outlets.
EPM works to prevent excessive
discharge of the battery. It does this
by balancing the generator's output
and the vehicle's electrical needs.
It can increase engine idle speed to
generate more power whenever
needed. It can temporarily reduce
the power demands of some
accessories.
Page 298 of 413
Chevrolet Malibu Owner Manual (GMNA-Localizing-U.S./Canada/Mexico-
11348460) - 2018 - crc - 5/3/17
Vehicle Care 297
Headlamps, Front Turn
Signal, Sidemarker, and
Parking Lamps
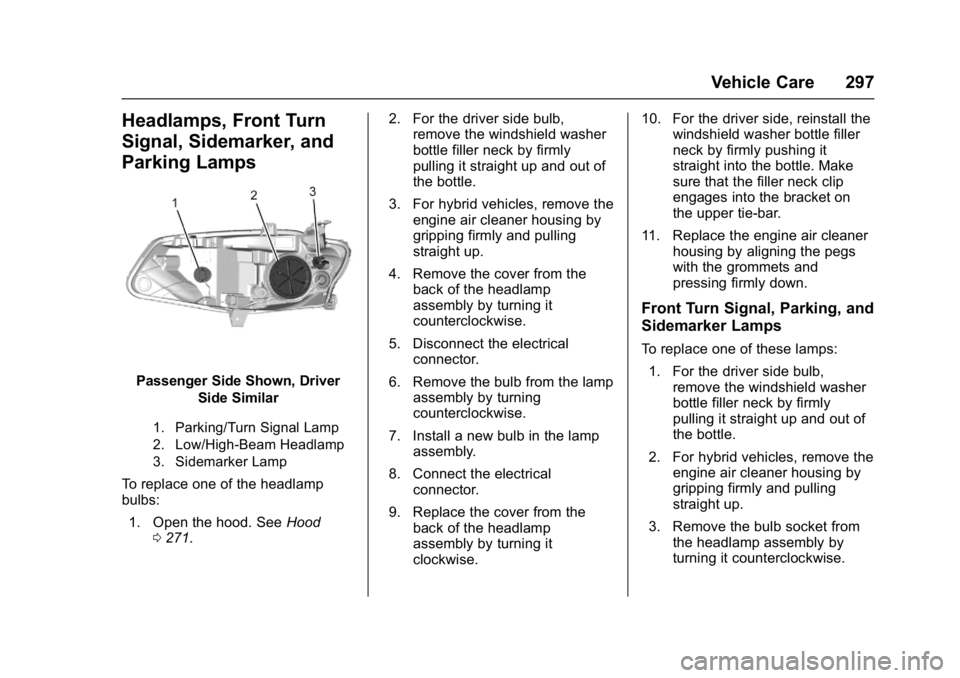
Passenger Side Shown, DriverSide Similar
1. Parking/Turn Signal Lamp
2. Low/High-Beam Headlamp
3. Sidemarker Lamp
To replace one of the headlamp
bulbs:
1. Open the hood. See Hood
0 271. 2. For the driver side bulb,
remove the windshield washer
bottle filler neck by firmly
pulling it straight up and out of
the bottle.
3. For hybrid vehicles, remove the engine air cleaner housing by
gripping firmly and pulling
straight up.
4. Remove the cover from the back of the headlamp
assembly by turning it
counterclockwise.
5. Disconnect the electrical connector.
6. Remove the bulb from the lamp assembly by turning
counterclockwise.
7. Install a new bulb in the lamp assembly.
8. Connect the electrical connector.
9. Replace the cover from the back of the headlamp
assembly by turning it
clockwise. 10. For the driver side, reinstall the
windshield washer bottle filler
neck by firmly pushing it
straight into the bottle. Make
sure that the filler neck clip
engages into the bracket on
the upper tie-bar.
11. Replace the engine air cleaner housing by aligning the pegs
with the grommets and
pressing firmly down.
Front Turn Signal, Parking, and
Sidemarker Lamps
To replace one of these lamps:
1. For the driver side bulb, remove the windshield washer
bottle filler neck by firmly
pulling it straight up and out of
the bottle.
2. For hybrid vehicles, remove the engine air cleaner housing by
gripping firmly and pulling
straight up.
3. Remove the bulb socket from the headlamp assembly by
turning it counterclockwise.