2018 CHEVROLET CRUZE reset
[x] Cancel search: resetPage 169 of 404
Chevrolet Cruze Owner Manual (GMNA-Localizing-U.S./Canada/Mexico-
11348462) - 2018 - crc - 5/15/17
168 Infotainment System
To change a preset button, tune to
the new desired channel and hold
the button.
Listening to Preset Channels1. Touch
SorTrepeatedly to
select the desired
favorites page.
2. Touch the preset button to listen to the channel.
Using the SiriusXM Menu
Operation
1. Touch MENU on the SXM radio screen.
2. Touch the menu to select the desired item or to display the
detail menu item.
3. Touch
0to return to the
previous menu.
Channel List 1. Touch Channel List from the SXM menu. The channel list is
displayed. 2. Touch
QorRto find the
desired channel. Touch the
channel to select it.
Tone Settings 1. Touch Tone Settings. See “Tone Settings” under
Operation 0164.
2. Touch
0.
Auto Volume 1. Touch Auto Volume. See “Auto
Volume” underOperation
0 164.
2. Touch
0.
Categories 1. Touch Categories.
2. Touch
QorRto find the
desired category. Touch the
category to select it.
Explicit Content Filter
When on, only a filtered list of
channels will be received. When off,
all regular SXM programming
subscribed to will be received. 1. Touch SXM Explicit Filter. 2. Select to enable or disable.
Radio Reception
Frequency interference and static
can occur during normal radio
reception if items such as mobile
phone chargers, vehicle
convenience accessories, and
external electronic devices are
plugged into the accessory power
outlet. If there is interference or
static, unplug the item from the
accessory power outlet.
FM
FM signals only reach about 16 to
65 km (10 to 40 mi). Although the
radio has a built-in electronic circuit
that automatically works to reduce
interference, some static can occur,
especially around tall buildings or
hills, causing the sound to fade in
and out.
AM
The range for most AM stations is
greater than for FM, especially at
night. The longer range can cause
station frequencies to interfere with
each other. Static can occur when
Page 218 of 404
Chevrolet Cruze Owner Manual (GMNA-Localizing-U.S./Canada/Mexico-
11348462) - 2018 - crc - 5/15/17
Driving and Operating 217
Entry (RKE) transmitter is outside
the vehicle, the vehicle will turn off
after one hour.
If the vehicle is left parked while
running and the RKE transmitter is
inside, the vehicle will turn off after
two hours.
Vehicles without pushbutton start
will run indefinitely, or until the
ignition is turned off.
Automatic Transmission
The timer will reset if the vehicle is
shifted out of P (Park) while it is
running.
Manual Transmission
The timer will reset if the vehicle
speed is greater than 4 km/h
(2.5 mph).Engine Exhaust
{Warning
Engine exhaust contains carbon
monoxide (CO), which cannot be
seen or smelled. Exposure to CO
can cause unconsciousness and
even death.
Exhaust may enter the vehicle if:. The vehicle idles in areas
with poor ventilation
(parking garages, tunnels,
deep snow that may block
underbody airflow or tail
pipes).
. The exhaust smells or
sounds strange or different.
. The exhaust system leaks
due to corrosion or damage.
. The vehicle exhaust system
has been modified,
damaged, or improperly
repaired.
(Continued)
Warning (Continued)
.There are holes or openings
in the vehicle body from
damage or aftermarket
modifications that are not
completely sealed.
If unusual fumes are detected or
if it is suspected that exhaust is
coming into the vehicle: . Drive it only with the
windows completely down.
. Have the vehicle repaired
immediately.
Never park the vehicle with the
engine running in an enclosed
area such as a garage or a
building that has no fresh air
ventilation.
Page 227 of 404
Chevrolet Cruze Owner Manual (GMNA-Localizing-U.S./Canada/Mexico-
11348462) - 2018 - crc - 5/15/17
226 Driving and Operating
Caution (Continued)
transmission fluid. This message
clears when the transmission fluid
has cooled sufficiently.
L : Electronic Range Select (ERS)
or Manual Mode allows for the
selection of the range of gear
positions. See Manual Mode0226.
Operating Modes
The transmission may operate in a
lower gear. The engine speed may
be higher and there may be an
increase in noise during the
following conditions:
. When climbing a grade.
. When driving downhill.
. When driving in hot
temperatures or at high altitude.
Manual Mode
Driver Shift Control (DSC)
Driver Shift Control (DSC) allows the
automatic transmission to be shifted
similar to a manual transmission. Electronic Range Select (ERS) or
Manual Mode allows the range of
gear positions to be selected. Use
this mode when driving downhill or
to limit the top gear and vehicle
speed. The shift position indicator in
the Driver Information Center (DIC)
will display a number next to the L.
This indicates the highest available
gear under Manual Mode.
To use:
1. Move the shift lever to L (Low).
2. Press + (plus) or −(minus) on
the shift lever to increase or
decrease the available gear
range.
When shifting to L (Low), the
transmission will shift to a preset
lower gear range. For this preset
range, the highest gear available is
displayed next to the L in the DIC.
See Driver Information Center (DIC)
(Base) 0138 orDriver Information
Center (DIC) (Uplevel) 0141.
All gears below that number are
available to use.
While using ERS, cruise control can
be used. The transmission will not allow
shifting to the next lower gear if the
vehicle speed or engine rpm is
too high.
If vehicle speed is not reduced
within the time allowed, the lower
gear range shift will not be
completed. Slow the vehicle, then
press
−(minus) to the desired lower
gear range.
Second Gear Start Feature
When accelerating the vehicle from
a stop in snowy and icy conditions,
you may want to shift into
2 (Second) gear. A higher gear
allows you to gain more traction on
slippery surfaces.
With the DSC feature, the vehicle
can be set to pull away in
2 (Second) gear.
1. Move the shift lever from D (Drive) to L (Low).
2. With the vehicle stopped, press the + (plus) end of the button to
select 2 (Second) gear. The
vehicle will start from a stop
position in 2 (Second) gear.
3. Once moving, select the desired drive gear.
Page 269 of 404
Chevrolet Cruze Owner Manual (GMNA-Localizing-U.S./Canada/Mexico-
11348462) - 2018 - crc - 5/15/17
268 Vehicle Care
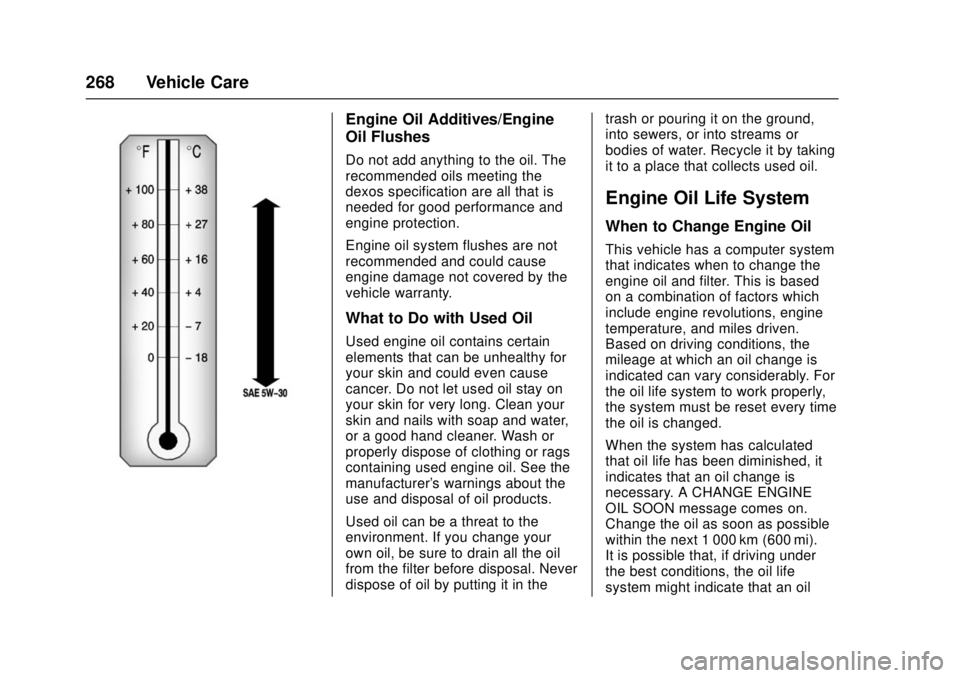
Engine Oil Additives/Engine
Oil Flushes
Do not add anything to the oil. The
recommended oils meeting the
dexos specification are all that is
needed for good performance and
engine protection.
Engine oil system flushes are not
recommended and could cause
engine damage not covered by the
vehicle warranty.
What to Do with Used Oil
Used engine oil contains certain
elements that can be unhealthy for
your skin and could even cause
cancer. Do not let used oil stay on
your skin for very long. Clean your
skin and nails with soap and water,
or a good hand cleaner. Wash or
properly dispose of clothing or rags
containing used engine oil. See the
manufacturer's warnings about the
use and disposal of oil products.
Used oil can be a threat to the
environment. If you change your
own oil, be sure to drain all the oil
from the filter before disposal. Never
dispose of oil by putting it in thetrash or pouring it on the ground,
into sewers, or into streams or
bodies of water. Recycle it by taking
it to a place that collects used oil.
Engine Oil Life System
When to Change Engine Oil
This vehicle has a computer system
that indicates when to change the
engine oil and filter. This is based
on a combination of factors which
include engine revolutions, engine
temperature, and miles driven.
Based on driving conditions, the
mileage at which an oil change is
indicated can vary considerably. For
the oil life system to work properly,
the system must be reset every time
the oil is changed.
When the system has calculated
that oil life has been diminished, it
indicates that an oil change is
necessary. A CHANGE ENGINE
OIL SOON message comes on.
Change the oil as soon as possible
within the next 1 000 km (600 mi).
It is possible that, if driving under
the best conditions, the oil life
system might indicate that an oil
Page 270 of 404

Chevrolet Cruze Owner Manual (GMNA-Localizing-U.S./Canada/Mexico-
11348462) - 2018 - crc - 5/15/17
Vehicle Care 269
change is not necessary for up to a
year. The engine oil and filter must
be changed at least once a year
and, at this time, the system must
be reset. Your dealer has trained
service people who will perform this
work and reset the system. It is also
important to check the oil regularly
over the course of an oil drain
interval and keep it at the proper
level.
If the system is ever reset
accidentally, the oil must be
changed at 5 000 km (3,000 mi)
since the last oil change.
Remember to reset the oil life
system whenever the oil is changed.
How to Reset the Engine Oil
Life System
Reset the system whenever the
engine oil is changed so that the
system can calculate the next
engine oil change. To reset the
system:Resetting the Oil Life System
(Base Level Cluster)
1. Display the REMAINING OIL LIFE on the DIC.
See Driver Information Center
(DIC) (Base) 0138 orDriver
Information Center (DIC)
(Uplevel) 0141.
2. Press and hold SET/CLR on the turn signal lever while the
Oil Life display is active. The
oil life will change to 100%.
Resetting the Oil Life System
(Uplevel Cluster) 1. Display the REMAINING OIL LIFE on the DIC.
See Driver Information Center
(DIC) (Base) 0138 orDriver
Information Center (DIC)
(Uplevel) 0141.
2. Press and hold
Von the DIC
while the Oil Life display is
active. The oil life will change
to 100%. The oil life system can also be reset
as follows:
1. Turn the ignition on with the engine off.
See Ignition Positions (Key
Access) 0206 orIgnition
Positions (Keyless Access)
0 208.
2. Fully press and release the accelerator pedal three times
within five seconds.
The system is reset when the
CHANGE ENGINE OIL SOON
message goes off.
If the CHANGE ENGINE OIL SOON
message comes back on when the
vehicle is started, the engine oil life
system has not been reset. Repeat
the procedure.Automatic Transmission
Fluid
How to Check Automatic
Transmission Fluid
It is not necessary to check the
transmission fluid level.
A transmission fluid leak is the only
Page 285 of 404
Chevrolet Cruze Owner Manual (GMNA-Localizing-U.S./Canada/Mexico-
11348462) - 2018 - crc - 5/15/17
284 Vehicle Care
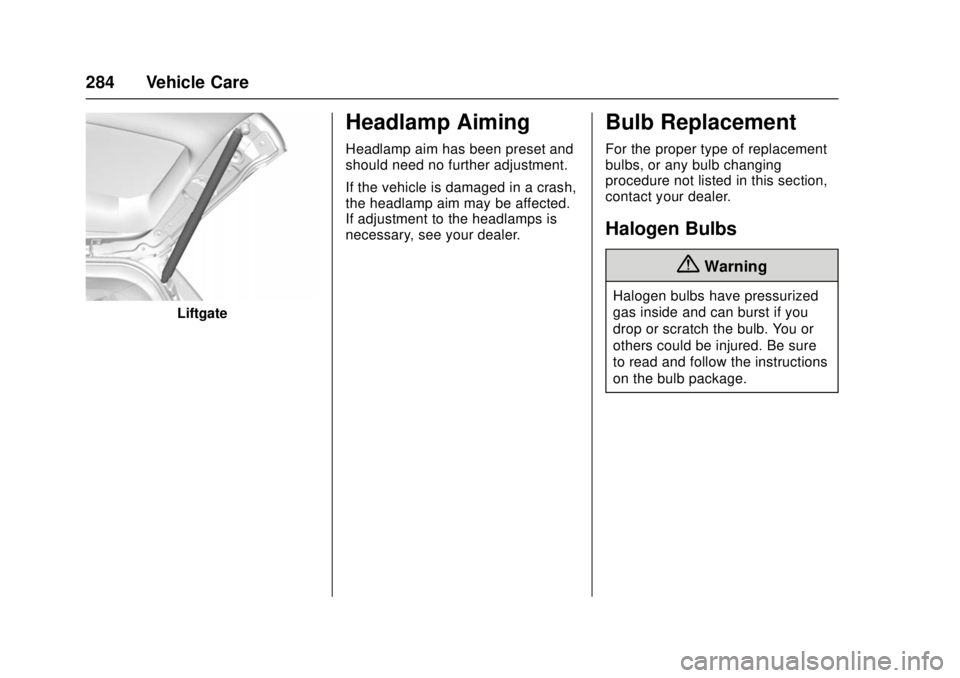
Liftgate
Headlamp Aiming
Headlamp aim has been preset and
should need no further adjustment.
If the vehicle is damaged in a crash,
the headlamp aim may be affected.
If adjustment to the headlamps is
necessary, see your dealer.
Bulb Replacement
For the proper type of replacement
bulbs, or any bulb changing
procedure not listed in this section,
contact your dealer.
Halogen Bulbs
{Warning
Halogen bulbs have pressurized
gas inside and can burst if you
drop or scratch the bulb. You or
others could be injured. Be sure
to read and follow the instructions
on the bulb package.
Page 311 of 404
Chevrolet Cruze Owner Manual (GMNA-Localizing-U.S./Canada/Mexico-
11348462) - 2018 - crc - 5/15/17
310 Vehicle Care
matched to the tire/wheel positions,
using a TPMS relearn tool, in the
following order: driver side front tire,
passenger side front tire, passenger
side rear tire, and driver side rear.
See your dealer for service or to
purchase a relearn tool. A TPMS
relearn tool can also be purchased.
See Tire Pressure Monitor Sensor
Activation Tool at
www.gmtoolsandequipment.com or
call 1-800-GM TOOLS
(1-800-468-6657).
There are two minutes to match the
first tire/wheel position, and
five minutes overall to match all four
tire/wheel positions. If it takes
longer, the matching process stops
and must be restarted.
The TPMS sensor matching
process is:1. Set the parking brake.
2. Turn the ignition on without starting the vehicle or place the
vehicle in Service Mode.
See Ignition Positions (Key
Access) 0206 orIgnition
Positions (Keyless Access)
0 208. 3. Uplevel DIC Only: Make sure
the Tire Pressure info page
option is turned on. The info
pages on the DIC can be
turned on and off through the
Options menu.
See Driver Information Center
(DIC) (Base) 0138 orDriver
Information Center (DIC)
(Uplevel) 0141.
4. If the vehicle has an uplevel DIC, use the DIC controls on
the right side of the steering
wheel to scroll to the Tire
Pressure screen under the DIC
info page.
If the vehicle has a base level
DIC, press MENU to select the
Vehicle Information Menu in
the DIC. Use the thumbwheel
to scroll to the Tire Pressure
Menu item screen.
5. If the vehicle has an uplevel DIC, press and hold the
V
(Set/Reset) button in the center
of the DIC controls.
If the vehicle has a base level
DIC, press SET/CLR to begin
the sensor matching process. A message requesting
acceptance of the process may
display.
If the vehicle has a base level
DIC, press SET/CLR again to
confirm the selection.
The horn sounds twice to
signal the receiver is in relearn
mode and the TIRE
LEARNING ACTIVE message
displays on the DIC screen.
6. Start with the driver side front tire.
7. Place the relearn tool against the tire sidewall, near the valve
stem. Then press the button to
activate the TPMS sensor.
A horn chirp confirms that the
sensor identification code has
been matched to this tire and
wheel position.
8. Proceed to the passenger side front tire, and repeat the
procedure in Step 7.
9. Proceed to the passenger side rear tire, and repeat the
procedure in Step 7.
Page 313 of 404
Chevrolet Cruze Owner Manual (GMNA-Localizing-U.S./Canada/Mexico-
11348462) - 2018 - crc - 5/15/17
312 Vehicle Care
Adjust the front and rear tires to
the recommended inflation
pressure on the Tire and
Loading Information label after
the tires have been rotated.
SeeTire Pressure 0305 and
Vehicle Load Limits 0202.
Reset the Tire Pressure Monitor
System. See Tire Pressure
Monitor Operation 0308.
Check that all wheel nuts are
properly tightened. See “Wheel
Nut Torque” underCapacities
and Specifications 0364.
{Warning
Rust or dirt on a wheel, or on the
parts to which it is fastened, can
make wheel nuts become loose
after time. The wheel could come
off and cause an accident. When
changing a wheel, remove any
rust or dirt from places where the
wheel attaches to the vehicle. In
an emergency, a cloth or a paper
(Continued)
Warning (Continued)
towel can be used; however, use
a scraper or wire brush later to
remove all rust or dirt.
Lightly coat the center of the
wheel hub with wheel bearing
grease after a wheel change or
tire rotation to prevent corrosion
or rust build-up. Do not get
grease on the flat wheel
mounting surface or on the
wheel nuts or bolts.
When It Is Time for New
Tires
Factors such as maintenance,
temperatures, driving speeds,
vehicle loading, and road conditions
affect the wear rate of the tires.
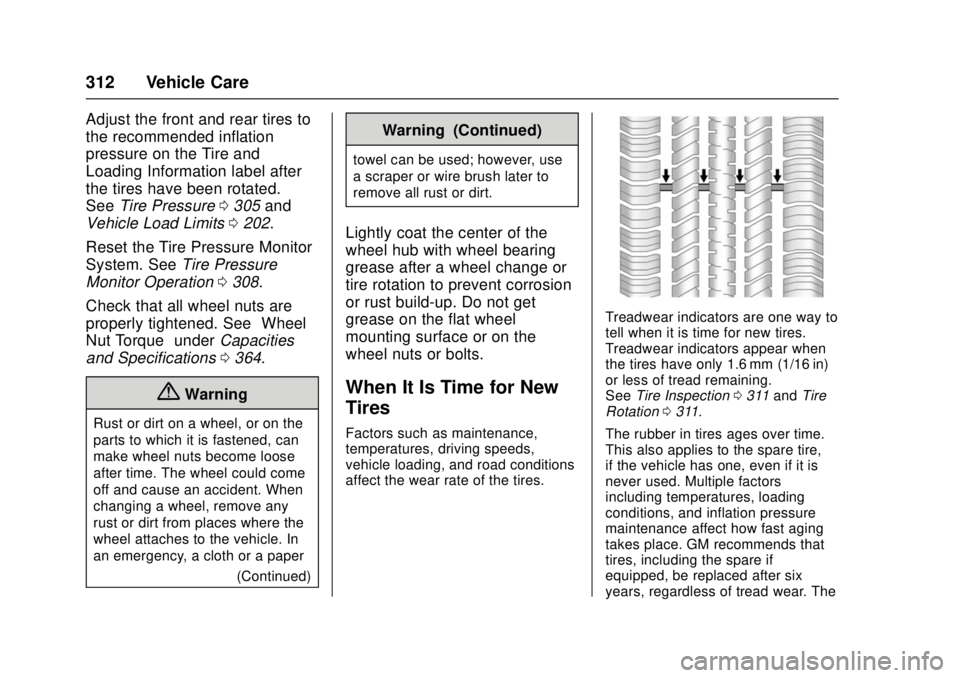
Treadwear indicators are one way to
tell when it is time for new tires.
Treadwear indicators appear when
the tires have only 1.6 mm (1/16 in)
or less of tread remaining.
SeeTire Inspection 0311 and Tire
Rotation 0311.
The rubber in tires ages over time.
This also applies to the spare tire,
if the vehicle has one, even if it is
never used. Multiple factors
including temperatures, loading
conditions, and inflation pressure
maintenance affect how fast aging
takes place. GM recommends that
tires, including the spare if
equipped, be replaced after six
years, regardless of tread wear. The