2018 CHEVROLET CRUZE display
[x] Cancel search: displayPage 114 of 404

Chevrolet Cruze Owner Manual (GMNA-Localizing-U.S./Canada/Mexico-
11348462) - 2018 - crc - 5/15/17
Instruments and Controls 113
The wiper operations return to
normal when the transmission is no
longer in N (Neutral) or the vehicle
speed has increased.
Reverse Gear Wipes
If the rear wiper control is off, the
rear wiper will automatically operate
continuously when the shift lever is
in R (Reverse), and the front
windshield wiper is performing low
or high speed wipes. If the rear
wiper control is off, the shift lever is
in R (Reverse), and the front
windshield wiper is performing
interval wipes, then the rear wiper
automatically performs interval
wipes.
This feature can be turned on or off.
SeeVehicle Personalization 0145.
The windshield washer reservoir is
used for the windshield and rear
window. Check the fluid level if
either washer is not working. See
Washer Fluid 0276.Compass
The vehicle may have a compass
display in the Driver Information
Center (DIC). The compass receives
its heading and other information
from the Global Positioning
System (GPS) antenna, StabiliTrak,
and vehicle speed information.
Avoid covering the GPS antenna,
located on the roof, for long periods
of time with objects that may
interfere with the antenna's ability to
receive a satellite signal. The
compass system is designed to
operate for a certain number of
miles or degrees of turn before
needing a signal from the GPS
satellites. When the compass
display shows CAL, drive the
vehicle for a short distance in an
open area where it can receive a
GPS signal. The compass system
will automatically determine when
the GPS signal is restored and
provide a heading again.
Clock
Base Radio
The infotainment system controls
are used to access the time and
date settings through the menu
system. See Operation0164 on
how to use the menu system.
Setting the Time and Date
When Auto Set is enabled the time
cannot be manually set.
1. Press
{, then touch
SETTINGS.
2. Touch Time and Date, then Set Time or Set Date.
3. Touch + or −to adjust the
value.
4. Touch
RorQto adjust AM or
PM for 12 hour format.
5. Touch
0.
Using Auto Set
1. Press{, then touch
SETTINGS.
Page 115 of 404

Chevrolet Cruze Owner Manual (GMNA-Localizing-U.S./Canada/Mexico-
11348462) - 2018 - crc - 5/15/17
114 Instruments and Controls
2. Touch Time and Date, thenAuto Set.
3. Select from the available selections.
4. Touch
0.
Setting the 12/24 Hour Format
1. Press{, then touch
SETTINGS.
2. Touch Time and Date, then select 12h or 24h format.
3. Touch
0.
Setting the Month and Day
Format
1. Press{, then touch
SETTINGS.
2. Touch Time and Date, then Set Date Format.
3. Select DD/MM/YYYY (day/ month/year), MM/DD/YYYY
(month/day/year), or YYYY/
MM/DD (year/month/day)
format.
4. Touch
0.
Uplevel Radio Using Center
Stack Controls
The infotainment system controls
are used to access the time and
date settings through the menu
system. See “Using the System”
under “Introduction” in the
infotainment manual.
To set the time or date:
1. Press
{, then select
SETTINGS.
2. Select Time and Date, then the desired function.
3. Turn the MENU knob to increase or decrease the value.
4. Press the MENU knob to go to the next value. After the last
value is selected, the system
will update and return to the
Settings menu. Press
oBACK
to go to the last menu and
save the changes.
Auto Set requires an OnStar
service plan. If auto timing is set, the time
displayed on the clock may not
update immediately when driving
into a new time zone.
To set the clock display:
1. Select SETTINGS from the Home Page, then select Time
and Date.
2. Select Clock Display.
3. Turn the MENU knob to Off or On.
4. Press the MENU knob to select.
Press
oBACK to go to the last
menu and save the changes.
Uplevel Radio Using
Infotainment Display Controls
To set the time:
1. Touch SETTINGS from the Home Page, then touch Time
and Date.
Page 116 of 404

Chevrolet Cruze Owner Manual (GMNA-Localizing-U.S./Canada/Mexico-
11348462) - 2018 - crc - 5/15/17
Instruments and Controls 115
2. Touch Set Time and touch«
orªto increase or decrease
hours, minutes, and AM or PM.
Touch 12–24 Hr for 12 or
24 hour clock.
3. Touch
}to go back to the
previous menu.
Auto Set requires an OnStar
service plan.
If auto timing is set, the time
displayed on the clock may not
update immediately when driving
into a new time zone.
To set the date: 1. Touch SETTINGS from the Home Page, then touch Time
and Date.
2. Touch Set Date and touch
«
orªto increase or decrease
month, day, or year.
3. Touch
}to go back to the
previous menu.
To set the clock display: 1. Touch SETTINGS and touch Time and Date. 2. Touch Clock Display and touch
OFF or ON to turn the clock
display off or on.
3. Touch
}to go back to the
previous menu.
The clock settings can also be
accessed by touching the time
display, then touching Set.
Power Outlets
Power Outlet 12-Volt Direct
Current
The accessory power outlet can be
used to plug in electrical equipment,
such as a cell phone or MP3 player.
There is an accessory power outlet
on the center console in front of the
shift lever. This outlet is powered
when the ignition is on or in ACC/
ACCESSORY, or until the driver
door is opened within 10 minutes of
turning off the vehicle. See Retained
Accessory Power (RAP) 0215.
Open the cover to access.
Caution
Leaving electrical equipment
plugged in for an extended period
of time while the vehicle is off will
drain the battery. Always unplug
electrical equipment when not in
use and do not plug in equipment
that exceeds the maximum
20 amp rating.
Certain electrical accessories may
not be compatible with the
accessory power outlet and could
overload vehicle or adapter fuses.
If a problem is experienced, see
your dealer.
When adding electrical equipment,
be sure to follow the installation
instructions included with the
equipment. See Add-On Electrical
Equipment 0257.
Page 119 of 404
Chevrolet Cruze Owner Manual (GMNA-Localizing-U.S./Canada/Mexico-
11348462) - 2018 - crc - 5/15/17
118 Instruments and Controls
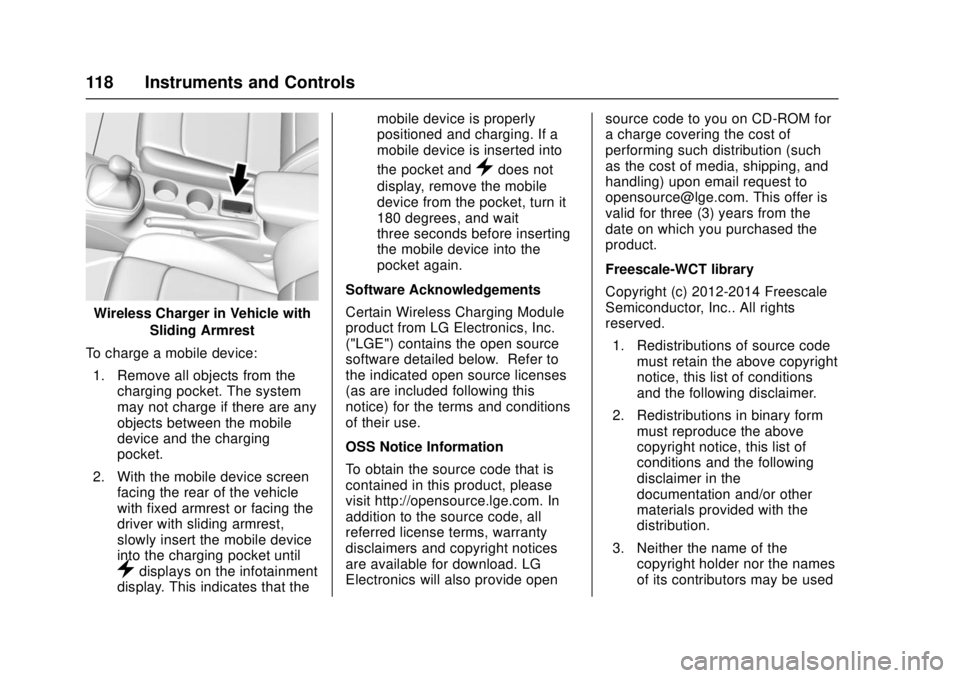
Wireless Charger in Vehicle withSliding Armrest
To charge a mobile device: 1. Remove all objects from the charging pocket. The system
may not charge if there are any
objects between the mobile
device and the charging
pocket.
2. With the mobile device screen facing the rear of the vehicle
with fixed armrest or facing the
driver with sliding armrest,
slowly insert the mobile device
into the charging pocket until
}displays on the infotainment
display. This indicates that the mobile device is properly
positioned and charging. If a
mobile device is inserted into
the pocket and
}does not
display, remove the mobile
device from the pocket, turn it
180 degrees, and wait
three seconds before inserting
the mobile device into the
pocket again.
Software Acknowledgements
Certain Wireless Charging Module
product from LG Electronics, Inc.
("LGE") contains the open source
software detailed below. Refer to
the indicated open source licenses
(as are included following this
notice) for the terms and conditions
of their use.
OSS Notice Information
To obtain the source code that is
contained in this product, please
visit http://opensource.lge.com. In
addition to the source code, all
referred license terms, warranty
disclaimers and copyright notices
are available for download. LG
Electronics will also provide open source code to you on CD-ROM for
a charge covering the cost of
performing such distribution (such
as the cost of media, shipping, and
handling) upon email request to
[email protected]. This offer is
valid for three (3) years from the
date on which you purchased the
product.
Freescale-WCT library
Copyright (c) 2012-2014 Freescale
Semiconductor, Inc.. All rights
reserved.
1. Redistributions of source code must retain the above copyright
notice, this list of conditions
and the following disclaimer.
2. Redistributions in binary form must reproduce the above
copyright notice, this list of
conditions and the following
disclaimer in the
documentation and/or other
materials provided with the
distribution.
3. Neither the name of the copyright holder nor the names
of its contributors may be used
Page 125 of 404
Chevrolet Cruze Owner Manual (GMNA-Localizing-U.S./Canada/Mexico-
11348462) - 2018 - crc - 5/15/17
124 Instruments and Controls
Cluster Menu
There is an interactive display area
in the center of the instrument
cluster.
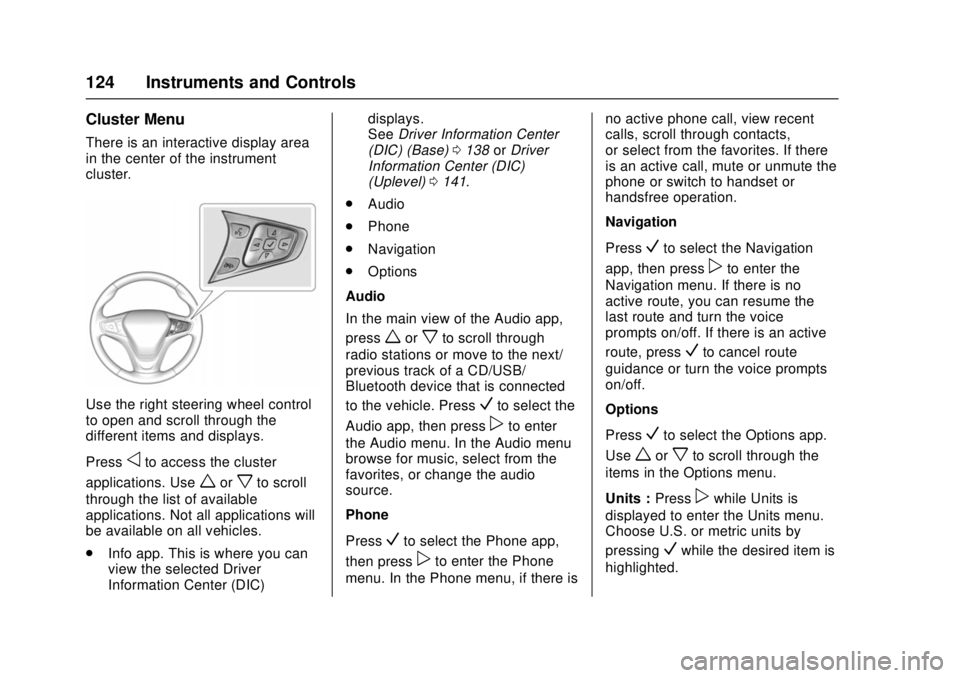
Use the right steering wheel control
to open and scroll through the
different items and displays.
Press
oto access the cluster
applications. Use
worxto scroll
through the list of available
applications. Not all applications will
be available on all vehicles.
. Info app. This is where you can
view the selected Driver
Information Center (DIC) displays.
See
Driver Information Center
(DIC) (Base) 0138 orDriver
Information Center (DIC)
(Uplevel) 0141.
. Audio
. Phone
. Navigation
. Options
Audio
In the main view of the Audio app,
press
worxto scroll through
radio stations or move to the next/
previous track of a CD/USB/
Bluetooth device that is connected
to the vehicle. Press
Vto select the
Audio app, then press
pto enter
the Audio menu. In the Audio menu
browse for music, select from the
favorites, or change the audio
source.
Phone
Press
Vto select the Phone app,
then press
pto enter the Phone
menu. In the Phone menu, if there is no active phone call, view recent
calls, scroll through contacts,
or select from the favorites. If there
is an active call, mute or unmute the
phone or switch to handset or
handsfree operation.
Navigation
Press
Vto select the Navigation
app, then press
pto enter the
Navigation menu. If there is no
active route, you can resume the
last route and turn the voice
prompts on/off. If there is an active
route, press
Vto cancel route
guidance or turn the voice prompts
on/off.
Options
Press
Vto select the Options app.
Use
worxto scroll through the
items in the Options menu.
Units : Press
pwhile Units is
displayed to enter the Units menu.
Choose U.S. or metric units by
pressing
Vwhile the desired item is
highlighted.
Page 126 of 404
Chevrolet Cruze Owner Manual (GMNA-Localizing-U.S./Canada/Mexico-
11348462) - 2018 - crc - 5/15/17
Instruments and Controls 125
Info Pages :Presspwhile Info
Pages is displayed to enter the Info
Pages menu and select the items to
be displayed in the Info app.
See Driver Information Center (DIC)
(Base) 0138 orDriver Information
Center (DIC) (Uplevel) 0141.
Speed Warning : The Speed
Warning display allows the driver to
set a speed that they do not want to
exceed. To set the Speed Warning,
press
pwhen Speed Warning is
displayed. Press
worxto adjust
the value. Press
Vto set the speed.
Once the speed is set, this feature
can be turned off by pressing
V
while viewing this page. If the
selected speed limit is exceeded, a
pop-up warning is displayed with a
chime.
Speedometer
The speedometer shows the
vehicle's speed in either kilometers
per hour (km/h) or miles per
hour (mph).
Odometer
The odometer shows how far the
vehicle has been driven, in either
kilometers or miles.
Trip Odometer
The trip odometer shows how far
the vehicle has been driven since
the trip odometer was last reset.
The trip odometer is accessed and
reset through the Driver Information
Center (DIC).
See Driver Information Center (DIC)
(Base) 0138 orDriver Information
Center (DIC) (Uplevel) 0141.
Tachometer
The tachometer displays the engine
speed in revolutions per
minute (rpm).
For vehicles with the stop/start
system, when the ignition is on, the
tachometer indicates the vehicle
status. When pointing to AUTO
STOP, the engine is off but the
vehicle is on and can move. The engine could auto start at any time.
When the indicator points to OFF,
the vehicle is off.
When the engine is on, the
tachometer will indicate the engine’s
revolutions per minute (rpm). The
tachometer may vary by several
hundred rpm’s, during Auto Stop
mode, when the engine is shutting
off and restarting.
A slight bump may be felt when the
transmission is determining the
most fuel efficient operating range.
Caution
If the engine is operated with the
rpm’s in the warning area at the
high end of the tachometer, the
vehicle could be damaged, and
the damage would not be covered
by the vehicle warranty. Do not
operate the engine with the rpm’s
in the warning area.
Page 134 of 404
Chevrolet Cruze Owner Manual (GMNA-Localizing-U.S./Canada/Mexico-
11348462) - 2018 - crc - 5/15/17
Instruments and Controls 133
The Antilock Brake System (ABS)
light comes on briefly when the
engine is started.
If the light does not come on, have it
fixed so it will be ready to warn if
there is a problem.
If the ABS light comes on and stays
on while driving, stop as soon as
possible and turn the ignition off.
Start the engine again to reset the
system. If the light stays on after
driving at a speed above 20 km/h
(13 mph), see your dealer for
service. A chime may also sound
when the light comes on steady.
If the regular brake system warning
light is not on, the vehicle still has
brakes, but not antilock brakes.
If the regular brake system warning
light is also on, the vehicle does not
have antilock brakes and there is a
problem with the regular brakes.
SeeBrake System Warning Light
0 132.
A DIC message may display.Up-Shift Light
This light comes on when an
up-shift is recommended for best
fuel economy. The number
displayed with the arrow indicates
the recommended gear.
Lane Keep Assist (LKA)
Light
For some vehicles, this light comes
on briefly while starting the vehicle.
If it does not come on, have the
vehicle serviced. For vehicles with the uplevel cluster,
this light may not come on when
starting the vehicle.
This light is green if LKA is available
to assist.
LKA may assist by gently turning
the steering wheel if the vehicle
approaches a detected lane marking
without using the turn signal in that
direction. The LKA light will turn
amber.
This light is amber and flashes as a
Lane Departure Warning (LDW)
alert, to indicate that the lane
marking has been crossed.
See
Lane Keep Assist (LKA) 0242.
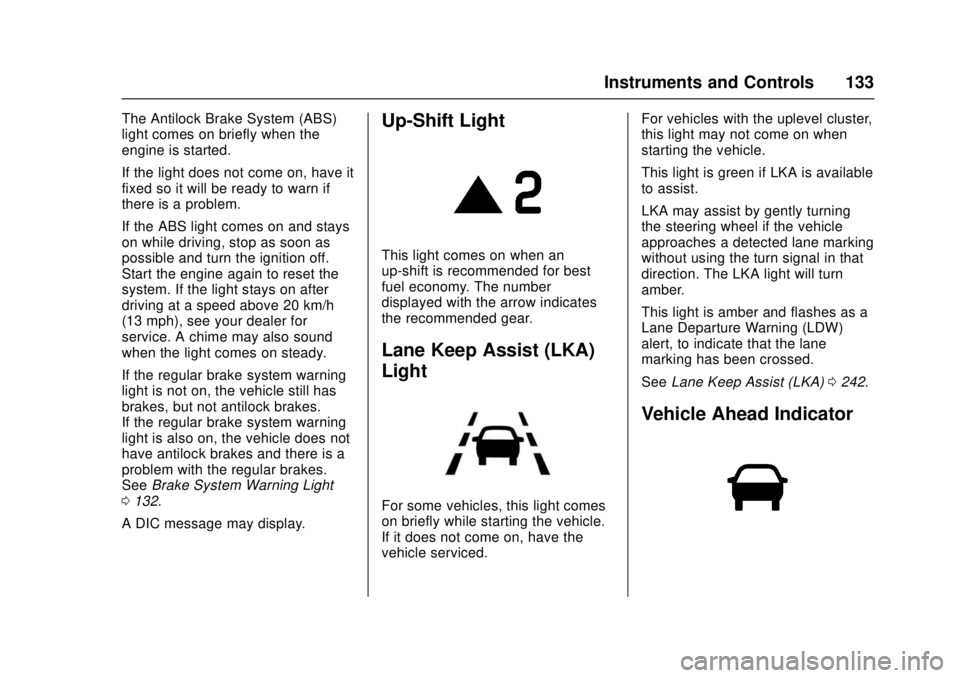
Vehicle Ahead Indicator
Page 135 of 404
Chevrolet Cruze Owner Manual (GMNA-Localizing-U.S./Canada/Mexico-
11348462) - 2018 - crc - 5/15/17
134 Instruments and Controls
If equipped, this indicator will
display green when a vehicle is
detected ahead and amber when
you are following a vehicle ahead
much too closely.
SeeForward Collision Alert (FCA)
System 0238.
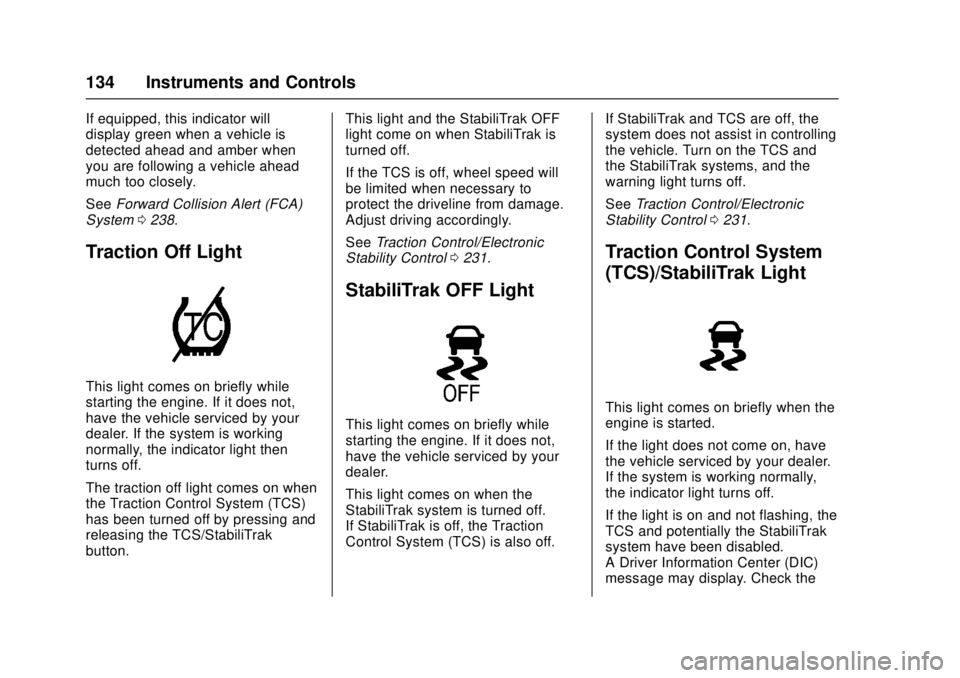
Traction Off Light
This light comes on briefly while
starting the engine. If it does not,
have the vehicle serviced by your
dealer. If the system is working
normally, the indicator light then
turns off.
The traction off light comes on when
the Traction Control System (TCS)
has been turned off by pressing and
releasing the TCS/StabiliTrak
button. This light and the StabiliTrak OFF
light come on when StabiliTrak is
turned off.
If the TCS is off, wheel speed will
be limited when necessary to
protect the driveline from damage.
Adjust driving accordingly.
See
Traction Control/Electronic
Stability Control 0231.
StabiliTrak OFF Light
This light comes on briefly while
starting the engine. If it does not,
have the vehicle serviced by your
dealer.
This light comes on when the
StabiliTrak system is turned off.
If StabiliTrak is off, the Traction
Control System (TCS) is also off. If StabiliTrak and TCS are off, the
system does not assist in controlling
the vehicle. Turn on the TCS and
the StabiliTrak systems, and the
warning light turns off.
See
Traction Control/Electronic
Stability Control 0231.
Traction Control System
(TCS)/StabiliTrak Light
This light comes on briefly when the
engine is started.
If the light does not come on, have
the vehicle serviced by your dealer.
If the system is working normally,
the indicator light turns off.
If the light is on and not flashing, the
TCS and potentially the StabiliTrak
system have been disabled.
A Driver Information Center (DIC)
message may display. Check the