2018 CHEVROLET CRUZE display
[x] Cancel search: displayPage 36 of 404
Chevrolet Cruze Owner Manual (GMNA-Localizing-U.S./Canada/Mexico-
11348462) - 2018 - crc - 5/15/17
Keys, Doors, and Windows 35
keys no longer work. Any remaining
keys will need to be reprogrammed.
Each vehicle can have up to eight
keys matched to it.
Programming with Two
Recognized Keys (Key
Vehicles Only)
This procedure is for adding a
transmitter, not replacing a
transmitter. To program:1. Insert the original, already programmed key in the ignition
and turn the ignition on.
2. Turn the ignition off, and remove the key.
3. Quickly, within five seconds, insert the second original
already programmed key in the
ignition and turn the ignition on.
4. Turn the ignition off, and remove the key.
5. Insert the new key to be programmed and turn the
ignition on within five seconds.
The security light will turn off
once the key has been
programmed. 6. Repeat Steps 1–5 if additional
keys are to be programmed.
If a key is lost or damaged, see your
dealer to have a new key made.
Programming without Two
Recognized Keys (Key
Vehicles Only)
Program a new key to the vehicle
when a recognized key is not
available. Canadian regulations
require that owners see their dealer.
If two currently recognized keys are
not available, follow this procedure
to program the first key.
This procedure will take
approximately 30 minutes to
complete for the first key. The
vehicle must be off and all of the
keys you wish to program must be
with you. 1. Insert the new vehicle key into the ignition.
2. Turn the ignition on. The security light will come on.
3. Wait 10 minutes until the security light turns off.
4. Turn the ignition off. 5. Repeat Steps 2–4 two more
times. After the third time, turn
the ignition on; the key is
learned and all previously
known keys will no longer work
with the vehicle.
6. To learn a second key, turn the ignition off, insert the second
key to be learned, and turn the
ignition on.
After two keys are learned,
remaining keys can be learned by
following the procedure in
“Programming with Two Recognized
Keys (Key Vehicles Only).”
Battery Replacement
Replace the battery if the REPLACE
BATTERY IN REMOTE KEY
message displays in the DIC.
Caution
When replacing the battery, do
not touch any of the circuitry on
the transmitter. Static from your
body could damage the
transmitter.
Page 40 of 404
Chevrolet Cruze Owner Manual (GMNA-Localizing-U.S./Canada/Mexico-
11348462) - 2018 - crc - 5/15/17
Keys, Doors, and Windows 39
Remote No Longer in Vehicle Alert
If the vehicle is on with a door open,
and then all doors are closed, the
vehicle will check for RKE
transmitters inside. If an RKE
transmitter is not detected, the DIC
will display NO REMOTE
DETECTED and the horn will chirp
three times. This occurs only once
each time the vehicle is driven. To
turn on or off seeVehicle
Personalization 0145.
Keyless Trunk Opening
Press the touch pad on the rear of
the trunk above the license plate to
open the trunk when the RKE
transmitter is in range.
Key Access
To access a vehicle with a dead
transmitter battery, see Door Locks
0 44.
Programming Transmitters to
the Vehicle
Only RKE transmitters programmed
to the vehicle will work. If a
transmitter is lost or stolen, a
replacement can be purchased and programmed through your dealer.
The vehicle can be reprogrammed
so that lost or stolen transmitters no
longer work. Any remaining
transmitters will need to be
reprogrammed. Each vehicle can
have up to eight transmitters
matched to it.
Programming with Recognized
Transmitters (Keyless Access
Vehicles Only)
A new transmitter can be
programmed to the vehicle when
there are two recognized
transmitters. To program, the vehicle
must be off and all of the
transmitters, both currently
recognized and new, must be
with you.
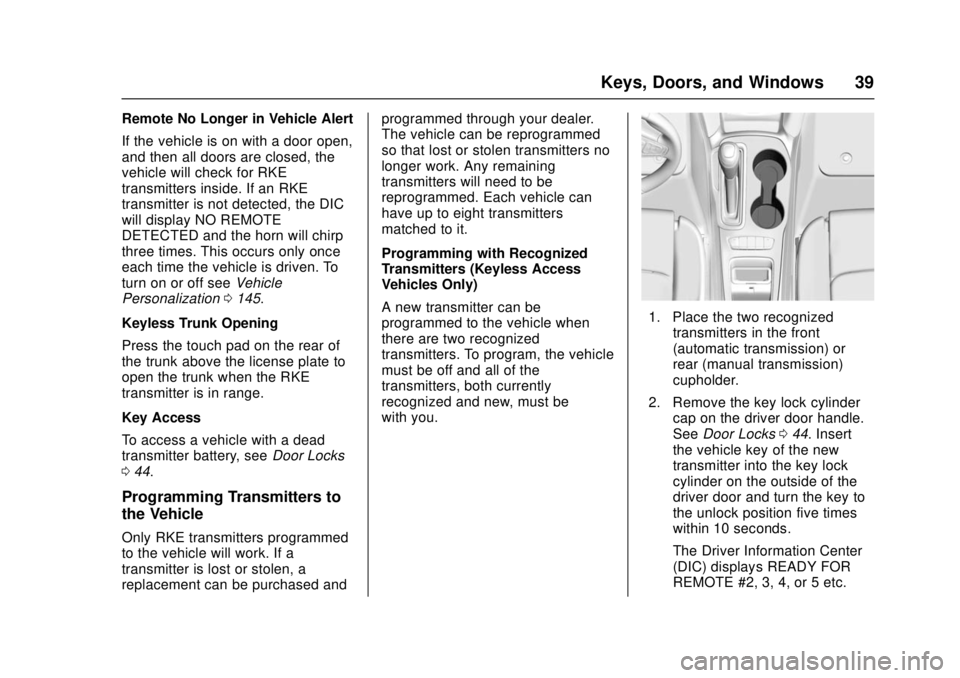
1. Place the two recognized
transmitters in the front
(automatic transmission) or
rear (manual transmission)
cupholder.
2. Remove the key lock cylinder cap on the driver door handle.
See Door Locks 044. Insert
the vehicle key of the new
transmitter into the key lock
cylinder on the outside of the
driver door and turn the key to
the unlock position five times
within 10 seconds.
The Driver Information Center
(DIC) displays READY FOR
REMOTE #2, 3, 4, or 5 etc.
Page 41 of 404
Chevrolet Cruze Owner Manual (GMNA-Localizing-U.S./Canada/Mexico-
11348462) - 2018 - crc - 5/15/17
40 Keys, Doors, and Windows
3. Remove the recognizedtransmitters and place the new
transmitter into the cupholder.
4. Press ENGINE START/STOP. When the transmitter is
learned, the DIC will show that
it is ready to program the next
transmitter.
5. Remove the transmitter from the cupholder and press
Kor
Qon the transmitter.
To program additional
transmitters, repeat Steps 3–5.
When all additional transmitters
are programmed, press and
hold ENGINE START/STOP for
12 seconds to exit
programming mode.
6. Return the vehicle key back into the transmitter.
Programming without Recognized
Transmitters (Keyless Access
Vehicles Only)
If two currently recognized
transmitters are not available, follow
this procedure to program up to
eight transmitters. This feature is not available in Canada. This
procedure will take approximately
30 minutes to complete. The vehicle
must be off and all of the
transmitters you wish to program
must be with you.
1. Remove the key lock cylinder cap on the driver door handle.
See Door Locks 044. Insert
the vehicle key of the
transmitter into the key lock
cylinder on the outside of the
driver door and turn the key to
the unlock position five times
within 10 seconds.
The Driver Information Center
(DIC) displays REMOTE
LEARN PENDING,
PLEASE WAIT.
2. Wait for 10 minutes until the DIC displays PRESS ENGINE
START BUTTON TO LEARN
and then press ENGINE
START/STOP.
The DIC will again show
REMOTE LEARN PENDING,
PLEASE WAIT. 3. Repeat Step 2 two additional
times. After the third time all
previously known transmitters
will no longer work with the
vehicle. Remaining transmitters
can be relearned during the
next steps.
The DIC display should now
show READY FOR REMOTE
# 1.
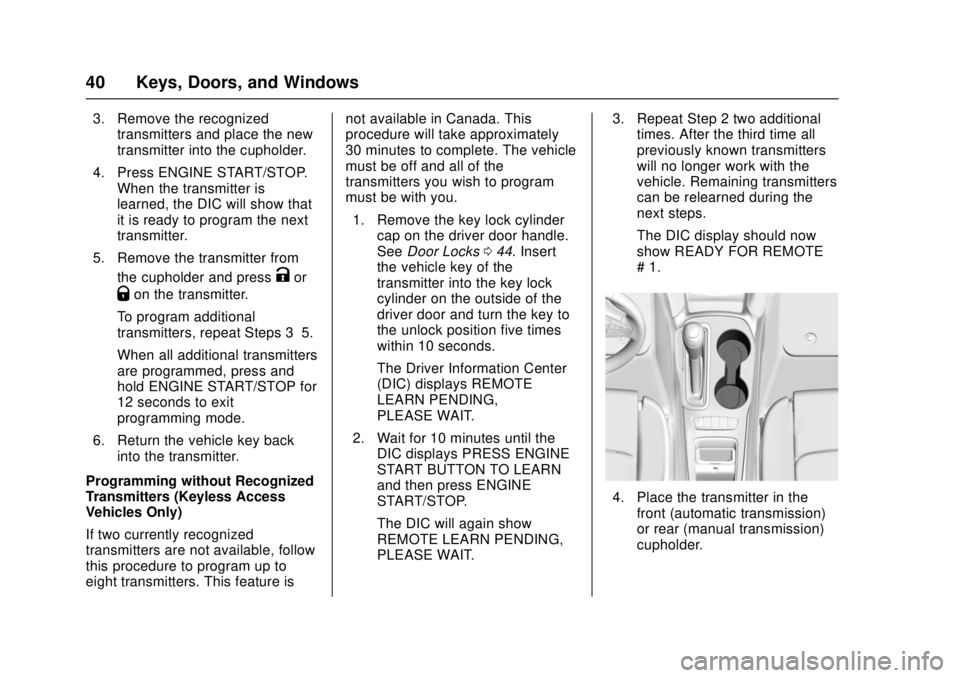
4. Place the transmitter in thefront (automatic transmission)
or rear (manual transmission)
cupholder.
Page 42 of 404
Chevrolet Cruze Owner Manual (GMNA-Localizing-U.S./Canada/Mexico-
11348462) - 2018 - crc - 5/15/17
Keys, Doors, and Windows 41
5. Press ENGINE START/STOP.When the transmitter is learned
the DIC will show that it is
ready to program the next
transmitter.
6. Remove the transmitter from the cupholder and press
Kor
Qon the transmitter.
To program additional
transmitters, repeat Steps 4–6.
When all additional transmitters
are programmed, press and
hold ENGINE START/STOP for
12 seconds to exit
programming mode.
7. Return the vehicle key back into the transmitter.
Starting the Vehicle with a Low
Transmitter Battery
If the transmitter battery is weak or if
there is interference with the signal
when trying to start the vehicle, the
DIC may display NO REMOTE
DETECTED or NO REMOTE KEY
WAS DETECTED PLACE KEY IN
TRANSMITTER POCKET THEN
START YOUR VEHICLE. The REPLACE BATTERY IN REMOTE
KEY message may also be
displayed at this time.
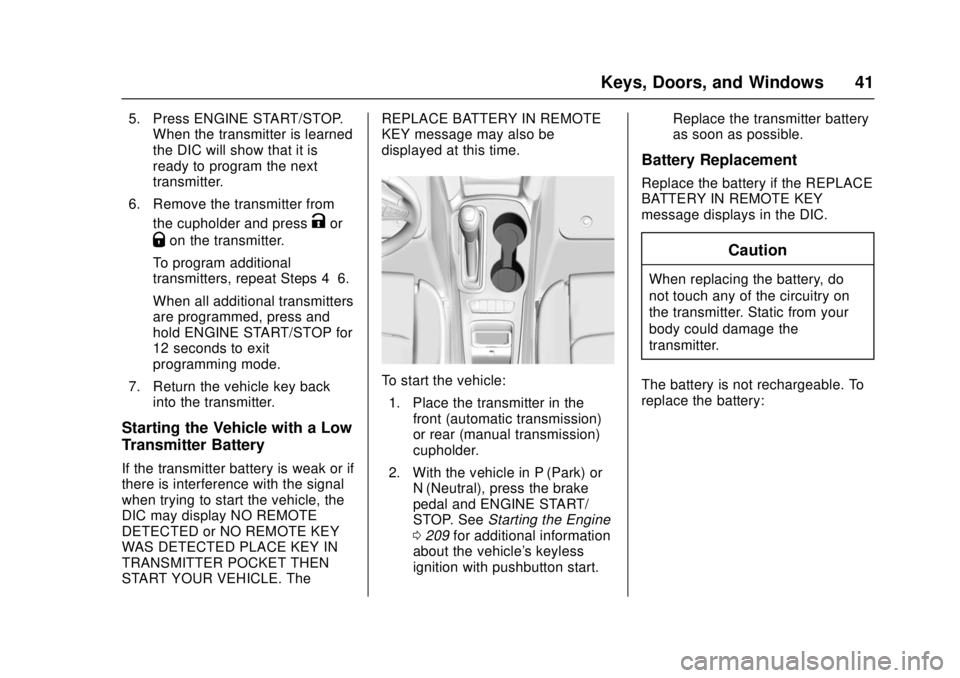
To start the vehicle:
1. Place the transmitter in the front (automatic transmission)
or rear (manual transmission)
cupholder.
2. With the vehicle in P (Park) or N (Neutral), press the brake
pedal and ENGINE START/
STOP. See Starting the Engine
0 209 for additional information
about the vehicle's keyless
ignition with pushbutton start. Replace the transmitter battery
as soon as possible.
Battery Replacement
Replace the battery if the REPLACE
BATTERY IN REMOTE KEY
message displays in the DIC.
Caution
When replacing the battery, do
not touch any of the circuitry on
the transmitter. Static from your
body could damage the
transmitter.
The battery is not rechargeable. To
replace the battery:
Page 67 of 404
Chevrolet Cruze Owner Manual (GMNA-Localizing-U.S./Canada/Mexico-
11348462) - 2018 - crc - 5/15/17
66 Seats and Restraints
Rear Seats
Rear Seat Reminder
If equipped, the message REAR
SEAT REMINDER LOOK IN REAR
SEAT displays under certain
conditions indicating there may be
an item or passenger in the rear
seat. Check before exiting the
vehicle.
This feature will activate when a
second row door is opened while
the vehicle is on or up to 10 minutes
before the vehicle is turned on.
There will be an alert when the
vehicle is turned off. The alert does
not directly detect objects in the rear
seat; instead, under certain
conditions, it detects when a rear
door is opened and closed,
indicating that there may be
something in the rear seat.
The feature is active only once each
time the vehicle is turned on and off,
and will require reactivation by
opening and closing the second row
doors. There may be an alert even
when there is nothing in the rear
seat; for example, if a child enteredthe vehicle through the rear door
and left the vehicle without the
vehicle being shut off.
The feature can be turned on or off.
See
Vehicle Personalization 0145.
Folding the Seatback
The rear seatbacks can be folded.
To fold the rear seatbacks:
1. Place the front seatbacks in the upright position. See Reclining
Seatbacks 063.
Caution
Folding a rear seat with the seat
belts still fastened may cause
damage to the seat or the seat
belts. Always unbuckle the seat
belts and return them to their
normal stowed position before
folding a rear seat.
2. Unbuckle the rear seat belt and make sure the seat belt is in
the guide on top of the
seatback.
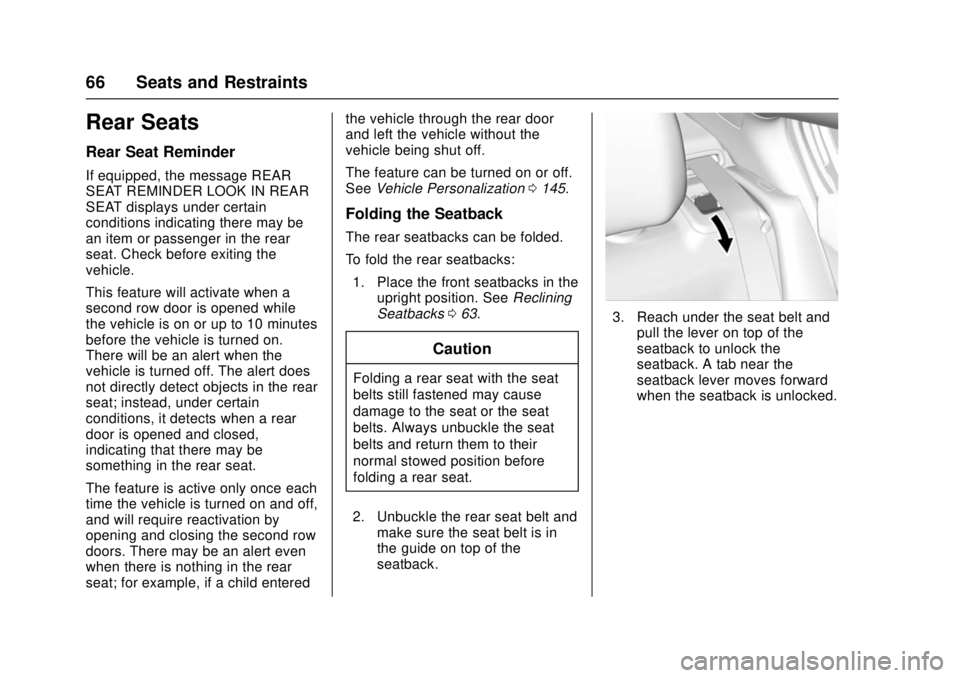
3. Reach under the seat belt andpull the lever on top of the
seatback to unlock the
seatback. A tab near the
seatback lever moves forward
when the seatback is unlocked.
Page 70 of 404
Chevrolet Cruze Owner Manual (GMNA-Localizing-U.S./Canada/Mexico-
11348462) - 2018 - crc - 5/15/17
Seats and Restraints 69
Seat Belts
This section describes how to use
seat belts properly, and some things
not to do.
{Warning
Do not let anyone ride where a
seat belt cannot be worn properly.
In a crash, if you or your
passenger(s) are not wearing
seat belts, injuries can be much
worse than if you are wearing
seat belts. You can be seriously
injured or killed by hitting things
inside the vehicle harder or by
being ejected from the vehicle. In
addition, anyone who is not
buckled up can strike other
passengers in the vehicle.
It is extremely dangerous to ride
in a cargo area, inside or outside
of a vehicle. In a collision,
passengers riding in these areas
are more likely to be seriously
injured or killed. Do not allow(Continued)
Warning (Continued)
passengers to ride in any area of
the vehicle that is not equipped
with seats and seat belts.
Always wear a seat belt, and
check that all passenger(s) are
restrained properly too.
This vehicle has indicators as a
reminder to buckle the seat belts.
See Seat Belt Reminders 0128.
Seat Belt Assurance System
This vehicle may have the Seat Belt
Assurance System, which prevents
the vehicle from shifting out of
P (Park). A message displays in the
Driver Information Center (DIC)
indicating the shift lever is locked
when the brake pedal is applied and
the seat belts for either the driver or
front outboard passenger are not
buckled. The vehicle will not shift
out of P (Park). Buckle the seat
belts to unlock the shift lever. If the
front passenger seat is unoccupied,
only the driver seat belt must be
buckled to unlock the shift lever. This system may not allow the
vehicle to shift out of P (Park) if an
object
—such as a briefcase,
handbag, grocery bag, laptop,
or other electronic device —is on
the front outboard passenger seat.
If this happens, remove the object
from the seat or buckle the
seat belt.
If the driver or front outboard
passenger unbuckles their seat belt
while driving, the seat belt reminder
chime and light(s) will come on. See
Seat Belt Reminders 0128.
The Seat Belt Assurance System
will time out 30 seconds after the
brake pedal is initially pressed.
A message displays in the DIC
indicating the shift lever is unlocked
allowing the vehicle to be shifted out
of P (Park). See “Seat Belts”and
“Child Restraints” in the Index for
information about the importance of
proper restraint use.
This system may not function
properly if the airbag readiness light
is on. See Airbag Readiness Light
0 128.
Page 110 of 404

Chevrolet Cruze Owner Manual (GMNA-Localizing-U.S./Canada/Mexico-
11348462) - 2018 - crc - 5/15/17
Instruments and Controls 109
Instruments and
Controls
Controls
Steering Wheel Adjustment . . . 110
Steering Wheel Controls . . . . . . 110
Heated Steering Wheel . . . . . . . 111
Horn . . . . . . . . . . . . . . . . . . . . . . . . . . 111
Windshield Wiper/Washer . . . . . 111
Rear Window Wiper/Washer . . . . . . . . . . . . . . . . . . . . . . 112
Compass . . . . . . . . . . . . . . . . . . . . . 113
Clock . . . . . . . . . . . . . . . . . . . . . . . . . 113
Power Outlets . . . . . . . . . . . . . . . . 115
Wireless Charging . . . . . . . . . . . . 117
Warning Lights, Gauges, and
Indicators
Warning Lights, Gauges, and Indicators . . . . . . . . . . . . . . . . . . . 119
Instrument Cluster . . . . . . . . . . . . 120
Speedometer . . . . . . . . . . . . . . . . . 125
Odometer . . . . . . . . . . . . . . . . . . . . . 125
Trip Odometer . . . . . . . . . . . . . . . . 125
Tachometer . . . . . . . . . . . . . . . . . . . 125
Fuel Gauge . . . . . . . . . . . . . . . . . . . 126
Engine Coolant Temperature
Gauge . . . . . . . . . . . . . . . . . . . . . . 127
Seat Belt Reminders . . . . . . . . . 128 Airbag Readiness Light . . . . . . . 128
Passenger Airbag Status
Indicator . . . . . . . . . . . . . . . . . . . . 129
Charging System Light . . . . . . . 130
Malfunction Indicator Lamp (Check Engine Light) . . . . . . . . 130
Brake System Warning Light . . . . . . . . . . . . . . . . . . . . . . . . 132
Antilock Brake System (ABS) Warning Light . . . . . . . . . . . . . . . 132
Up-Shift Light . . . . . . . . . . . . . . . . . 133
Lane Keep Assist (LKA) Light . . . . . . . . . . . . . . . . . . . . . . . . 133
Vehicle Ahead Indicator . . . . . . 133
Traction Off Light . . . . . . . . . . . . . 134
StabiliTrak OFF Light . . . . . . . . . 134
Traction Control System (TCS)/ StabiliTrak Light . . . . . . . . . . . . . 134
Wait-to-Start Light . . . . . . . . . . . . 135
Tire Pressure Light . . . . . . . . . . . 135
Engine Oil Pressure Light . . . . 135
Low Fuel Warning Light . . . . . . 136
Diesel Exhaust Fluid (DEF) Warning Light . . . . . . . . . . . . . . . 136
Security Light . . . . . . . . . . . . . . . . . 136
High-Beam On Light . . . . . . . . . . 137
Front Fog Lamp Light . . . . . . . . . 137
Lamps On Reminder . . . . . . . . . 137
Cruise Control Light . . . . . . . . . . 137
Door Ajar Light . . . . . . . . . . . . . . . 137
Information Displays
Driver Information Center (DIC) (Base) . . . . . . . . . . . . . . . . 138
Driver Information Center (DIC) (Uplevel) . . . . . . . . . . . . . . . . . . . . 141
Vehicle Messages
Vehicle Messages . . . . . . . . . . . . 144
Engine Power Messages . . . . . 144
Vehicle Speed Messages . . . . . 144
Vehicle Personalization
Vehicle Personalization . . . . . . . 145
Page 112 of 404

Chevrolet Cruze Owner Manual (GMNA-Localizing-U.S./Canada/Mexico-
11348462) - 2018 - crc - 5/15/17
Instruments and Controls 111
Heated Steering Wheel
(:If equipped, press to turn on or
off. A light on the button displays
when the feature is turned on.
The steering wheel takes about
three minutes to start heating.
Horn
Pressaon the steering wheel pad
to sound the horn.
Windshield Wiper/Washer
The windshield wiper/washer lever
is on the side of the steering
column. With the ignition on or in
ACC/ACCESSORY, move the
windshield wiper lever to select the
wiper speed.
HI : Use for fast wipes.
LO : Use for slow wipes.
INT : Move the lever up to INT for
intermittent wipes, then adjust the
band to control the frequency of
wipes.
OFF : Use to turn the wipers off.
1X : For a single wipe, briefly move
the lever down. For several wipes,
hold the lever down.
Clear snow and ice from the wiper
blades and windshield before using
them. If frozen to the windshield,
carefully loosen or thaw them.
Damaged blades should be
replaced. See Wiper Blade
Replacement 0282.
Heavy snow or ice can overload the
wiper motor. If the wiper motor
overheats, the windshield wipers will
stop until the motor cools and the
wiper control is turned off. See
Electrical System Overload 0290.
Wiper Parking
If the ignition is turned off while the
wipers are on LO, HI, or INT, they
will immediately stop.