Page 140 of 353

Chevrolet Corvette Owner Manual (GMNA-Localizing-U.S./Canada/Mexico-
11374030) - 2018 - crc - 3/29/17
Lighting 139
If after signaling a turn or lane
change the arrows flash rapidly or
do not come on, a turn signal
indicator light failure may have
occurred.
If a turn signal has failed, the lamp
may need to be replaced. See your
dealer.
Turn Signal on Chime
A chime sounds if the turn signal
has been on for more than 1.2 km
(0.75 mi) of driving.
If you need to leave the turn signal
on for more than 1.2 km (0.75 mi),
turn off the signal and then turn it
back on.Interior Lighting
Instrument Panel
Illumination Control
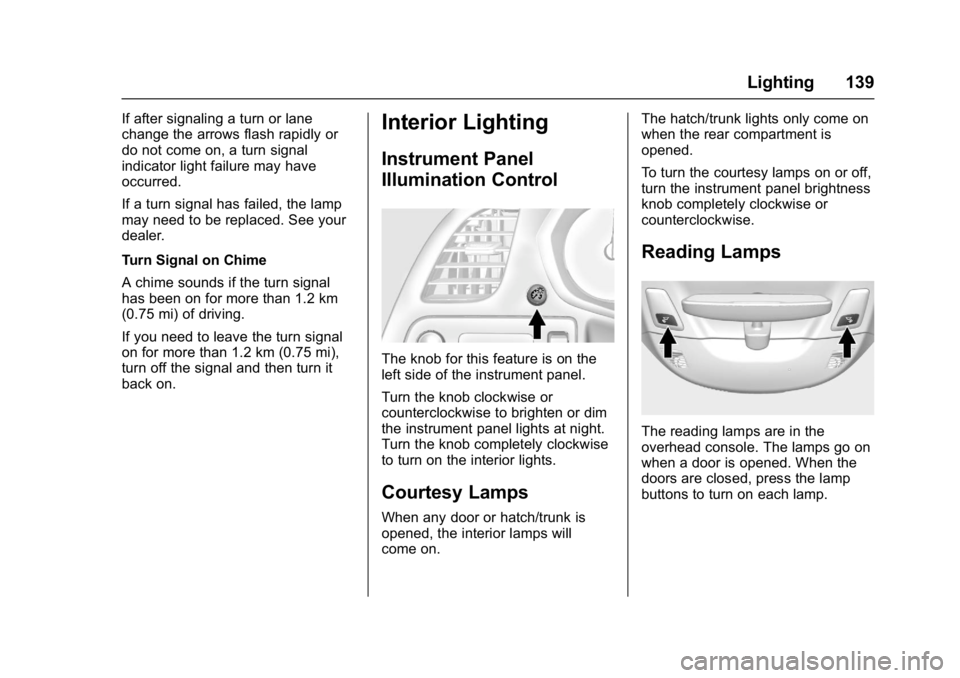
The knob for this feature is on the
left side of the instrument panel.
Turn the knob clockwise or
counterclockwise to brighten or dim
the instrument panel lights at night.
Turn the knob completely clockwise
to turn on the interior lights.
Courtesy Lamps
When any door or hatch/trunk is
opened, the interior lamps will
come on.The hatch/trunk lights only come on
when the rear compartment is
opened.
To turn the courtesy lamps on or off,
turn the instrument panel brightness
knob completely clockwise or
counterclockwise.
Reading Lamps
The reading lamps are in the
overhead console. The lamps go on
when a door is opened. When the
doors are closed, press the lamp
buttons to turn on each lamp.
Page 210 of 353

Chevrolet Corvette Owner Manual (GMNA-Localizing-U.S./Canada/Mexico-
11374030) - 2018 - crc - 4/4/17
Driving and Operating 209
2. Insert and latch the funnel intothe capless fuel system.
{Warning
Attempting to refuel without using
the funnel adapter may cause fuel
spillage and damage the capless
fuel system. This could cause a
fire and you or others could be
badly burned and the vehicle
could be damaged.
3. Remove and clean the funnel adapter and return it to the
storage location.
Filling a Portable Fuel
Container
{Warning
Filling a portable fuel container
while it is in the vehicle can cause
fuel vapors that can ignite either
by static electricity or other
(Continued)
Warning (Continued)
means. You or others could be
badly burned and the vehicle
could be damaged. Always:
. Use approved fuel
containers.
. Remove the container from
the vehicle, trunk, or pickup
bed before filling.
. Place the container on the
ground.
. Place the nozzle inside the
fill opening of the container
before dispensing fuel, and
keep it in contact with the fill
opening until filling is
complete.
. Fill the container no more
than 95% full to allow for
expansion.
. Do not smoke, light
matches, or use lighters
while pumping fuel.
. Avoid using cell phones or
other electronic devices.
Trailer Towing
General Towing
Information
The vehicle is neither designed nor
intended to tow a trailer.
Page 245 of 353

Chevrolet Corvette Owner Manual (GMNA-Localizing-U.S./Canada/Mexico-
11374030) - 2018 - crc - 3/29/17
244 Vehicle Care
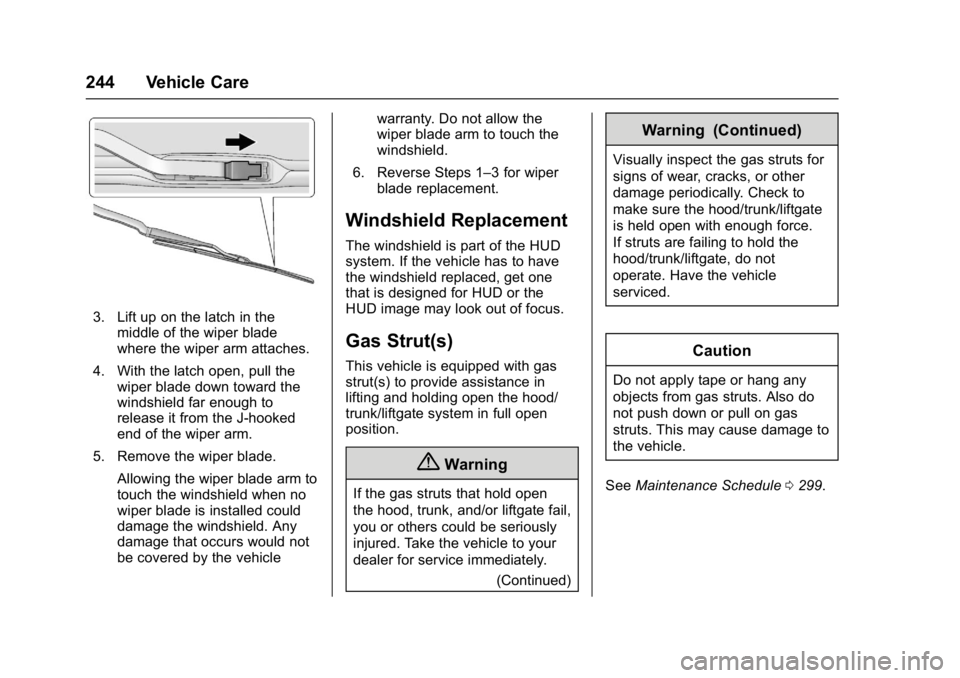
3. Lift up on the latch in themiddle of the wiper blade
where the wiper arm attaches.
4. With the latch open, pull the wiper blade down toward the
windshield far enough to
release it from the J-hooked
end of the wiper arm.
5. Remove the wiper blade. Allowing the wiper blade arm to
touch the windshield when no
wiper blade is installed could
damage the windshield. Any
damage that occurs would not
be covered by the vehicle warranty. Do not allow the
wiper blade arm to touch the
windshield.
6. Reverse Steps 1–3 for wiper blade replacement.
Windshield Replacement
The windshield is part of the HUD
system. If the vehicle has to have
the windshield replaced, get one
that is designed for HUD or the
HUD image may look out of focus.
Gas Strut(s)
This vehicle is equipped with gas
strut(s) to provide assistance in
lifting and holding open the hood/
trunk/liftgate system in full open
position.
{Warning
If the gas struts that hold open
the hood, trunk, and/or liftgate fail,
you or others could be seriously
injured. Take the vehicle to your
dealer for service immediately.
(Continued)
Warning (Continued)
Visually inspect the gas struts for
signs of wear, cracks, or other
damage periodically. Check to
make sure the hood/trunk/liftgate
is held open with enough force.
If struts are failing to hold the
hood/trunk/liftgate, do not
operate. Have the vehicle
serviced.
Caution
Do not apply tape or hang any
objects from gas struts. Also do
not push down or pull on gas
struts. This may cause damage to
the vehicle.
See Maintenance Schedule 0299.
Page 246 of 353
Chevrolet Corvette Owner Manual (GMNA-Localizing-U.S./Canada/Mexico-
11374030) - 2018 - crc - 3/29/17
Vehicle Care 245
Hood
Trunk
Liftgate
Headlamp Aiming
Headlamp aim has been preset and
should need no further adjustment.
If the vehicle is damaged in a crash,
the headlamp aim may be affected.
If adjustment to the headlamps is
necessary, see your dealer.
Page 254 of 353

Chevrolet Corvette Owner Manual (GMNA-Localizing-U.S./Canada/Mexico-
11374030) - 2018 - crc - 3/29/17
Vehicle Care 253
You can remove fuses using the
fuse puller.
The vehicle may not be equipped
with all of the fuses, relays, and
features shown.Fuses Usage
1 Window
2 Driver power seat
3 Passive entry/ Passive start 2
4 Passive entry/ Passive start 1
5 Engine control module
6 Heated mirrors
7 Body control module 4
8 Rear window defogger
9 GBS
10 Body control module 2
11 Steering wheel Fuses Usage
12 Passenger power seat
13 –
14 Exterior rearview mirror
15 Body control module 1
16 Body control module 3
17 Sensing diagnostic module/Automatic
occupant sensing
18 Logistics 2
19 Body control module 8
20 Integrated chassis control module
21 Amplifier
22 Rear accessory power outlet
24 Memory seat module/
Convertible top Fuses Usage
25 Theft deterrent PSM
26 Trunk release module
27 OnStar (if equipped)
28 Camera module
29 –
30 Fuel pump power module
31 Trunk release module latch
32 Battery regulated voltage control
33 –
34 Convertible top solenoid
35 –
36 Passenger window switch
37 Front accessory power outlet
38 –
Page 284 of 353
Chevrolet Corvette Owner Manual (GMNA-Localizing-U.S./Canada/Mexico-
11374030) - 2018 - crc - 3/29/17
Vehicle Care 283
The tire sealant and compressor kit
has an accessory adapter located in
a compartment on the bottom of its
housing that may be used to inflate
air mattresses, balls, etc.
Removal and Installation of the
Sealant Canister
To remove the sealant canister:1. Unwrap the sealant hose.
2. Press the canister release button (9).
3. Pull up and remove the canister. 4. Replace with a new canister
which is available from your
dealer.
5. Push the new canister into place.
Storing the Tire Sealant
and Compressor Kit
The tire sealant and compressor kit,
if equipped, should be stored in the
storage area behind the left rear
wheel opening in the rear
compartment when it is not
being used.
To access the storage area:
1. Open the hatch/trunk. See Hatch (Trunk) 038.
2. Lift the storage cover.
Page 285 of 353

Chevrolet Corvette Owner Manual (GMNA-Localizing-U.S./Canada/Mexico-
11374030) - 2018 - crc - 3/29/17
284 Vehicle Care
Jump Starting
Jump Starting - North
America
For more information about the
vehicle battery, seeBattery - North
America 0240.
If the battery has run down, use
another vehicle and some jumper
cables to start the vehicle. Be sure
to use the following steps to do it
safely.
{Warning
WARNING: Battery posts,
terminals, and related
accessories contain lead and lead
compounds, chemicals known to
the State of California to cause
cancer and birth defects or other
reproductive harm. Batteries also
contain other chemicals known to
the State of California to cause
cancer. WASH HANDS AFTER
(Continued)
Warning (Continued)
HANDLING.For more information
go to www.P65Warnings.ca.gov/
passenger-vehicle.
See California Proposition
65 Warning 0212 and the back
cover.
{Warning
Batteries can hurt you. They can
be dangerous because:
. They contain acid that can
burn you.
. They contain gas that can
explode or ignite.
. They contain enough
electricity to burn you.
If you do not follow these steps
exactly, some or all of these
things can hurt you.
Caution
Ignoring these steps could result
in costly damage to the vehicle
that would not be covered by the
vehicle warranty. Trying to start
the vehicle by pushing or pulling it
will not work, and it could damage
the vehicle.
The battery is under a battery cover
in the hatch/trunk area on the
passenger side under the carpet.
Before you connect the cables, here
are some basic things you should
know. Positive (+) will go to the
positive (+) terminal. Negative (−)
will go the negative (−) terminal.
Page 287 of 353

Chevrolet Corvette Owner Manual (GMNA-Localizing-U.S./Canada/Mexico-
11374030) - 2018 - crc - 3/29/17
286 Vehicle Care
4. Open the hatch/trunk and liftthe carpet on the passenger
side of the vehicle to gain
access to the battery cover.
5. Remove the left elastic loop forthe cargo cover, then remove
the battery cover and locate
the positive (+) and negative
(−) terminals.
6. Check that the jumper cables do not have loose or missing
insulation. If they do, you could
get a shock. The vehicles
could be damaged too.
7. Open the positive terminal trim cover and connect the red
positive (+) cable to the
positive (+) terminal (1) of the
dead battery.
8. Do not let the other end touch metal. Connect it to the
positive (+) terminal (4) of the
good battery.
9. Now connect the black negative (−) cable to the
negative (−) terminal (3) of the
good battery.
Do not let the other end touch
anything until the next step. 10. Connect the other end of the
negative (−) cable to the
negative (−) terminal (2) on the
dead battery.
11. Now start the vehicle with the good battery and run the
engine for a while.
12. Try to start the vehicle that had the dead battery. If it will not
start after a few tries, it
probably needs service.
Caution
If the jumper cables are
connected or removed in the
wrong order, electrical shorting
may occur and damage the
vehicle. The repairs would not be
covered by the vehicle warranty.
Always connect and remove the
jumper cables in the correct order,
making sure that the cables do
not touch each other or other
metal.