2018.5 OPEL ZAFIRA C clock
[x] Cancel search: clockPage 75 of 341

Storage73Lift the rack at the rear (1) and pull it
backwards.
Fold up the rack (2).
Push down the rack (1) and turn
handle (2) backwards to engage.
Attaching the first bicycle
1. Rotate the pedals into position as shown in the illustration and put
the bicycle on the foremost wheel
recess.
Make sure that the bicycle stands centrally on the wheel recesses.
2. Attach the short mounting bracket
to the bicycle frame. Turn the
knob clockwise to fasten.
Page 78 of 341

76Storage● Without attached adapter:
Push the lever (1) to disengage
and hold.
Pull the rack (2) backwards to
fold the rear carrier system.
● With attached adapter:
9 Warning
Take care when disengaging the
rear carrier system as it will tilt
backwards. Risk of injury.
Hold frame (1) of rearmost
bicycle with one hand and pull the
loop (2) to disengage.
Hold rearmost bicycle with both
hands and fold the rear carrier
system backwards.
To increase visibility, the tail lights of
the vehicle are activated when the
rear carrier system is folded back.
9 Warning
When folding the rear carrier
system forwards again, take care
that the system is engaged
securely.
Removing bicycles
Undo strap retainers on bicycle tyres.
Turn knob anti-clockwise and remove
mounting brackets.
Detaching adapter
Detach the adapter before removing
the last bicycle remaining on the rear
carrier system.
1. Fold in wheel recesses.
2. Unbutton the strap.
Page 92 of 341

90StoragePartitioning net in front of tailgate
Install directly in front of the tailgate.
Before installation push in the four
end pieces of the net rod by rotating
each end piece anticlockwise.
To install, push the net rods together
and insert into the openings of the
tailgate frame. The longer rod must
be inserted at the top.
To remove, push the net rods
together and remove.
Safety net
The safety net can be installed behind the seats of the second row or the
front seats.
Passengers must not be transported
behind the safety net.
Installation behind second row
seats
● There are installation openings on both sides in the roof frame
above second row seats:
suspend and engage rod of net at
one side, compress rod and
suspend and engage at the other side.
● Attach hooks of safety net straps
to front lashing eyes on both
sides in the load compartment.
● Tension both straps by pulling at the loose end.
Page 98 of 341

96Instruments and controlsInstruments and
controlsControls ....................................... 97
Steering wheel adjustment ........97
Steering wheel controls .............97
Heated steering wheel ...............97
Horn ........................................... 98
Windscreen wiper and washer ..98
Rear window wiper and washer ...................................... 99
Outside temperature ................100
Clock ....................................... 100
Power outlets ........................... 101
Cigarette lighter .......................102
Ashtrays .................................. 102
Warning lights, gauges and indi‐ cators ......................................... 103
Instrument cluster ....................103
Speedometer ........................... 103
Odometer ................................ 103
Trip odometer .......................... 103
Tachometer ............................. 104
Fuel gauge .............................. 104
Fuel selector ............................ 105
Engine coolant temperature gauge ..................................... 107Service display........................ 107
Control indicators ....................108
Turn lights ................................ 110
Seat belt reminder ...................111
Airbag and belt tensioners .......111
Airbag deactivation ..................112
Charging system .....................112
Malfunction indicator light ........112
Brake and clutch system .........112
Operate pedal .......................... 113
Electric parking brake ..............113
Electric parking brake fault ......113
Antilock brake system (ABS) ...113
Gear shifting ............................ 114
Power steering ........................ 114
Following distance ...................114
Lane departure warning ..........114
Electronic Stability Control off . 114
Electronic Stability Control and Traction Control system .........114
Traction Control system off .....114
Preheating ............................... 115
Exhaust filter ............................ 115
AdBlue ..................................... 115
Tyre pressure monitoring system .................................... 115
Engine oil pressure ..................115
Low fuel ................................... 116
Immobiliser .............................. 116
Exterior light ............................ 116High beam............................... 116
High beam assist .....................116
LED headlights ........................ 116
Fog light ................................... 116
Rear fog light ........................... 116
Cruise control .......................... 116
Adaptive cruise control ............117
Vehicle detected ahead ...........117
Speed limiter ........................... 117
Traffic sign assistant ................117
Door open ................................ 117
Displays ..................................... 117
Driver Information Centre ........117
Info Display .............................. 121
Vehicle messages ......................122
Warning chimes .......................123
Battery voltage ........................ 123
Vehicle personalisation ..............124
Telematics service .....................125
OnStar ..................................... 125
Page 102 of 341

100Instruments and controls
Push lever. Washer fluid is sprayed
onto the rear window and the wiper
wipes a few times.
Do not use if the rear window is
frozen.
Switch off in car washes.
The rear window wiper comes on
automatically when the windscreen
wiper is switched on and reverse gear
is engaged.
Activation or deactivation of this
function can be changed in the
Settings menu in the Info-Display.
Vehicle personalisation 3 124.
Outside temperature
A drop in temperature is indicated
immediately and a rise in temperature
after a time delay.
If outside temperature drops to 3 °C,
a warning message is displayed in the Driver Information Centre.9 Warning
The road surface may already be
icy even though the display
indicates a few degrees above
0 °C.
Clock
Date and time are shown in the
Info-Display.
R 4.0 IntelliLink
Press ; and then select Settings.
Select Time and Date to display the
respective submenu.
Page 135 of 341

Lighting133Headlights when driving
abroad
The asymmetrical headlight beam
extends visibility at the edge of the
road at the passenger side.
However, when driving in countries
where traffic drives on the opposite
side of the road, adjust the headlights to prevent dazzling of oncoming
traffic.
Vehicles with halogen headlight
There is a white adjuster element on
the rear of each headlight housing.
Turn adjuster element on each
headlight housing 1
/2 turn with a
size six hexagon key anticlockwise to set to right-hand traffic mode. To
adjust, insert the key in the guide as
shown in the illustration. Alternatively,
a Phillips head screwdriver
size three can be used for setting.
To reset to left-hand traffic mode, turn
adjuster elements on both headlight
housings 1
/2 turn clockwise.
Vehicles with LED headlight
1. Key in ignition switch.
2. Pull turn signal lever and hold (headlight flash).
3. Switch on ignition.
4. After approx. five seconds the control indicator f starts flashing
and an acoustic signal sounds.
Control indicator f 3 116.
Every time the ignition is switched on,
f flashes as a reminder for approx.
four seconds.
For deactivation, operate the same
procedure as described above. f will
not flash when function is
deactivated.
Daytime running lights Daytime running light increases
visibility of the vehicle during daylight.
They are switched on automatically
when the engine is running.
The system switches between
daytime running lights and headlights automatically, depending on the
lighting conditions. Automatic light
control 3 131.
Page 165 of 341

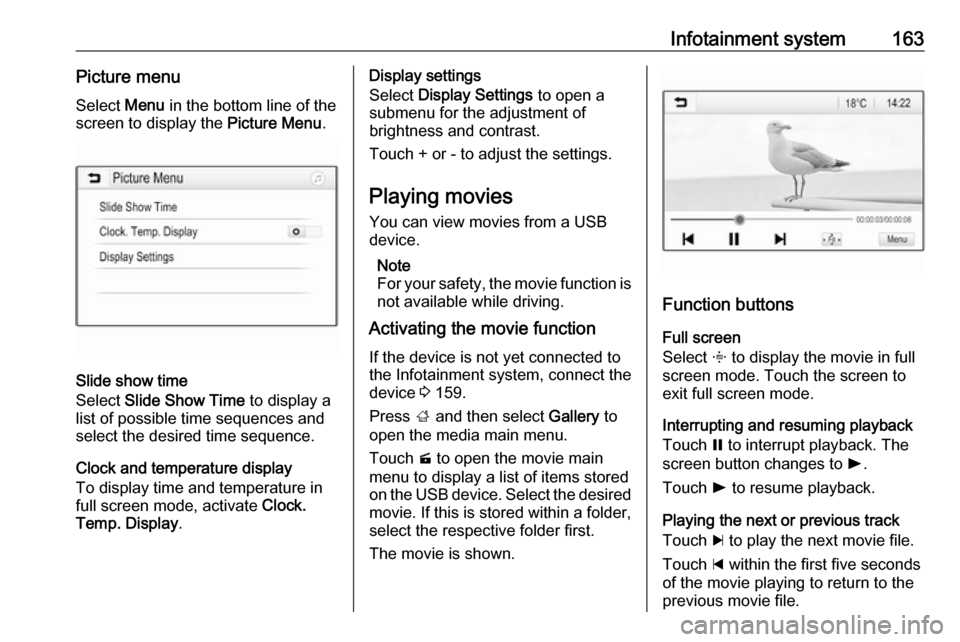
Infotainment system163Picture menuSelect Menu in the bottom line of the
screen to display the Picture Menu.
Slide show time
Select Slide Show Time to display a
list of possible time sequences and select the desired time sequence.
Clock and temperature display
To display time and temperature in
full screen mode, activate Clock.
Temp. Display .
Display settings
Select Display Settings to open a
submenu for the adjustment of
brightness and contrast.
Touch + or - to adjust the settings.
Playing movies
You can view movies from a USB device.
Note
For your safety, the movie function is
not available while driving.
Activating the movie function
If the device is not yet connected to
the Infotainment system, connect the
device 3 159.
Press ; and then select Gallery to
open the media main menu.
Touch m to open the movie main
menu to display a list of items stored on the USB device. Select the desired
movie. If this is stored within a folder, select the respective folder first.
The movie is shown.
Function buttons
Full screen
Select x to display the movie in full
screen mode. Touch the screen to
exit full screen mode.
Interrupting and resuming playback
Touch = to interrupt playback. The
screen button changes to l.
Touch l to resume playback.
Playing the next or previous track
Touch c to play the next movie file.
Touch d within the first five seconds
of the movie playing to return to the
previous movie file.
Page 166 of 341

164Infotainment systemReturning to the beginning of the
current movie
Touch d after five seconds of the
movie playing.
Fast forwarding and rewinding
Touch and hold d or c. Release to
return to normal playback mode.
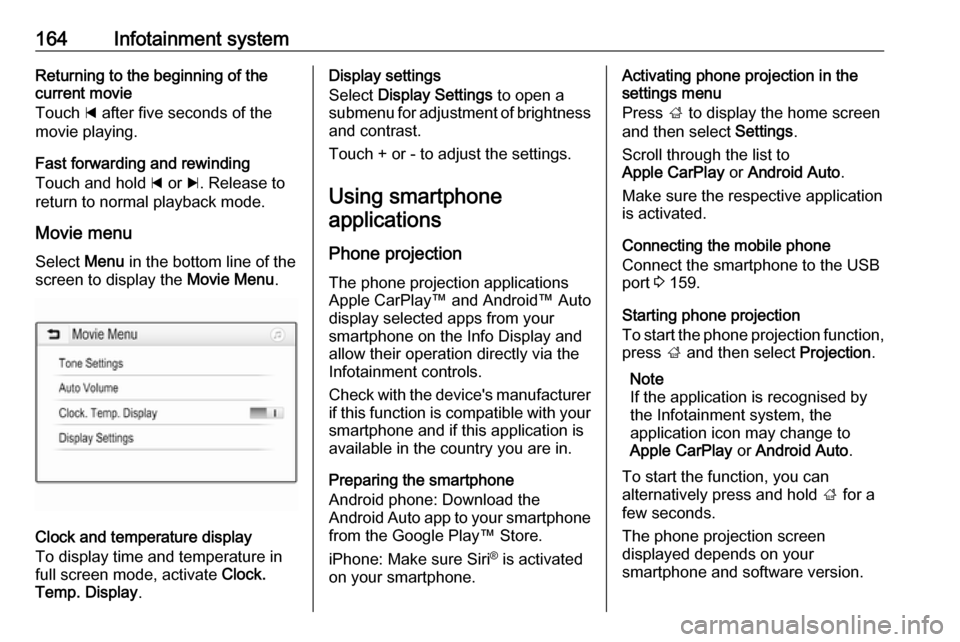
Movie menu Select Menu in the bottom line of the
screen to display the Movie Menu.
Clock and temperature display
To display time and temperature in
full screen mode, activate Clock.
Temp. Display .
Display settings
Select Display Settings to open a
submenu for adjustment of brightness and contrast.
Touch + or - to adjust the settings.
Using smartphone applications
Phone projection The phone projection applications
Apple CarPlay™ and Android™ Auto
display selected apps from your
smartphone on the Info Display and
allow their operation directly via the
Infotainment controls.
Check with the device's manufacturer
if this function is compatible with your smartphone and if this application is
available in the country you are in.
Preparing the smartphone
Android phone: Download the
Android Auto app to your smartphone
from the Google Play™ Store.
iPhone: Make sure Siri ®
is activated
on your smartphone.Activating phone projection in the
settings menu
Press ; to display the home screen
and then select Settings.
Scroll through the list to
Apple CarPlay or Android Auto .
Make sure the respective application
is activated.
Connecting the mobile phone
Connect the smartphone to the USB
port 3 159.
Starting phone projection
To start the phone projection function,
press ; and then select Projection.
Note
If the application is recognised by
the Infotainment system, the
application icon may change to
Apple CarPlay or Android Auto .
To start the function, you can
alternatively press and hold ; for a
few seconds.
The phone projection screen
displayed depends on your
smartphone and software version.