Page 129 of 186
8-17
8
TIPSkip steps 8–10 if the oil filter cartridge is not
being replaced. 8. Remove the oil filter cartridge with an oilfilter wrench. Make sure that the O-ring is
removed together with the oil filter car-
tridge. If the O-ring remains attached to
the crankcase, oil leakage may occur.
TIPAn oil filter wrench is available from a Yamaha
dealer. 9. Apply a light coat of clean engine oil tothe O-ring of the new oil filter cartridge.TIPMake sure that the O-ring is properly seated.
1. Engine oil drain bolt
2. Gasket
1 2
1. Oil filter cartridge
2. Oil filter wrench
2
1
U2MB7BE0.book Page 17 Thursday, March 3, 2016 11:46 AM
Page 130 of 186
8-18
8
10. Install the new oil filter cartridge with anoil filter wrench, and then tighten it to the
specified torque with a torque wrench. 11. Install the engine oil drain bolt and its new
gasket, and then tighten the bolt to the
specified torque.
12. Refill with the specified amount of recom- mended engine oil into the oil filler hole.
13. Install the dipstick with the arrow pointing in the direction shown.1. O-ringTightening torque:Oil filter cartridge:15 N·m (1.5 kgf·m, 11 lb·ft)
1
1. Torque wrenchTightening torque:Engine oil drain bolt:22 N·m (2.2 kgf·m, 16 lb·ft)
1
U2MB7BE0.book Page 18 Thursday, March 3, 2016 11:46 AM
Page 131 of 186
8-19
8
TIPBe sure to wipe off spilled oil on any parts af-
ter the engine and exhaust system have
cooled down. NOTICEECB00301In order to prevent clutch slippage (since
the engine oil also lubricates the clutch),
do not mix any chemical additives. Do
not use oils with a diesel specification of
“CD” or oils of a higher quality than
specified. In addition, do not use oils la-
beled “ENERGY CONSERVING II” or
higher.
Make sure that no foreign material en-
ters the crankcase. 14. Start the engine, and then let it idle for
several minutes while checking it for oil
leakage. If oil is leaking, immediately turn
the engine off and check for the cause.
1. Engine oil dipstick
2. Arrow markRecommended engine oil:See page 10-1.
Oil quantity: Without oil filter cartridge replacement:2.20 L (2.33 US qt, 1.94 Imp.qt)
With oil filter cartridge replacement: 2.30 L (2.43 US qt, 2.02 Imp.qt)
1
2
U2MB7BE0.book Page 19 Thursday, March 3, 2016 11:46 AM
Page 132 of 186

8-20
8
15. Turn the engine off, wait at least 10 minu-tes, and then check the oil level and cor-
rect it if necessary.
16. Install the rubber cover.
17. Install the passenger seat cushion.EBU36050Final gear oilCheck the oil level and change the final gear
oil at the intervals specified in the general
maintenance and lubrication chart.
Checking the final gear oil level 1. Park the vehicle on a level surface.
2. Remove the final gear oil filler bolt and its gasket, and then check the oil level in the
final gear case. The oil level should be at
the brim of the filler hole. 3. If the oil is below the brim of the filler hole,
add sufficient oil of the recommended
type to raise it to the correct level.
NOTICE: Be sure no foreign material
enters the final gear case.
[ECB00422]
4. Check the gasket for damage, and re- place it if necessary.
5. Install the oil filler bolt and its gasket, and then tighten the bolt to the specified
torque.1. Final gear oil
2. Gasket
3. Final gear oil filler bolt
4. Correct oil level
24
3
1
U2MB7BE0.book Page 20 Thursday, March 3, 2016 11:46 AM
Page 133 of 186

8-21
8
Changing the final gear oil1. Park the vehicle on a level surface.
2. Place an oil pan under the final gear case
to collect the used oil.
3. Remove the final gear oil filler bolt, the fi-
nal gear oil drain bolt and their gasket to
drain the oil. 4. Install the drain bolt and its new gasket,
and then tighten the bolt to the specified
torque.
5. Refill with the recommended final gear oil up to the brim of the filler hole. NOTICE:
Be sure no foreign material enters the
final gear case.
[ECB00422]
TIP GL-4 is a quality and additive rating; GL-5
rated hypoid gear oils may also be used.
If desired, an SAE 80W-90 hypoid gear oil
may be used instead.
Tightening torque:
Final gear oil filler bolt:23 N·m (2.3 kgf·m, 17 lb·ft)1. Final gear oil drain bolt
2. Gasket
21
Tightening torque: Final gear oil drain bolt:22 N·m (2.2 kgf·m, 16 lb·ft)
Recommended oil: SAE 80 API GL-4 Hypoid gear oil
Oil quantity: 0.64 L (0.68 US qt, 0.56 Imp.qt)
U2MB7BE0.book Page 21 Thursday, March 3, 2016 11:46 AM
Page 134 of 186

8-22
8
6. Check the oil filler bolt gasket for dam-age, and replace it if necessary.
7. Install the oil filler bolt and its gasket, and then tighten the bolt to the specified
torque.
8. Check for oil leakage. If oil leakage is found, check for the cause.EBU36060Differential gear oilCheck the oil level and change the differential
gear oil at the intervals specified in the gener-
al maintenance and lubrication chart.
Checking the differential gear oil level
1. Park the vehicle on a level surface. 2. Remove the differential gear oil filler bolt
and its gasket, and then check the oil lev-
el. It should be up to the brim of the filler
hole.
3. If the level is low, add sufficient oil of the recommended type to raise it to the
specified level. NOTICE: Be sure no for-
eign material enters the differential
gear case.
[ECB00412]
Tightening torque: Final gear oil filler bolt:23 N·m (2.3 kgf·m, 17 lb·ft)
1. Differential gear oil filler bolt
2. Gasket
3. Differential gear oil
4. Correct oil level
1
2
3
4
U2MB7BE0.book Page 22 Thursday, March 3, 2016 11:46 AM
Page 135 of 186

8-23
8
4. Check the gasket for damage, and re-place it if necessary.
5. Install the differential gear oil filler bolt and its gasket, and then tighten the bolt
to the specified torque.
Changing the differential gear oil 1. Park the vehicle on a level surface.
2. Place an oil pan under the differential gear case to collect the used oil.
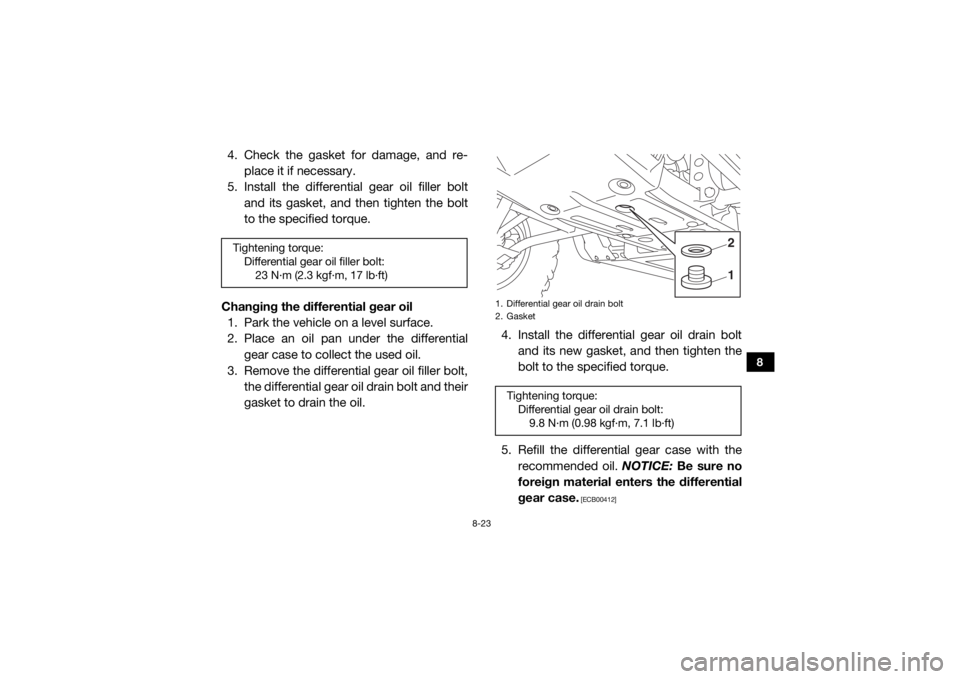
3. Remove the differential gear oil filler bolt, the differential gear oil drain bolt and their
gasket to drain the oil. 4. Install the differential gear oil drain bolt
and its new gasket, and then tighten the
bolt to the specified torque.
5. Refill the differential gear case with the recommended oil. NOTICE: Be sure no
foreign material enters the differential
gear case.
[ECB00412]
Tightening torque: Differential gear oil filler bolt:23 N·m (2.3 kgf·m, 17 lb·ft)
1. Differential gear oil drain bolt
2. GasketTightening torque: Differential gear oil drain bolt:9.8 N·m (0.98 kgf·m, 7.1 lb·ft)
12
U2MB7BE0.book Page 23 Thursday, March 3, 2016 11:46 AM
Page 136 of 186

8-24
8
TIPGL-4 is a quality and additive rating; GL-5
rated hypoid gear oils may also be used.
If desired, an SAE 80W -90 hypoid gear oil
may be used instead. 6. Check the oil filler bolt gasket for dam-
age, and replace it if necessary.
7. Install the differential gear oil filler bolt
and its gasket, and then tighten the bolt
to the specified torque.
8. Check for oil leakage. If oil leakage is found, check for the cause.
EBU33660CoolantThe coolant level should be checked before
each ride. In addition, the coolant must be
changed at the intervals specified in the peri-
odic maintenance and lubrication chart.
Checking the coolant level1. Park the vehicle on a level surface.
2. Check the coolant level in the coolant reservoir when the engine is cold as the
coolant level varies with engine tempera-
ture.TIPThe coolant should be between the minimum
and maximum level marks.
Recommended oil:SAE 80 API GL-4 Hypoid gear oil
Oil quantity: 0.18 L (0.19 US qt, 0.16 Imp.qt)
Tightening torque: Differential gear oil filler bolt:23 N·m (2.3 kgf·m, 17 lb·ft)
U2MB7BE0.book Page 24 Thursday, March 3, 2016 11:46 AM