Page 65 of 172

5-6
5
EBU31760CoolantCheck the coolant level in the coolant reser-
voir when the engine is cold (the coolant level
will vary with engine temperature).
The coolant level is satisfactory if it is be-
tween the minimum and maximum level
marks on the coolant reservoir. If the coolant
level is at or below the minimum level mark,
add additional coolant to bring the level up to
maximum level mark. If coolant is not avail-
able, add distilled water. Change the coolant
every two years. (See page 8-21.)NOTICEECB02120Hard water or salt water is harmful to the
engine. You may use soft water if you can-
not get distilled water.
EBU36020Final gearMake sure there is no oil leaking from the final
gear case.EBU36030Differential gearMake sure there is no oil leaking from the dif-
ferential gear case.EBU31790Accelerator pedalCheck to see that the accelerator pedal oper-
ates correctly. It must operate smoothly and
spring back to the idle position fully when re-
leased. Have a Yamaha dealer repair as nec-
essary for proper operation.EBU31800Seat beltsMake sure that the seat belts are not frayed,
torn, stretched, or damaged. The seat belts
must move smoothly when pulled out and re-
tract on its own when released. The seat belts
must also lock up when quickly pulled out.
Coolant reservoir capacity (up to the maxi-
mum level mark): 0.28 L (0.30 US qt, 0.25 Imp.qt)
UB427BE0.book Page 6 Friday, February 5, 2016 2:14 PM
Page 105 of 172
8-6
8
EBU32112General maintenance and lubrication chartNO. ITEMROUTINE INITIAL
EVERY
Whichev- er comes
first month 1 3 6 6 12
km
(mi) 320
(200) 1200
(750) 2400
(1500) 2400
(1500) 4800
(3000)
hours 20 75 150 150 300
1 *Cooling system • Check coolant leakage.
• Repair if necessary.
√√√√√
• Change coolant. Every 2 years
2 Air filter element •Clean.
• Replace if necessary. Every 20–40 hours (more often in
wet or dusty areas)
3Engine oil • Change (warm engine before draining). √√√√
4 Engine oil filter
cartridge • Replace.
√√√
5 Final gear oil/Dif-
ferential gear oil • Check oil level and for leakage.
√√√√√
• Change. √√
6 *Front brake • Check operation/brake pad wear/fluid leak-
age/see page 8-8.
• Correct if necessary. Replace pads if worn to the limit. √√√√√
7 *Rear brake • Check operation/brake pad wear/fluid leak-
age/see page 8-8.
• Correct if necessary. Replace pads if worn to the limit. √√√√√
UB427BE0.book Page 6 Friday, February 5, 2016 2:14 PM
Page 106 of 172

8-7
8
8*Parking brake • Check operation and free play/brake pad
wear.
• Correct if necessary. Replace pads if worn to the limit. √√√√√
9 *Brake fluid • Change. Every 2 years
10 *Accelerator pedal • Check operation and free play. √√√√√
11 *V-b e l t • Check operation.
• Check for wear, cracks, or damage. √√
√
12 *Wheels • Check balance/damage/runout.
• Repair if necessary. √ √√√
13 *Wheel bearings • Check bearing assemblies for loose-
ness/damage.
• Replace if damaged. √ √√√
14 *Front and rear
suspension • Check operation and for oil leakage.
• Correct if necessary.
√√
15 *Steering system • Check operation and for looseness. Replace
if damaged.
• Check toe-in. Adjust if necessary. √√√√√
16 *Stabilizer bushes • Check for cracks or other damage, and re-
place if necessary. √√√
NO. ITEM
ROUTINE INITIAL
EVERY
Whichev- er comes first month136612
km
(mi) 320
(200) 1200
(750) 2400
(1500) 2400
(1500) 4800
(3000)
hours 20 75 150 150 300UB427BE0.book Page 7 Friday, February 5, 2016 2:14 PM
Page 110 of 172

8-11
8
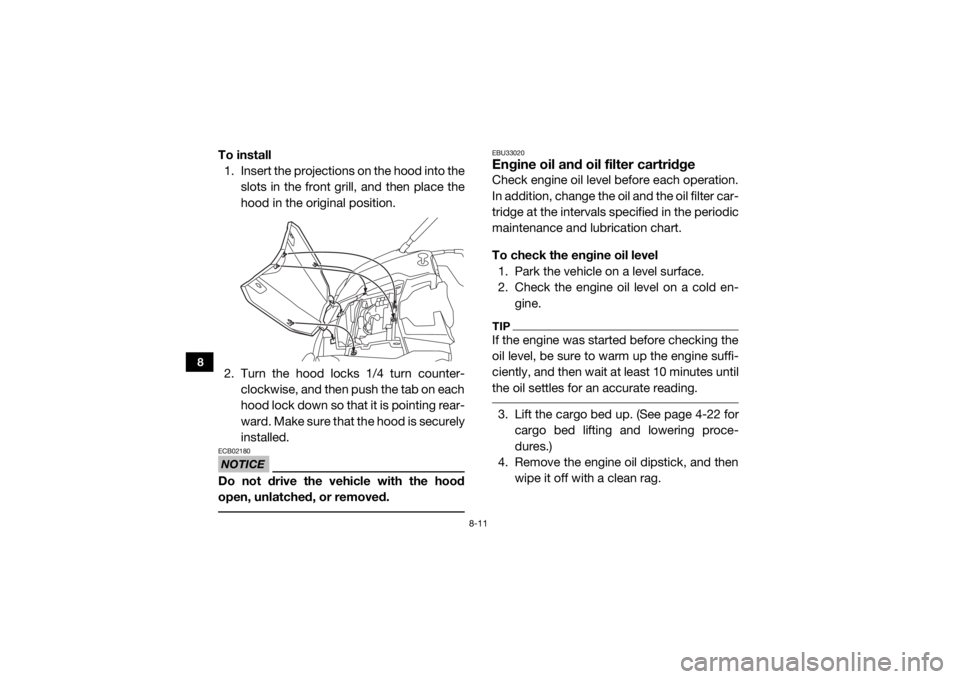
To install1. Insert the projections on the hood into the
slots in the front grill, and then place the
hood in the original position.
2. Turn the hood locks 1/4 turn counter- clockwise, and then push the tab on each
hood lock down so that it is pointing rear-
ward. Make sure that the hood is securely
installed.NOTICEECB02180Do not drive the vehicle with the hood
open, unlatched, or removed.
EBU33020Engine oil and oil filter cartridgeCheck engine oil level before each operation.
In addition, change the oil and the oil filter car-
tridge at the intervals specified in the periodic
maintenance and lubrication chart.
To check the engine oil level1. Park the vehicle on a level surface.
2. Check the engine oil level on a cold en- gine.TIPIf the engine was started before checking the
oil level, be sure to warm up the engine suffi-
ciently, and then wait at least 10 minutes until
the oil settles for an accurate reading. 3. Lift the cargo bed up. (See page 4-22 forcargo bed lifting and lowering proce-
dures.)
4. Remove the engine oil dipstick, and then
wipe it off with a clean rag.
UB427BE0.book Page 11 Friday, February 5, 2016 2:14 PM
Page 112 of 172
8-13
8
7. Insert the dipstick completely into the oilfiller hole, and then install the right rear
panel by installing the bolts and the quick
fastener screws.
8. Lower the cargo bed.
To change the engine oil (with or without
oil filter cartridge replacement) 1. Park the vehicle on a level surface.
2. Start the engine, warm it up for several
minutes, and then turn it off. 3. Lift the cargo bed up. (See page 4-22 for
cargo bed lifting and lowering proce-
dures.)
4. Remove the right rear panel by removing the quick fastener screws and bolts.
5. Place an oil pan under the engine to col- lect the used oil, and then remove the
dipstick.
6. Remove the engine oil drain bolt and its gasket to drain the oil from the crank-
case.1. Right rear panel
2. Quick fastener screw
3. Bolt
1
2
3
1. Right rear panel
2. Quick fastener screw
3. Bolt
1
2
3
UB427BE0.book Page 13 Friday, February 5, 2016 2:14 PM
Page 115 of 172

8-16
8
TIPBe sure to wipe off spilled oil on any parts af-
ter the engine and exhaust system have
cooled down. NOTICEECB00301In order to prevent clutch slippage (since
the engine oil also lubricates the clutch),
do not mix any chemical additives. Do
not use oils with a diesel specification of
“CD” or oils of a higher quality than
specified. In addition, do not use oils la-
beled “ENERGY CONSERVING II” or
higher.
Make sure that no foreign material en-
ters the crankcase.
12. Start the engine, and then let it idle for
several minutes while checking it for oil
leakage. If oil is leaking, immediately turn
the engine off and check for the cause.
13. Turn the engine off, wait at least 10 minu-
tes, and then check the oil level and cor-
rect it if necessary.
14. Install the right rear panel by installing the
bolts and the quick fastener screws.
15. Lower the cargo bed.EBU36050Final gear oilCheck the oil level and change the final gear
oil at the intervals specified in the general
maintenance and lubrication chart.
Checking the final gear oil level 1. Park the vehicle on a level surface.
Recommended engine oil: See page 10-1.
Oil quantity: Without oil filter cartridge replacement:2.20 L (2.33 US qt, 1.94 Imp.qt)
With oil filter cartridge replacement: 2.30 L (2.43 US qt, 2.02 Imp.qt)
UB427BE0.book Page 16 Friday, February 5, 2016 2:14 PM
Page 118 of 172
8-19
8
EBU36060Differential gear oilCheck the oil level and change the differential
gear oil at the intervals specified in the gener-
al maintenance and lubrication chart.
Checking the differential gear oil level1. Park the vehicle on a level surface.
2. Remove the differential gear oil filler bolt and its gasket, and then check the oil lev-
el. It should be up to the brim of the filler
hole.
3. If the level is low, add sufficient oil of therecommended type to raise it to the
specified level. NOTICE: Be sure no for-
eign material enters the differential
gear case.
[ECB00412]
4. Check the gasket for damage, and re- place it if necessary.
5. Install the differential gear oil filler bolt and its gasket, and then tighten the bolt
to the specified torque.1. Differential gear oil filler bolt
2. Gasket
3. Differential gear oil
4. Correct oil level
1
2
3
4
UB427BE0.book Page 19 Friday, February 5, 2016 2:14 PM