Page 245 of 396

2456-3. Do-it-yourself maintenance
6
Maintenance and care
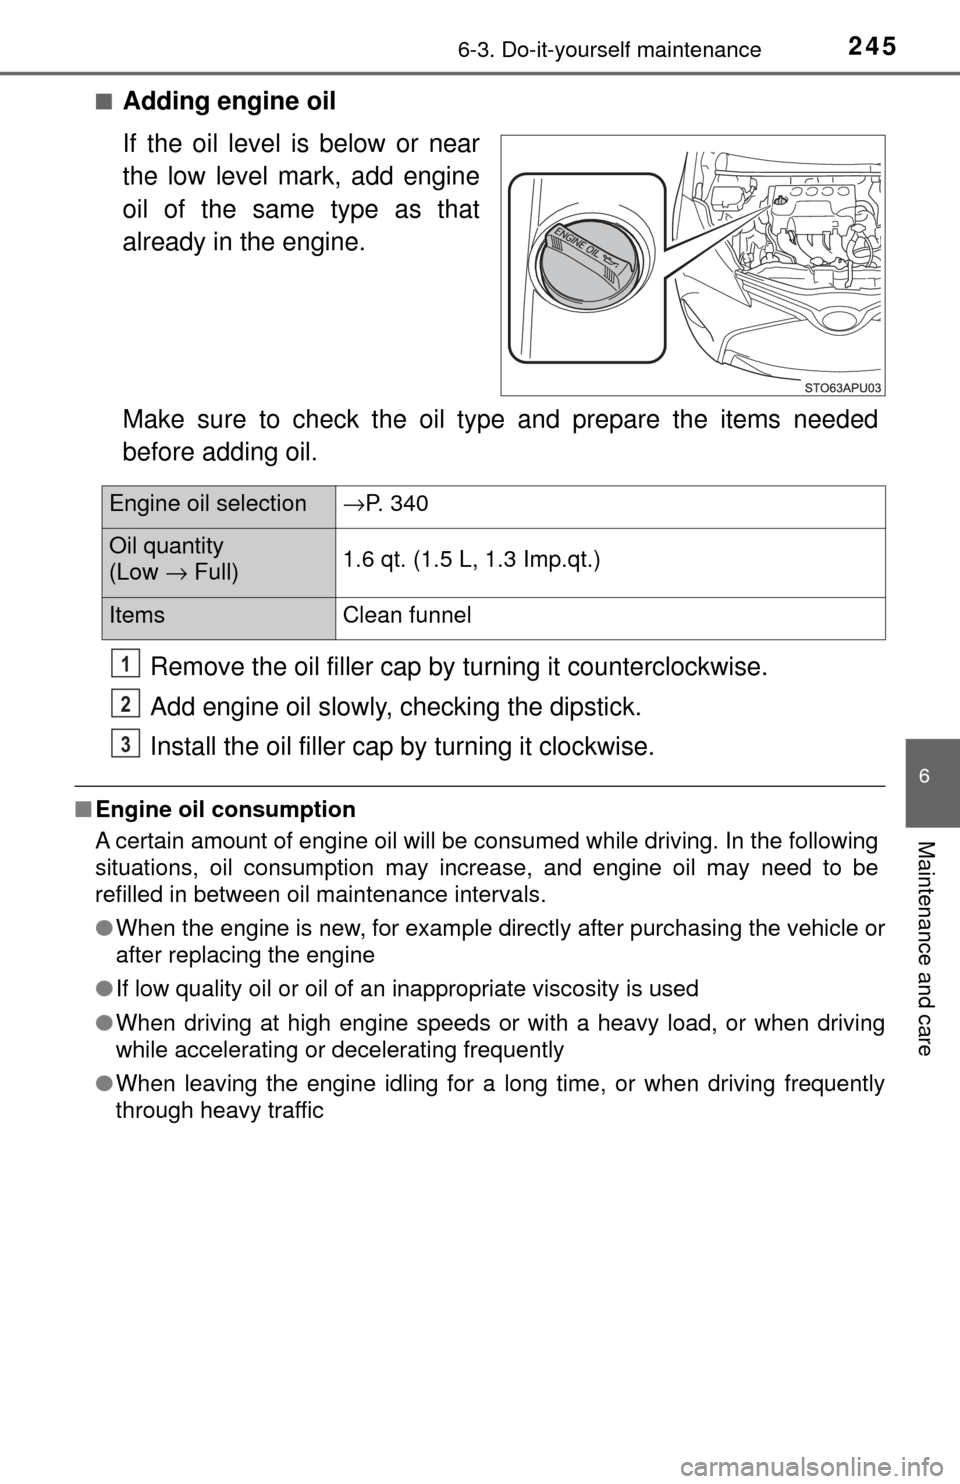
■Adding engine oil
If the oil level is below or near
the low level mark, add engine
oil of the same type as that
already in the engine.
Make sure to check the oil type and prepare the items needed
before adding oil.Remove the oil filler cap by turning it counterclockwise.
Add engine oil slowly, c hecking the dipstick.
Install the oil filler cap by turning it clockwise.
■Engine oil consumption
A certain amount of engine oil will be consumed while driving. In the following
situations, oil consumption may increase, and engine oil may need to be
refilled in between oil maintenance intervals.
●When the engine is new, for example directly after purchasing the vehicle or
after replacing the engine
● If low quality oil or oil of an inappropriate viscosity is used
● When driving at high engine speeds or with a heavy load, or when driving
while accelerating or decelerating frequently
● When leaving the engine idling for a long time, or when driving frequently
through heavy traffic
Engine oil selection →P. 340
Oil quantity
(Low → Full) 1.6 qt. (1.5 L, 1.3 Imp.qt.)
Items
Clean funnel
1
2
3
Page 255 of 396

2556-3. Do-it-yourself maintenance
6
Maintenance and care
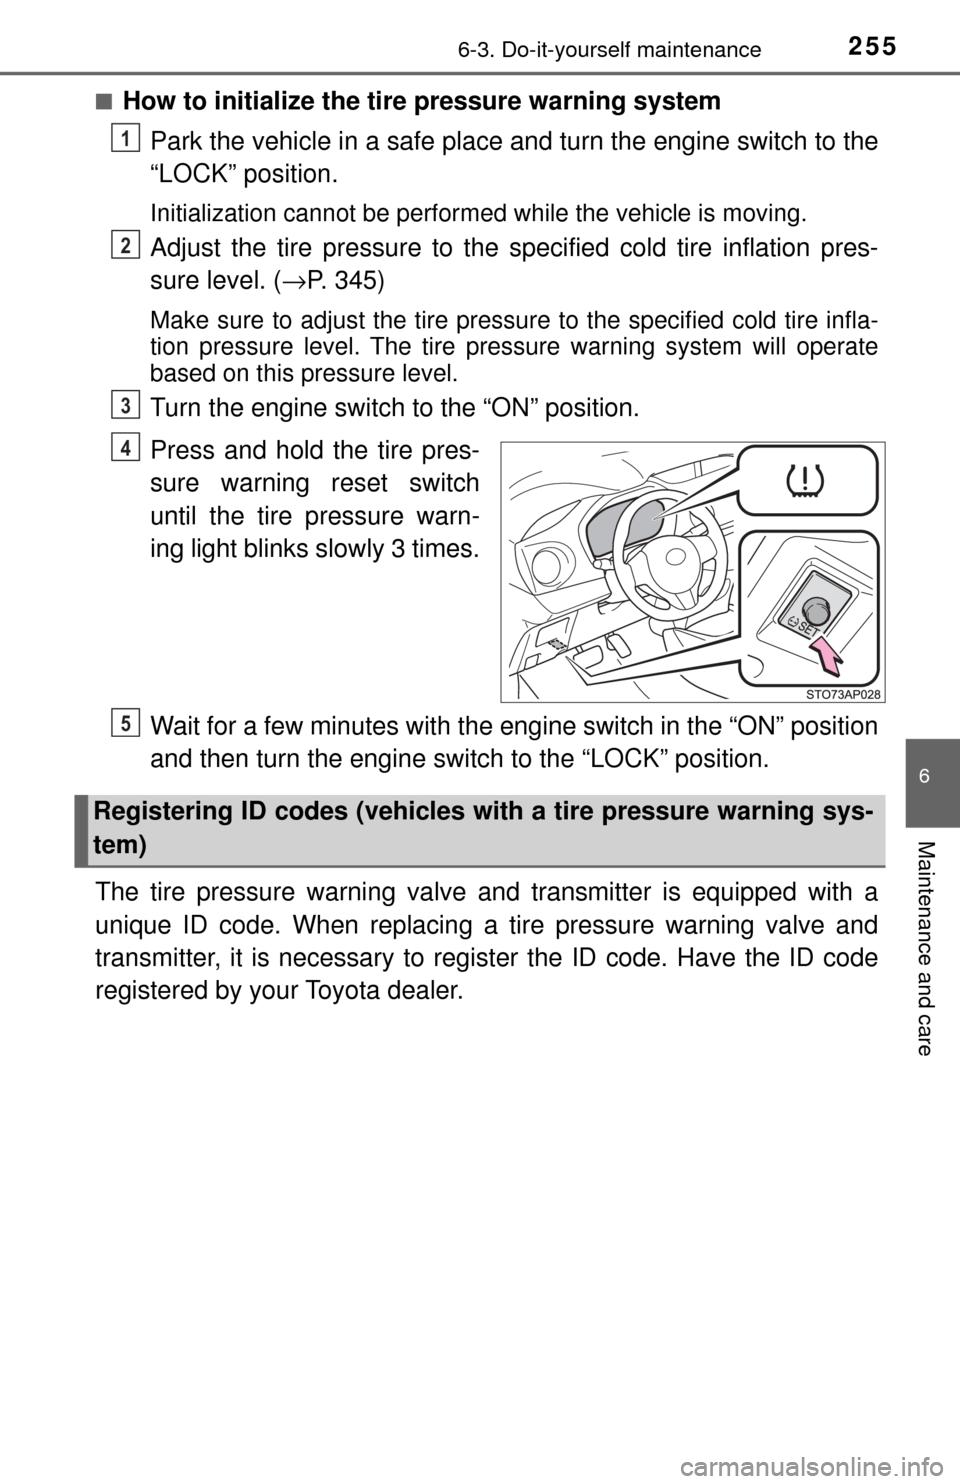
■How to initialize the tire pressure warning systemPark the vehicle in a safe place and turn the engine switch to the
“LOCK” position.
Initialization cannot be performed while the vehicle is moving.
Adjust the tire pressure to the specified cold tire inflation pres-
sure level. ( →P. 345)
Make sure to adjust the tire pressu re to the specified cold tire infla-
tion pressure level. The tire pressure warning system will operate
based on this pressure level.
Turn the engine switch to the “ON” position.
Press and hold the tire pres-
sure warning reset switch
until the tire pressure warn-
ing light blinks slowly 3 times.
Wait for a few minutes with the eng ine switch in the “ON” position
and then turn the engine switch to the “LOCK” position.
The tire pressure warning valve and transmitter is equipped with a
unique ID code. When replacing a tire pressure warning valve and
transmitter, it is necessary to register the ID code. Have the ID code
registered by your Toyota dealer.
1
2
3
4
Registering ID codes (vehicles with a tire pressure warning sys-
tem)
5
Page 268 of 396
2686-3. Do-it-yourself maintenance
Air conditioning filter
Turn the engine switch to the “LOCK” position.
Open the glove box and slide
off the damper.
Push in each side of the glove
box to disconnect the upper
claws.
Pull out the glove box and dis-
connect the lower claws.
The air conditioning filter must be changed regularly to maintain
air conditioning efficiency.
Removal method
1
2
3
4
Page 273 of 396
2736-3. Do-it-yourself maintenance
6
Maintenance and care
Checking and replacing fuses
Turn the engine switch to the “LOCK” position.
Open the fuse box cover.
Engine compartment: type A and B fuse boxesType A fuse box
Push the tab in and lift the lid off.
Type B fuse box
Push the tab in and lift the lid off.
If any of the electrical components do not operate, a fuse may
have blown. If this happens, check and replace the fuses as nec-
essary.
1
2
1
2
Page 280 of 396
2806-3. Do-it-yourself maintenance
Release the bulb retaining
spring.
Remove the bulb.
When installing a new bulb,
align tabs of the bulb with the
cutouts of the mounting hole.
To install, reverse the steps listed.
Projector typeTurn the bulb base counter-
clockwise.
Pull the bulb out while press-
ing the lock release of the
connector.
3
4
5
1
2
Page 282 of 396
2826-3. Do-it-yourself maintenance
Partly remove the fender
liner.
Unplug the connector while
pressing the lock release.
Turn the bulb base counter-
clockwise and remove.
Set the new light bulb.
Align the 3 tabs on the light bulb
with the mounting, and insert.
3
4
5
6
Page 283 of 396
2836-3. Do-it-yourself maintenance
6
Maintenance and care
Turn and secure the bulb.
Install the connector.
Shake the bulb base gently to
check that it is not loose, turn
the front fog light, on once and
visually confirm that no light is
leaking through the mounting.
When installing the fender liner, install by starting and the
directions reversed.
■Front side marker lightsTurn the bulb base counter-
clockwise.
Remove the light bulb
When installing, reve rse the steps listed.
7
83
1
2
3
Page 284 of 396
2846-3. Do-it-yourself maintenance
■Front turn signal lights/parking lights
Turn the bulb base counter-
clockwise.
Remove the light bulb.
When installing, reve rse the steps listed.
1
2
3