Page 48 of 796
481-1. For safe use
PRIUS_OM_OM47B54U_(U)■
When to contact your Toyota dealer
In the following cases, the vehicle will require inspection and/or repair. Con-
tact your Toyota dealer as soon as possible.
●Any of the SRS airbags have been inflated.
● The front of the vehicle is damaged or
deformed, or was involved in an acci-
dent that was not severe enough to
cause the SRS front airbags to inflate.
● A portion of a door or its surrounding
area is damaged, deformed or has had a
hole made in it, or the vehicle was
involved in an accident that was not
severe enough to cause the SRS side
and curtain shield airbags to inflate.
● The pad section of the steering wheel,
dashboard near the front passenger air-
bag or lower portion of the driver’s side
instrument panel is scratched, cracked,
or otherwise damaged.
● The front passenger’s seat cushion sur-
face is scratched, cracked, or otherwise
damaged.
Page 93 of 796
PRIUS_OM_OM47B54U_(U)
932. Instrument cluster
2
Instrument cluster
The meter control switches equipped on the steering wheel can be
used to switch the screen display and change settings related to func-
tions displayed on the screen.
Each time the button is
pressed, the mileage display
switches among odometer, trip
meters, etc., and the fuel con-
sumption information for each
distance switches as well.
(→ P. 109)
Pressing , , or
performs such operations as
scrolling the screen
*, switching
the contents of the display
* and
moving the cursor.
This button is used to perform such operations as selecting the cur-
rent item or switching between on and off.
When pressed, the display returns to the previous screen.
*: On screens where the screen can be scrolled and the display can be
switched, marks are displayed to indicate the method of operation (such as
and ).
Operations related to the combination meter
1
2
3
4
Page 99 of 796

PRIUS_OM_OM47B54U_(U)
992. Instrument cluster
2
Instrument cluster
■Liquid crystal display
Small spots or light spots may appear on the display. This phenomenon is
characteristic of liquid crystal displays, and there is no problem continuing to
use the display.
■ Pop-up display
Some functions, such as the driving mode select switch and air conditioning
system, are operation-linked and display pop-up screens on the multi-infor-
mation display. If the pop-up screens of these functions are not desired, they
can be turned off in the “Meter Customize” settings. ( →P. 142)
WARNING
■To prevent an accident
■ Caution for use while driving
For safety, avoid operating the meter control switch while driving as much
as possible, and do not look continuously at the multi-information display
while driving. Stop the vehicle and operate the meter control switch. Failure
to do so may cause a steering wheel operation error, resulting in an unex-
pected accident.
NOTICE
■The information display at low temperatures
Allow the interior of the vehicle to warm up before using the liquid crystal
information display. At extremely low temperatures, the information display
monitor may respond slowly, and display changes may be delayed.
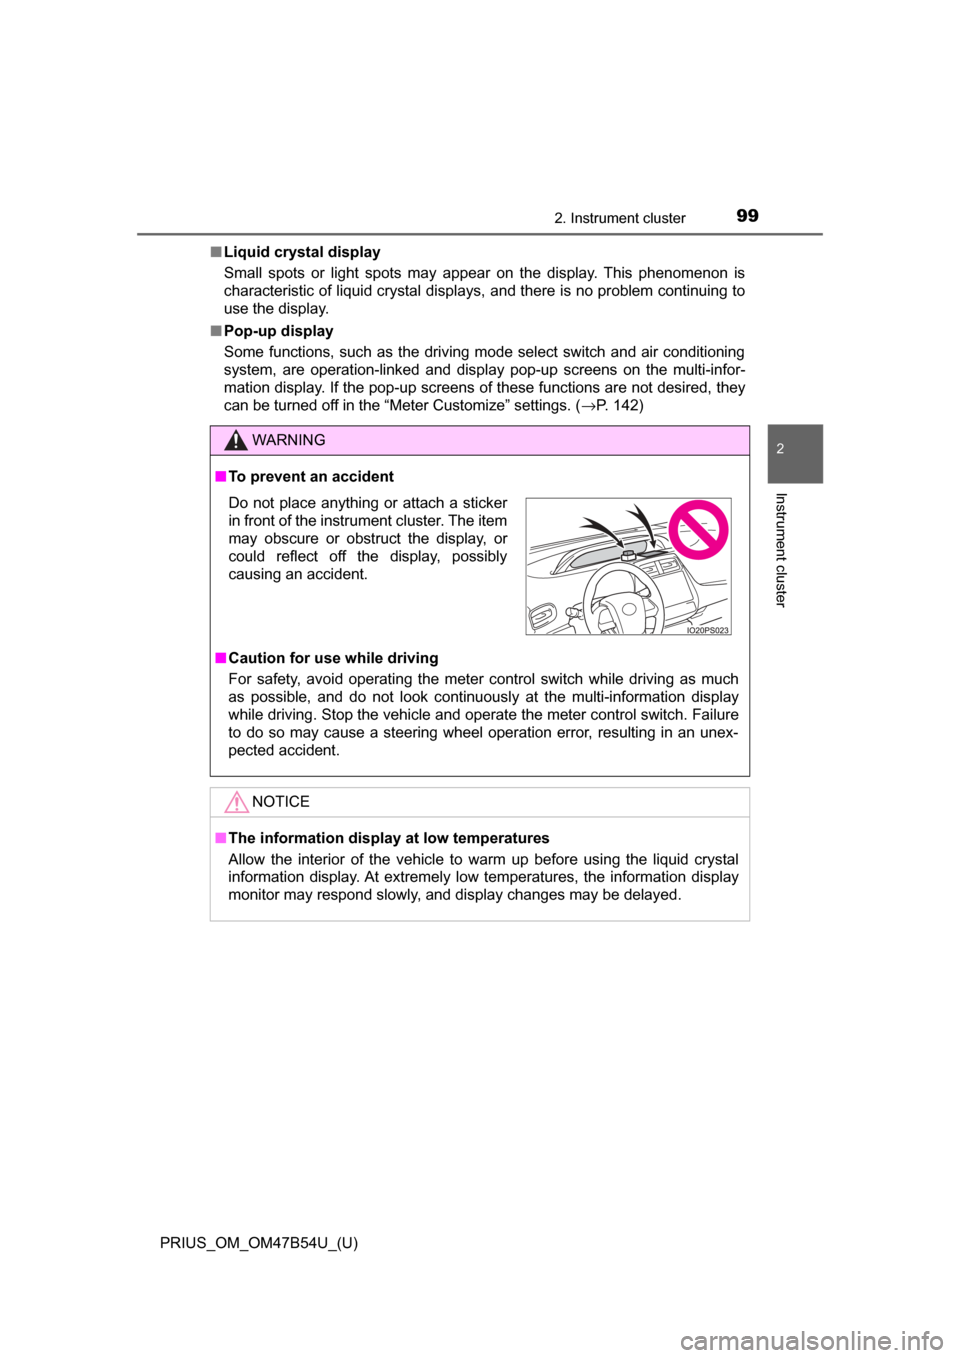
Do not place anything or attach a sticker
in front of the instrument cluster. The item
may obscure or obstruct the display, or
could reflect off the display, possibly
causing an accident.
Page 139 of 796

PRIUS_OM_OM47B54U_(U)
1392. Instrument cluster
2
Instrument cluster
The operation contents of the driving support systems and settings
related to the combination meter display can be changed.
Driving support systems such as the PCS (Pre-Collision System) (if
equipped) and Blind Spot Monitor (if equipped) is turned on and off by sim-
ply pressing . Make sure not to cancel the systems accidentally.
■
Setting procedure
Press or of the meter cont rol switches on the steering
wheel and select .
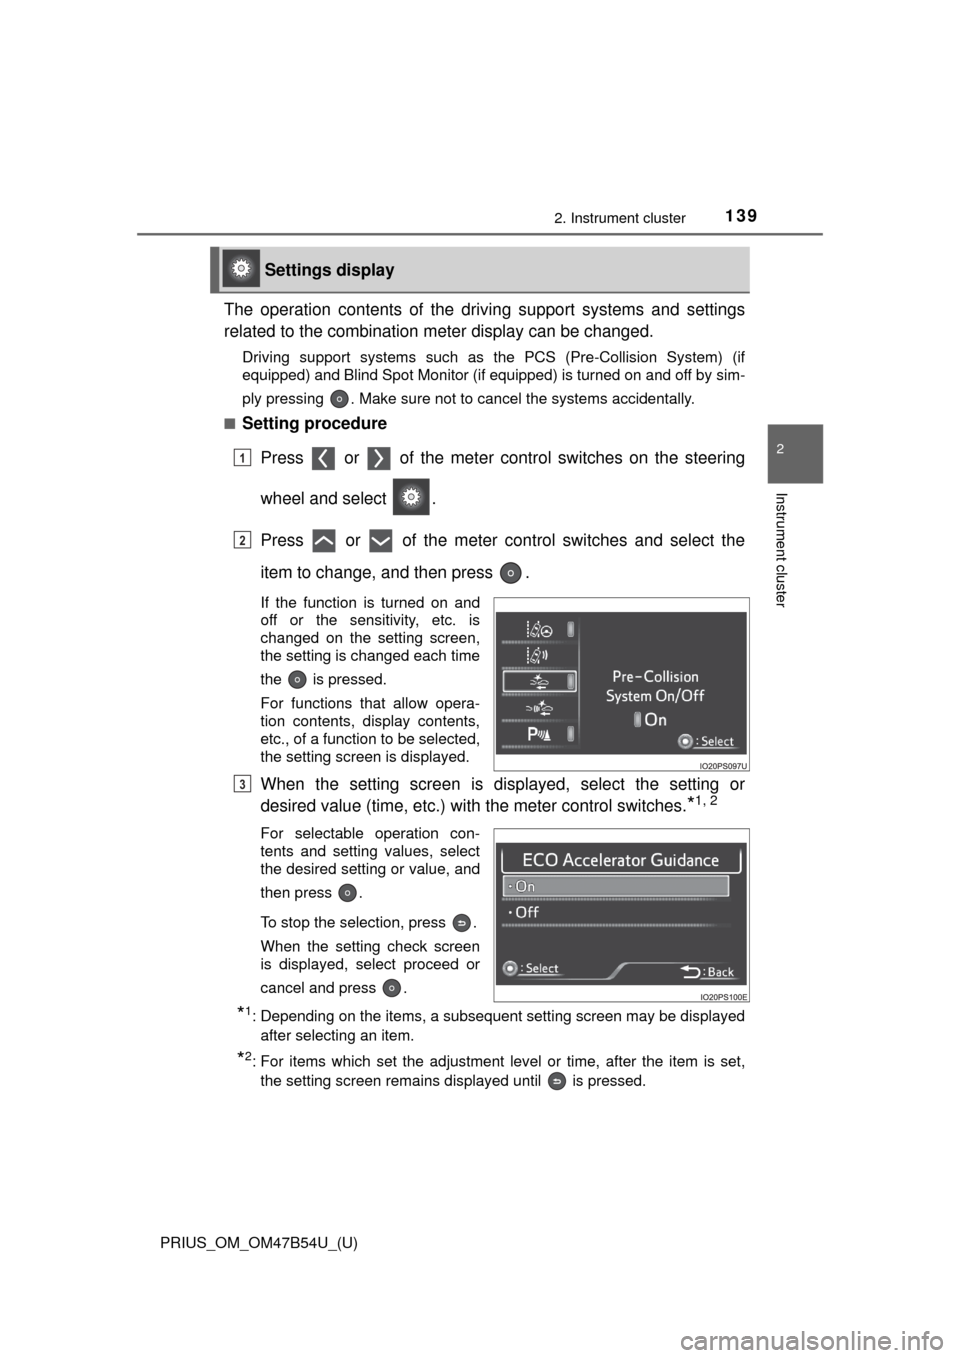
Press or of the meter control switches and select the
item to change, and then press .
If the function is turned on and
off or the sensitivity, etc. is
changed on the setting screen,
the setting is changed each time
the is pressed.
For functions that allow opera-
tion contents, display contents,
etc., of a function to be selected,
the setting screen is displayed.
When the setting screen is displayed, select the setting or
desired value (time, etc.) with the meter control switches.
*1, 2
For selectable operation con-
tents and setting values, select
the desired setting or value, and
then press .
To stop the selection, press .
When the setting check screen
is displayed, select proceed or
cancel and press .
*1: Depending on the items, a subsequent setting screen may be displayed
after selecting an item.
*2: For items which set the adjustment level or time, after the item is set,the setting screen remains displayed until is pressed.
Settings display
1
2
3
Page 149 of 796

PRIUS_OM_OM47B54U_(U)
1492. Instrument cluster
2
Instrument cluster
■Insert displays of the driving support systems
Insert displays are linked with the operation of the following sys-
tems and used to show some of the information shown on the multi-
information display on the head-up display.
*: If equipped
■
Master warning light insert display
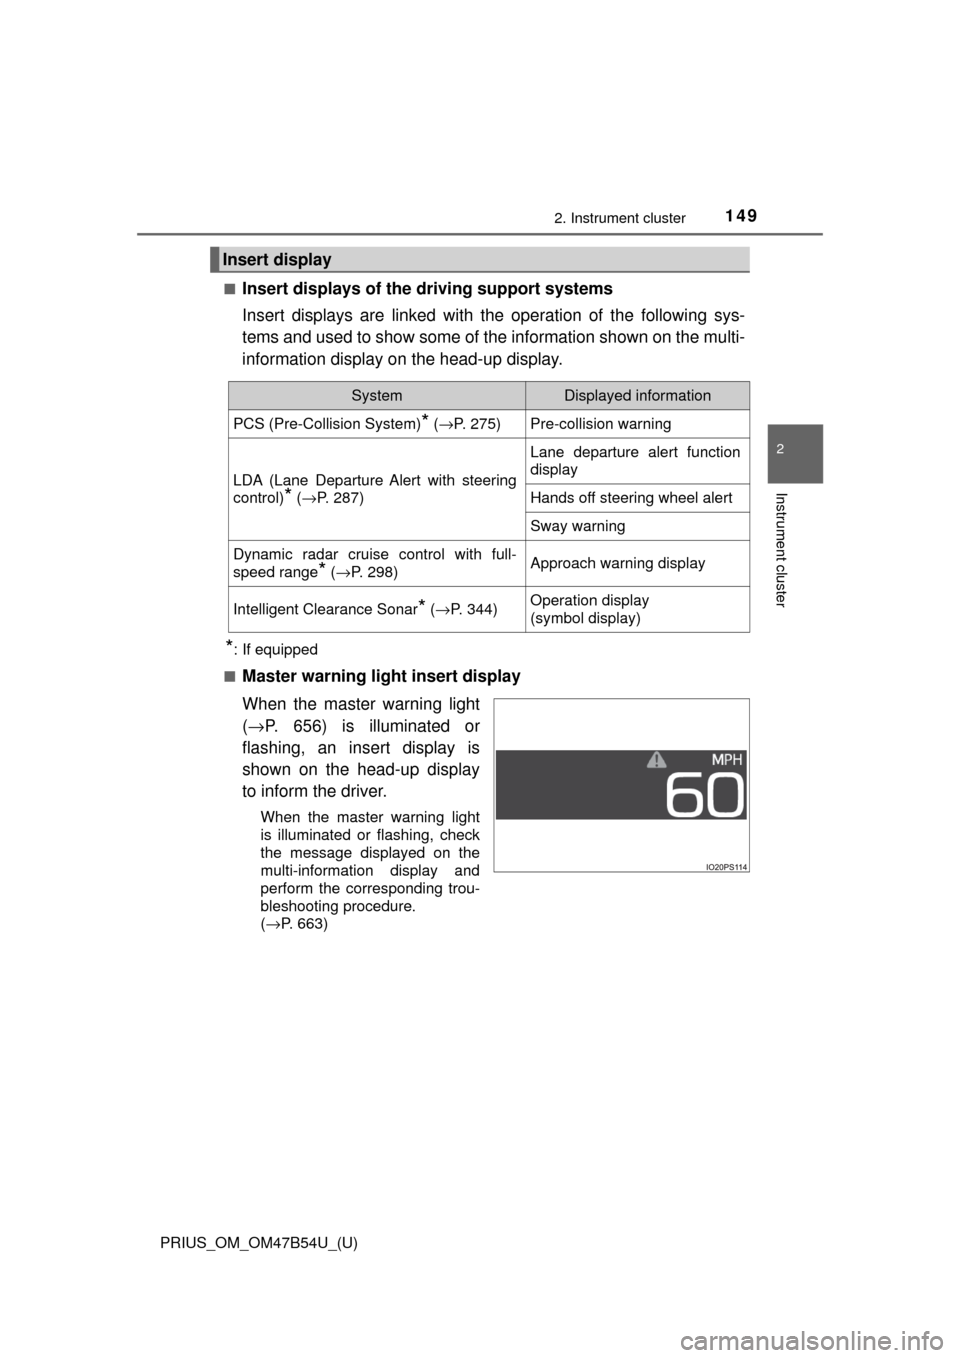
When the master warning light
( → P. 656) is illuminated or
flashing, an insert display is
shown on the head-up display
to inform the driver.
When the master warning light
is illuminated or flashing, check
the message displayed on the
multi-information display and
perform the corresponding trou-
bleshooting procedure.
( →P. 663)
Insert display
SystemDisplayed information
PCS (Pre-Collision System)* ( →P. 275)Pre-collision warning
LDA (Lane Departure Alert with steering
control)
* (→P. 287)
Lane departure alert function
display
Hands off steering wheel alert
Sway warning
Dynamic radar cruise control with full-
speed range
* (→P. 298)Approach warning display
Intelligent Clearance Sonar* (→ P. 344)Operation display
(symbol display)
Page 159 of 796
159
PRIUS_OM_OM47B54U_(U)
3
Operation of
each component
3-1. Key information
Keys .................................. 160
3-2. Opening, closing and locking the doors
Side doors ......................... 165
Back door .......................... 171
Smart key system ............. 176
3-3. Adjusting the seats Front seats ........................ 184
Rear seats......................... 186
Head restraints.................. 189
3-4. Adjusting the steering wheel and mirrors
Steering wheel .................. 192
Inside rear view mirror ...... 194
Outside rear view mirrors ............................. 196
3-5. Opening and closing the windows and moon roof
Power windows ................. 198
Moon roof .......................... 202
Page 192 of 796
1923-4. Adjusting the steering wheel and mirrors
PRIUS_OM_OM47B54U_(U)
Steering wheel
Hold the steering wheel and
push the lever down.
Adjust to the ideal position by
moving the steering wheel hori-
zontally and vertically.
After adjustment, pull the lever up
to secure the steering wheel.
To sound the horn, press on or
close to the mark.
■After adjusting the steering wheel
Make sure that the steering wheel is securely locked.
The horn may not sound if the steering wheel is not securely locked.
Adjustment procedure
1
2
Horn
Page 193 of 796
1933-4. Adjusting the steering wheel and mirrors
3
Operation of each component
PRIUS_OM_OM47B54U_(U)
WARNING
■Caution while driving
Do not adjust the steering wheel while driving.
Doing so may cause the driver to mishandle the vehicle and cause an acci-
dent, resulting in death or serious injury.
■ After adjusting the steering wheel
Make sure that the steering wheel is securely locked.
Otherwise, the steering wheel may move suddenly, possibly causing an
accident, and resulting in death or serious injury.