2017 TOYOTA MIRAI light
[x] Cancel search: lightPage 128 of 464
1284-2. Opening, closing and locking the doors
MIRAI_OM_USA_OM62023U
■Tr u n k l i g h t
The trunk light turns on when the trunk is opened.
■ Function to prevent the tr unk being locked with the electronic key inside
● When all doors are locked, closing the trunk lid with the electronic key left
inside the trunk will sound an alarm.
In this case, the trunk lid can be opened by pressing the trunk release but-
ton on the trunk lid.
● If the spare electronic key is put in the trunk with all the doors locked, the
key confinement prevention function is activated so the trunk can be
opened. In order to prevent theft, take all electronic keys with you when
leaving the vehicle.
● If the electronic key is put in the trunk with all the doors locked, the key may
not be detected depending on the location of the key and the surrounding
radio wave conditions. In this case, the key confinement prevention function
cannot be activated, causing the doors to lock when the trunk is closed.
Make sure to check where the key is before closing the trunk.
● The key confinement prevention function cannot be activated if any one of
the doors is unlocked. In this case, open the trunk using the trunk opener
switch.
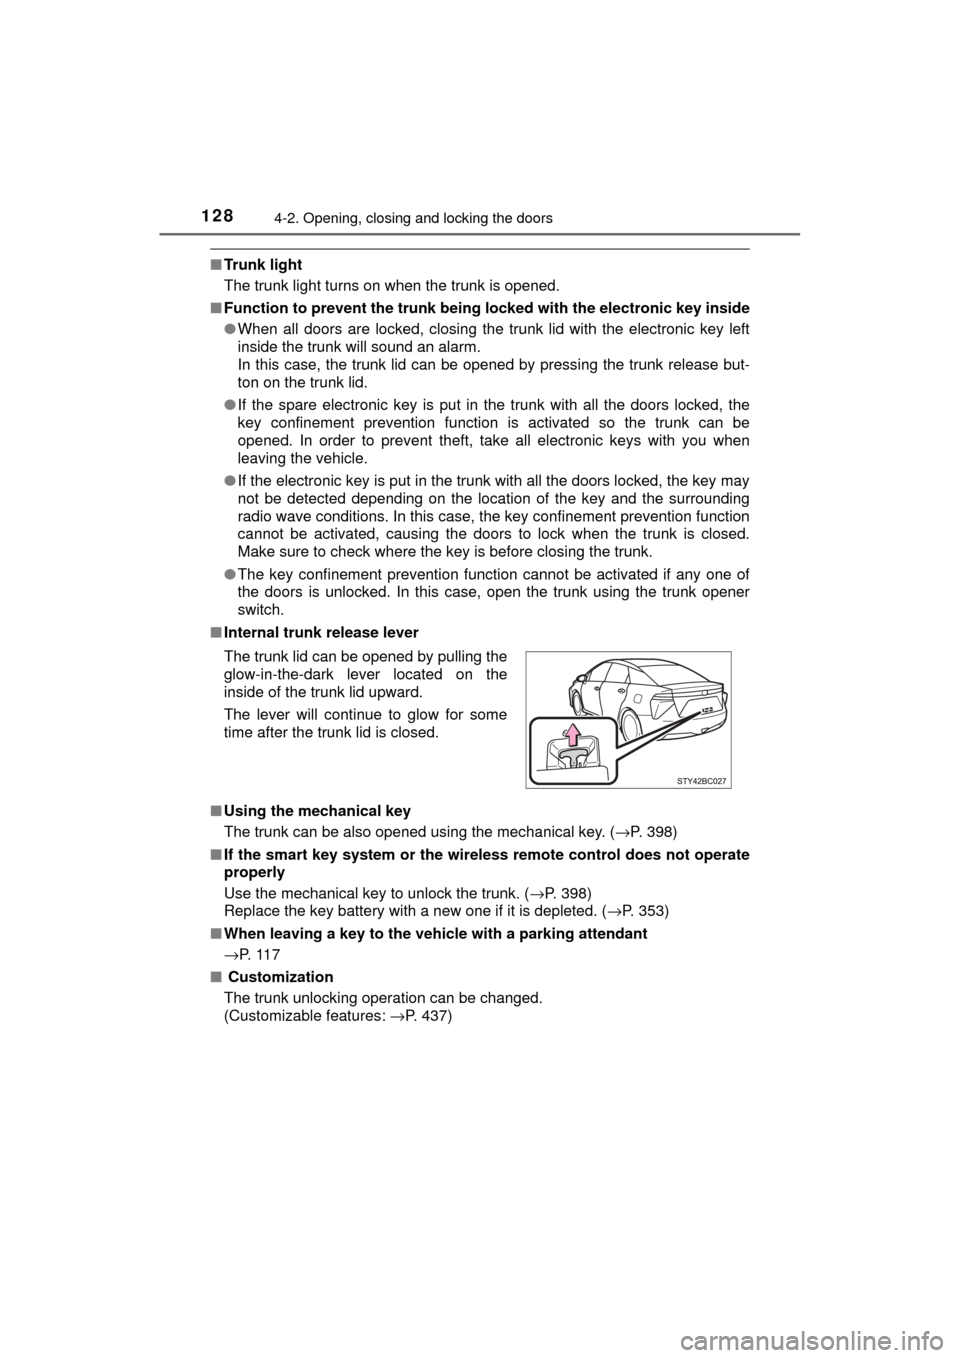
■ Internal trunk release lever
■ Using the mechanical key
The trunk can be also opened using the mechanical key. ( →P. 398)
■ If the smart key system or the wireless remote control does not operate
properly
Use the mechanical key to unlock the trunk. ( →P. 398)
Replace the key battery with a new one if it is depleted. ( →P. 353)
■ When leaving a key to the vehicle with a parking attendant
→P. 1 1 7
■ Customization
The trunk unlocking operation can be changed.
(Customizable features: →P. 437)
The trunk lid can be opened by pulling the
glow-in-the-dark lever located on the
inside of the trunk lid upward.
The lever will continue to glow for some
time after the trunk lid is closed.
Page 130 of 464
1304-2. Opening, closing and locking the doors
MIRAI_OM_USA_OM62023U
WARNING
■Using the trunk
Observe the following precautions.
Failure to do so may cause parts of the body to be caught, resulting in seri-
ous injury.
● Remove any heavy loads, such as snow and ice, from the trunk lid before
opening it. Failure to do so may cause the trunk lid to suddenly shut again
after it is opened.
● When opening or closing the trunk lid, thoroughly check to make sure the
surrounding area is safe.
● If anyone is in the vicinity, make sure they are safe and let them know that
the trunk is about to open or close.
● Use caution when opening or closing the trunk lid in windy weather as it
may move abruptly in strong wind.
● Do not attach any accessories other than genuine Toyota parts to the trunk
lid. Such additional weight on the trunk lid may cause the lid to suddenly
shut again after it is opened.
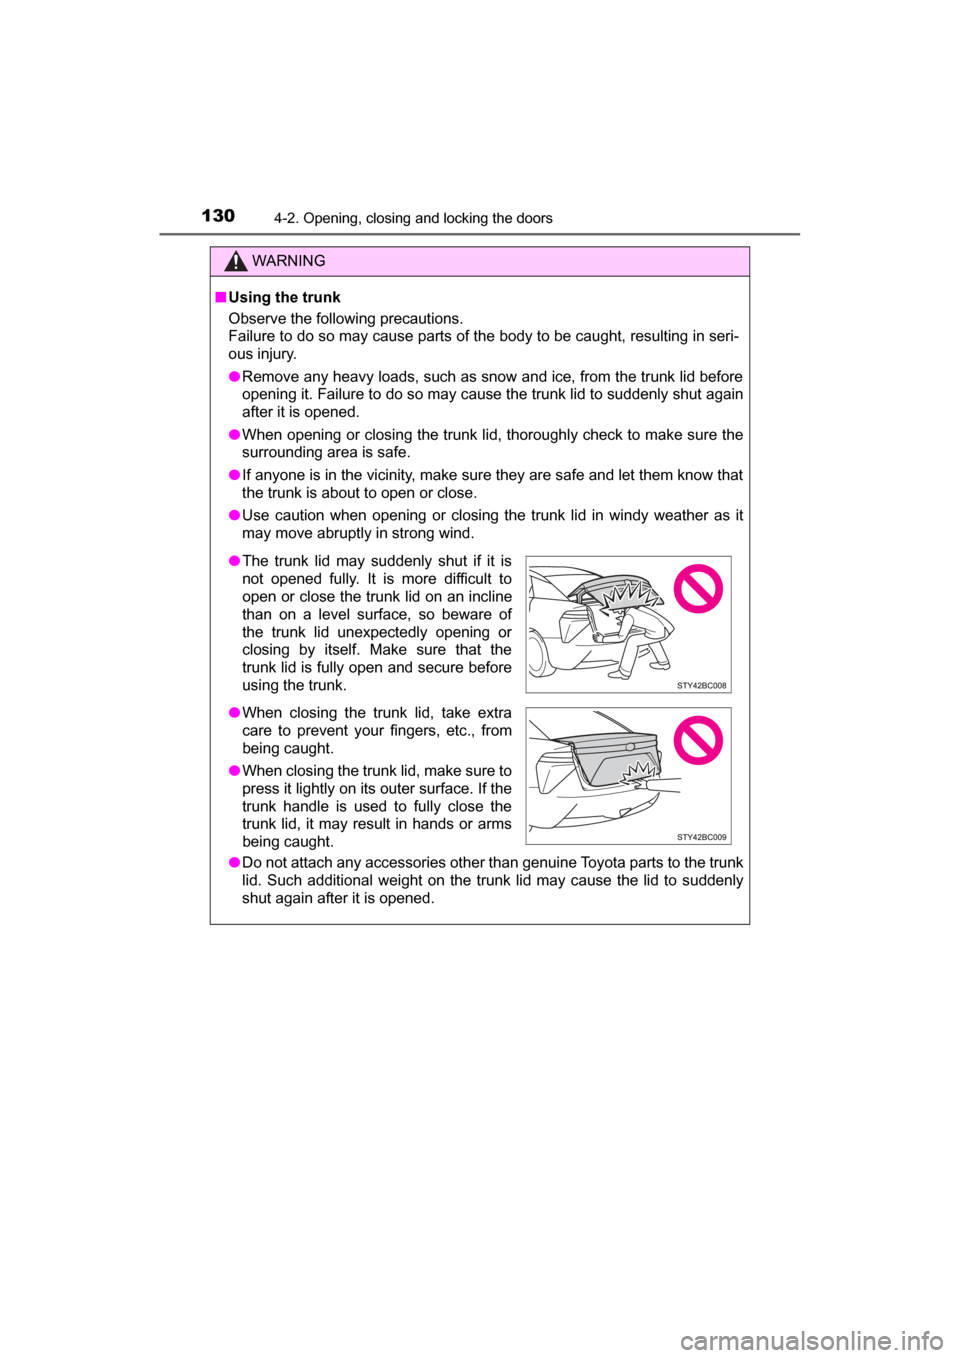
●The trunk lid may suddenly shut if it is
not opened fully. It is more difficult to
open or close the trunk lid on an incline
than on a level surface, so beware of
the trunk lid unexpectedly opening or
closing by itself. Make sure that the
trunk lid is fully open and secure before
using the trunk.
● When closing the trunk lid, take extra
care to prevent your fingers, etc., from
being caught.
● When closing the trunk lid, make sure to
press it lightly on its outer surface. If the
trunk handle is used to fully close the
trunk lid, it may result in hands or arms
being caught.
Page 136 of 464

1364-2. Opening, closing and locking the doors
MIRAI_OM_USA_OM62023U●
The lock sensor may not work properly if it comes into contact with ice,
snow, mud, etc. Clean the lock sensor and attempt to operate it again.
● A sudden approach to the effective range or door handle may prevent the
doors from being unlocked. In this case, return the door handle to the origi-
nal position and check that the doors unlock before pulling the door handle
again.
● If there is another electronic key in the detection area, it may take slightly
longer to unlock the doors after the door handle is gripped.
■ When the vehicle is not driven for extended periods
●To prevent theft of the vehicle, do not leave the electronic key within 6 ft. (2 m)
of the vehicle.
● The smart key system can be deactivated in advance. ( →P. 436)
■ To operate the system properly
●Make sure to carry the electronic key when operating the system. Do not get
the electronic key too close to the vehicle when operating the system from the
outside of the vehicle.
Depending on the position and holding condition of the electronic key, the key
may not be detected correctly and the system may not operate properly. (The
alarm may go off accidentally, or the door lock prevention function may not
operate.)
● Do not leave the electronic key inside the trunk.
The key confinement prevention function may not operate, depending on
the location of the key (close to the emergency tire puncture repair kit, the
inside edge of the trunk), conditions (inside a metal bag, close to metallic
objects) and the radio waves in the surrounding area. ( →P. 128)
■ If the smart key system do es not operate properly
● Locking and unlocking the doors and opening the trunk:
Use the mechanical key. ( →P. 398)
● Starting the fuel cell system: →P. 399
■ Customization
Settings (e. g. smart key system) can be changed.
(Customizable features: →P. 436)
■ If the smart key system has been deactivated in a customized setting
●Locking and unlocking the doors and opening the trunk:
Use the wireless remote control or mechanical key. ( →P. 120, 126, 398)
● Starting the fuel cell system and changing power switch modes: →P. 399
● Stopping the fuel cell system: →P. 1 7 3
Page 142 of 464
1424-3. Adjusting the seats
MIRAI_OM_USA_OM62023U
■To stop the position recall operation part-way through
Perform any of the following:
● Press the “SET” button.
● Press button “1” or “2”.
● Operate any of the seat adjustment switches (only cancels seat position
recall).
● Operate the tilt and telescopic steering control switch (only cancels steering
wheel position recall).
■ Seat positions that can be memorized ( →P. 138)
The adjusted positions other than the position adjusted by lumbar support
switch can be recorded.
■ Operating the driving position memory after turning the power switch off
Recorded seat positions can be activated up to 180 seconds after the driver’s
door is opened and another 60 seconds after it is closed again.
■ In order to correctly use the dr iving position memory function
If a seat position is already in the furthest possible position and the seat is
operated in the same direction, the recorded position may be slightly different
when it is recalled.
Each electronic key can be registered to recall your preferred driving
position.
■Registering procedure
Record your driving position to button “1” or “2” before performing
the following:
Carry only the key you want to re gister, and then close the driver’s
door.
If 2 or more keys are in the vehicle, the driving position cannot be
recorded properly.
Turn the power switch to ON mode.
Check that the shift position is in P.
Recall the driving position that you want to record.
Memory recall function
1
2
3
Page 143 of 464
1434-3. Adjusting the seats
4
Operation of each component
MIRAI_OM_USA_OM62023U
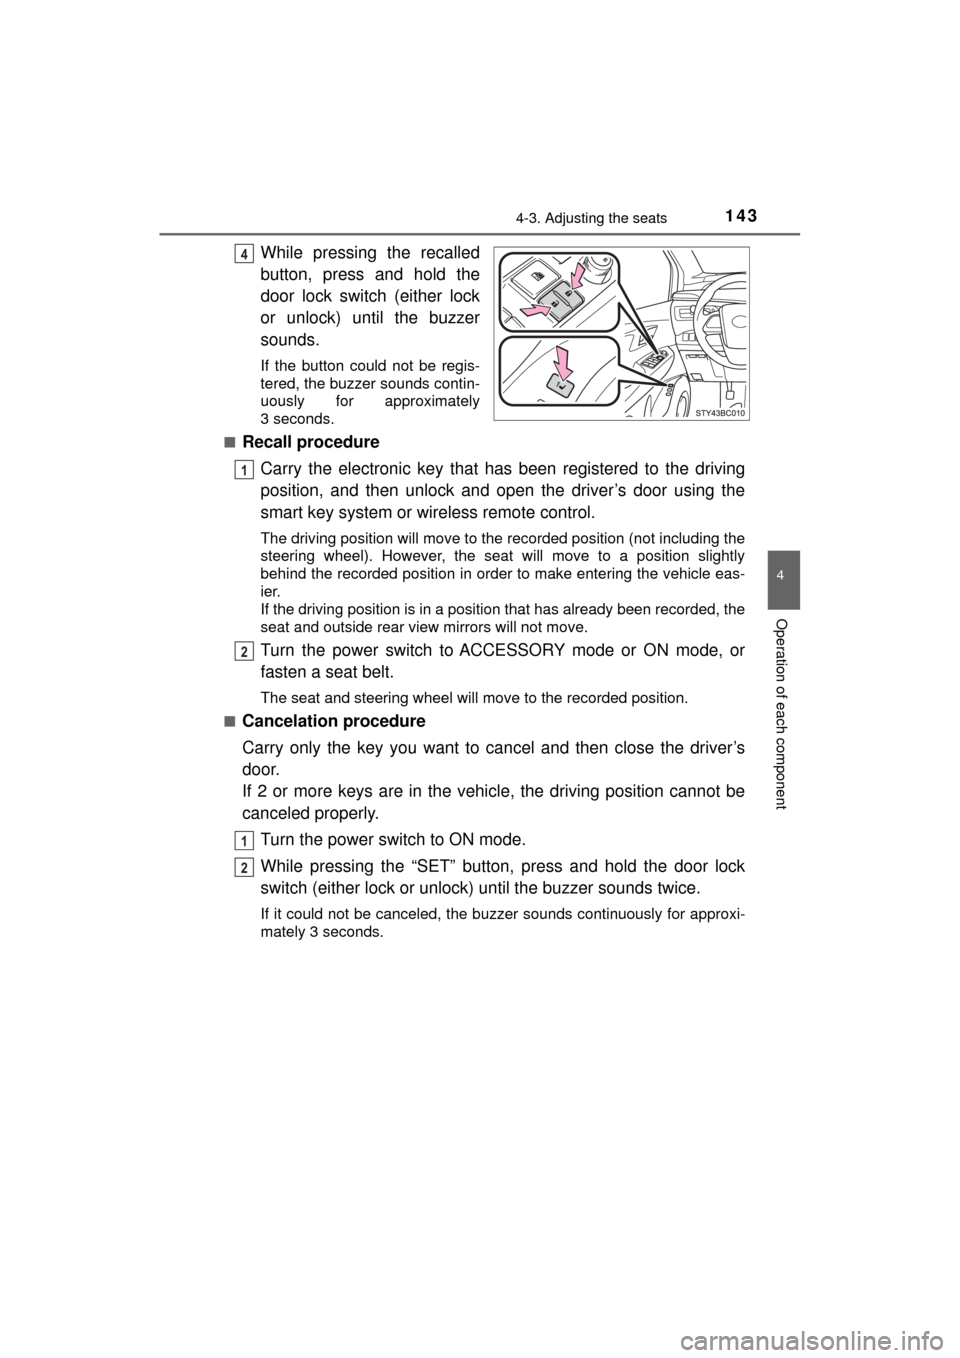
While pressing the recalled
button, press and hold the
door lock switch (either lock
or unlock) until the buzzer
sounds.
If the button could not be regis-
tered, the buzzer sounds contin-
uously for approximately
3 seconds.
■
Recall procedure
Carry the electronic key that has been registered to the driving
position, and then unlock and open the driver’s door using the
smart key system or wi reless remote control.
The driving position will move to the recorded position (not including the
steering wheel). However, the seat will move to a position slightly
behind the recorded position in order to make entering the vehicle eas-
ier.
If the driving position is in a position that has already been recorded, the
seat and outside rear view mirrors will not move.
Turn the power switch to ACCESSORY mode or ON mode, or
fasten a seat belt.
The seat and steering wheel will move to the recorded position.
■
Cancelation procedure
Carry only the key you want to cancel and then close the driver’s
door.
If 2 or more keys are in the vehicle, the driving position cannot be
canceled properly.
Turn the power switch to ON mode.
While pressing the “SET” button, press and hold the door lock
switch (either lock or unlock) until the buzzer sounds twice.
If it could not be canceled, the buzzer sounds continuously for approxi-\
mately 3 seconds.
4
1
2
1
12
Page 149 of 464
1494-4. Adjusting the steering wheel and mirrors
4
Operation of each component
MIRAI_OM_USA_OM62023U
Inside rear view mirror
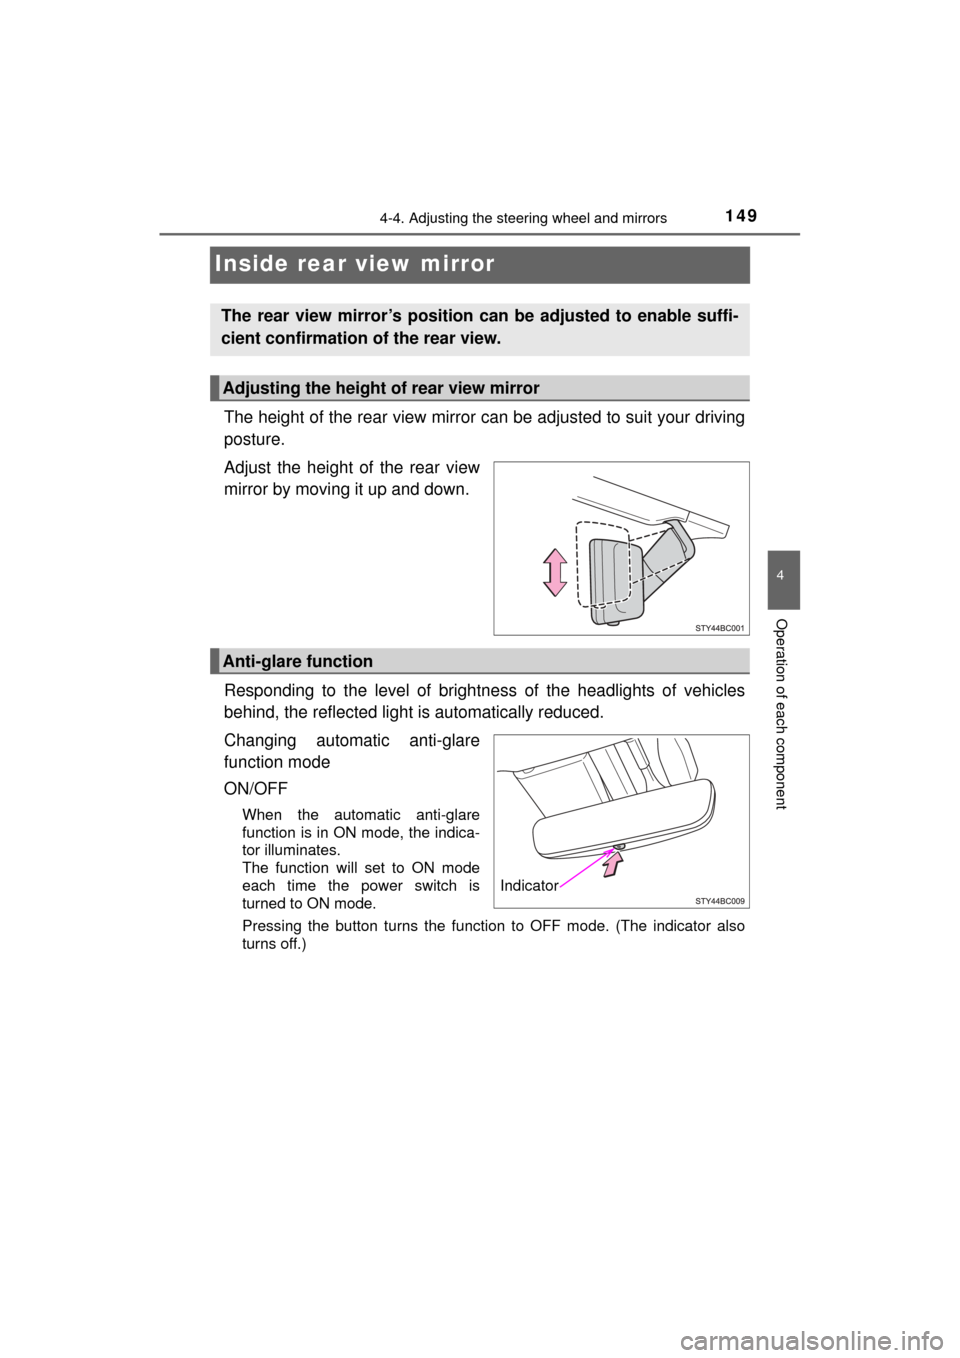
The height of the rear view mirror can be adjusted to suit your driving
posture.
Adjust the height of the rear view
mirror by moving it up and down.
Responding to the level of brightne ss of the headlights of vehicles
behind, the reflected light is automatically reduced.
Changing automatic anti-glare
function mode
ON/OFF
When the automatic anti-glare
function is in ON mode, the indica-
tor illuminates.
The function will set to ON mode
each time the power switch is
turned to ON mode.
Pressing the button turns the function to OFF mode. (The indicator also
turns off.)
The rear view mirror’s position can be adjusted to enable suffi-
cient confirmation of the rear view.
Adjusting the height of rear view mirror
Anti-glare function
Indicator
Page 152 of 464

1524-4. Adjusting the steering wheel and mirrors
MIRAI_OM_USA_OM62023U
When the mirror select switch is in the “L” or “R” position, the outside
rear view mirrors will automatically angle downwards when the vehicle
is reversing in order to give a better view of the ground.
To disable this function, move the mirror select switch to the neutral
position (between “L” or “R”)
■Adjusting the mirror angle when the vehicle is reversing
With the shift position in R, adjust the mirror angle at a desired posi-
tion.
The adjusted angle will be memorize d and the mirror will automati-
cally tilt to the memorized angle whenever the shift position is
shifted to R from next time.
The memorized downward tilt position of the mirror is linked to the nor-
mal position (angle adjusted with the shift position in other than R).
Therefore, if the normal position is changed after adjustment, the tilt
position will also change.
When the normal position is changed, readjust the angle in reversing.
■ Mirror angle can be adjusted when
The power switch is in ACCESSORY or ON mode.
■ Rain clearing mirrors
The coating on the mirror has the rain clearing (hydrophilic) effect to make the
rear view clearer in raining. When wa ter droplets collect on the mirror surface,
this effect causes the droplets to be spread out into a film.
● The rain clearing effect will be reduced temporarily, when the dirt is adhered
to the mirror or after your vehicle is parked for a long time in underground or
indoor parking lots, etc., where there is no direct sunlight.
However, the effect will gradually recover after 1- or 2-day exposure to direct
sunlight.
● If you want to restore the rain clearing effect immediately, conduct the resto-
ration work. ( →P. 307)
■ When the mirrors are fogged up
The outside rear view mirrors can be cleared using the mirror defoggers. Turn
on the rear window defogger to turn on the outside rear view mirror defog-
gers. ( →P. 261)
■ Automatic adjustment of the mirror angle
A desired mirror face angle can be entered to memory and recalled automati-
cally by the driving position memory. ( →P. 141)
Linked mirror function when reversing
Page 154 of 464
1544-5. Opening and closing the windows
MIRAI_OM_USA_OM62023U
Power windows
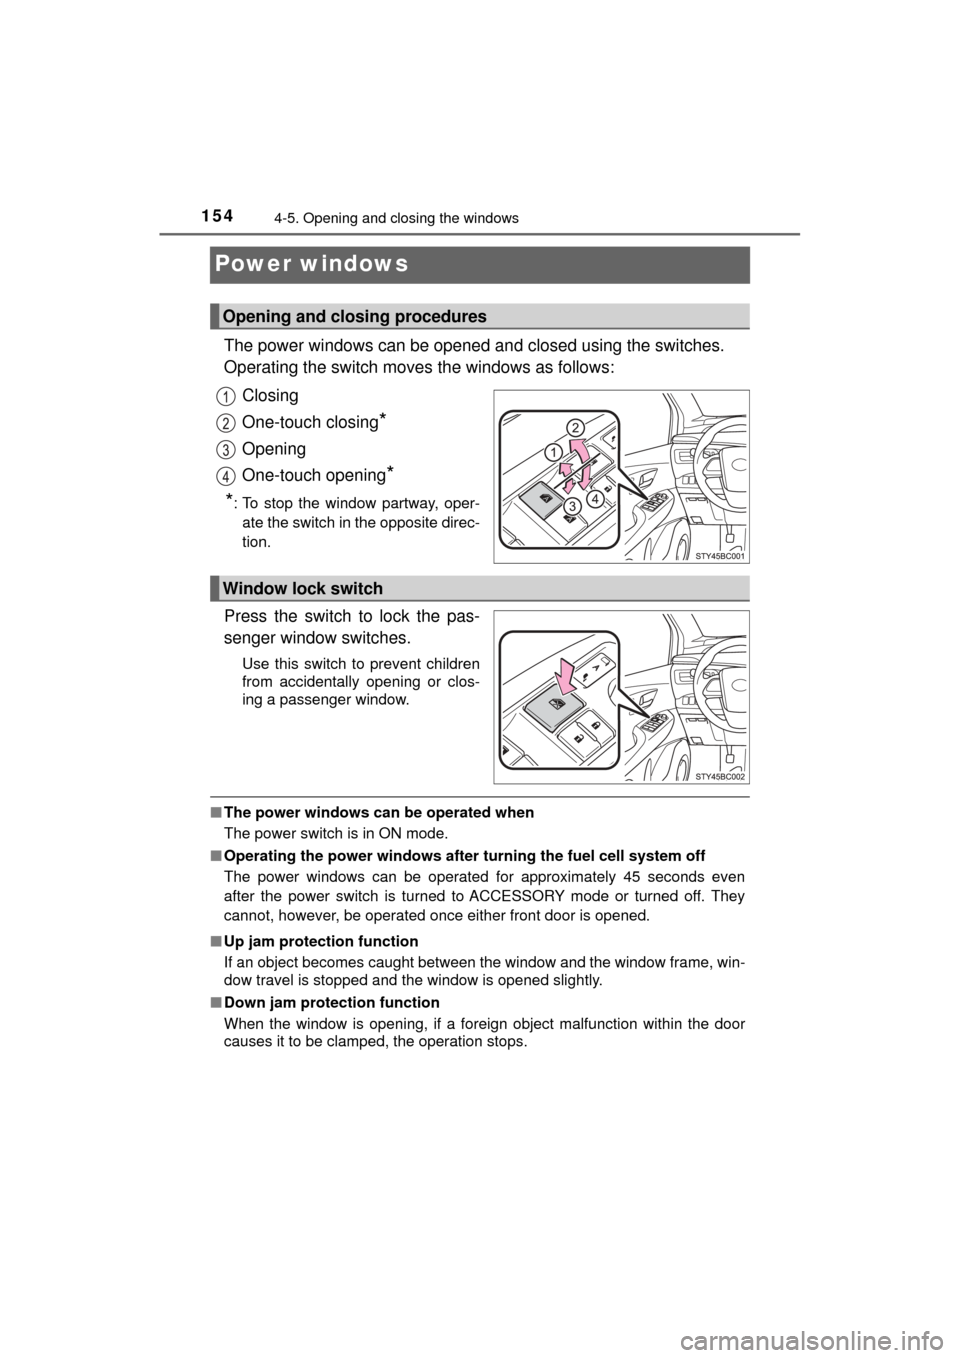
The power windows can be opened and closed using the switches.
Operating the switch moves the windows as follows:
Closing
One-touch closing
*
Opening
One-touch opening
*
*
: To stop the window partway, oper- ate the switch in the opposite direc-
tion.
Press the switch to lock the pas-
senger window switches.
Use this switch to prevent children
from accidentally opening or clos-
ing a passenger window.
■ The power windows can be operated when
The power switch is in ON mode.
■ Operating the power windows after turning the fuel cell system off
The power windows can be operated for approximately 45 seconds even
after the power switch is turned to ACCESSORY mode or turned off. They
cannot, however, be operated once either front door is opened.
■ Up jam protection function
If an object becomes caught between the window and the window frame, win-
dow travel is stopped and the window is opened slightly.
■ Down jam protection function
When the window is opening, if a foreign object malfunction within the doo\
r
causes it to be clamped, the operation stops.
Opening and closing procedures
Window lock switch