Page 47 of 464

471-1. For safe use
1
For safety and security
MIRAI_OM_USA_OM62023UThe SRS curtain shield airbags do not generally inflate if the vehicle is
involved in a rear collision, if it pitches end over end, or if it is involved in a
low-speed side or low-speed frontal collision.
■ When to contact your Toyota dealer
In the following cases, the vehicle will require inspection and/or repair. Con-
tact your Toyota dealer as soon as possible.
●Any of the SRS airbags have been inflated.
●
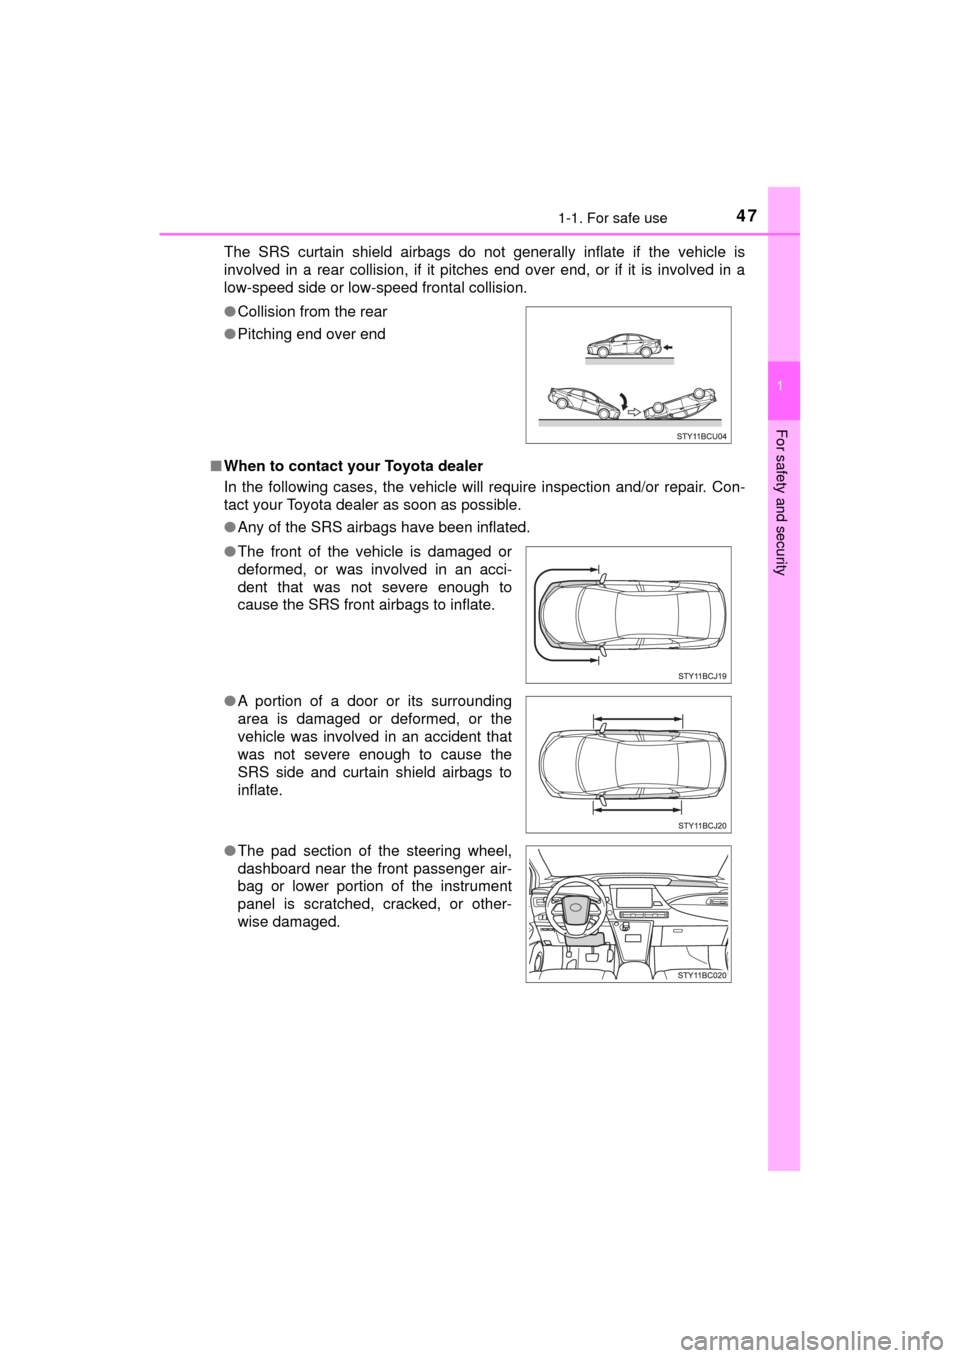
Collision from the rear
● Pitching end over end
● The front of the vehicle is damaged or
deformed, or was involved in an acci-
dent that was not severe enough to
cause the SRS front airbags to inflate.
● A portion of a door or its surrounding
area is damaged or deformed, or the
vehicle was involved in an accident that
was not severe enough to cause the
SRS side and curtain shield airbags to
inflate.
● The pad section of the steering wheel,
dashboard near the front passenger air-
bag or lower portion of the instrument
panel is scratched, cracked, or other-
wise damaged.
Page 99 of 464
993. Instrument cluster
3
Instrument cluster
MIRAI_OM_USA_OM62023U
Warning lights inform the driver of malfunctions in the indicated vehi-
cle’s systems.
Warning lights
*1
Hydrogen leak warning
light ( →P. 369)*1
Slip indicator ( →P. 370)
*1
Brake system warning
light (→P. 369)Parking brake warning
light (→P. 371)
*1
Charging system
warning light ( →P. 369)Open door warning light
(→P. 371)
*1High coolant
temperature warning
light ( →P. 369)Low fuel level warning
light (→P. 371)
*1
Brake system warning
light (→P. 369)Driver’s and front
passenger’s seat belt
reminder light ( →P. 3 7 1 )
*1
SRS warning light
(→P. 370)*1
Master warning light
(→P. 371)
*1
ABS warning light
(→P. 370)*1
Tire pressure warning
light ( →P. 371)
*1
(Red/
Ye l l o w )
Electric power steering
system warning light
( →P. 370)*3Brake Override System/
Drive-Start Control
warning light ( →P. 372)
*1, 2
PCS warning light
(→P. 370)
Page 115 of 464
115
4
Operation of
each component
MIRAI_OM_USA_OM62023U 4-1. Key information
Keys .................................. 116
4-2. Opening, closing and locking the doors
Doors ................................ 120
Trunk ................................. 126
Smart key system ............. 131
4-3. Adjusting the seats Front seats ........................ 138
Driving position memory ... 140
Head restraints.................. 145
4-4. Adjusting the steering wheel and mirrors
Steering wheel .................. 147
Inside rear view mirror ...... 149
Outside rear view mirrors ............................. 151
4-5. Opening and closing the windows
Power windows ................. 154
Page 138 of 464
1384-3. Adjusting the seats
MIRAI_OM_USA_OM62023U
Front seats
■Power easy access system
The driver’s seat and steering wheel move in accordance with power switch
mode and the driver’s seat belt condition. ( →P. 140)
■ Adjusting the seat
Be careful to not allow the head restraint to touch the ceiling.
Adjustment procedure
Seat position adjustment
Seatback angle adjustment
Seat cushion (front) angle
adjustment Vertical height adjustment
Lumbar support adjustment
Page 140 of 464

1404-3. Adjusting the seats
MIRAI_OM_USA_OM62023U
Driving position memory
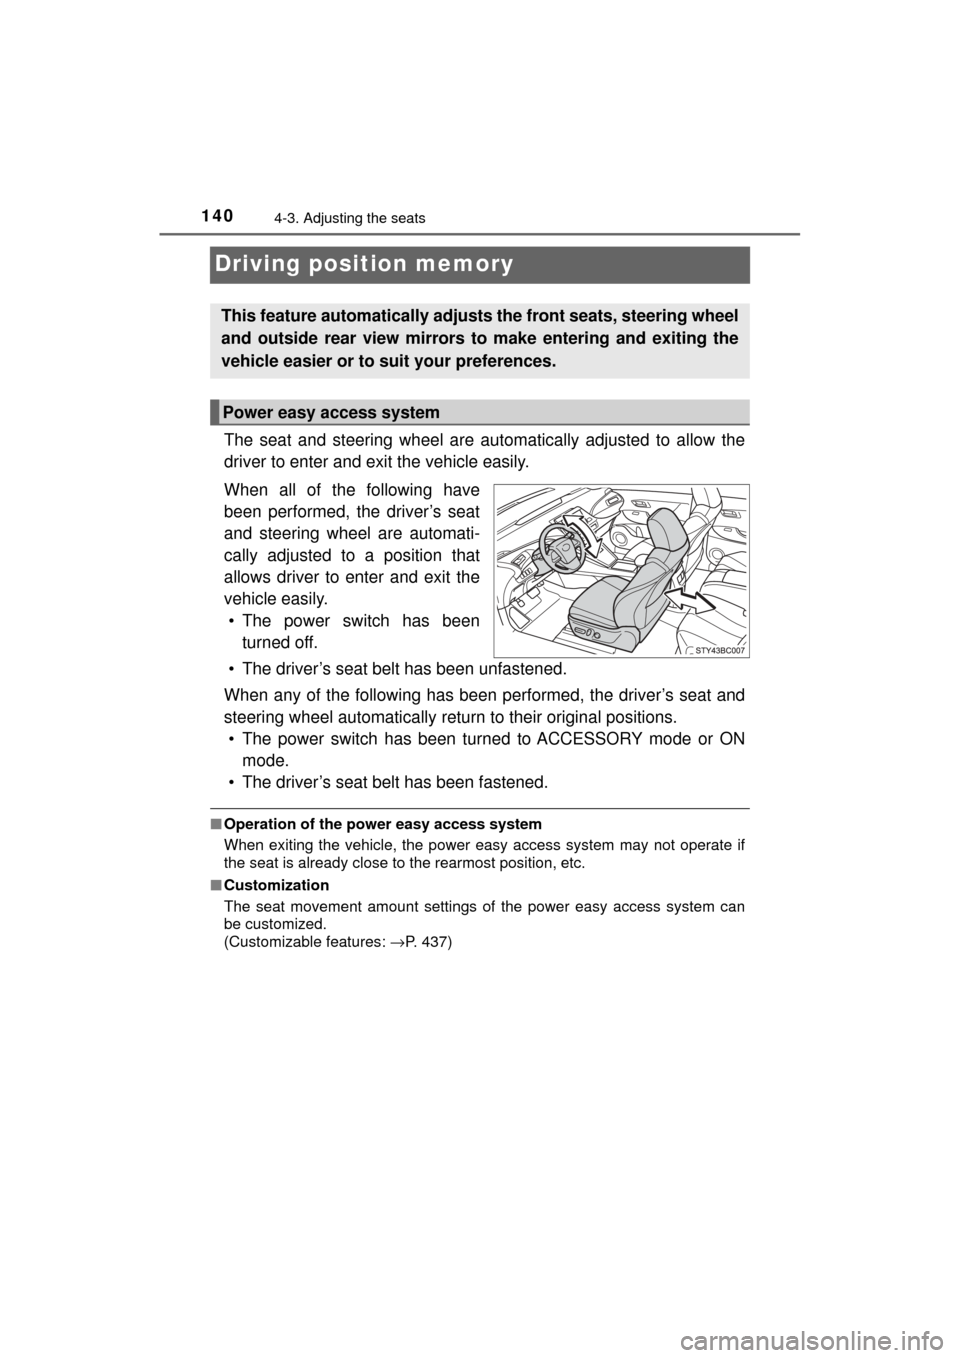
The seat and steering wheel are automatically adjusted to allow the
driver to enter and exit the vehicle easily.
When all of the following have
been performed, the driver’s seat
and steering wheel are automati-
cally adjusted to a position that
allows driver to enter and exit the
vehicle easily. • The power switch has been turned off.
• The driver’s seat belt has been unfastened.
When any of the following has been performed, the driver’s seat and
steering wheel automatically retu rn to their original positions.
• The power switch has been turned to ACCESSORY mode or ON mode.
• The driver’s seat belt has been fastened.
■ Operation of the power easy access system
When exiting the vehicle, the power easy access system may not operate if
the seat is already close to the rearmost position, etc.
■ Customization
The seat movement amount settings of the power easy access system can
be customized.
(Customizable features: →P. 437)
This feature automatically adjusts the front seats, steering wheel
and outside rear view mirrors to make entering and exiting the
vehicle easier or to suit your preferences.
Power easy access system
Page 141 of 464
1414-3. Adjusting the seats
4
Operation of each component
MIRAI_OM_USA_OM62023U
Your preferred driving position (the position of the driver’s seat, steer-
ing wheel and outside rear view mirrors) can be recorded and recalled
by pressing a button.
Two different driving positions can be recorded into memory.
■Recording procedureTurn the power switch to ON mode.
Check that the shift position is in P.
Adjust the driver’s seat, steering wheel and outside rear view
mirrors to the desired positions.
While pressing the “SET”
button, or within 3 seconds
after the “SET” button is
pressed, press button “1” or
“2” until the buzzer sounds.
If the selected button has
already been preset, the previ-
ously recorded position will be
overwritten.
■
Recall procedure
Turn the power switch to ON mode.
Check that the shift position is in P.
Press one of the buttons for
the driving position you want
to recall until the buzzer
sounds.
Driving position memory
1
2
3
4
1
2
3
Page 142 of 464

1424-3. Adjusting the seats
MIRAI_OM_USA_OM62023U
■To stop the position recall operation part-way through
Perform any of the following:
● Press the “SET” button.
● Press button “1” or “2”.
● Operate any of the seat adjustment switches (only cancels seat position
recall).
● Operate the tilt and telescopic steering control switch (only cancels steering
wheel position recall).
■ Seat positions that can be memorized ( →P. 138)
The adjusted positions other than the position adjusted by lumbar support
switch can be recorded.
■ Operating the driving position memory after turning the power switch off
Recorded seat positions can be activated up to 180 seconds after the driver’s
door is opened and another 60 seconds after it is closed again.
■ In order to correctly use the dr iving position memory function
If a seat position is already in the furthest possible position and the seat is
operated in the same direction, the recorded position may be slightly different
when it is recalled.
Each electronic key can be registered to recall your preferred driving
position.
■Registering procedure
Record your driving position to button “1” or “2” before performing
the following:
Carry only the key you want to re gister, and then close the driver’s
door.
If 2 or more keys are in the vehicle, the driving position cannot be
recorded properly.
Turn the power switch to ON mode.
Check that the shift position is in P.
Recall the driving position that you want to record.
Memory recall function
1
2
3
Page 143 of 464

1434-3. Adjusting the seats
4
Operation of each component
MIRAI_OM_USA_OM62023U
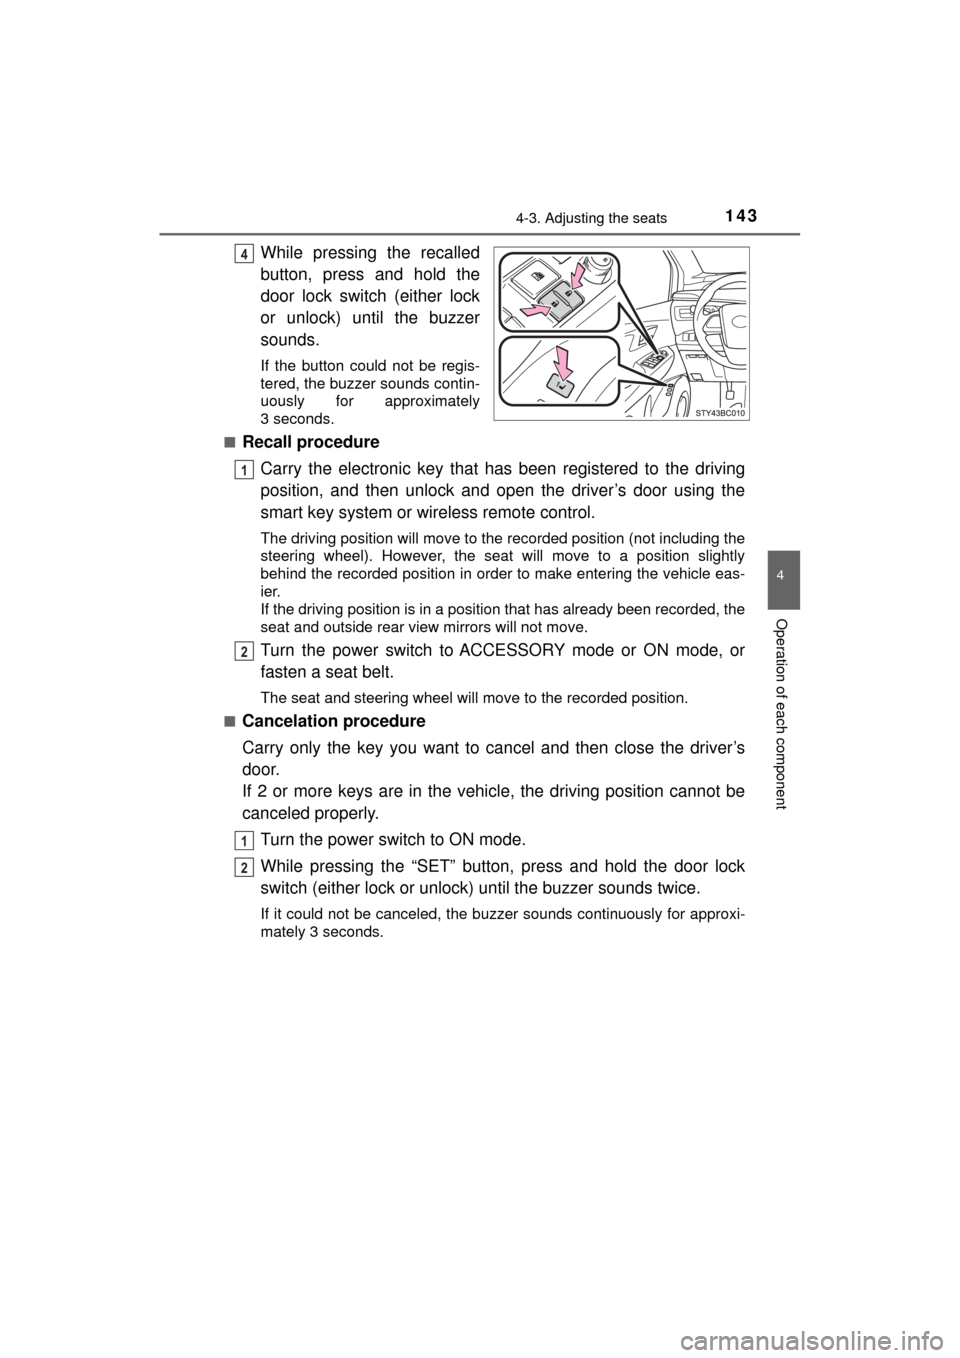
While pressing the recalled
button, press and hold the
door lock switch (either lock
or unlock) until the buzzer
sounds.
If the button could not be regis-
tered, the buzzer sounds contin-
uously for approximately
3 seconds.
■
Recall procedure
Carry the electronic key that has been registered to the driving
position, and then unlock and open the driver’s door using the
smart key system or wi reless remote control.
The driving position will move to the recorded position (not including the
steering wheel). However, the seat will move to a position slightly
behind the recorded position in order to make entering the vehicle eas-
ier.
If the driving position is in a position that has already been recorded, the
seat and outside rear view mirrors will not move.
Turn the power switch to ACCESSORY mode or ON mode, or
fasten a seat belt.
The seat and steering wheel will move to the recorded position.
■
Cancelation procedure
Carry only the key you want to cancel and then close the driver’s
door.
If 2 or more keys are in the vehicle, the driving position cannot be
canceled properly.
Turn the power switch to ON mode.
While pressing the “SET” button, press and hold the door lock
switch (either lock or unlock) until the buzzer sounds twice.
If it could not be canceled, the buzzer sounds continuously for approxi-\
mately 3 seconds.
4
1
2
1
12