Page 54 of 392

54
2. Bluetooth® SETTINGS
HIGHLANDER_Navi_U
1Display the “Bluetooth* Setup” screen.
(→P.51)
2Select the device to be connected.
Supported profile icons will be displayed.
: Phone
: Audio player
: Phone/Entune App Suite service (En-
tune Premium Audio only)
The profile icon for a currently connected
device will be displayed in color.
Selecting a profile icon which is not cur-
rently connected will switch the connec-
tion to the function.
*: Bluetooth is a regi stered trademark of
Bluetooth SIG, Inc.
3Select the desired connection.
When another Bluetooth
® device is con-
nected
To disconnect the Bluetooth® device,
select “Yes”.
4Check that a confirmation screen is
displayed when the connection is com-
plete.
If an error message is displayed, follow
the guidance on the screen to try again.
CONNECTING A Bluetooth®
DEVICE
Up to 5 Bluetooth® devices (Phones
(HFP) and audio players (AVP)) can be
registered.
If more than 1 Bluetooth
® device has
been registered, select which device to
connect to.
If the desired Bluetooth® device is not
on the list, select “Add” to register the
device. ( →P. 5 2 )
INFORMATION
● It may take time if the device connection
is carried out during Bluetooth® audio
playback.
● Depending on the type of Bluetooth
®
device being connected, it may be nec-
essary to perform additional steps on
the device.
● When disconnecting a Bluetooth
®
device, it is recommended to disconnect
using this system.
Page 55 of 392

55
2. Bluetooth® SETTINGS
HIGHLANDER_Navi_U
BASIC FUNCTION
2
■AUTO CONNECTION MODE
Vehicles without a smart key system
When the engine switch is turned to the
“ACC” or “ON” position, the system
searches for a nearby registered device.
The system will connect with the regis-
tered device that was last connected, if it
is nearby.
Vehicles with a smart key system
When the engine switch is
turned to ACCESSORY or IGNITION ON
mode, the system searches for a
nearby registered device.
The system will connect with the regis-
tered device that was last connected, if it
is nearby.
■CONNECTING MANUALLY
1Press the “APPS” button and select
“Setup” .
2Select “Bluetooth*” .
3Follow the steps in “CONNECTING A
Bluetooth
® DEVICE” from “STEP 2”.
(→P.54)
*: Bluetooth is a registered trademark of Bluetooth SIG, Inc.
■RECONNECTING THE Bluetooth®
PHONE
To turn auto connection mode on, set
“Bluetooth* Power” to on. ( →P.57)
Leave the Bluetooth
® device in a loca-
tion where the connection can be es-
tablished.
When the auto connection has failed or
“Bluetooth* Power” is turned off, it is
necessary to connect Bluetooth
® man-
ually.
If a Bluetooth® phone is disconnected
due to poor reception from the
Bluetooth
® network when the engine
switch is in the following, the
system automatically reconnects the
Bluetooth
® phone.
Vehicles without a smart key system
The engine switch is in the “ACC” or
“ON” position.
Vehicles with a smart key system
The engine switch is in AC-
CESSORY or IGNITION ON
mode.
Page 56 of 392

56
2. Bluetooth® SETTINGS
HIGHLANDER_Navi_U
1Display the “Bluetooth* Setup” screen.
(→P.51)
2Select the desired device to be edited.
3Select “Device Info” .
4Confirm and change the Bluetooth®
device information.
*: Bluetooth is a regi stered trademark of
Bluetooth SIG, Inc.
EDITING THE Bluetooth®
DEVICE INFORMATION
The Bluetooth® device’s information
can be displayed on the screen. The
displayed information can be edited.
No.Information
The name of the Bluetooth® device.
Can be changed to a desired name.
( → P.57)
Select to set the Bluetooth® audio
player connection method. ( →P.57)
Device address is unique to the de-
vice and cannot be changed.
Phone number of the Bluetooth®
phone.
Compatibility profile of the
Bluetooth® device.
Select to reset all setup items.
INFORMATION
● If 2 Bluetooth® devices have been regis-
tered with the same device name, the
devices can be distinguished referring to
the device’s address.
● Depending on the type of phone, some
information may not be displayed.
Page 58 of 392

58
2. Bluetooth® SETTINGS
HIGHLANDER_Navi_U
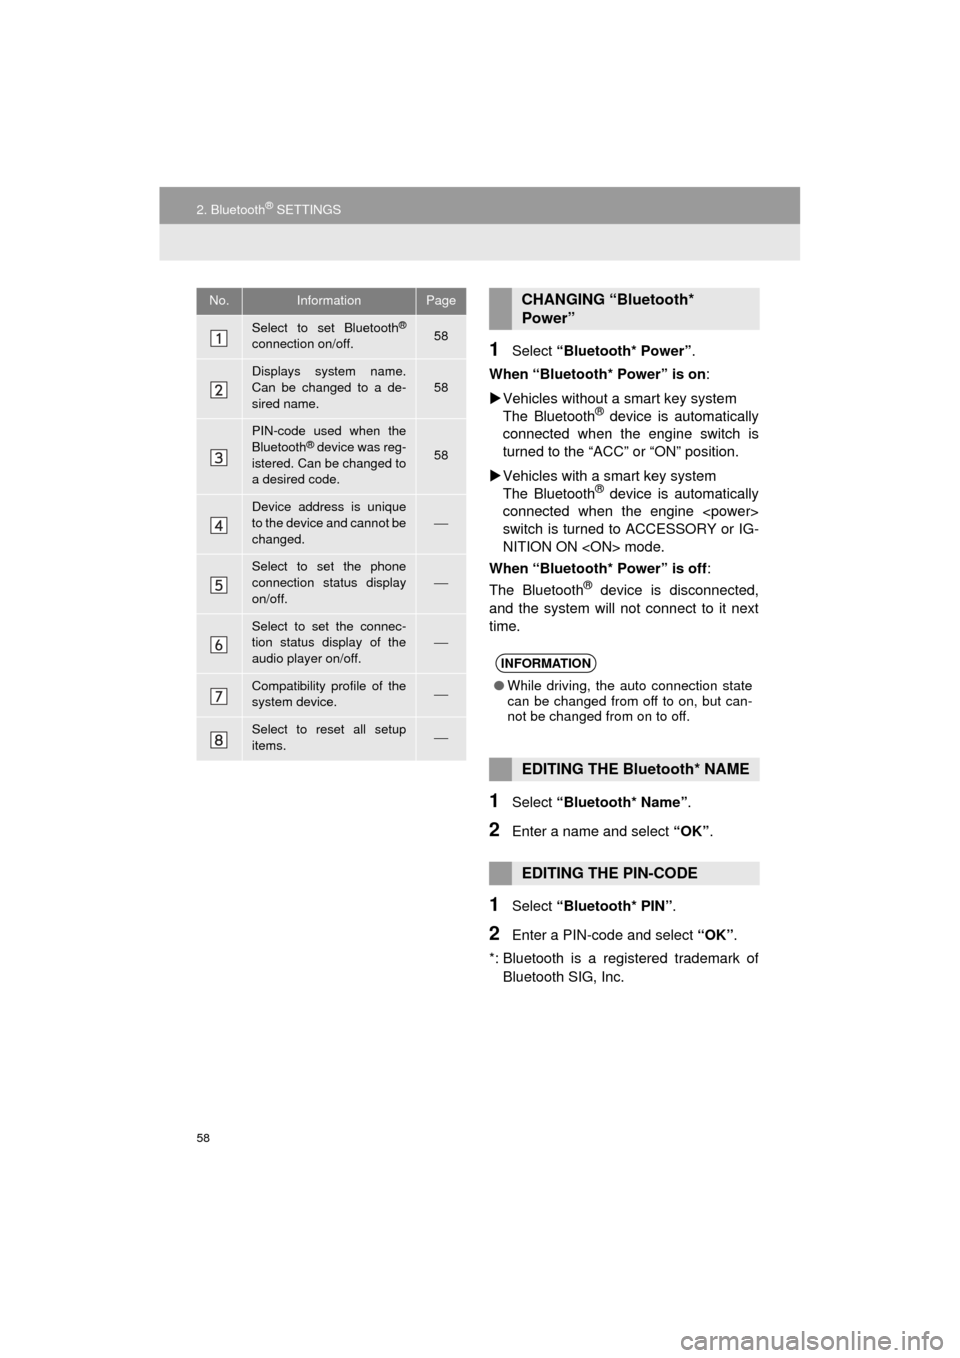
1Select “Bluetooth* Power” .
When “Bluetooth* Power” is on :
Vehicles without a smart key system
The Bluetooth
® device is automatically
connected when the engine switch is
turned to the “ACC” or “ON” position.
Vehicles with a smart key system
The Bluetooth
® device is automatically
connected when the engine
switch is turned to ACCESSORY or IG-
NITION ON mode.
When “Bluetooth* Power” is off :
The Bluetooth
® device is disconnected,
and the system will not connect to it next
time.
1Select “Bluetooth* Name” .
2Enter a name and select “OK”.
1Select “Bluetooth* PIN” .
2Enter a PIN-code and select “OK”.
*: Bluetooth is a registered trademark of Bluetooth SIG, Inc.
No.InformationPage
Select to set Bluetooth®
connection on/off.58
Displays system name.
Can be changed to a de-
sired name.58
PIN-code used when the
Bluetooth® device was reg-
istered. Can be changed to
a desired code.58
Device address is unique
to the device and cannot be
changed.⎯
Select to set the phone
connection status display
on/off.
⎯
Select to set the connec-
tion status display of the
audio player on/off.
⎯
Compatibility profile of the
system device.⎯
Select to reset all setup
items.⎯
CHANGING “Bluetooth*
Power”
INFORMATION
● While driving, the auto connection state
can be changed from off to on, but can-
not be changed from on to off.
EDITING THE Bluetooth* NAME
EDITING THE PIN-CODE
Page 60 of 392

60
3. OTHER SETTINGS
HIGHLANDER_Navi_U
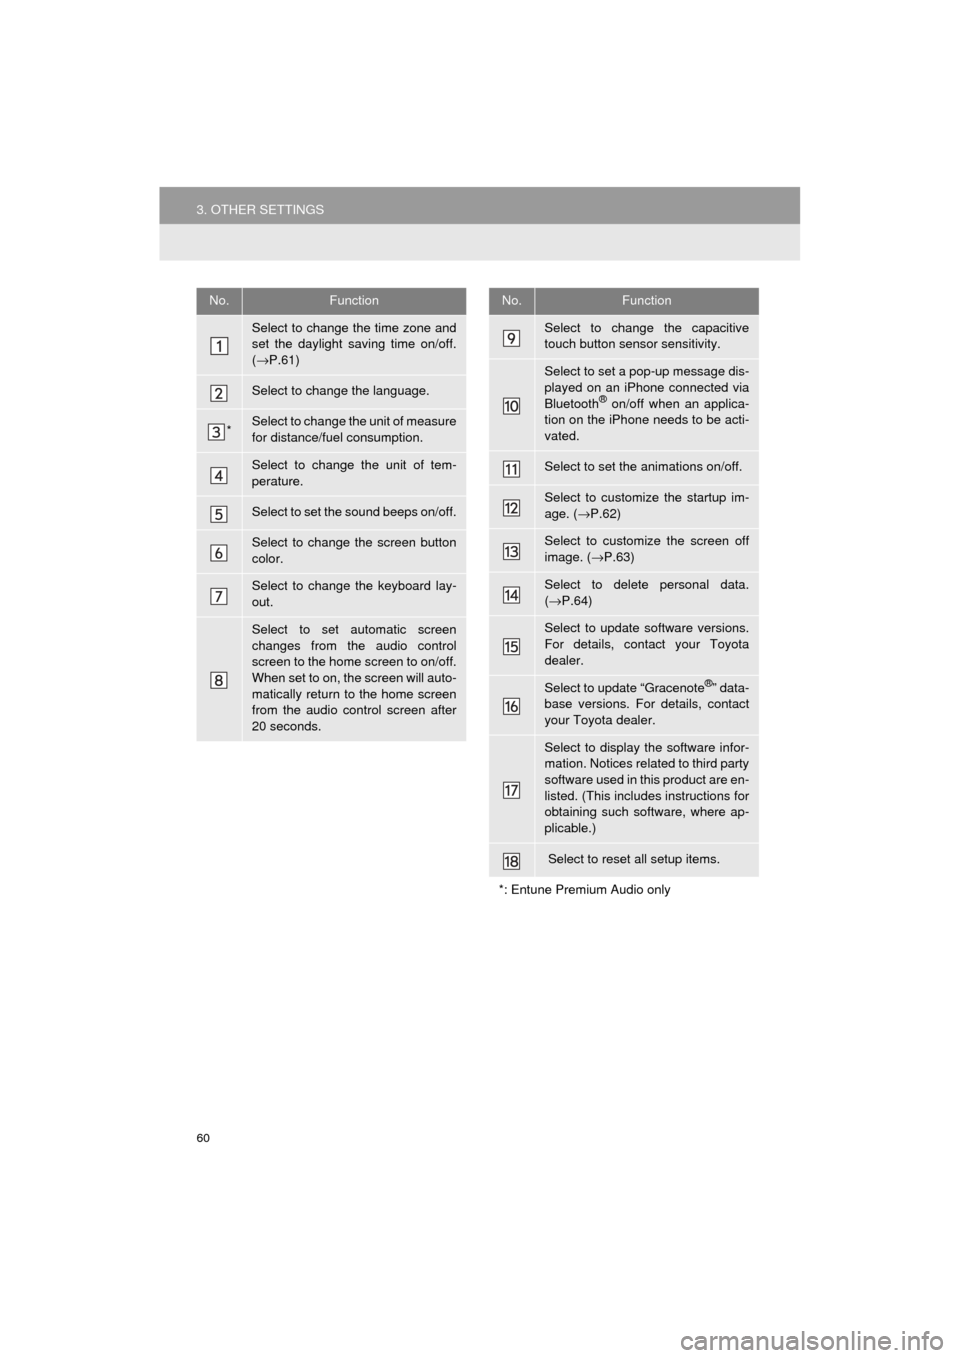
No.Function
Select to change the time zone and
set the daylight saving time on/off.
(→ P.61)
Select to change the language.
*Select to change the unit of measure
for distance/fuel consumption.
Select to change the unit of tem-
perature.
Select to set the sound beeps on/off.
Select to change the screen button
color.
Select to change the keyboard lay-
out.
Select to set automatic screen
changes from the audio control
screen to the home screen to on/off.
When set to on, the screen will auto-
matically return to the home screen
from the audio control screen after
20 seconds.
Select to change the capacitive
touch button sensor sensitivity.
Select to set a pop-up message dis-
played on an iPhone connected via
Bluetooth
® on/off when an applica-
tion on the iPhone needs to be acti-
vated.
Select to set the animations on/off.
Select to customize the startup im-
age. ( →P.62)
Select to customize the screen off
image. ( →P.63)
Select to delete personal data.
(→ P.64)
Select to update software versions.
For details, contact your Toyota
dealer.
Select to update “Gracenote®” data-
base versions. For details, contact
your Toyota dealer.
Select to display the software infor-
mation. Notices related to third party
software used in this product are en-
listed. (This includes instructions for
obtaining such software, where ap-
plicable.)
Select to reset all setup items.
*: Entune Premium Audio only
No.Function
Page 64 of 392
64
3. OTHER SETTINGS
HIGHLANDER_Navi_U
■DELETING TRANSFERRED IMAG-
ES
1Display the “General Settings” screen.
(→P.59)
2Select “Customize Startup Image” or
“Customize Screen Off Image” .
3Select “Delete All”.
4Select “Yes”.
1Display the “General Settings” screen.
(→P.59)
2Select “Delete Personal Data” .
3Select “Delete” .
4Select “Yes” when the confirmation
screen appears.
Registered or changed personal settings
will be deleted or returned to their default
conditions.
For example:
• General settings
• Navigation settings*
• Audio settings
• Phone settings
*: Entune Premium Audio only
DELETING PERSONAL DATA
Page 68 of 392
68
3. OTHER SETTINGS
HIGHLANDER_Navi_U
4. DRIVER SETTINGS
1Press the “APPS” button.
2Select “Setup” .
3Select “Driver” .
4Select “Enable this Feature” .
1Display the driver settings screen.
(→P.68)
2Select “Manually Select Linked Set-
tings” .
3Select the desired phone.
After a few seconds, loaded screen auto-
matically switches to the home screen.
The driver settings feature will allow
the system to link some preferences
(such as audio presets, button colors,
language, etc.) to a paired Bluetooth
®
phone.
MANUALLY SELECT LINKED
SETTINGS
Page 71 of 392
71
3. OTHER SETTINGS
HIGHLANDER_Navi_U
BASIC FUNCTION
2
3Select the items to be edited.■EDITING DEALER OR CONTACT
NAME
1Select “Edit” next to “Dealer” or “Con-
tact”.
2Enter the name and select “OK”.
■EDITING THE LOCATION
1Select “Edit” next to “Location”.
2Scroll the map to the desired point
(→P.309) and select “OK”.
■EDITING PHONE NUMBER
1Select “Edit” next to “Phone #”.
2Enter the phone number and select
“OK”.
No.FunctionPage
Select to enter the name of
a dealer.71
Select to enter the name of
a dealer member.71
Select to set the location.71
Select to enter the phone
number.71
Select to delete the dealer
information displayed on
the screen.⎯
Select to set the displayed
dealer as a destination.329