2017 TESLA MODEL X warning lights
[x] Cancel search: warning lightsPage 3 of 198
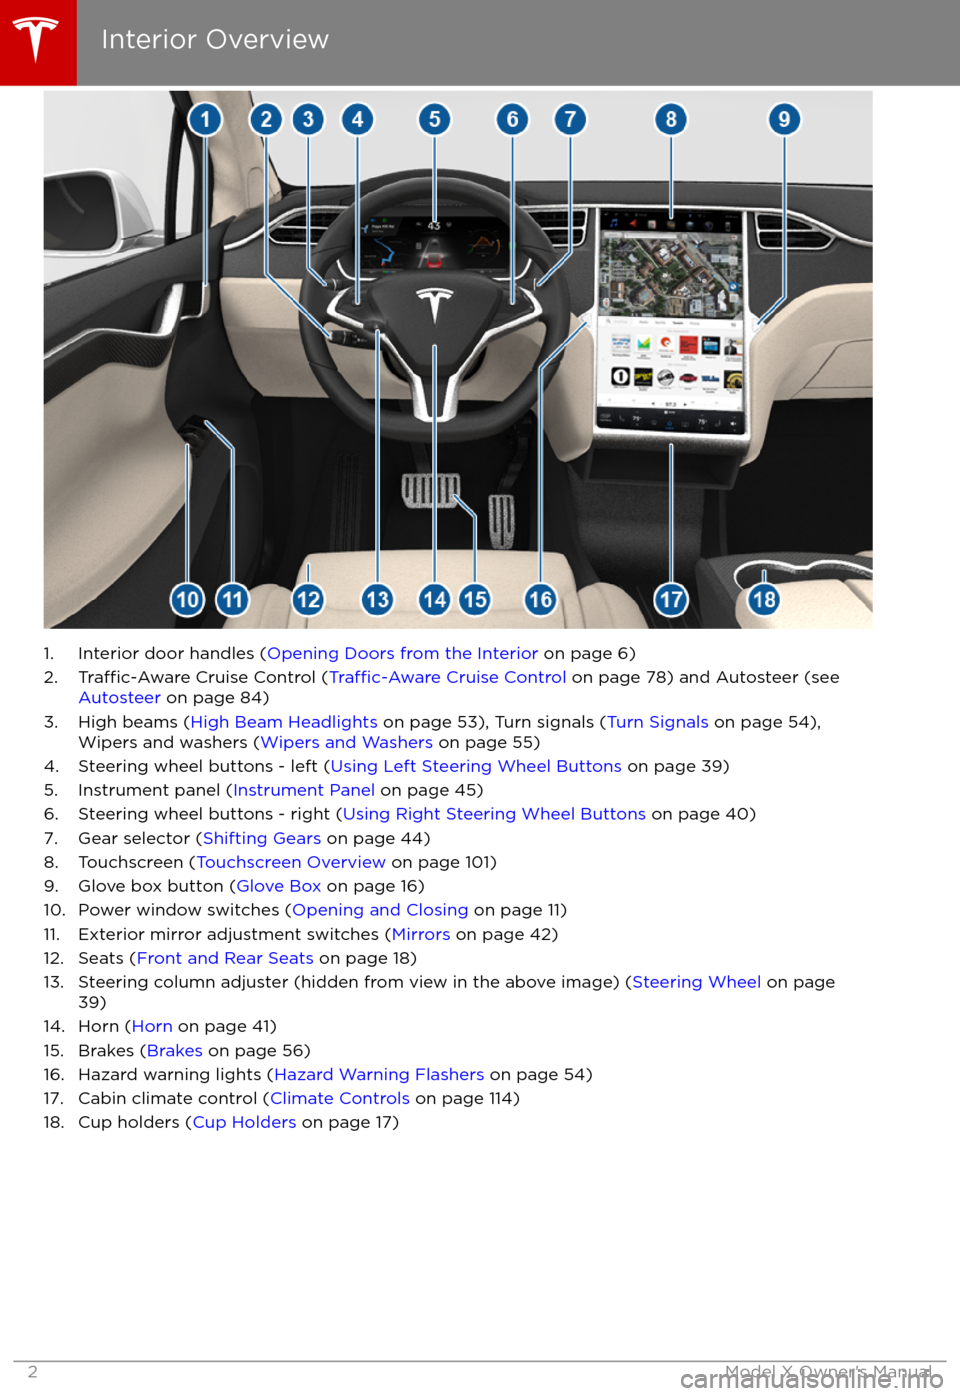
1. Interior door handles (Opening Doors from the Interior on page 6)
2.Traffic-Aware Cruise Control (Traffic-Aware Cruise Control on page 78) and Autosteer (see
Autosteer on page 84)
3. High beams ( High Beam Headlights on page 53), Turn signals ( Turn Signals on page 54),
Wipers and washers ( Wipers and Washers on page 55)
4. Steering wheel buttons - left ( Using Left Steering Wheel Buttons on page 39)
5. Instrument panel ( Instrument Panel on page 45)
6. Steering wheel buttons - right ( Using Right Steering Wheel Buttons on page 40)
7. Gear selector ( Shifting Gears on page 44)
8. Touchscreen ( Touchscreen Overview on page 101)
9. Glove box button ( Glove Box on page 16)
10. Power window switches ( Opening and Closing on page 11)
11. Exterior mirror adjustment switches ( Mirrors on page 42)
12. Seats ( Front and Rear Seats on page 18)
13. Steering column adjuster (hidden from view in the above image) ( Steering Wheel on page
39)
14. Horn ( Horn on page 41)
15. Brakes ( Brakes on page 56)
16. Hazard warning lights ( Hazard Warning Flashers on page 54)
17. Cabin climate control ( Climate Controls on page 114)
18. Cup holders ( Cup Holders on page 17)
Interior Overview
2Model X Owner
Page 52 of 198
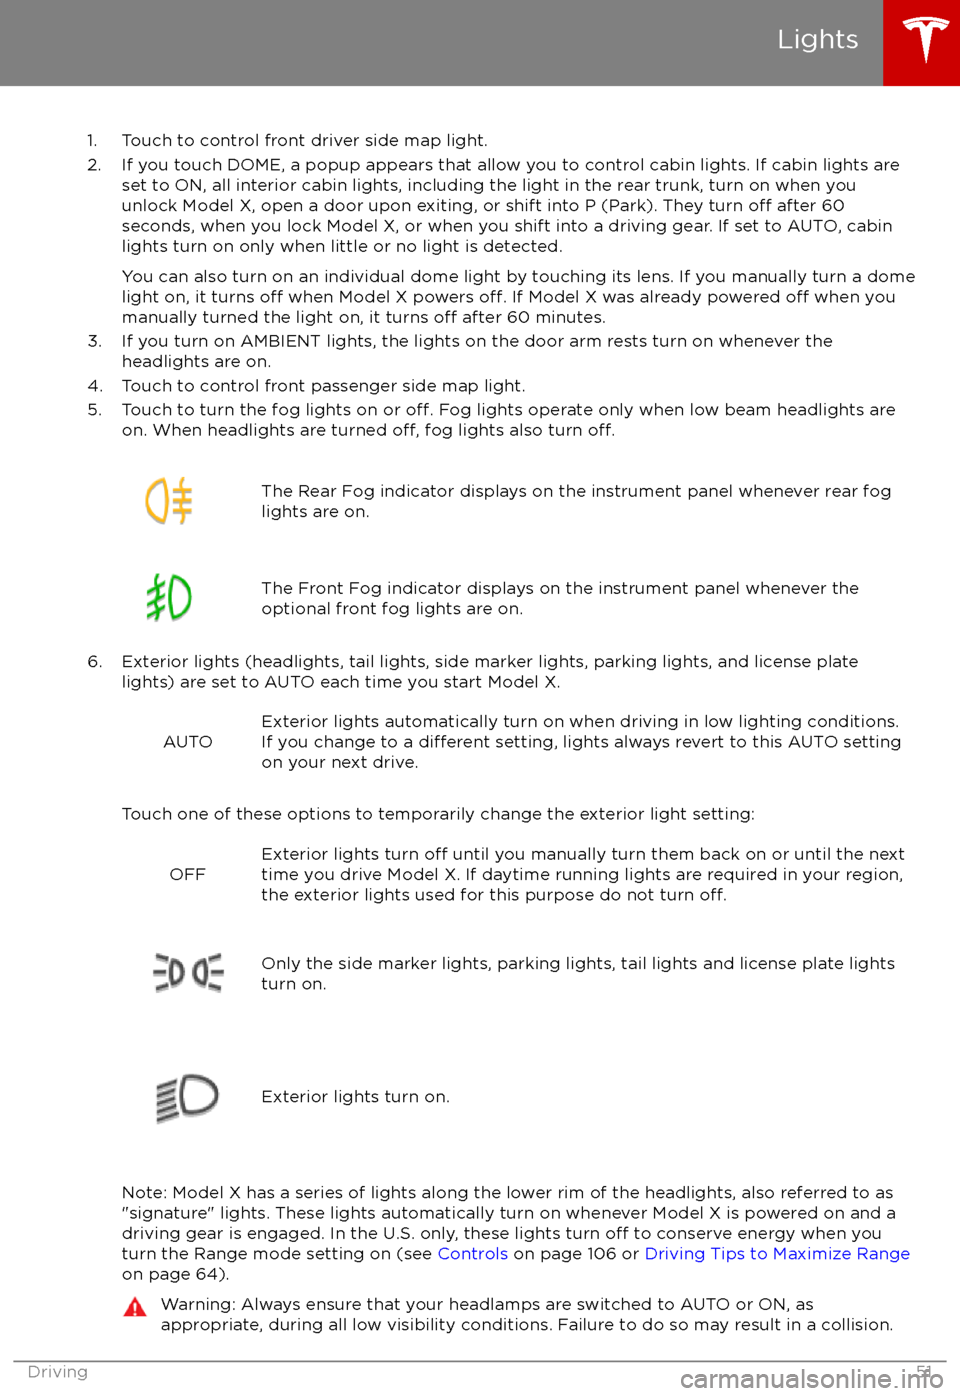
1. Touch to control front driver side map light.
2. If you touch DOME, a popup appears that allow you to control cabin lights. If cabin lights are set to ON, all interior cabin lights, including the light in the rear trunk, turn on when youunlock Model X, open a door upon exiting, or shift into P (Park). They turn
off after 60
seconds, when you lock Model X, or when you shift into a driving gear. If set to AUTO, cabin lights turn on only when little or no light is detected.
You can also turn on an individual dome light by touching its lens. If you manually turn a domelight on, it turns
off when Model X powers off. If Model X was already powered off when you
manually turned the light on, it turns off after 60 minutes.
3. If you turn on AMBIENT lights, the lights on the door arm rests turn on whenever the headlights are on.
4. Touch to control front passenger side map light.
5. Touch to turn the fog lights on or
off. Fog lights operate only when low beam headlights are
on. When headlights are turned off, fog lights also turn off.
The Rear Fog indicator displays on the instrument panel whenever rear fog
lights are on.The Front Fog indicator displays on the instrument panel whenever the
optional front fog lights are on.
6. Exterior lights (headlights, tail lights, side marker lights, parking lights, and license plate lights) are set to AUTO each time you start Model X.
AUTOExterior lights automatically turn on when driving in low lighting conditions.
If you change to a different setting, lights always revert to this AUTO setting
on your next drive.
Touch one of these options to temporarily change the exterior light setting:
OFFExterior lights turn off until you manually turn them back on or until the next
time you drive Model X. If daytime running lights are required in your region,
the exterior lights used for this purpose do not turn
off.Only the side marker lights, parking lights, tail lights and license plate lights
turn on.Exterior lights turn on.
Note: Model X has a series of lights along the lower rim of the headlights, also referred to as
"signature" lights. These lights automatically turn on whenever Model X is powered on and a driving gear is engaged. In the U.S. only, these lights turn
off to conserve energy when you
turn the Range mode setting on (see Controls on page 106 or Driving Tips to Maximize Range
on page 64).
Warning: Always ensure that your headlamps are switched to AUTO or ON, as
appropriate, during all low visibility conditions. Failure to do so may result in a collision.
Lights
Driving51
Page 54 of 198
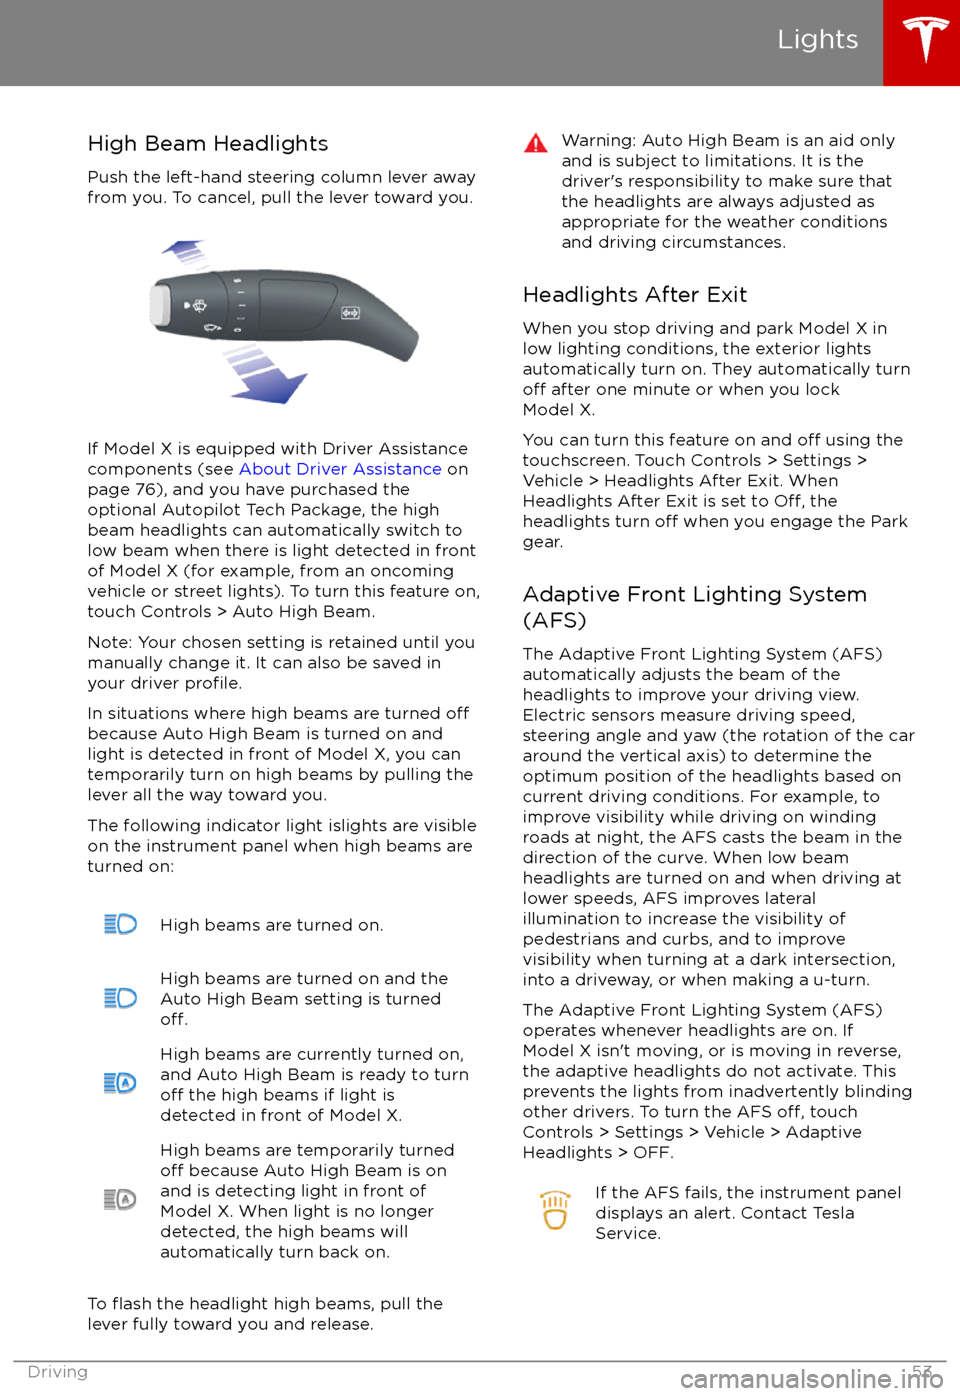
High Beam HeadlightsPush the left-hand steering column lever away
from you. To cancel, pull the lever toward you.
If Model X is equipped with Driver Assistance
components (see About Driver Assistance on
page 76), and you have purchased the
optional Autopilot Tech Package, the high
beam headlights can automatically switch to low beam when there is light detected in front
of Model X (for example, from an oncoming vehicle or street lights). To turn this feature on,touch Controls > Auto High Beam.
Note: Your chosen setting is retained until you manually change it. It can also be saved in
your driver
profile.
In situations where high beams are turned offbecause Auto High Beam is turned on and
light is detected in front of Model X, you can
temporarily turn on high beams by pulling the
lever all the way toward you.
The following indicator light islights are visible
on the instrument panel when high beams are
turned on:
High beams are turned on.High beams are turned on and the
Auto High Beam setting is turned
off.
High beams are currently turned on,
and Auto High Beam is ready to turn
off the high beams if light is
detected in front of Model X.
High beams are temporarily turnedoff because Auto High Beam is on
and is detecting light in front of
Model X. When light is no longer
detected, the high beams will
automatically turn back on.
To flash the headlight high beams, pull the
lever fully toward you and release.
Warning: Auto High Beam is an aid only and is subject to limitations. It is the
driver
Page 55 of 198
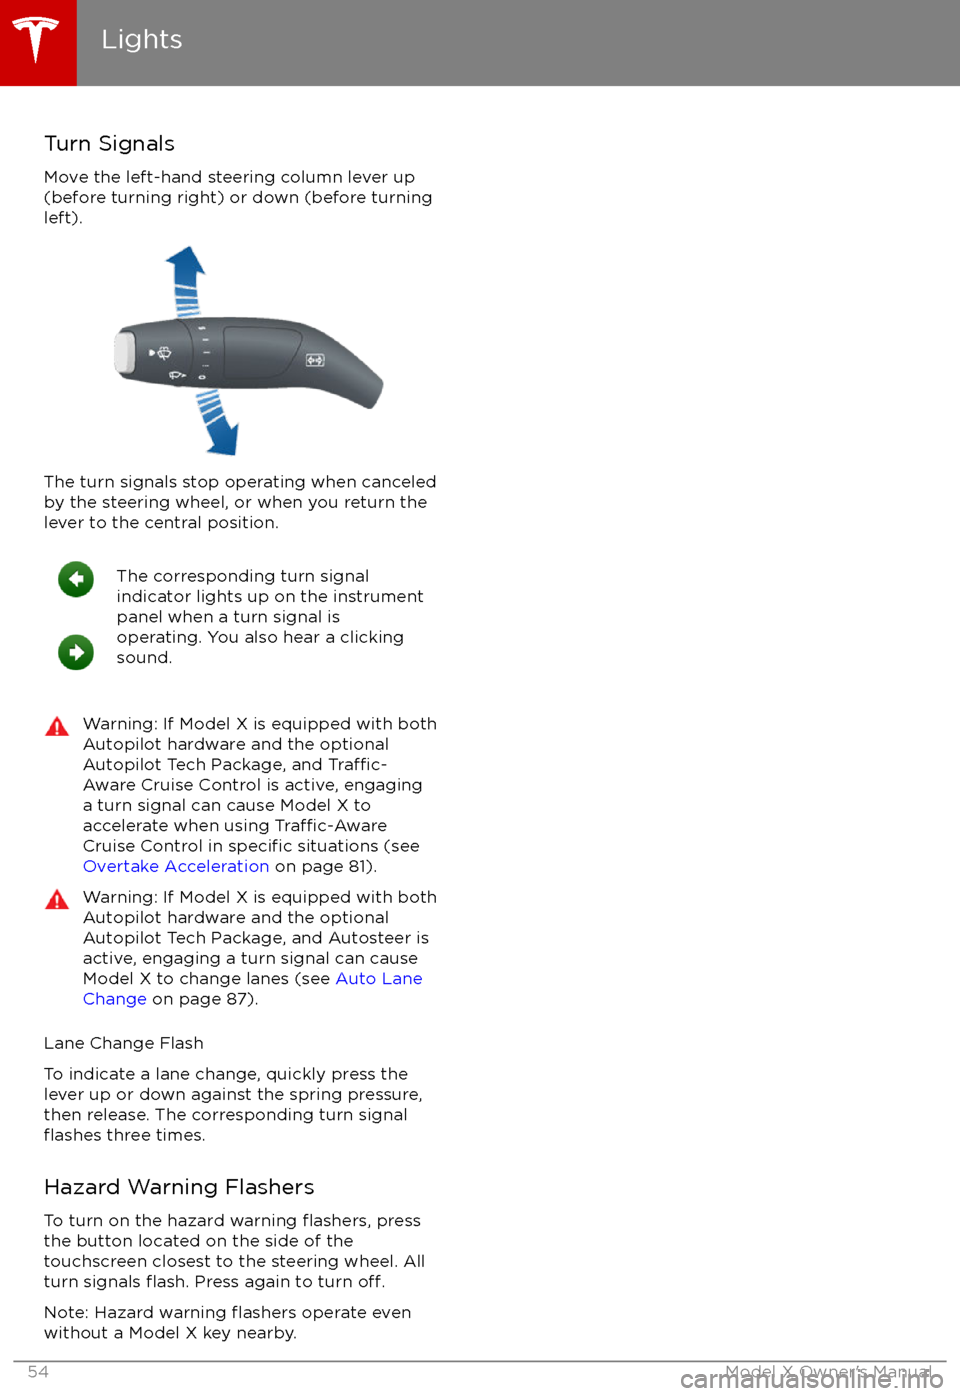
Turn Signals
Move the left-hand steering column lever up
(before turning right) or down (before turning
left).
The turn signals stop operating when canceled by the steering wheel, or when you return the
lever to the central position.
The corresponding turn signal
indicator lights up on the instrument
panel when a turn signal is
operating. You also hear a clicking
sound.Warning: If Model X is equipped with both
Autopilot hardware and the optional
Autopilot Tech Package, and
Traffic-
Aware Cruise Control is active, engaging
a turn signal can cause Model X to
accelerate when using
Traffic-AwareCruise Control in specific situations (see
Overtake Acceleration on page 81).
Warning: If Model X is equipped with both
Autopilot hardware and the optional
Autopilot Tech Package, and Autosteer is active, engaging a turn signal can cause
Model X to change lanes (see Auto Lane
Change on page 87).
Lane Change Flash
To indicate a lane change, quickly press the
lever up or down against the spring pressure,
then release. The corresponding turn signal
flashes three times.
Hazard Warning Flashers To turn on the hazard warning
flashers, press
the button located on the side of the
touchscreen closest to the steering wheel. All
turn signals
flash. Press again to turn off.
Note: Hazard warning flashers operate even
without a Model X key nearby.
Lights
54Model X Owner
Page 57 of 198
Braking Systems
Model X has an anti-lock braking system
(ABS) that prevents the wheels from locking when you apply maximum brake pressure. This
improves steering control during heavy
braking in most road conditions.
During emergency braking conditions, the
ABS constantly monitors the speed of each
wheel and varies the brake pressure according to the grip available.
The alteration of brake pressure can be felt as
a pulsing sensation through the brake pedal.
This demonstrates that the ABS is operating
and is not a cause for concern. Keep
firm and
steady pressure on the brake pedal while
experiencing the pulsing.
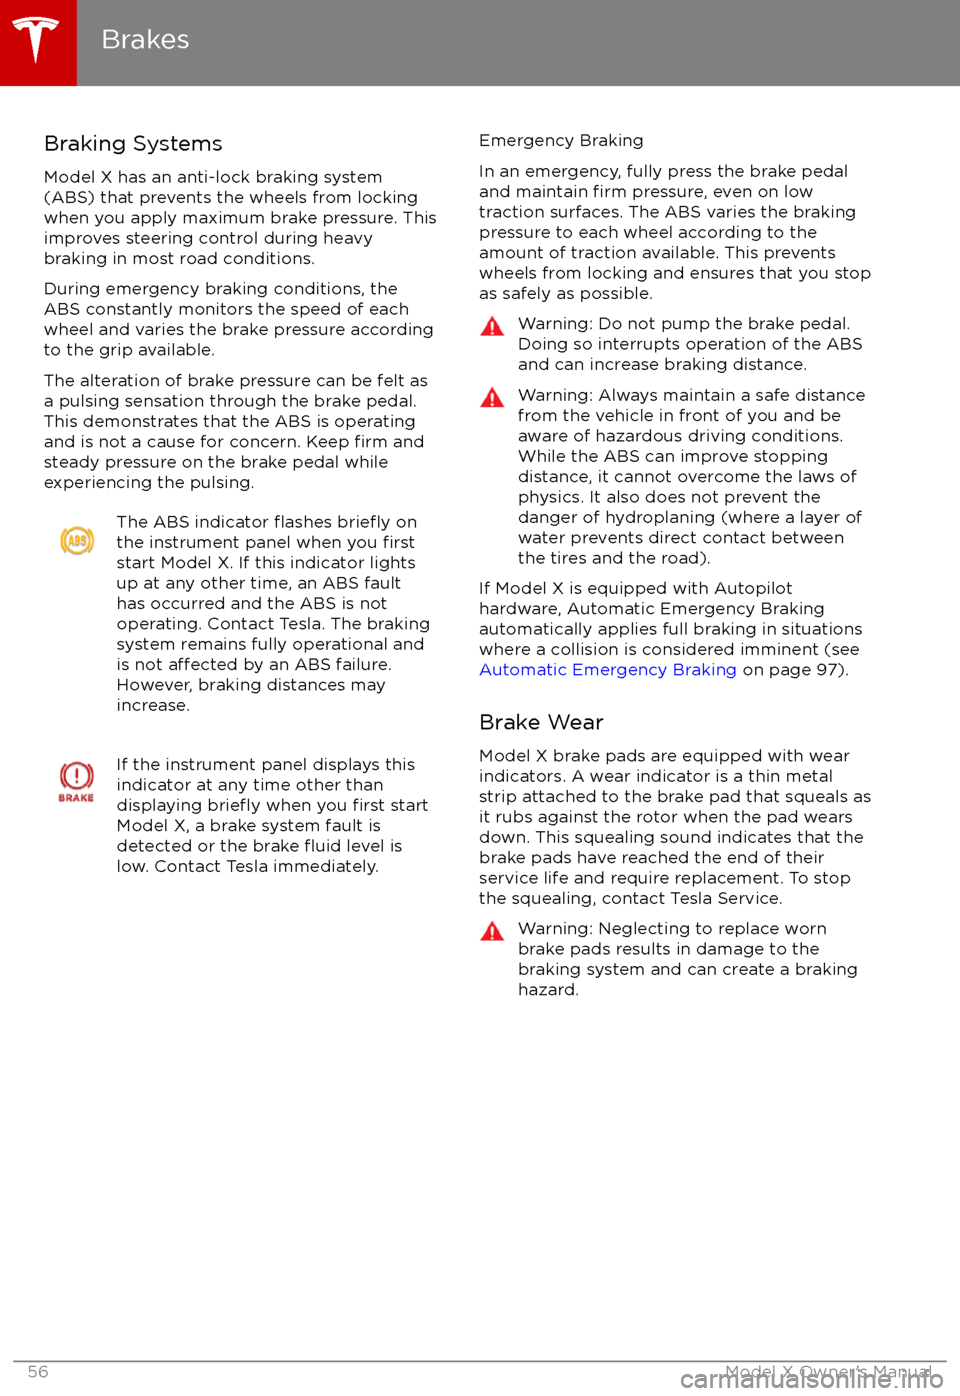
The ABS indicator flashes briefly on
the instrument panel when you firststart Model X. If this indicator lights
up at any other time, an ABS fault
has occurred and the ABS is not
operating. Contact Tesla. The braking system remains fully operational and
is not
affected by an ABS failure.
However, braking distances may increase.
If the instrument panel displays this
indicator at any time other than
displaying
briefly when you first start
Model X, a brake system fault is
detected or the brake
fluid level is
low. Contact Tesla immediately.
Emergency Braking
In an emergency, fully press the brake pedal
and maintain
firm pressure, even on low
traction surfaces. The ABS varies the braking
pressure to each wheel according to the
amount of traction available. This prevents
wheels from locking and ensures that you stop
as safely as possible.
Warning: Do not pump the brake pedal.
Doing so interrupts operation of the ABS
and can increase braking distance.Warning: Always maintain a safe distance
from the vehicle in front of you and be
aware of hazardous driving conditions.
While the ABS can improve stopping
distance, it cannot overcome the laws of physics. It also does not prevent the
danger of hydroplaning (where a layer of
water prevents direct contact between the tires and the road).
If Model X is equipped with Autopilot
hardware, Automatic Emergency Braking
automatically applies full braking in situations
where a collision is considered imminent (see
Automatic Emergency Braking on page 97).
Brake Wear
Model X brake pads are equipped with wear
indicators. A wear indicator is a thin metal
strip attached to the brake pad that squeals as
it rubs against the rotor when the pad wears
down. This squealing sound indicates that the
brake pads have reached the end of their service life and require replacement. To stop
the squealing, contact Tesla Service.
Warning: Neglecting to replace worn
brake pads results in damage to the
braking system and can create a braking
hazard.
Brakes
56Model X Owner
Page 76 of 198

Supported Accessory CarriersTo support the installation of an accessory
carrier (such as a bicycle, ski, or snowboard
rack) on the rear of Model X, the accessory
hitch or optional towing package is required.
Do not attempt to install an accessory carrier
on a Model X that is not equipped with the
accessory hitch or towing package. Doing so
can cause damage.
Model X is designed to support an accessory carrier of up to 120 lbs (55 kg). When carrying
accessories on Model X, always check to ensure that the maximum weight is notexceeded. For example, this weight threshold
is
sufficient for carrying two bicycles weighing
approximately 40 lbs (18 kg) each, or four
bicycles weighing approximately 20 lbs (9 kg)
each, assuming the accessory carrier weighs
approximately 33 lbs (15 kg).
Warning: The accessory hitch is designed
to attach a 1.25“ hitch accessory only. Do
not use the accessory hitch for trailer
towing, transportation or vehicle recovery.
Model X is capable of towing ONLY IF
equipped with the towing package.
Although the accessory hitch and the
towing package are similar in appearance,
a Model X equipped with an accessory
hitch does not have the appropriate
hardware or software to ensure that
towing can be done safely.
Installing an Accessory Carrier
1. Carefully follow the instructions provided by the manufacturer of the accessory
carrier.
2. Connect the electrical connector (if equipped). When Model X detects the
electrical connector, Trailer Mode
automatically engages. To ensure
availability of Autopilot features, it is
recommended that you disable Trailer
Mode. To disable Trailer Mode, touch
Controls > Driving > Trailer Mode > OFF
on the touchscreen.
3. Check that the lights are functioning properly (if equipped).
Note: Using an accessory carrier is likely to
obscure the rear view camera
Page 80 of 198

You can accelerate at any time when driving ata set speed using Traffic-Aware Cruise Control.
But when you release the accelerator, Model X
returns to the set speed.
When following a vehicle,
Traffic-Aware Cruise
Control remains active at low speeds, even if
Model X comes to a standstill while following a
vehicle. When
traffic is moving again, Traffic-
Aware Cruise Control resumes operating at
your currently set speed. However, if an or
object is detected in front of Model X,
Traffic-
Aware Cruise Control goes into a HOLD state
and the instrument panel displays a message
indicating that you need to resume cruise
control. To resume, press the accelerator pedalor pull the cruise control lever toward you (see
Canceling and Resuming on page 82).
In right hand
traffic, engaging the right turn
signal when driving in the right-most lane
within 164 feet (50 meters) of an exit (on a
controlled access road only, such as a highway
or freeway), causes
Traffic-Aware Cruise
Control to assume you are exiting. As a result,
Traffic-Aware Cruise Control begins to slow
down the vehicle. Likewise in left hand traffic,when engaging the left turn signal when
driving in the left-most lane within 164 feet
(50 meters) of an exit. The onboard GPS (Global Positioning System) determines if you
are driving in a region with right or left hand
traffic. In situations where GPS data is
unavailable (for example, inadequate signal), engaging the turn signal near an exit does not
cause
Traffic-Aware Cruise Control to slow
down the vehicle.
Note: If you double-pull the cruise control
lever (or single-pull when
Traffic-Aware Cruise
Control is active), Autosteer activates and the set speed changes to either your current
driving speed, or the speed limit plus any
offset you have defined, whichever is greater
(see Cruising at the Speed Limit on page
80).
Note: When
Traffic-Aware Cruise Control is
actively slowing down Model X to maintain the
selected distance from the vehicle ahead, the brake lights turn on to alert other road users
that you are slowing down. You may also
notice slight movement of the brake pedal.
Warning: Due to limitations inherent in
the onboard GPS, you may experience
situations in which
Traffic-Aware Cruise
Control slows down the vehicle, especially
near highway exits where a curve is
detected and/or you are actively navigating to a destination and not
following the route.
Warning: Traffic-Aware Cruise Control can
not detect all objects and may not brake/
decelerate for stationary vehicles,
especially in situations when you are
driving over 50 mph (80 km/h) and a
vehicle you are following moves out of
your driving path and a stationary vehicle
or object is in front of you instead. Always
pay attention to the road ahead and stay
prepared to take immediate corrective
action. Depending on
Traffic-AwareCruise Control to avoid a collision can
result in serious injury or death. In
addition,
Traffic-Aware Cruise Control
may react to vehicles or objects that
either do not exist or are not in the lane
of travel, causing Model X to slow down
unnecessarily or inappropriately.
Warning: Traffic-Aware Cruise Control
may be unable to provide adequate
speed control because of limited braking capability and hills. It can also misjudgethe distance from a vehicle ahead. Driving
downhill can increase driving speed, causing Model X to exceed your set
speed. Never depend on
Traffic-AwareCruise Control to slow down the vehicle
enough to prevent a collision. Always
keep your eyes on the road when driving
and be prepared to take corrective action
as needed. Depending on
Traffic-AwareCruise Control to slow the vehicle down enough to prevent a collision can result in
serious injury or death.
Warning: Traffic-Aware Cruise Control
may occasionally brake Model X when not required or you are not expecting it. Thiscan be caused by closely following a
vehicle ahead, detecting vehicles or
objects in adjacent lanes (especially on curves), etc.
Adjust your following distance
To adjust the distance you want to maintain
between Model X and a vehicle traveling
ahead of you, rotate the cruise control lever to
choose a setting from 1 (the closest following distance) to 7 (the longest following distance).
Each setting corresponds to a time-based
distance that represents how long it takes for
Model X, from its current location, to reach the
location of the rear bumper of the vehicle
ahead.
Traffic-Aware Cruise Control
Driver Assistance79
Page 191 of 198

AABS (Anti-lock Braking System) 56
Acceleration (dual-motor) 106
access panel, removing 163accessoriesinstalling 166
plugging into power socket 125
adaptive headlights 53
air circulation 115
air conditioning 114
air distribution 115
air
filter 118
air suspension 120
air vents 118
airbags 33
alarm 134
all-season tires 152
always connected, setting 64
anti-lock braking (ABS) 56
audioplaying files 121
steering wheel buttons 39
volume control 121
Auto High Beam 53
Auto Lane Change 87
auto-raising suspension 119
Autopark 89
Autopilot 76
Autosteer 84
average range 64
B backup camera 66
battery (12V)complete discharge 142specifications 173Battery (high voltage)care of 142
coolant 163
specifications 174
temperature limits 142
battery (key), replacing 5
blind spot warning 94
Bluetoothdevices, playing audio files from 124
general information 126
phone, pairing and using 126
body repairs 166
body touch up 161
brake
fluid replacement 149
brakesautomatic in emergencies 96fluid level 163
overview of 56
specifications 173
brightness of displays 110
C
Cabin Overheat Protection setting 110
cabin temperature control 114
Calendar app 132
California Proposition 65 186
camera (rear view) 66
car cover 161
car washes 159
carpets, cleaning 160
CE
certifications 188
CHAdeMO 141
chains 153
change of ownership 113
charge port 143
charge port light 146
chargingcharge settings 147
components and equipment 140
instructions 143
public charging stations 141
scheduling 147
status of 148
charging locations, finding 129
child protectiondisabling liftgate and rear door handles 9
disabling rear window switches 11child seatsinstalling and using 25
cleaning 159
climate controls 114
Cold Weather controls 106
collision avoidance assist 96
console12V power socket 125
cup holders 17
USB ports 124
consumption chart 64
contact informationroadside assistance 180
Tesla 187coolantBattery, checking level of 163
Battery, replacement interval 149
copyrights 184, 185
Creep 106
cruise control 78
cup holders 17
D
dashboard overview 2
data recording 186
day mode 110
declarations of conformity 188
delivery mileage 186
devicesBluetooth, playing audio files 124
Index
190Model X Owner