2017 SUZUKI SWIFT Light
[x] Cancel search: LightPage 218 of 336

7-27INSPECTION AND MAINTENANCE
74LH0-74E
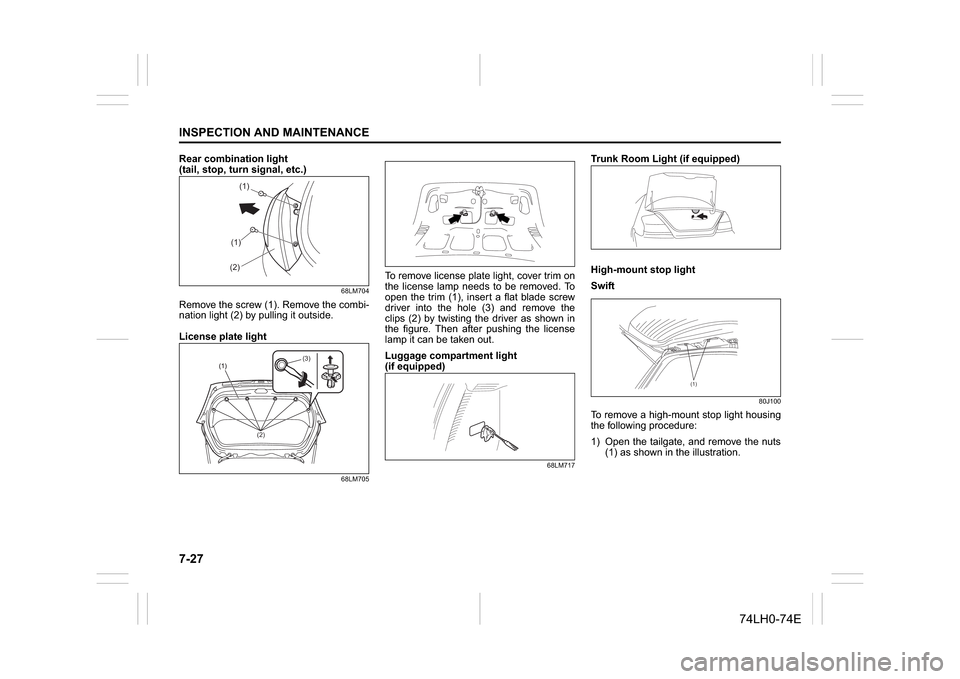
Rear combination light
(tail, stop, turn signal, etc.)
68LM704
Remove the screw (1). Remove the combi-
nation light (2) by pulling it outside.
License plate light
68LM705
To remove license plate light, cover trim on
the license lamp needs to be removed. To
open the trim (1), insert a flat blade screw
driver into the hole (3) and remove the
clips (2) by twisting the driver as shown in
the figure. Then after pushing the license
lamp it can be taken out.
Luggage compartment light
(if equipped)
68LM717
Trunk Room Light (if equipped)
High-mount stop light
Swift
80J100
To remove a high-mount stop light housing
the following procedure:
1) Open the tailgate, and remove the nuts
(1) as shown in the illustration.
(1)(1)
(2)
(2)(3)
(1)
Page 219 of 336

7-28
INSPECTION AND MAINTENANCE
74LH0-74E
63J127
2) Close the tailgate. Remove a high-
mounted stop light housing (2) from the
tailgate.
74LHT0712
3) Remove the each bulb.
4) Replace the bulbs.
To install a high-mounted stop light
housing in the reverse order of removal.Swift Dzire
Wiper Blades
54G129
If the wiper blades become brittle or dam-
aged, or make streaks when wiping,
replace the wiper blades.
To install new wiper blades, follow the pro-
cedures below.NOTE:
Some wiper blades may be different from
the ones described here depending on
vehicle specifications. If so, consult your
MARUTI SUZUKI dealer for proper
replacement method.
For windshield wipers:
70G119
1) Hold the wiper arm away from the win-
dow.
NOTE:
When raising both of the front wiper arms,
pull the driver’s side wiper arm up first.
When returning the wiper arms, lower the
passenger’s side wiper arm first. Other-
wise, the wiper arms may interfere with
each other.
(2)
NOTICE
To avoid scratching or breaking the
window, do not let the wiper arm
strike the window while replacing the
wiper blade.
Page 228 of 336

8-5EMERGENCY SERVICE
74LH0-74E
Full Wheel Cover (if equipped)
60G309
Insert a piece of cloth between the spokes
of the wheel cover and try to pull the cover
outward (as shown in figure). Take out the
detached wheel cover from the wheel rim.
For installation first match the slot at the
wheel cover with the air filling nozzle of the
wheel. Apply equal pressure at the circum-
ference of the wheel cover to fix it in the
wheel rim.
74LHT0860
When installing the cover, make sure that it
is positioned so that it does not cover or
foul the air valve.
Jump Starting Instructions
When Jump Starting Your Vehicle,
Use the Following Procedure:1) Use only a 12-volt battery to jump start
your vehicle. Position the good 12-volt
battery close to your vehicle so that the
jump leads will reach both batteries.
When using a battery installed on
another vehicle, DO NOT LET THE
VEHICLES TOUCH. Set the parking
brakes fully on both vehicles.
2) Turn off all vehicle accessories, except
those necessary for safety reasons (for
example, headlights or hazard lights).
EXAMPLEEXAMPLE
WA R N I N G
Never attempt to jump start your
vehicle if the battery appears to be
frozen. Batteries in this condition
may explode or rupture if jump
starting is attempted.
When making jump lead connec-
tions, be certain that your hands
and the jump leads remain clear
from pulleys, belts, or fans.
Batteries produce flammable
hydrogen gas. Keep flames and
sparks away from the battery or an
explosion may occur. Never smoke
when working in the vicinity of the
battery.
If the booster battery you use for
jump starting is installed in another
vehicle, make sure the two vehicles
are not touching each other.
If your battery discharges repeat-
edly, for no apparent reason, have
your vehicle inspected by an
authorized MARUTI SUZUKI dealer.
To avoid harm to yourself or dam-
age to your vehicle or battery, fol-
low the jump starting instructions
below precisely and in order.
If you are in doubt, contact your
nearest MARUTI SUZUKI autho-
rized workshop.
NOTICE
Your vehicle should not be started by
pushing or towing. This starting
method could result in permanent
damage to the catalytic converter and
high pressure fuel pump (diesel) Use
jump leads to start a vehicle with a
weak or flat battery.
Page 229 of 336

8-6
EMERGENCY SERVICE
74LH0-74E
71LST0802
3) Make jump lead connections as follows:
1. Connect one end of the first jump
lead to the positive (+) terminal of
the flat battery (1).
2. Connect the other end to the positive
(+) terminal of the booster battery
(2).
3. Connect one end of the second jump
lead to the negative (–) terminal of
the booster battery (3).
4. Make the final connection to an
unpainted, heavy metal part (i.e.
engine mounting stud/nut (4)) of the
engine of the vehicle with the flat
battery (1).4) If the booster battery you are using is
fitted to another vehicle, start the
engine of the vehicle with the booster
battery. Run the engine at moderate
speed.
5) Start the engine of the vehicle with the
flat battery.
6) Remove the jump leads in the exact
reverse order in which you connected
them.
If the Starter Does Not
Operate1) Try turning the ignition switch to the
“START” position or try pressing the
engine switch to change the ignition
mode to “START” with the headlights
turned on to determine the battery con-
dition. If the headlights go excessively
dim or go off, it usually means that
either the battery is flat or the battery
terminal contact is poor. Recharge the
battery or correct battery terminal con-
tact as necessary.
2) If the headlights remain bright, check
the fuses. If the reason for failure of the
starter is not obvious, there may be a
major electrical problem. Have the vehi-
cle inspected by your authorized MAR-
UTI SUZUKI dealer.If the Engine is Flooded(Vehicle without Keyless Push Start
System)
If the engine is flooded with Petrol, it may
be hard to start. If this happens, press the
accelerator pedal all the way to the floor
and hold it there while cranking the engine.
For Petrol engine model, do not operate
the starter motor for more than 12 sec-
onds.
For diesel engine model, do not operate
the starter motor for more than 30 sec-
onds.
EXAMPLE
WA R N I N G
Never connect the jump lead directly
to the negative (–) terminal of the dis-
charged battery, or an explosion may
occur.
Page 231 of 336

8-8
EMERGENCY SERVICE
74LH0-74E
For Diesel
65D350D
Warning Triangle
MHO-07-001
In case of vehicle break-down or during
emergency stopping, where, your vehicle
could become a potential traffic hazard,
keep the warning triangle, provided with
your vehicle, on the road free from any
obstacles behind your vehicle so as to
warn the approaching traffic, at an approxi-
mate distance of 50-100 m. The reflecting
side of the triangle should face the on com-
ing traffic. Please activate the hazard
warning lamps before alighting the vehicle
to keep the warning triangle.
MHO-07-014
Remove the warning triangle carefully
from the cover as shown by arrow 1.
Open both the reflector arms as shown
by arrow and lock the arms with each
other with the clip provided in the right
arm. Open the bottom stand in counter
clock-wise direction as shown by arrow
3. Position the warning triangle behind
the vehicle on a plain surface.
Reverse the removal procedure for keep-
ing inside the cover.
MHO-07-014
WA R N I N G
It is hazardous to remove the radia-
tor cap (or degassing tank cap for a
diesel engine) when the water tem-
perature is high, because scalding
fluid and steam may be blown out
under pressure. The cap should
only be taken off when the coolant
temperature has lowered.
To help prevent personal injury,
keep hands, tools and clothing
away from the engine cooling fan
and air-conditioner fan (if
equipped). These electric fans can
automatically turn on without warn-
ing.
EXAMPLE
Page 236 of 336

9-3APPEARANCE CARE
74LH0-74E
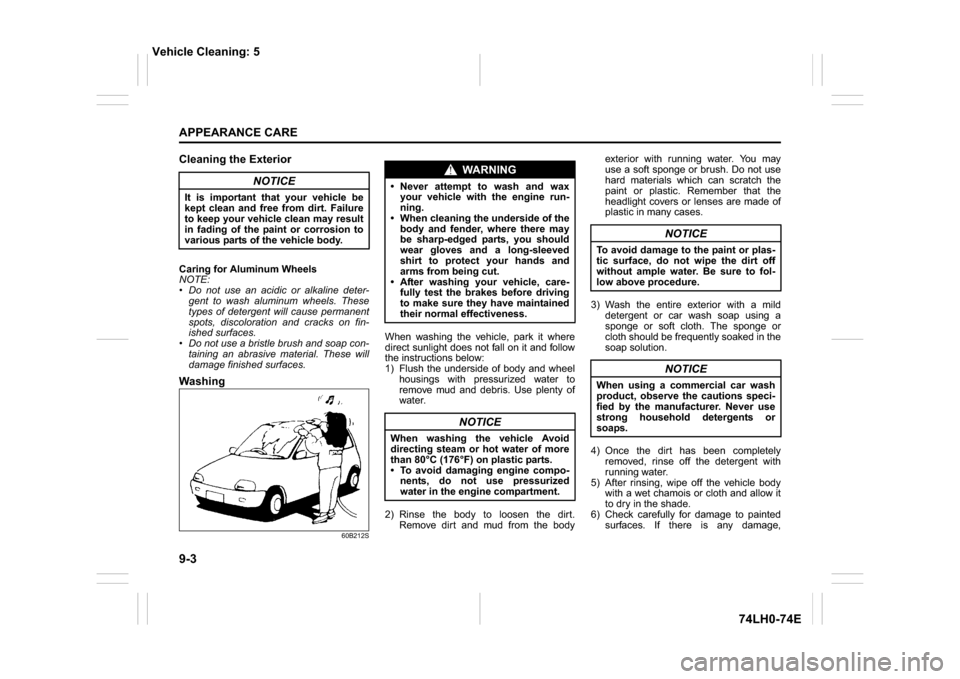
Cleaning the ExteriorCaring for Aluminum Wheels
NOTE:
Do not use an acidic or alkaline deter-
gent to wash aluminum wheels. These
types of detergent will cause permanent
spots, discoloration and cracks on fin-
ished surfaces.
Do not use a bristle brush and soap con-
taining an abrasive material. These will
damage finished surfaces.Washing
60B212S
When washing the vehicle, park it where
direct sunlight does not fall on it and follow
the instructions below:
1) Flush the underside of body and wheel
housings with pressurized water to
remove mud and debris. Use plenty of
water.
2) Rinse the body to loosen the dirt.
Remove dirt and mud from the bodyexterior with running water. You may
use a soft sponge or brush. Do not use
hard materials which can scratch the
paint or plastic. Remember that the
headlight covers or lenses are made of
plastic in many cases.
3) Wash the entire exterior with a mild
detergent or car wash soap using a
sponge or soft cloth. The sponge or
cloth should be frequently soaked in the
soap solution.
4) Once the dirt has been completely
removed, rinse off the detergent with
running water.
5) After rinsing, wipe off the vehicle body
with a wet chamois or cloth and allow it
to dry in the shade.
6) Check carefully for damage to painted
surfaces. If there is any damage,
NOTICE
It is important that your vehicle be
kept clean and free from dirt. Failure
to keep your vehicle clean may result
in fading of the paint or corrosion to
various parts of the vehicle body.
WA R N I N G
Never attempt to wash and wax
your vehicle with the engine run-
ning.
When cleaning the underside of the
body and fender, where there may
be sharp-edged parts, you should
wear gloves and a long-sleeved
shirt to protect your hands and
arms from being cut.
After washing your vehicle, care-
fully test the brakes before driving
to make sure they have maintained
their normal effectiveness.
NOTICE
When washing the vehicle Avoid
directing steam or hot water of more
than 80°C (176°F) on plastic parts.
To avoid damaging engine compo-
nents, do not use pressurized
water in the engine compartment.
NOTICE
To avoid damage to the paint or plas-
tic surface, do not wipe the dirt off
without ample water. Be sure to fol-
low above procedure.
NOTICE
When using a commercial car wash
product, observe the cautions speci-
fied by the manufacturer. Never use
strong household detergents or
soaps.
Vehicle Cleaning: 5
Page 237 of 336

9-4
APPEARANCE CARE
74LH0-74E
“touch-up” the damage following the
procedure below:
1. Clean all damaged spots and allow
them to dry.
2. Stir the paint and “touch-up” the
damaged spots lightly using a small
brush.
3. Allow the paint to dry completely.
Waxing
60B211S
After washing the vehicle, waxing and pol-
ishing are recommended to further protect
and beautify the paint. Only use waxes and polishes of good
quality.
When using waxes and polishes,
observe the precautions specified by the
manufacturers.
NOTICE
If you use an automatic car wash,
make sure that your vehicle’s body
parts, such as spoilers, cannot be
damaged. If you are in doubt, consult
the car wash operator for advice.
Vehicle Cleaning: 5
Page 245 of 336

11-3
SPECIFICATIONS
74LH0-74E
ITEM: Lights WATTAGE BULB No.
Headlight 12V 60/55W H4
Turn signal light Front 12V 21W PY21W
Rear 12V 21W PY21W
Side turn signal light (on fender) 12V 5W WY5W/12W5W
Side turn signal light (on outside rearview mirror) LED –
Position light 12V 5W W5W
Tail/brake light 12V 5/21W P21/5W
License plate light 12V 5W W5W
Reversing light 12V 16W W16W
Interior light 12V 10W –
Luggage compartment light 12V 5W –
Front fog light 12V 35W H8
Rear fog light 12V 21W P21W
High mount stop light 12V 16W W16W
Specifications: 1, 2, 5, 6, 7, 10, 11