2017 SUBARU LEGACY door lock
[x] Cancel search: door lockPage 58 of 610

the belt more effectively restrains the
driver.
When a seatbelt pretensioner is activated,
an operating noise will be heard and a
small amount of smoke will be released.
These occurrences are normal and not
harmful. This smoke does not indicate a
fire in the vehicle.
Once the seatbelt pretensioner has been
activated, the seatbelt retractor remains
locked. Consequently, the seatbelt cannot
be pulled out and retracted and therefore
must be replaced.
NOTE
.Seatbelt pretensioners are not de-
signed to activate in minor impacts.
. In cases of rollover accidents, as the
SRS curtain airbags deploy, the seat-
belt pretensioners are activated simul-
taneously.
. In cases of frontal collisions, the
following components will operate si-
multaneously.
–Seatbelt pretensioner for driver
– Seatbelt pretensioner for front
passenger
– SRS frontal airbag for driver
– SRS frontal airbag for front pas-
senger*
– SRS seat cushion airbag for driver
–
SRS seat cushion airbag for front
passenger*
– SRS curtain airbags (both sides)
(if an offset frontal collision occurs)
*: This does not operate if the occupant
detection system deactivates airbag op-
eration. For details, refer to “Front
passenger ’s SRS frontal airbag ”F 1-52.
. In cases of side collisions, the
following components will operate si-
multaneously.
–SRS curtain airbag (impacted
side)
– SRS side airbag (impacted side)
(when any of the center pillar im-
pact sensors/front door impact sen-
sors senses an impact force)
– Seatbelt pretensioner for driver
(when the driver ’s side front door
impact sensor senses an impact
force)
– Seatbelt pretensioner for front
passenger (when the front passen-
ger ’s side front door impact sensor
senses an impact force)
. Pretensioners are designed to func-
tion on a one-time-only basis. In the
event that a pretensioner is activated,
both the driver ’s and front passenger ’s
seatbelt retractor assemblies should
be replaced only by an authorized SUBARU dealer. When replacing seat-
belt retractor assemblies, use only
genuine SUBARU parts.
.
If either front seatbelt does not
retract or cannot be pulled out due to
a malfunction or activation of the
pretensioner, contact your SUBARU
dealer as soon as possible.
. If the front seatbelt retractor assem-
bly or surrounding area has been
damaged, contact your SUBARU dealer
as soon as possible.
. When you sell your vehicle, we urge
you to explain to the buyer that it has
seatbelt pretensioners by alerting the
buyer to the contents of this section.
WARNING
. To obtain maximum protection,
the occupants should sit in an
upright position with their seat-
belts properly fastened. Refer to
“ Seatbelts ”F 1-16.
. Do not modify, remove or strike
the front seatbelt retractor as-
semblies or surrounding area.
This could result in accidental
activation of the seatbelt preten-
sioners or could make the sys-
tem inoperative, possibly result-
ing in serious injury. Seatbelt
Seat, seatbelt and SRS airbags/Front seatbelt pretensioners
–CONTINUED –1-25
Page 88 of 610

nated while the OFF indicator turns off
despite the fact that the actions noted
above have been taken, seat the child/
small adult in the rear seat and im-
mediately contact your SUBARU dealer
for an inspection. Even if the system
has passed the dealer inspection, it is
recommended that on subsequent trips
the child/small adult always take the
rear seat.
Children who have outgrown a child
restraint system should always wear the
seatbelt irrespective of whether the airbag
is deactivated or activated.
!Conditions in which front passen-
ger’s SRS frontal airbag is activated
The front passenger ’s SRS frontal airbag
will be activated for deployment upon
impact when any of the following condi-
tions is met regarding the front passen-
ger ’s seat.
. When the seat is occupied by an adult.
. When a heavy article is placed on the
seat.
CAUTION
When the front passenger ’s seat is
occupied by an adult, observe the
following precautions. Failure to do
so may lessen the load on the front
passenger ’s seat, deactivating the front passenger
’s SRS frontal airbag
despite the fact that the seat is
occupied by an adult. This may
result in personal injury.
. Do not allow the rear seat occu-
pant to lift the front passenger ’s
seat cushion using his/her feet.
. Do not place any article under the
front passenger ’s seat, or
squeeze any article from behind
and under the seat. This may lift
the seat cushion.
. Do not squeeze any article be-
tween the front passenger ’s seat
and side trim/pillar, door or cen-
ter console box. This may lift the
seat cushion.
! If the passenger ’s frontal airbag
OFF indicator illuminates and
the ON indicator turns off even
when the front passenger ’s seat
is occupied by an adult
This can be caused by the adult incor-
rectly sitting in the front passenger ’s seat.
1. Turn the ignition switch to the “LOCK”/
“OFF ”position.
2. Ask the front passenger to set the
seatback to the upright position, sit up
straight in the center of the seat cushion,
correctly fasten the seatbelt, position his/ her legs out forward, and adjust the seat to
the rearmost position.
3. Turn the ignition switch to the
“ON”
position.
If the OFF indicator remains illuminated
while the ON indicator remains off, take
the following actions.
1. Turn the ignition switch to the “LOCK”/
“OFF ”position.
2. Ensure that there is no article, book,
shoe, or other object trapped under the
seat, at the rear of the seat, or on the side
of the seat.
3. Ensure that the backward-forward
position and seatback of front passenger ’s
seat are locked into place securely by
moving the seat back and forth. (Models
equipped with manual seats only)
4. Turn the ignition switch to the “ON”
position and wait 6 seconds to allow the
system to complete self-checking. Follow-
ing the system check, both indicators turn
off for 2 seconds. Now, the ON indicator
should illuminate while the OFF indicator
remains off.
If the OFF indicator still remains illumi-
nated while the ON indicator remains off,
ask the occupant to move to the rear seat
and immediately contact your SUBARU
dealer for an inspection.
Seat, seatbelt and SRS airbags/*SRS airbag (Supplemental Restraint System airbag)
–CONTINUED –1-55
Page 106 of 610

Keys..................................................................... 2-3
Key number plate ................................................ 2-3
Immobilizer.......................................................... 2-4Certification for immobilizer system ..................... 2-4
Security indicator light ........................................ 2-5
Key replacement ................................................. 2-5
Door locks........................................................... 2-6Locking and unlocking from the outside . ............. 2-6
Locking and unlocking from the inside ................ 2-7
Battery drainage prevention function ................... 2-8
Power door locking switches............................. 2-9Key lock-in prevention function ........................... 2-9
Keyless access with push-button start
system (if equipped) ....................................... 2-10
Access key........................................................ 2-10
Safety precautions ............................................. 2-11
Locking and unlocking with “keyless access ”
entry function. .................................................. 2-14
Selecting audible signal operation ...................... 2-18
Selecting hazard warning flasher operation ......... 2-18
Warning chimes and warning indicator ............... 2-18
Disabling keyless access function ...................... 2-18
When access key does not operate properly ....... 2-20
Replacing battery of access key ......................... 2-20
Replacing access key ......................................... 2-20
Certification for keyless access with push-button start system ..................................................... 2-21
PIN Code Access (models with “keyless
access with push-button start system ”) ....... 2-22
Registering a PIN code ...................................... 2-22
Unlocking .......................................................... 2-23
Remote keyless entry system ........................... 2-24Operating the access key................................... 2-25
Operating the transmitter ................................... 2-26
Replacing the battery ......................................... 2-27
Replacing lost transmitters ................................ 2-27
Certification for remote keyless entry system ..... 2-27
Alarm system..................................................... 2-28System alarm operation ..................................... 2-29
Activating and deactivating the alarm system ..... 2-29
If you have accidentally triggered the alarm system ............................................................ 2-29
Arming the system ............................................ 2-30
Disarming the system ........................................ 2-32
Valet mode ........................................................ 2-33
Tripped sensor identification .............................. 2-33
Shock sensors (dealer option).. .......................... 2-33
Child safety locks.............................................. 2-34
Windows ............................................................. 2-34
Power window operation by driver ..................... 2-34
Power window operation by passengers ............. 2-37
Initialization of power window .. .......................... 2-38
Trunk lid (Legacy).............................................. 2-38
To open and close the trunk lid from outside . ..... 2-39
To open the trunk lid from inside. ....................... 2-39
Internal trunk lid release handle ......................... 2-39
Keys and doors
2
Page 108 of 610

Keys
NOTE
For models with“keyless access with
push-button start system ”, refer to
“ Keyless access with push-button start
system ”F 2-10.
1) Master key
2) Submaster key
3) Valet key
4) Key number plate
Three types of keys are provided for your
vehicle:
Master key, submaster key and valet key.
The master key and submaster key fit all
locks on your vehicle.
. Ignition switch .
Driver ’s door
. Glove box
. Trunk lid (Legacy)
The valet key fits only the ignition switch
and door locks. You can keep the glove
box locked when you leave your vehicle
and valet key at a parking facility.
CAUTION
Do not attach a large key holder or
key case to either key. If it bangs
against your knees while you are
driving, it could turn the ignition
switch from the “ON ”position to the
“ ACC ”or “LOCK ”position, thereby
stopping the engine.
& Key number plate
The key number is stamped on the key
number plate attached to the key set.
Write down the key number and keep it in
another safe place, not in the vehicle. This
number is needed to make a replacement
key if you lose your key or lock it inside the
vehicle.
Keys and doors/Keys2-3
Page 109 of 610

Keys and doors/Immobilizer
Immobilizer
The immobilizer system is designed to
prevent an unauthorized person from
starting the engine. Only keys registered
with your vehicle’s immobilizer system can
be used to operate your vehicle. This
system, however, is not a 100% anti-theft
guaranty.
For models with “keyless access with
push-button start system ”:
If you press the push-button ignition
switch when carrying an unregistered
access key, the switch will not turn to the
“ON ”position and the engine will not start.
If the engine does not start, perform the
procedure described in “Starting engine”
F 9-19.
For models without “keyless access
with push-button start system ”:
Even if an unregistered key fits into the
ignition switch and can be turned to the
“START ”position, the engine will auto-
matically stop after several seconds.
If the engine does not start, pull out the
key once before trying again. Refer to
“ Ignition switch (models without push-
button start system) ”F 3-4.
CAUTION
. Do not place the key under direct
sunlight or anywhere it may
become hot.
. Do not get the key wet. If the key
gets wet, wipe it dry with a cloth
immediately.
. Do not modify or remove the
system. If modified or removed,
the proper operation of the sys-
tem cannot be guaranteed.
NOTE
. To protect your vehicle from theft,
please pay close attention to the fol-
lowing security precautions:
–Never leave your vehicle unat-
tended with its keys inside.
– Before leaving your vehicle,
close all windows and the moon-
roof, and lock the doors (all models)
and rear gate (Outback).
– Do not leave spare keys or any
record of your key number in the
vehicle.
. The vehicle has a maintenance-free
type immobilizer system.
& Certification for immobilizer
system
. For models with “keyless access
with push-button start system ”:
Refer to “Certification for keyless access
with push-button start system ”F 2-21.
. For models without “keyless access
with push-button start system ”:
– U.S.-spec. models
FCC ID: MOZRI-38BFH
CAUTION
FCC WARNING
Changes or modifications not ex-
pressly approved by the party re-
sponsible for compliance could void
the user ’s authority to operate the
equipment.
This device complies with part 15 of the
FCC Rules. Operation is subject to the
following two conditions: (1) This de-
vice may not cause harmful interfer-
ence, and (2) this device must accept
any interference received, including
interference that may cause undesired
operation.
2-4
Page 111 of 610

Keys and doors/Door locks
Door locks
&Locking and unlocking from
the outside
NOTE
If you unlock the driver ’s door with a
key (including a mechanical key) and
open the door while the alarm system
is armed, the alarm system is triggered
and the vehicle ’s horn sounds. In this
case, perform any of the following
operations:
Models with “keyless access with
push-button start system ”:
. Press any button on the access key
(except when the access key battery is
discharged).
. Turn the push-button ignition switch
to the “ACC ”position.
. Carry the access key and perform
either of the following procedures.
–Grip the front door handle
– Press the rear gate opener button
Models without “keyless access with
push-button start system ”:
. Press any button on the remote
transmitter (except when the transmit-
ter battery is discharged).
. Insert the key into the ignition
switch and turn the ignition switch to the
“ON ”position.
For details about the alarm system,
refer to “Alarm system ”F 2-28.
To lock the driver ’s door from the outside
with the key, turn the key toward the front.
To unlock the door, turn the key toward the
rear. Pull the outside door handle to open
an unlocked door.
NOTE
The mechanical key is directional. If the
key cannot be inserted, change the
direction that the grooved side is
facing and insert it again.
2-6
Page 112 of 610

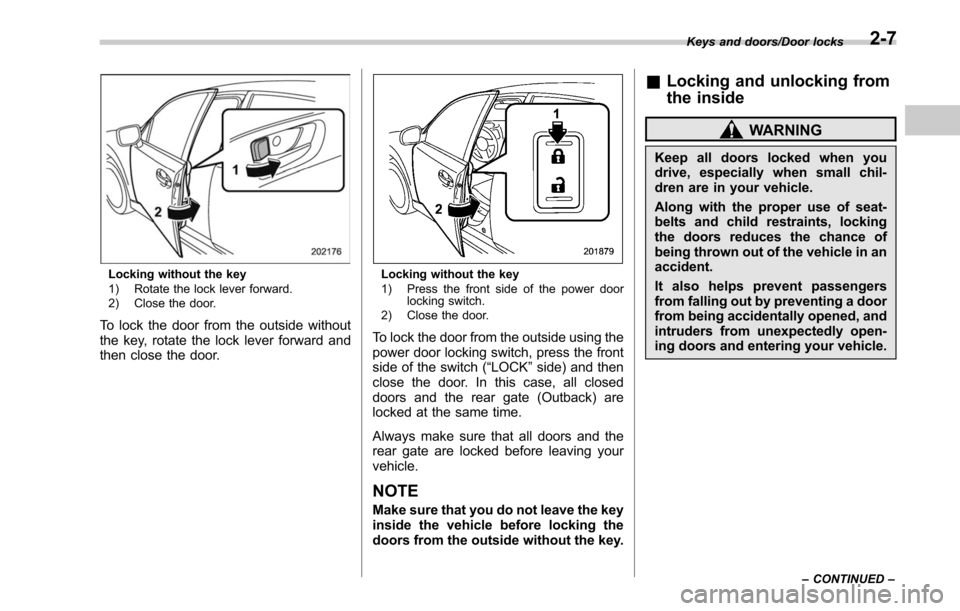
Locking without the key
1) Rotate the lock lever forward.
2) Close the door.
To lock the door from the outside without
the key, rotate the lock lever forward and
then close the door.
Locking without the key
1) Press the front side of the power doorlocking switch.
2) Close the door.
To lock the door from the outside using the
power door locking switch, press the front
side of the switch (“LOCK” side) and then
close the door. In this case, all closed
doors and the rear gate (Outback) are
locked at the same time.
Always make sure that all doors and the
rear gate are locked before leaving your
vehicle.
NOTE
Make sure that you do not leave the key
inside the vehicle before locking the
doors from the outside without the key.
& Locking and unlocking from
the inside
WARNING
Keep all doors locked when you
drive, especially when small chil-
dren are in your vehicle.
Along with the proper use of seat-
belts and child restraints, locking
the doors reduces the chance of
being thrown out of the vehicle in an
accident.
It also helps prevent passengers
from falling out by preventing a door
from being accidentally opened, and
intruders from unexpectedly open-
ing doors and entering your vehicle.
Keys and doors/Door locks
–CONTINUED –2-7
Page 113 of 610

Keys and doors/Door locks
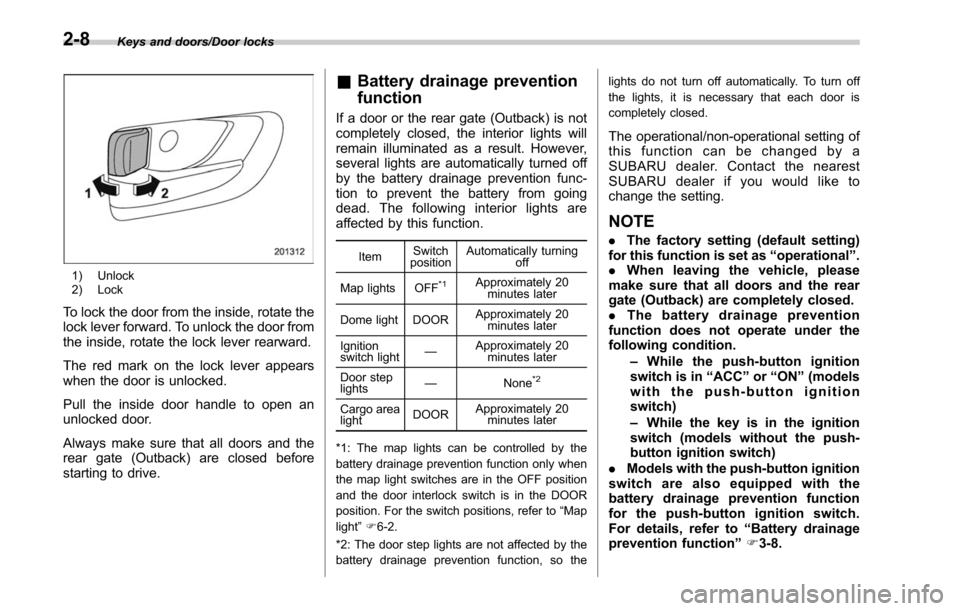
1) Unlock
2) Lock
To lock the door from the inside, rotate the
lock lever forward. To unlock the door from
the inside, rotate the lock lever rearward.
The red mark on the lock lever appears
when the door is unlocked.
Pull the inside door handle to open an
unlocked door.
Always make sure that all doors and the
rear gate (Outback) are closed before
starting to drive.
&Battery drainage prevention
function
If a door or the rear gate (Outback) is not
completely closed, the interior lights will
remain illuminated as a result. However,
several lights are automatically turned off
by the battery drainage prevention func-
tion to prevent the battery from going
dead. The following interior lights are
affected by this function.
Item Switch
position Automatically turning
off
Map lights OFF
*1Approximately 20 minutes later
Dome light DOOR Approximately 20
minutes later
Ignition
switch light —
Approximately 20
minutes later
Door step
lights —
None
*2
Cargo area
lightDOORApproximately 20
minutes later
*1: The map lights can be controlled by the
battery drainage prevention function only when
the map light switches are in the OFF position
and the door interlock switch is in the DOOR
position. For the switch positions, refer to “Map
light ”F 6-2.
*2: The door step lights are not affected by the
battery drainage prevention function, so the lights do not turn off automatically. To turn off
the lights, it is necessary that each door is
completely closed.
The operational/non-operational setting of
this function can be changed by a
SUBARU dealer. Contact the nearest
SUBARU dealer if you would like to
change the setting.
NOTE
.
The factory setting (default setting)
for this function is set as “operational ”.
. When leaving the vehicle, please
make sure that all doors and the rear
gate (Outback) are completely closed.
. The battery drainage prevention
function does not operate under the
following condition.
–While the push-button ignition
switch is in “ACC ”or “ON ”(models
with the push-button ignition
switch)
– While the key is in the ignition
switch (models without the push-
button ignition switch)
. Models with the push-button ignition
switch are also equipped with the
battery drainage prevention function
for the push-button ignition switch.
For details, refer to “Battery drainage
prevention function” F3-8.
2-8