Page 383 of 634

Interior equipment/Interior lights
Interior lights
CAUTION
When leaving your vehicle, make
sure the lights are turned off to
avoid battery discharge.
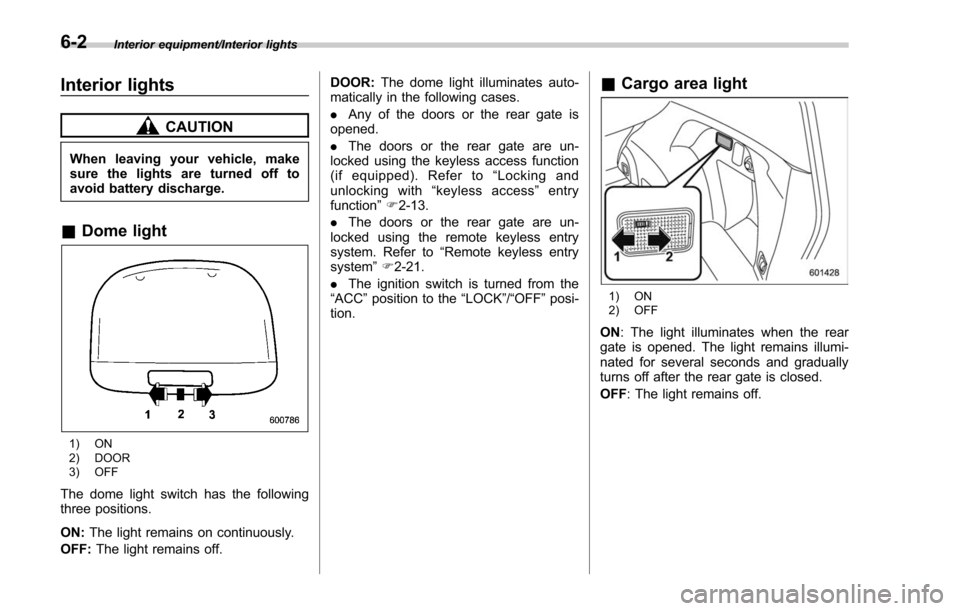
&Dome light
1) ON
2) DOOR
3) OFF
The dome light switch has the following
three positions.
ON: The light remains on continuously.
OFF: The light remains off. DOOR:
The dome light illuminates auto-
matically in the following cases.
. Any of the doors or the rear gate is
opened.
. The doors or the rear gate are un-
locked using the keyless access function
(if equipped). Refer to “Locking and
unlocking with “keyless access” entry
function ”F 2-13.
. The doors or the rear gate are un-
locked using the remote keyless entry
system. Refer to “Remote keyless entry
system ”F 2-21.
. The ignition switch is turned from the
“ACC ”position to the “LOCK”/ “OFF ”posi-
tion.
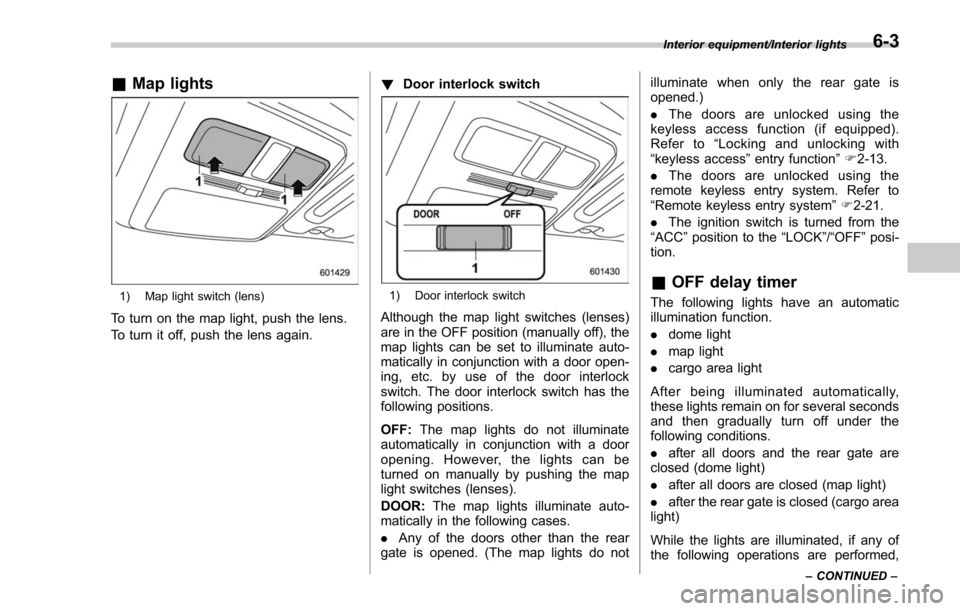
& Cargo area light
1) ON
2) OFF
ON : The light illuminates when the rear
gate is opened. The light remains illumi-
nated for several seconds and gradually
turns off after the rear gate is closed.
OFF : The light remains off.
6-2
Page 384 of 634

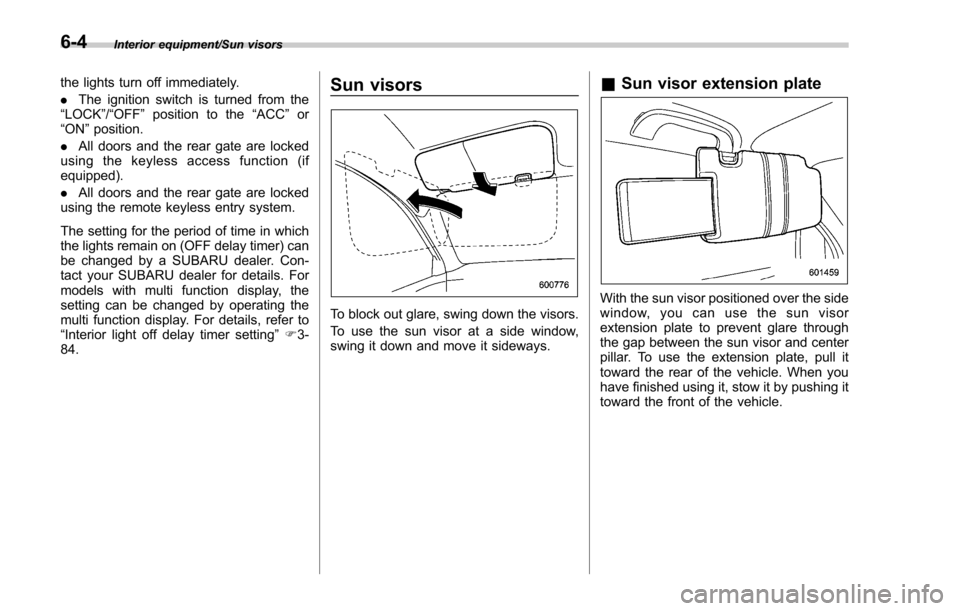
&Map lights
1) Map light switch (lens)
To turn on the map light, push the lens.
To turn it off, push the lens again. !
Door interlock switch
1) Door interlock switch
Although the map light switches (lenses)
are in the OFF position (manually off), the
map lights can be set to illuminate auto-
matically in conjunction with a door open-
ing, etc. by use of the door interlock
switch. The door interlock switch has the
following positions.
OFF: The map lights do not illuminate
automatically in conjunction with a door
opening. However, the lights can be
turned on manually by pushing the map
light switches (lenses).
DOOR: The map lights illuminate auto-
matically in the following cases.
. Any of the doors other than the rear
gate is opened. (The map lights do not illuminate when only the rear gate is
opened.)
.
The doors are unlocked using the
keyless access function (if equipped).
Refer to “Locking and unlocking with
“keyless access ”entry function ”F 2-13.
. The doors are unlocked using the
remote keyless entry system. Refer to
“Remote keyless entry system ”F 2-21.
. The ignition switch is turned from the
“ACC ”position to the “LOCK”/“OFF”posi-
tion.
& OFF delay timer
The following lights have an automatic
illumination function.
. dome light
. map light
. cargo area light
After being illuminated automatically,
these lights remain on for several seconds
and then gradually turn off under the
following conditions.
. after all doors and the rear gate are
closed (dome light)
. after all doors are closed (map light)
. after the rear gate is closed (cargo area
light)
While the lights are illuminated, if any of
the following operations are performed,
Interior equipment/Interior lights
–CONTINUED –6-3
Page 385 of 634

Interior equipment/Sun visors
the lights turn off immediately.
.The ignition switch is turned from the
“LOCK”/ “OFF ”position to the “ACC”or
“ON ”position.
. All doors and the rear gate are locked
using the keyless access function (if
equipped).
. All doors and the rear gate are locked
using the remote keyless entry system.
The setting for the period of time in which
the lights remain on (OFF delay timer) can
be changed by a SUBARU dealer. Con-
tact your SUBARU dealer for details. For
models with multi function display, the
setting can be changed by operating the
multi function display. For details, refer to
“Interior light off delay timer setting ”F 3-
84.Sun visors
To block out glare, swing down the visors.
To use the sun visor at a side window,
swing it down and move it sideways.
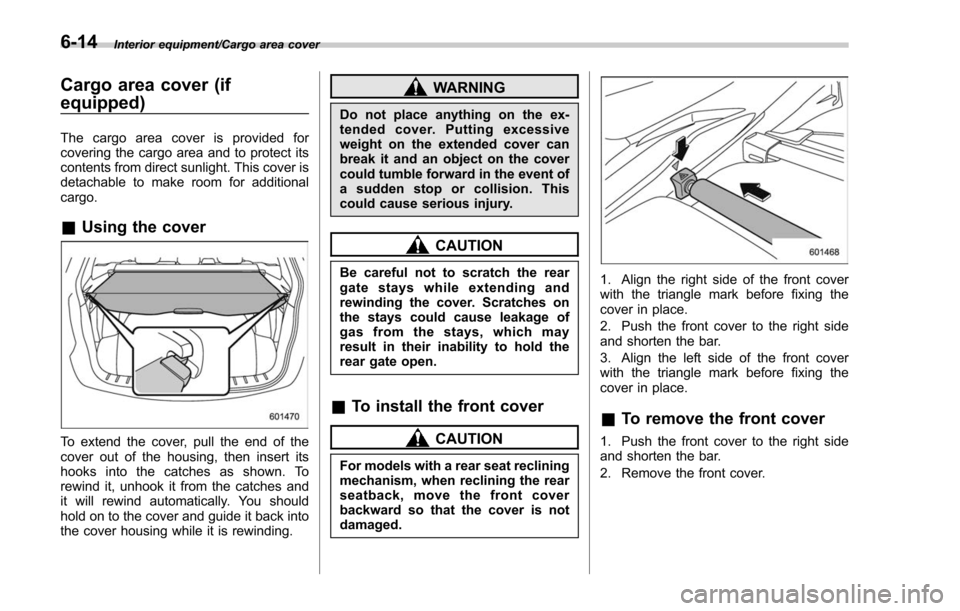
& Sun visor extension plate
With the sun visor positioned over the side
window, you can use the sun visor
extension plate to prevent glare through
the gap between the sun visor and center
pillar. To use the extension plate, pull it
toward the rear of the vehicle. When you
have finished using it, stow it by pushing it
toward the front of the vehicle.
6-4
Page 386 of 634
CAUTION
Do not pull out the extension plate
with the sun visor positioned over
the windshield. The extension plate
would obstruct your view of the
rearview mirror.
&Vanity mirror
CAUTION
Keep the vanity mirror cover closed
while the car is being driven to avoid
being temporarily blinded by the
glare of bright light.
To use the vanity mirror, swing down the
sun visor and open the vanity mirror cover.
&Vanity mirror with light (if
equipped)
CAUTION
Keep the vanity mirror cover closed
while the car is being driven to avoid
being distracted by the light.
To use the vanity mirror, swing down the
sun visor and open the vanity mirror cover.
The light beside the vanity mirror illumi-
nates when the mirror cover is opened.
NOTE
Use of the vanity mirror light for a long
period of time while the engine is not
running can cause battery discharge.
Interior equipment/Sun visors6-5
Page 389 of 634
Interior equipment/Cup holders
A dual cup holder is built into the console.
The divider in the cup holder can be pulled
out.
NOTE
.The shape of the front passenger ’s
cup holder may be slightly different
depending on the model.
. With the divider taken out, the cup
holder can be used as a storage box.
& Rear passenger ’s cup holder
(if equipped)
CAUTION
When a cup in the rear passenger ’s
cup holder contains a beverage, do
not fold down the rear seatback.
Otherwise, the beverage could spill
and, if the beverage is hot, it could
burn you and/or your passengers.A dual cup holder is built into the armrest.
6-8
Page 394 of 634
Shopping bag hook
CAUTION
Do not hang items on the shopping
bag hook that weigh 6 lbs (3 kg) or
more.
A shopping bag hook is attached to each
side of the cargo area.
Convenient hook
CAUTION
.Do not hang items on the con-
venient hook that weigh 6 lbs (3
kg) or more. Depending on the
conditions of use (for example, in
low temperatures, etc.), the rear
gate may lower even with lighter
loads. However, this is not a
malfunction. Be careful not to
hit your head or other body parts.
. When using the convenient hook,
do not try to close the rear gate.
Doing so may cause the item on
the hook to be jammed in the rear
gate and damaged. Remove the
item from the hook before clos-
ing the rear gate.
A convenient hook is attached to the rear
gate trim. When the rear gate is open, you
can hang a candle lantern, wet suit, etc.
on the hook.
Interior equipment/Shopping bag hook6-13
Page 395 of 634

Interior equipment/Cargo area cover
Cargo area cover (if
equipped)
The cargo area cover is provided for
covering the cargo area and to protect its
contents from direct sunlight. This cover is
detachable to make room for additional
cargo.
&Using the cover
To extend the cover, pull the end of the
cover out of the housing, then insert its
hooks into the catches as shown. To
rewind it, unhook it from the catches and
it will rewind automatically. You should
hold on to the cover and guide it back into
the cover housing while it is rewinding.
WARNING
Do not place anything on the ex-
tended cover. Putting excessive
weight on the extended cover can
break it and an object on the cover
could tumble forward in the event of
a sudden stop or collision. This
could cause serious injury.
CAUTION
Be careful not to scratch the rear
gate stays while extending and
rewinding the cover. Scratches on
the stays could cause leakage of
gas from the stays, which may
result in their inability to hold the
rear gate open.
&To install the front cover
CAUTION
For models with a rear seat reclining
mechanism, when reclining the rear
seatback, move the front cover
backward so that the cover is not
damaged.
1. Align the right side of the front cover
with the triangle mark before fixing the
cover in place.
2. Push the front cover to the right side
and shorten the bar.
3. Align the left side of the front cover
with the triangle mark before fixing the
cover in place.
&To remove the front cover
1. Push the front cover to the right side
and shorten the bar.
2. Remove the front cover.
6-14
Page 399 of 634

Interior equipment/Rear view camera
of the image on the monitor is
limited, you should always check
the rear view and the surround-
ing area with your eyes and
mirrors, and move backward at
a slow speed. Moving backward
only by checking the rear view
image from the camera could
cause an accident.
. Do not disassemble or modify the
camera, switch or wiring. If
smoke comes out or you smell
a strange odor, stop using the
rear view camera immediately.
Contact your SUBARU dealer
for an inspection. Continued use
may result in accident, fire or
electric shock.
CAUTION
. If your vehicle is washed with a
high-pressure washer, do not
allow water to contact the camera
directly. Entry of water into the
camera lens may result in con-
densation, malfunction, fire or
electric shock.
. Since the camera is a precision
device, do not subject it to strong
impacts. Otherwise, malfunction, fire or electric shock may occur.
. If mud or snow sticks to or is
frozen on the camera, you must
be very careful when removing it.
Otherwise, damage to the camera
may cause a fire or electric
shock. Pour water or lukewarm
water over the camera to remove
mud and ice, and wipe it with a
soft, dry cloth.
. Do not put a flame close to the
camera or wiring. Otherwise, da-
mage or fire may occur.
. When replacing the fuse, be sure
to use a fuse with the specified
rating. Use of a fuse with a
different rating may result in a
malfunction.
. If the rear view camera is used for
a long time while the engine is
not operated, the battery may
become completely discharged.
NOTE
. Do not wipe the camera with alcohol,
benzine or paint thinner. Otherwise,
discoloration may occur. To remove
contamination, wipe the camera with a
cloth moistened with a diluted neutral
detergent and then wipe it with a soft, dry cloth.
.
When waxing the vehicle, be careful
not to apply the wax to the camera. If it
comes in contact with the camera,
moisten a clean cloth with a diluted
neutral detergent to remove the wax.
. The camera lens has a hard coating
to help prevent scratches. However,
when washing the vehicle or cleaning
the camera lens, be careful not to
scratch the camera lens. Do not use a
washing brush directly on the camera
lens. The image quality of the rear view
camera may deteriorate.
. Strong light shined on the camera
lens may develop vertical lines around
the light source. This is not a malfunc-
tion.
. Under fluorescent light, the display
may flicker. However, this is not a
malfunction.
. The image of the rear view camera
may be slightly different from the
actual color of the objects.& How to use the rear view
camera
When the shift lever/select lever is set to
“R”, the rear view camera automatically
displays the rear view image from the
vehicle. When the lever is set to other
positions, the image before setting to “R”
6-18