2017 SUBARU FORESTER check oil
[x] Cancel search: check oilPage 283 of 634

Climate control/Operating tips for heater and air conditioner
Operating tips for heater and
air conditioner
&Cleaning ventilation grille
1) Front ventilation inlet grille
Always keep the front ventilation inlet grille
free of snow, leaves, or other obstructions
to ensure efficient heating and defrosting.
Since the condenser is located in front of
the radiator, this area should be kept clean
because cooling performance is impaired
by any accumulation of insects and leaves
on the condenser.
&Efficient cooling after parking
in direct sunlight
After parking in direct sunlight, drive with
the windows open for a few minutes to allow outside air to circulate into the
heated interior. This results in quicker
cooling by the air conditioner. Keep the
windows closed during the operation of
the air conditioner for maximum cooling
efficiency.
&
Lubrication oil circulation in
the refrigerant circuit
Operate the air conditioner compressor at
a low engine speed (at idle or low driving
speeds) a few minutes each month during
the off-season to circulate its oil.
&Checking air conditioning
system before summer sea-
son
Check the air conditioner unit for refriger-
ant leaks, hose conditions, and proper
operation each spring. Have the air con-
ditioning system checked by your
SUBARU dealer.
&Cooling and dehumidifying in
high humidity and low tem-
perature weather conditions
Under certain weather conditions (high
relative humidity, low temperatures, etc.) a
small amount of water vapor emission
from the air outlets may be noticed. This
condition is normal and does not indicate any problem with the air conditioning
system.
&
Air conditioner compressor
shut-off when engine is
heavily loaded
To improve acceleration and gas mileage,
the air conditioner compressor is designed
to temporarily shut off during air condi-
tioner operation whenever the accelerator
is fully depressed such as during rapid
acceleration or when driving up a steep
incline.
&Refrigerant for your climate
control system
1) Air conditioner label
Your air conditioner uses ozone friendly
4-12
Page 412 of 634

CAUTION
Trapping small animals in the cool-
ing fan and belts of the engine may
result in a malfunction. Check that
no small animal enters the engine
compartment and under the vehicle
before starting the engine.
NOTE
Engine oil, engine coolant, brake fluid,
washer fluid and other fluid levels
should be checked daily, weekly or at
fuel stops.
Starting and stopping the
engine (models without
push-button start system)
&Starting engine
CAUTION
Do not operate the starter motor
continuously for more than 10 sec-
onds. If the engine fails to start after
operating the starter for 5 to 10
seconds, wait for 10 seconds or
more before trying again.
NOTE
It may be difficult to start the engine
when the battery has been discon-
nected and reconnected (for mainte-
nance or other purposes). This diffi-
culty is caused by the electronically
controlled throttle ’s self-diagnosis
function. To overcome it, keep the
ignition switch in the “ON ”position
for approximately 10 seconds before
starting the engine. !
General precautions when starting
engine
WARNING
.Never start the engine from out-
side the vehicle. It may result in
an accident.
. Do not leave the engine running
in locations with poor ventilation,
such as a garage and indoors.
The exhaust gas may enter the
vehicle or indoors, and it may
result in carbon monoxide poi-
soning.
. Do not start the engine near dry
foliage, paper, or other flam-
mable substances. The exhaust
pipe and exhaust emissions can
create a fire hazard at high
temperatures.
CAUTION
. If the engine is stopped during
driving, the catalyst may over-
heat and burn.
Starting and operating/Starting and stopping the engine (models without push –button start system)
–CONTINUED –7-9
Page 447 of 634

Starting and operating/X–mode
X-mode indicator light (type A)
X-mode indicator light (type B)
To activate:
Press the X-mode switch. While the X-
mode is activated, the X-mode indicator light illuminates.
To deactivate:
Press the X-mode switch again. The X-
mode indicator light will turn off when the
X-mode is deactivated.
NOTE
.
Even if you try to activate the X-
mode by pressing the X-mode switch
when the vehicle speed is 12 mph (20
km/h) or more, the X-mode will not be
activated. At this time, a buzzer will
sound twice.
. If the vehicle speed reaches 25 mph
(40 km/h) or more while the X-mode is
activated, a buzzer will sound once and
the X-mode will be deactivated.
NOTE
For models with SI-DRIVE:
. The SI-DRIVE mode will change to
the Intelligent (I) mode when the X-
mode is deactivated.
. The SI-DRIVE mode cannot be chan-
ged while the X-mode is activated. At
this time, a buzzer will sound twice.
. While the engine is running, if any of
the following conditions is met, the X-
mode will be deactivated. In this case, it
is not possible to activate the X-mode.
Also, for models with SI-DRIVE, the mode will change to the Sport (S) mode
and it will not be possible to change to
the other modes.
–The CHECK ENGINE warning
light/malfunction indicator light illu-
minates.
– The AT OIL TEMP warning light
flashes.
– The ABS warning light illumi-
nates.
– The Vehicle Dynamics Control
warning light illuminates.
. If there is a possibility that the
engine could overheat because of a
temperature increase of the engine
coolant, it is not possible to change to
the X-mode. While the vehicle is in the
X-mode, it changes to the Sport (S)
mode when the engine coolant tem-
perature increases.
. It is not possible to activate the X-
mode when the engine is not running,
because the hill descent control func-
tion is not activated.
& Hill descent control function
The hill descent control function will be in
standby mode when the X-mode is acti-
vated and the vehicle speed is less than
approximately 12 mph (20 km/h).
The function will operate when the vehicle
7-44
Page 483 of 634

Driving tips/On–road and off –road driving
conditions than a two wheel drive vehicle.
There is little difference in handling,
however, during extremely sharp turns or
sudden braking. Therefore, when driving
down a slope or turning corners, be sure
to reduce your speed and maintain an
ample distance from other vehicles.
. Always check the cold tire pressure
before starting to drive. The recom-
mended tire pressure is provided on the
tire placard, which is located under the
door latch on the driver ’s side.
. Frequent driving of an AWD vehicle
under hard-driving conditions such as
steep hills or dusty roads will necessitate
more frequent replacement of the follow-
ing items than that specified in the
“Warranty and Maintenance Booklet ”.
– Engine oil
– Brake fluid
– Rear differential gear oil
– Manual transmission oil (MT mod-
els)
– Continuously variable transmission
fluid (CVT models)
– Front differential gear oil (CVT
models)
. There are some precautions that you
must observe when towing your vehicle.
For detailed information, refer to “Towing ”
F 9-13.On-road and off-road driving
WARNING
. In a rollover crash, an unbelted
person is significantly more
likely to die than a person wear-
ing a seat belt. You the driver and
all your passengers should fas-
ten the seatbelts before starting
to drive in order to minimize the
chance of serious injury or death.
. Do not make sharp turns and
quick maneuvers unless abso-
lutely unavoidable. Such actions
are dangerous as you may lose
control, possibly resulting in a
rollover which could cause death
or serious injury.
. Always maintain a safe driving
speed according to the road and
weather conditions in order to
avoid having an accident on a
sharp turn, during sudden brak-
ing or under other similar condi-
tions.
. Whenever strong crosswinds are
present, slow down sufficiently
to maintain control of your vehi-
cle. Remember that your vehicle,
with its higher profile and center of gravity, is more likely to be
affected by crosswinds than or-
dinary passenger cars.
. Always use the utmost care in
driving –overconfidence be-
cause you are driving an All-
Wheel Drive model could easily
lead to a serious accident.
Your vehicle is classified as a utility
vehicle. Utility vehicles feature a higher
ground clearance which enables them to
be used for wide applications including off-
road driving. But please keep in mind that
your vehicle is neither a conventional off-
road vehicle nor an all-terrain vehicle. A
higher center of gravity in relation to the
tread width as compared with ordinary
passenger cars makes vehicles of this
type more likely to roll over. In reality, utility
vehicles have a significantly higher roll-
over rate than other types of vehicles. The
high ground clearance of this vehicle is a
real advantage, giving you a better view of
the road and allowing you to anticipate
problems earlier. However, remember that
your utility vehicle is not designed for high-
speed cornering comparable to ordinary
passenger cars and that your vehicle
could roll over if you make a sharp turn
at high speed.
If you take your SUBARU off-road, certain
8-6
Page 485 of 634

Driving tips/Winter driving
need to be washed thoroughly.
.Frequent driving of an AWD model
under hard-driving conditions such as
rough roads or off roads will necessitate
more frequent replacement of the follow-
ing items than that specified in the
maintenance schedule described in the
“Warranty and Maintenance Booklet ”.
– Engine oil
– Brake fluid
– Rear differential gear oil
– Manual transmission oil (MT mod-
els)
– Continuously variable transmission
fluid (CVT models)
– Front differential gear oil (CVT
models)
Remember that damage done to your
SUBARU while operating it off-road and
not using common sense precautions
such as those listed above is not eligible
for warranty coverage.Winter driving
& Operation during cold
weather
Carry some emergency equipment, such
as a window scraper, a bag of sand,
flares, a small shovel and jumper cables.
Check the battery and cables. Cold
temperatures reduce battery capacity.
The battery must be in good condition to
provide enough power for cold winter
starts.
It normally takes longer to start the engine
in very cold weather conditions. Use an
engine oil of a proper grade and viscosity
for cold weather. Using heavy summer oil
will make it harder to start the engine.
Keep the door locks from freezing by
squirting them with deicer or glycerin.
Forcing a frozen door open may damage
or separate the rubber weather strips
around the door. If the door is frozen,
use hot water to melt the ice, and after-
wards thoroughly wipe the water away.
Use a windshield washer fluid that con-
tains an antifreeze solution. Do not use
engine antifreeze or other substitutes
because they may damage the paint of
the vehicle. SUBARU Windshield Washer Fluid con-
tains 58.5% methyl alcohol and 41.5%
surfactant, by volume. Its freezing tem-
perature varies according to how much it
is diluted, as indicated in the following
table.
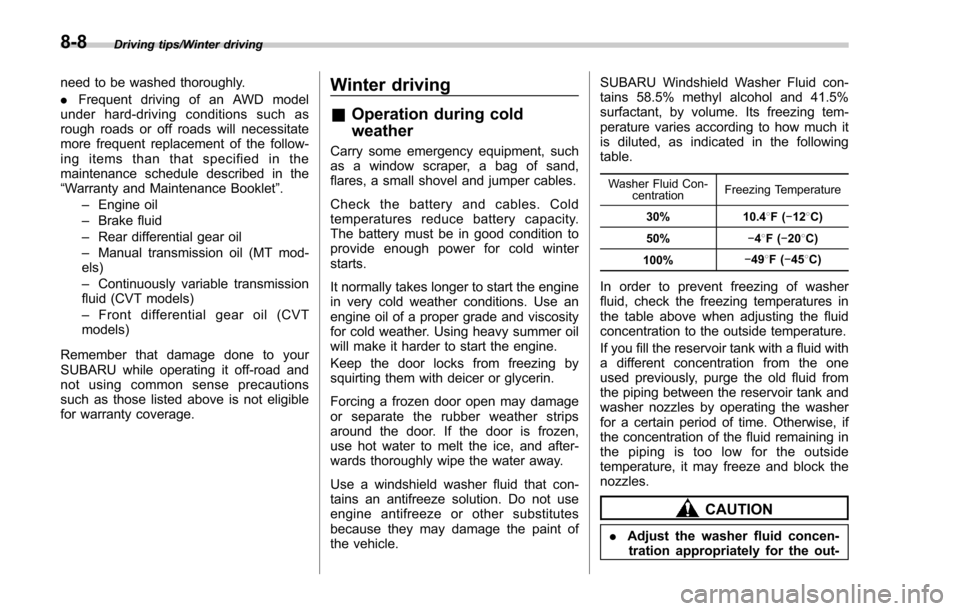
Washer Fluid Con-
centration Freezing Temperature
30% 10.4 8F( −12 8C)
50% −48F( −20 8C)
100% −
49 8F( −45 8C)
In order to prevent freezing of washer
fluid, check the freezing temperatures in
the table above when adjusting the fluid
concentration to the outside temperature.
If you fill the reservoir tank with a fluid with
a different concentration from the one
used previously, purge the old fluid from
the piping between the reservoir tank and
washer nozzles by operating the washer
for a certain period of time. Otherwise, if
the concentration of the fluid remaining in
the piping is too low for the outside
temperature, it may freeze and block the
nozzles.
CAUTION
. Adjust the washer fluid concen-
tration appropriately for the out-
8-8
Page 510 of 634

12. Before putting the spare tire on, clean
the mounting surface of the wheel and hub
with a cloth.
13. Put on the spare tire. Replace the
wheel nuts. Tighten them by hand.
WARNING
Do not use oil or grease on the
wheel studs or nuts when the spare
tire is installed. This could cause the
nuts to become loose and lead to an
accident.
14. Turn the jack handle counterclockwise
to lower the vehicle.
15. Use the wheel nut wrench to securely
tighten the wheel nuts to the specified
torque, following the tightening order in the
illustration.
For the wheel nut tightening torque, refer
to “Tires ”F 12-10. Never use your foot on
the wheel nut wrench or a pipe extension
on the wrench because you may exceed
the specified torque. Have the wheel nut torque checked at the nearest automotive
service facility.
16. Store the flat tire in the spare tire
compartment. Be sure to place the spacer
in the manner shown in the illustration,
and then tighten the bolt in the front side of
the bracket.
In case of emergency/Flat tires
–CONTINUED –9-7
Page 515 of 634

In case of emergency/Engine overheating
Engine overheating
WARNING
Never attempt to remove the radia-
tor cap until the engine has been
shut off and has fully cooled down.
When the engine is hot, the coolant
is under pressure. Removing the
cap while the engine is still hot
could release a spray of boiling hot
coolant, which could burn you very
seriously.
If the engine overheats, safely pull off the
road and stop the vehicle in a safe
location.
& If steam is coming from the
engine compartment
. Turn off the engine and get everyone
away from the vehicle until it cools down.
. Contact an authorized SUBARU deal-
er.
& If no steam is coming from
the engine compartment
1. Keep the engine running at idling
speed.
2. Open the engine hood to ventilate the engine compartment. Refer to
“Engine
hood ”F 11-7.
Confirm that the cooling fan is turning. If
the fan is not turning, immediately turn off
the engine and contact an authorized
SUBARU dealer for repair.
3. After the coolant temperature high
warning light that has blinked or illumi-
nated in REDturns off, turn off the engine.
For details about the warning light, refer to
“Coolant temperature low indicator light/
Coolant temperature high warning light ”
F 3-17.
4. After the engine has fully cooled down,
check the coolant level in the reserve
tank. If the coolant level is below the
“LOW ”mark, add coolant up to the “FULL ”
mark.
NOTE
For details about how to check the
coolant level or how to add coolant,
refer to “Engine coolant ”F 11-13.
5. If there is no coolant in the reserve
tank, add coolant to the reserve tank.
Then remove the radiator cap and fill the
radiator with coolant.
If you remove the radiator cap from a hot
radiator, first wrap a thick cloth around the
radiator cap, then turn the cap counter-
clockwise slowly without pressing down until it stops. Release the pressure from
the radiator. After the pressure has been
fully released, remove the cap by pressing
down and turning it.
9-12
Page 532 of 634

Maintenance schedule....................................... 11-3
Maintenance precautions ................................... 11-3
Before checking or servicing in the engine
compartment .................................................... 11-4
When checking or servicing in the engine compartment while the engine is running .......... 11-5
Maintenance tips................................................ 11-5Removing and reinstalling clips .......................... 11-5
Engine hood....................................................... 11-7
Engine compartment overview .......................... 11-8
Non-turbo models.............................................. 11-8
Turbo models ..................................................... 11-9
Engine oil.......................................................... 11-10Engine oil consumption .................................... 11-10
Checking the oil level ....................................... 11-10
Changing the oil and oil filter ............................ 11-11
Recommended grade and viscosity .................. 11-11
Synthetic oil ..................................................... 11-12
Cooling system ................................................ 11-12Cooling fan, hose and connections ................... 11-12
Engine coolant ................................................. 11-13
Air cleaner element .......................................... 11-14Replacing the air cleaner element ..................... 11-14
Spark plugs...................................................... 11-16Recommended spark plugs .............................. 11-16
Drive belts........................................................ 11-16
Manual transmission oil .................................. 11-17
Recommended grade and viscosity .................. 11-17
Continuously variable transmission fluid ....... 11-17Front differential gear oil (CVT models) and
rear differential gear oil ................................ 11-17
Recommended grade and viscosity .................. 11-17
Brake fluid........................................................ 11-18Checking the fluid level .................................... 11-18
Recommended brake fluid ............................... 11-18
Clutch fluid (MT models)................................. 11-19Checking the fluid level.................................... 11-19
Recommended clutch fluid ............................... 11-19
Brake booster.................................................. 11-20
Brake pedal ...................................................... 11-20
Checking the brake pedal free play .................. 11-20
Checking the brake pedal reserve distance ....... 11-20
Clutch pedal (MT models) ............................... 11-21Checking the clutch function ............................ 11-21
Checking the clutch pedal free play .................. 11-21
Hill start assist system.................................... 11-21
Replacement of brake pad and lining ............ 11-22
Breaking-in of new brake pads and linings ....... 11-22
Parking brake stroke ....................................... 11-23
Tires and wheels .............................................. 11-23
Types of tires................................................... 11-23
Tire pressure monitoring system (TPMS) (if equipped) ...................................................... 11-23
Tire inspection ................................................. 11-25
Tire pressures and wear .................................. 11-25
Wheel balance ................................................. 11-27
Wear indicators ............................................... 11-27
Tire rotation direction mark .............................. 11-28
Tire rotation ..................................................... 11-28
Maintenance and service
11