2017 SUBARU FORESTER Mode
[x] Cancel search: ModePage 279 of 634

Climate control/Manual climate control operation
&Sensors
1) Interior air temperature sensor
2) Solar sensor
The automatic climate control system
employs several sensors. These sensors
are delicate. If they are not treated properly and become damaged, the sys-
tem may not be able to control the interior
temperature correctly. To avoid damaging
the sensors, observe the following pre-
cautions.
–
Do not subject the sensors to impact.
– Keep water away from the sensors.
– Do not cover the sensors.
The sensors are located as follows.
– Solar sensor: beside the windshield
defroster grille
– Interior air temperature sensor: next to
the steering column
– Outside temperature sensor: near the
front bumper opening
Manual climate control op-
eration
& Airflow mode selection
To select the airflow mode:
Type A, B and C: Turn the airflow mode
selection dial.
Type D: Press the airflow mode selection
button.
To select the defrost mode:
Type A and B: Turn the airflow mode
selection dial.
Type C and D: Press the defroster button.
Airflow modes are as follows.
(Ventilation): Instrument panel outlets
4-8
Page 281 of 634
Climate control/Manual climate control operation
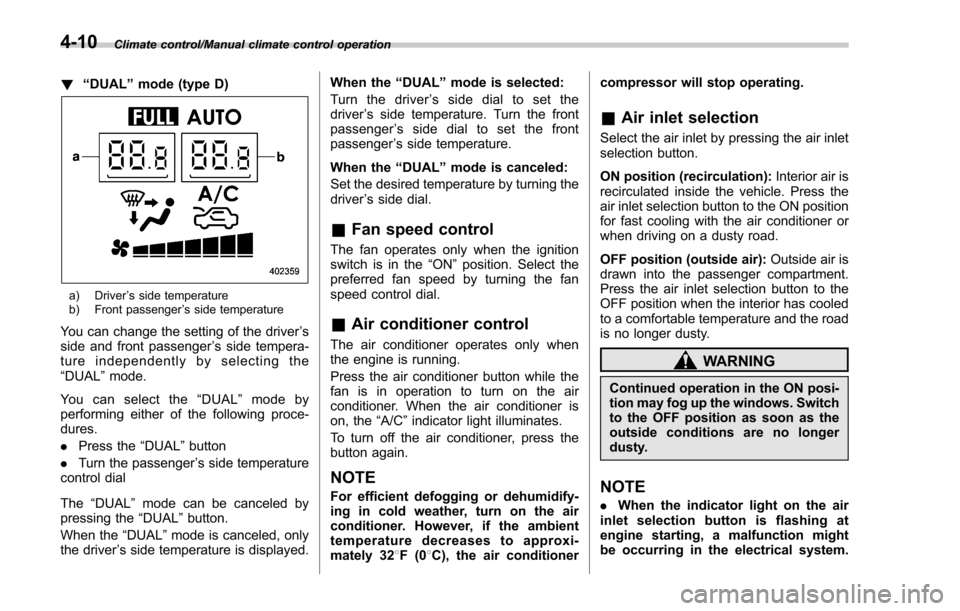
!“DUAL ”mode (type D)
a) Driver ’s side temperature
b) Front passenger ’s side temperature
You can change the setting of the driver ’s
side and front passenger ’s side tempera-
ture independently by selecting the
“DUAL ”mode.
You can select the “DUAL ”mode by
performing either of the following proce-
dures.
. Press the “DUAL”button
. Turn the passenger ’s side temperature
control dial
The “DUAL ”mode can be canceled by
pressing the “DUAL”button.
When the “DUAL”mode is canceled, only
the driver ’s side temperature is displayed. When the
“DUAL ”mode is selected:
Turn the driver ’s side dial to set the
driver ’s side temperature. Turn the front
passenger ’s side dial to set the front
passenger ’s side temperature.
When the “DUAL ”mode is canceled:
Set the desired temperature by turning the
driver ’s side dial.
& Fan speed control
The fan operates only when the ignition
switch is in the “ON”position. Select the
preferred fan speed by turning the fan
speed control dial.
& Air conditioner control
The air conditioner operates only when
the engine is running.
Press the air conditioner button while the
fan is in operation to turn on the air
conditioner. When the air conditioner is
on, the “A/C ”indicator light illuminates.
To turn off the air conditioner, press the
button again.
NOTE
For efficient defogging or dehumidify-
ing in cold weather, turn on the air
conditioner. However, if the ambient
temperature decreases to approxi-
mately 32 8F(0 8C), the air conditioner compressor will stop operating.
&
Air inlet selection
Select the air inlet by pressing the air inlet
selection button.
ON position (recirculation): Interior air is
recirculated inside the vehicle. Press the
air inlet selection button to the ON position
for fast cooling with the air conditioner or
when driving on a dusty road.
OFF position (outside air): Outside air is
drawn into the passenger compartment.
Press the air inlet selection button to the
OFF position when the interior has cooled
to a comfortable temperature and the road
is no longer dusty.
WARNING
Continued operation in the ON posi-
tion may fog up the windows. Switch
to the OFF position as soon as the
outside conditions are no longer
dusty.
NOTE
. When the indicator light on the air
inlet selection button is flashing at
engine starting, a malfunction might
be occurring in the electrical system.
4-10
Page 282 of 634
Contact your SUBARU dealer for in-
spection.
.The indicator light on the air inlet
selection button may flash in the
following cases. However, this does
not indicate a malfunction.
–After the vehicle battery has been
disconnected and reconnected.
– When the vehicle battery voltage
is low.Defrosting
& Type A and B
Select the “”or “”mode by turning the
airflow mode selection dial to defrost or to
dehumidify the windshield and front door
windows.
& Type C
Select the “”mode by pressing the
defroster button, or select the “”mode
by turning the airflow mode selection dial
to defrost or to dehumidify the windshield
and front door windows.
& Type D
Select the “”mode by pressing the
defroster button, or select the “”mode
by pressing the airflow mode selection
button to defrost or to dehumidify the
windshield and front door windows.
NOTE
. When the “”or “”mode is
selected, the air conditioner compres-
sor operates automatically regardless
of the position of the air conditioner
button to defrost the windshield more
quickly. However the indicator on the
air conditioner button will not illumi-
nate. At the same time, the air inlet selection is automatically set to the
outside air mode.
For type A climate control system, in
this state:
–You cannot stop the air condi-
tioner compressor by pressing the
air conditioner button.
– You cannot select the recircula-
tion mode by pressing the air inlet
selection button.
. For type C and D climate control
system, after defrosting the windshield
by pressing the defroster button “
”,
pressing the button again returns the
system to the setting that had been
selected before the defroster was acti-
vated.
Climate control/Defrosting4-11
Page 288 of 634

Antenna................................................................ 5-2Roof antenna ...................................................... 5-2
Audio set............................................................. 5-2Base display audio set (if equipped) .................... 5-3
STARLINKTM7.0 Multimedia Plus audio set
(U.S. spec. models only, if equipped) ................. 5-5
Tips for operating the audio/visual system ........... 5-6
Basic information before use .............................. 5-14
Basic operation .................................................. 5-17
Unit settings ...................................................... 5-18
SUBARU STARLINK (if equipped) ....................... 5-25
AM/FM radio ....................................................... 5-27
SiriusXM Satellite Radio (if equipped) ................. 5-36
aha
TMby HARMAN ............................................. 5-43
Pandora®(if equipped) ....................................... 5-49
CD ..................................................................... 5-52
USB memory ...................................................... 5-54
iPod ................................................................... 5-55
Bluetooth audio .................................................. 5-57
AUX ................................................................... 5-60
Steering switches for audio .............................. 5-62
Bluetooth®settings ............................................ 5-65Regulatory information ....................................... 5-65 Registering/connecting Bluetooth
®device
.......... 5-65
Setting Bluetooth details .................................... 5-68
Hands-free phone system ................................. 5-70Control screen................................................... 5-71
Registering/connecting a Bluetooth phone ......... 5-72
Using the phone switch/microphone ................... 5-72
How to change the hands-free phone system ..... 5-72
Making a call ..................................................... 5-73
Receiving a call ................................................. 5-76
Talking on the phone ......................................... 5-77
Phone settings .................................................. 5-78
Voice command system .................................... 5-80Using the voice command system ...................... 5-81
Voice command system operation ...................... 5-82
Command list .................................................... 5-84
What to do if.... ................................................... 5-88Troubleshooting ................................................. 5-88
Appendix............................................................ 5-92Certification ....................................................... 5-92
Certification for the Hands-free system ............... 5-92
Certification for Mexico models .......................... 5-93
Audio
5
Page 292 of 634
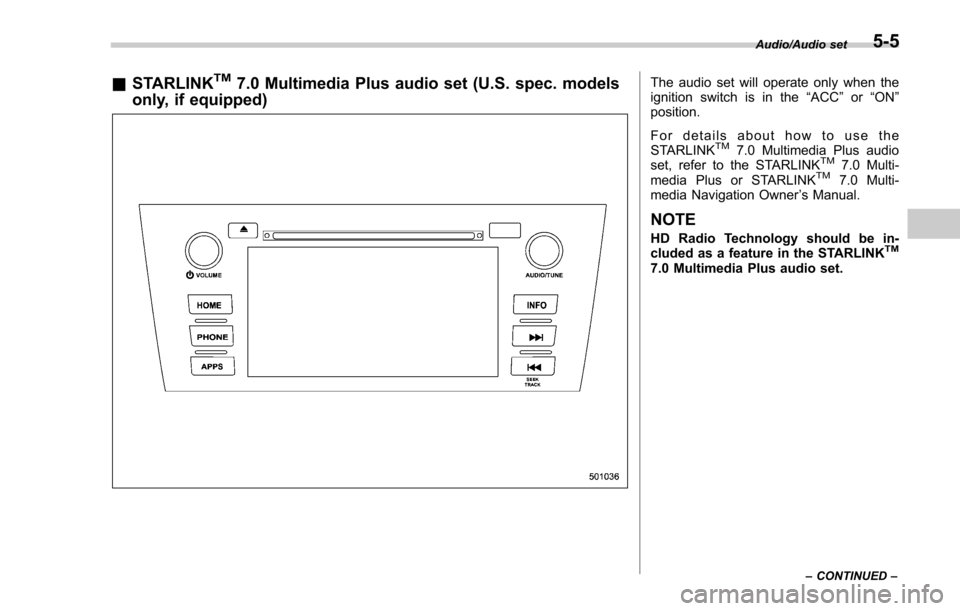
&STARLINKTM7.0 Multimedia Plus audio set (U.S. spec. models
only, if equipped)The audio set will operate only when the
ignition switch is in the “ACC”or “ON ”
position.
For details about how to use the
STARLINK
TM7.0 Multimedia Plus audio
set, refer to the STARLINKTM7.0 Multi-
media Plus or STARLINKTM7.0 Multi-
media Navigation Owner ’s Manual.
NOTE
HD Radio Technology should be in-
cluded as a feature in the STARLINKTM
7.0 Multimedia Plus audio set.
Audio/Audio set
–CONTINUED –5-5
Page 300 of 634
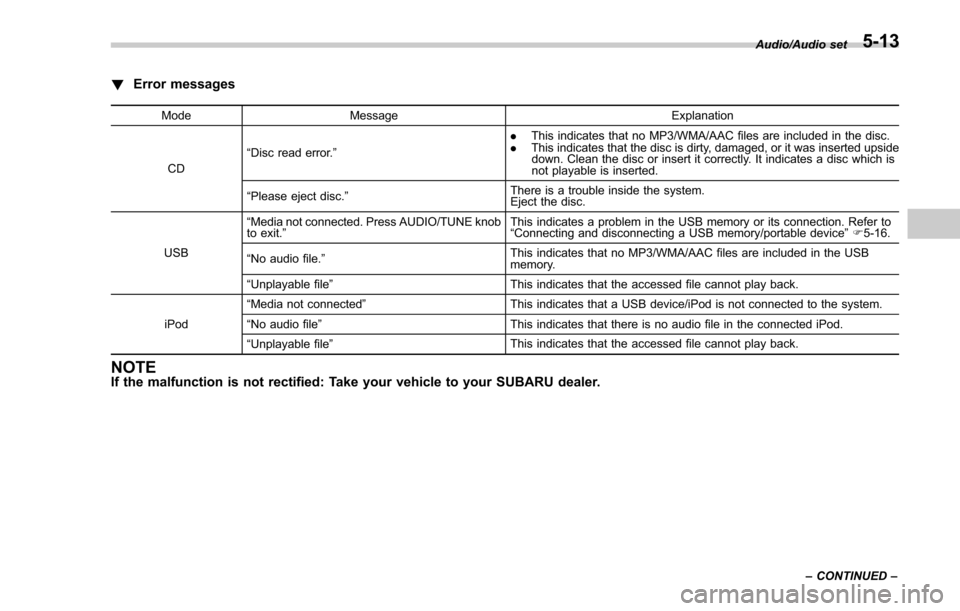
!Error messages
Mode Message Explanation
CD “
Disc read error.” .
This indicates that no MP3/WMA/AAC files are included in the disc.
. This indicates that the disc is dirty, damaged, or it was inserted upside
down. Clean the disc or insert it correctly. It indicates a disc which is
not playable is inserted.
“ Please eject disc. ” There is a trouble inside the system.
Eject the disc.
USB “
Media not connected. Press AUDIO/TUNE knob
to exit. ” This indicates a problem in the USB memory or its connection. Refer to
“
Connecting and disconnecting a USB memory/portable device ”F 5-16.
“ No audio file. ” This indicates that no MP3/WMA/AAC files are included in the USB
memory.
“ Unplayable file ” This indicates that the accessed file cannot play back.
iPod “
Media not connected ” This indicates that a USB device/iPod is not connected to the system.
“ No audio file ” This indicates that there is no audio file in the connected iPod.
“ Unplayable file ” This indicates that the accessed file cannot play back.
NOTEIf the malfunction is not rectified: Take your vehicle to your SUBARU dealer.
Audio/Audio set
–CONTINUED –5-13
Page 302 of 634
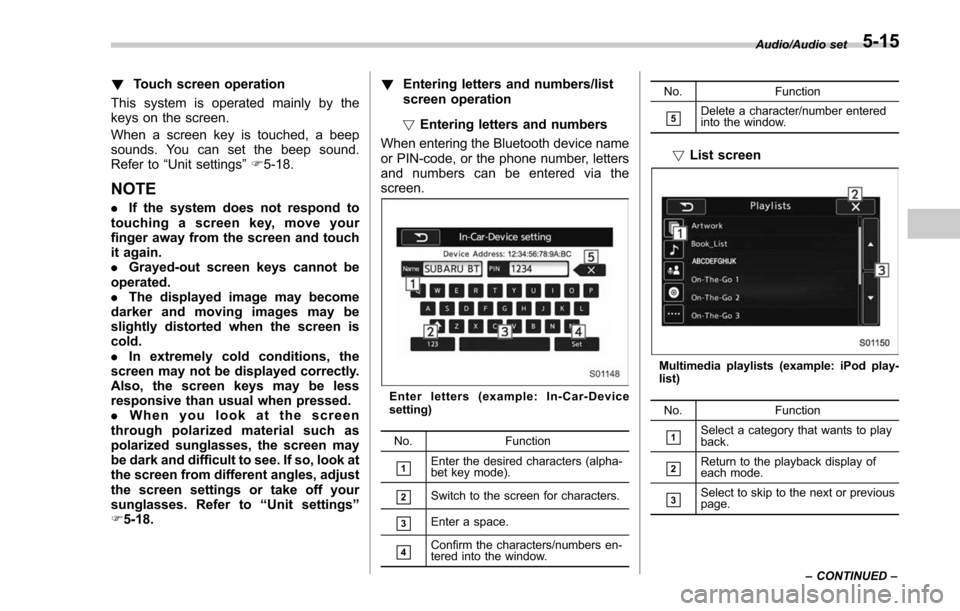
!Touch screen operation
This system is operated mainly by the
keys on the screen.
When a screen key is touched, a beep
sounds. You can set the beep sound.
Refer to “Unit settings” F5-18.
NOTE
. If the system does not respond to
touching a screen key, move your
finger away from the screen and touch
it again.
. Grayed-out screen keys cannot be
operated.
. The displayed image may become
darker and moving images may be
slightly distorted when the screen is
cold.
. In extremely cold conditions, the
screen may not be displayed correctly.
Also, the screen keys may be less
responsive than usual when pressed.
. When you look at the screen
through polarized material such as
polarized sunglasses, the screen may
be dark and difficult to see. If so, look at
the screen from different angles, adjust
the screen settings or take off your
sunglasses. Refer to “Unit settings ”
F 5-18. !
Entering letters and numbers/list
screen operation
! Entering letters and numbers
When entering the Bluetooth device name
or PIN-code, or the phone number, letters
and numbers can be entered via the
screen.
Enter letters (example: In-Car-Device
setting)
No. Function
&1Enter the desired characters (alpha-
bet key mode).
&2Switch to the screen for characters.
&3Enter a space.
&4Confirm the characters/numbers en-
tered into the window. No. Function
&5Delete a character/number entered
into the window.
!
List screen
Multimedia playlists (example: iPod play-
list)
No. Function
&1Select a category that wants to play
back.
&2Return to the playback display of
each mode.
&3Select to skip to the next or previous
page. Audio/Audio set
–CONTINUED –
5-15
Page 303 of 634

Audio/Audio set
!Initial screen
When the ignition switch is in the “ACC”or
“ON ”position, the initial screen will be
displayed and the system will begin
operating.
. When using the SUBARU STARLINK
function (if equipped), the display screen
may be different from the screen above.
. After a few seconds, the caution screen
will be displayed.
. After about 5 seconds, the caution
screen automatically switches to the next
screen.
! Connecting and disconnecting a
USB memory/portable device
The USB port and the AUX jack are
located as shown in the following illustra-
tion.
NOTE
. This unit does not support commer-
cially available USB hubs.
. Turn on the power of the device
when it is not turned on.
. This device has a USB port for USB
memory/portable device.
. For compatible USB memory de-
vices, refer to “USB memory device ”
F 5-9.
. For compatible iPod models, refer to
“ iPod ”F 5-9.
. Even if a USB hub is used to
connect more than two USB devices,
5-16