2017 Seat Toledo ECO mode
[x] Cancel search: ECO modePage 50 of 108

Audio and Media Mode
Insert or eject a CD or DVD 1)Fig. 41
Slots for data storage devices in the
glo v
e c
ompartment. The driver should refrain from operating the
u
nit
whi
le the vehicle is in motion. Insert or
change the data storage device before mov-
ing off!
The CD and DVD drive can play audio CDs
and DVDs and audio data CDs and DVDs.
Insert a CD or DVD
● Hold the CD or DVD with the printed side
facin
g up.
● Push the CD or DVD into the DVD slot
›››
Fig. 41 3 to the point where it is drawn in
aut om
atic
ally. Eject a CD or DVD
●
Press button
1 .
● The CD or DVD in the drive will be ejected
and mu s
t
be removed within approximately
10 seconds.
If the CD or DVD is not removed within the 10
seconds, it is automatically retracted for se-
curity reasons without activating the CD or
DVD mode.
Unreadable or defective CD or DVD
If the data on an inserted CD or DVD cannot
be read or a faulty CD or DVD is inserted, the
corresponding warning appears on screen.
Depending on the unit, unreadable CDs or
DVDs are ejected 3 times automatically and
inserted again to initiate another three at-
tempts before said message is displayed. Note
● Uneven r o
ad surfaces and strong vibrations
can cause playback to jump.
● When the temperature inside the unit is too
high, loadin
g and playback of CDs and DVDs
is disabled.
● If after inserting a number of different CDs
or DVDs
and receiving the CD drive error
every time, contact a qualified workshop. Insert or eject a memory card
Depending on the features and the country,
the v
ehic
le may have one or two slots for SD
cards.
Inserting a memory card
Insert the compatible memory card, bevelled
edge first and with the label face up (con-
tacts face down), into slot ››› Fig. 41 2 , until
properly in
serted.
If a memory card cannot be inserted, make
sure it is positioned correctly and is compati-
ble with the unit.
Removing a memory card
The inserted memory cards must be prepared
for removal.
● From the main Media menu, press the
SET TINGS button to open the Media Set-
tings menu or pr e
s
s the Infotainment MENU button and then press
Settin
g
s to open the
System settings menu.
● Press the R
emo
v
e safely function button. A
dr opdo
wn menu ap
pears with the following
options: SD1 Card, SD2 Card*, USB1 and
USB2*. After correctly ejecting the memory 1)
The DVD drive is only available for the model: “Na-
vi S
ystem Plus”.
48
Page 52 of 108
Audio and Media Mode
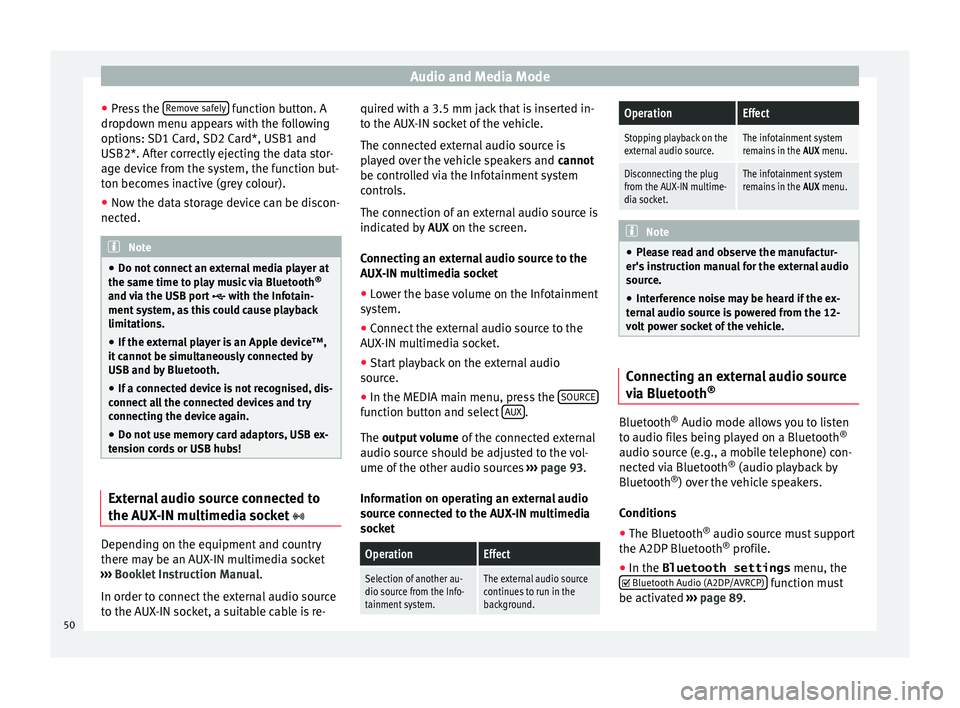
● Pr e
s
s the Remove safely function button. A
dr opdo
wn menu ap
pears with the following
options: SD1 Card, SD2 Card*, USB1 and
USB2*. After correctly ejecting the data stor-
age device from the system, the function but-
ton becomes inactive (grey colour).
● Now the data storage device can be discon-
nected. Note
● Do not c onnect
an external media player at
the same time to play music via Bluetooth ®
and via the USB port with the Infotain-
ment system, as this could cause playback
limitations.
● If the external player is an Apple device™,
it cannot
be simultaneously connected by
USB and by Bluetooth.
● If a connected device is not recognised, dis-
connect a
ll the connected devices and try
connecting the device again.
● Do not use memory card adaptors, USB ex-
tens
ion cords or USB hubs! External audio source connected to
the A
UX
-IN mu
ltimedia socket Depending on the equipment and country
ther
e m
a
y be an AUX-IN multimedia socket
››› Booklet Instruction Manual.
In order to connect the external audio source
to the AUX-IN socket, a suitable cable is re- quired with a 3.5 mm jack that is inserted in-
to the AUX
-IN socket of the vehicle.
The connected external audio source is
played over the vehicle speakers and cannot
be controlled via the Infotainment system
controls.
The connection of an external audio source is
indicated by AUX on the screen.
Connecting an external audio source to the
AUX-IN multimedia socket ● Lower the base volume on the Infotainment
syst
em.
● Connect the external audio source to the
AUX-IN mu
ltimedia socket.
● Start playback on the external audio
source.
● In the MEDIA m
ain menu, press the SOURCE function button and select
A
UX .
The outp ut
volume of the connected external
audio source should be adjusted to the vol-
ume of the other audio sources ››› page 93.
Information on operating an external audio
source connected to the AUX-IN multimedia
socket
OperationEffect
Selection of another au-
dio source from the Info-
tainment system.The external audio source
continues to run in the
background.
OperationEffect
Stopping playback on the
external audio source.The infotainment system
remains in the AUX menu.
Disconnecting the plug
from the AUX-IN multime-
dia socket.The infotainment system
remains in the AUX menu. Note
● Ple a
se read and observe the manufactur-
er's instruction manual for the external audio
source.
● Interference noise may be heard if the ex-
terna
l audio source is powered from the 12-
volt power socket of the vehicle. Connecting an external audio source
v
i
a Bluet
ooth® Bluetooth
®
Audio mode al lo
w
s you to listen
to audio files being played on a Bluetooth ®
audio source (e.g., a mobile telephone) con-
nected via Bluetooth ®
(audio playback by
Bluetooth ®
) over the vehicle speakers.
Conditions ● The Bluetooth ®
audio source mu
st support
the A2DP Bluetooth ®
profile.
● In the Bluetooth settings menu, the
Bluetooth Audio (A2DP/A
VRCP) function must
be activ at
ed ›
›› page 89.
50
Page 54 of 108

Audio and Media Mode
imported from different data storage devices
t o the
jukebox and thi
s used to play them.
The files will only be copied when the engine
is running. Copying copy-protected CDs and
DVDs is prohibited
Importing files
● In Media mode, press the SETTINGS function
b utt
on and then sel
ect Manage jukebox .
● Press the IMPOR
T function button.
● Select the desired source from the Select
source menu.
The d at
a s
torage device is prepared. This op-
eration may take a few seconds.
● Activate the checkboxes to the right of the
file
s or folders to be imported.
● If Select al
l is activated, all files and folders
on the d at
a s
torage device will be imported.
● Press the IMPORT function button.
D ependin
g on the sel
ection, all files and fold-
ers will be imported with the indicated name
to the Jukebox .
If no track information is available, the audio
files will be placed in the following folders:
Audio data CD
■ Album ■
Unknown albums
■ Track. mp31)
■ Artists
■ Unknown artists
■Unknown albums
■ Track. mp31)
Function
s and progress display during the
copying operation
While copying, an animation is displayed
along with the progress percentage on the
import screen.
Audio data CD: It is not possible to copy and
play files at the same time.
● Press the Cancel function button to end the
impor t
of
the whole track that is currently be-
ing imported.
● To obtain information on the status of the
import, pre
ss the Information function button.
● Press the B
A
CK
function button to close
the impor t
s
creen with the progress informa-
tion.
● When the file import ends, a message will
appear
.
Deleting files
● In Media mode, press the SETTINGS function
b utt on and then sel
ect Manage jukebox .●
Pr e
s
s the DELETE
function button.
● Activate the checkboxes to the right of the
fi l
e
s or folders to be deleted.
● If Select al
l is activated, all the files and
f o
l
ders on the data storage device will be de-
leted.
● Press the DELETE
function button. The
fi l
e
s and folders will be deleted according to
the selection made.
● When the files have been deleted, a mes-
sage w
ill appear.
● Press the BACK
function button to close
the menu.
Openin g s
t
ored audio and video files
● Change to Jukebox (SSD) cont
ent
››› page 46.
When storing the tracks, they are stored un-
der different categories and lists according to
the information available.
The tracks saved can be checked and opened
from these lists according to different catego-
ries.
Jukebox
● Playlist
● Artist
● Album 1)
The name and extension of the file are examples.
52
Page 61 of 108
Navigation
Use navigation data from a memory
c ar
d. 3 Only available for the model: Navi System
The SD c
ard is initially to be found inserted in
SD card slot 2.
To update navigation data visit our website:
www.seat.com.
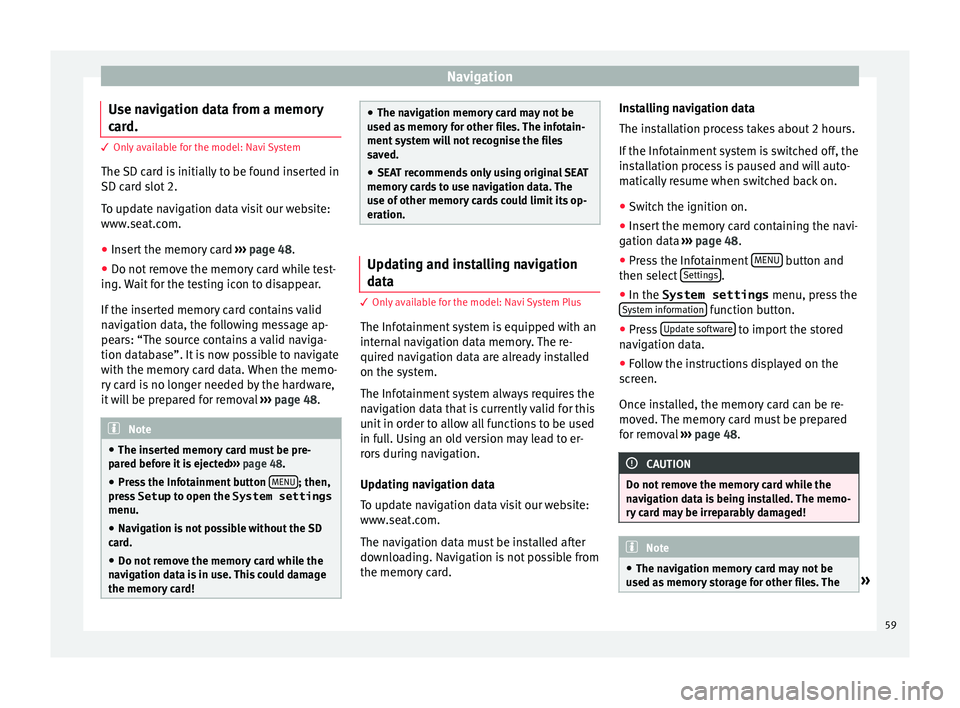
● Insert the memory card ›››
page 48 .
● Do not remove the memory card while test-
ing. W
ait for the testing icon to disappear.
If the inserted memory card contains valid
navigation data, the following message ap-
pears: “The source contains a valid naviga-
tion database”. It is now possible to navigate
with the memory card data. When the memo-
ry card is no longer needed by the hardware,
it will be prepared for removal ›››
page 48. Note
● The inser t
ed memory card must be pre-
pared before it is ejected ››› page 48.
● Press the Infotainment button MENU ; then,
pre s
s Setup to open the System settings
menu.
● Navigation is not possible without the SD
card.
● Do not
remove the memory card while the
navig
ation data is in use. This could damage
the memory card! ●
The nav ig
ation memory card may not be
used as memory for other files. The infotain-
ment system will not recognise the files
saved.
● SEAT recommends only using original SEAT
memory c
ards to use navigation data. The
use of other memory cards could limit its op-
eration. Updating and installing navigation
dat
a 3 Only
available for the model: Navi System Plus
The Inf
otainment system is equipped with an
internal navigation data memory. The re-
quired navigation data are already installed
on the system.
The Infotainment system always requires the
navigation data that is currently valid for this
unit in order to allow all functions to be used
in full. Using an old version may lead to er-
rors during navigation.
Updating navigation data
To update navigation data visit our website:
www.seat.com.
The navigation data must be installed after
downloading. Navigation is not possible from
the memory card. Installing navigation data
The ins
t
allation process takes about 2 hours.
If the Infotainment system is switched off, the
installation process is paused and will auto-
matically resume when switched back on.
● Switch the ignition on.
● Insert the memory card containing the navi-
gation dat
a ››› page 48.
● Press the Infotainment MENU button and
then sel ect
Settin
gs .
● In the System settings menu, pre
s
s the
System information function button.
● Press U
pd
at
e software to import the stored
n av
ig
ation data.
● Follow the instructions displayed on the
scr
een.
Once installed, the memory card can be re-
moved. The memory card must be prepared
for removal ››› page 48. CAUTION
Do not remove the memory card while the
nav ig
ation data is being installed. The memo-
ry card may be irreparably damaged! Note
● The nav ig
ation memory card may not be
used as memory storage for other files. The » 59
Page 64 of 108
NavigationRoute criteria: Meaning
Orange route: Shortest route
to the destination, even if it
results in longer travelling time. The route may have un-
conventional sections such as secondary roads. ●
Select the desired route by pressing it.
The setting f or the r
oute criteria in the Route
options menu is changed accordingly.
If no route is selected, then route guidance
starts automatically after about one minute
using the setting selected in the Route op- tions .
Navigation announcements (audible recom-
mendations for the driver)
Once the route has been calculated, the sys-
tem gives the first navigation announcement.
Up to 3 navigation announcements are given
before a turn, e.g. “Prepare to turn left”,
“Turn left in 300 metres” and “Now turn left”.
● Press the adjustment knob ››
›
Fig. 1 12 to
li s
t
en to the last audible navigation instruc-
tion.
The distances indicated largely depend on
the type of road and the speed at which you
are driving. For instance, navigation an-
nouncements are given much earlier on mo-
torways than on urban roads.
Appropriate navigation announcements are
also given on multi-lane roads, branching roads and at roundabouts, for example: “At
the round
about, take the second exit.”
A navigation announcement informs you
when you have reached your “destination”.
A navigation announcement informing you
that you have reached the “destination area”
is given if the exact destination cannot be
reached because it is located in a non-digi-
tised area. It also indicates the cardinal point
and the distance to the previously defined
destination. Navigation resumes “offroad”.
During dynamic route guidance , you receive
information about reported traffic congestion
on the route. An additional navigation an-
nouncement is given if the route is recalcula-
ted due to traffic congestion.
During a navigation announcement, you can
change its volume using the button
››› Fig. 1 10 up to a predefined minimum or
m ax
imum
volume. The following navigation
recommendations will then be made at the
adjusted volume.
For other adjustments to the navigation rec-
ommendations, see Navigation an-
nouncements settings. ››› page 70. Note
If you miss a turning during route guidance
and are c urr
ently unable to turn back, keep
on driving until the navigation system offers
a new route. Note
The quality of the navigation recommenda-
tions giv
en by the Infotainment system de-
pends on the navigation data available and
any reported traffic problems. Route
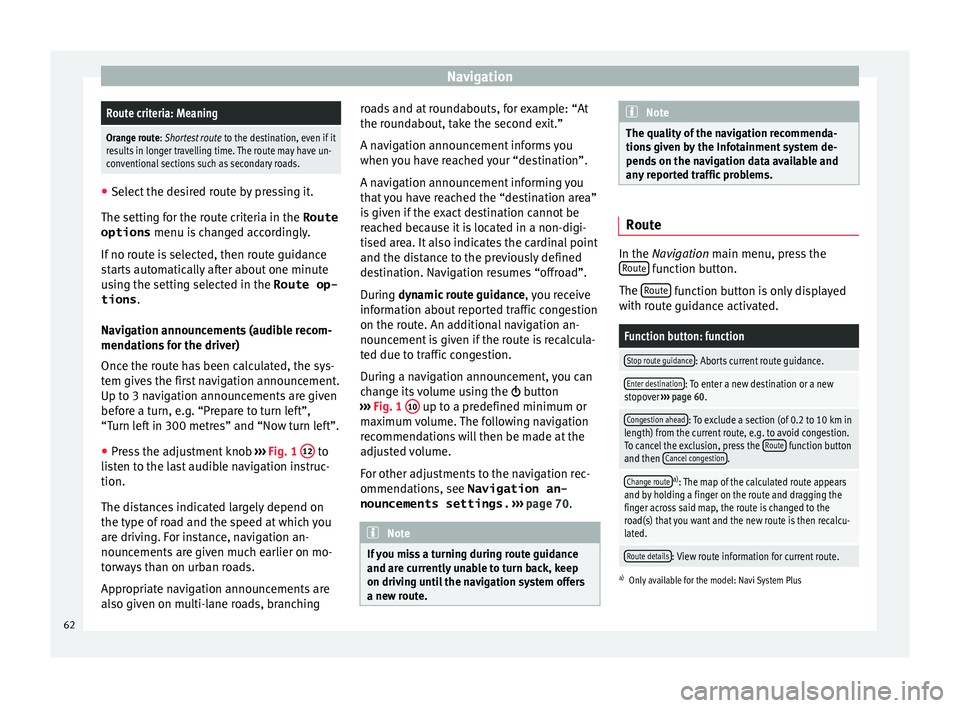
In the Navigation main menu, press the
R out
e function button.
The Rout
e function button is only displayed
w ith r
out
e guidance activated.
Function button: function
Stop route guidance: Aborts current route guidance.
Enter destination: To enter a new destination or a new
stopover ››› page 60.
Congestion ahead: To exclude a section (of 0.2 to 10 km in
length) from the current route, e.g. to avoid congestion.
To cancel the exclusion, press the Route
function button
and then Cancel congestion.
Change routea)
: The map of the calculated route appears
and by holding a finger on the route and dragging the
finger across said map, the route is changed to the
road(s) that you want and the new route is then recalcu-
lated.
Route details: View route information for current route.
a) Only available for the model: Navi System Plus
62
Page 68 of 108
NavigationFunction button: function
Position: current vehicle position in coordinates and GPS
status (satellite reception).
a) This function button is only shown when route guidance is
not active or when predictive route guidance is active.
Press the function button to close the split
sc r
een.
At any moment during navigation, pressing
inside the map will make a pop-up menu ap-
pear with the following functions:
Function button: function
Street name or coordinates: shows the details of the point
selected on the map.
Only when you press on an icon on the map:
POI: name of the point of interest (when only one
appears on the map).
Group of POIs: more points of interest (when you
press on the map on various POIs grouped togeth-
er).
Favourite: name of the favourite.
Home: Home address.
Start route guidance: starts guidance directly.
Add stopover destination: only when you have an active
route.
Search nearby: enters in the search menu, but only for the
area around the point selected on the map.
Function button: function
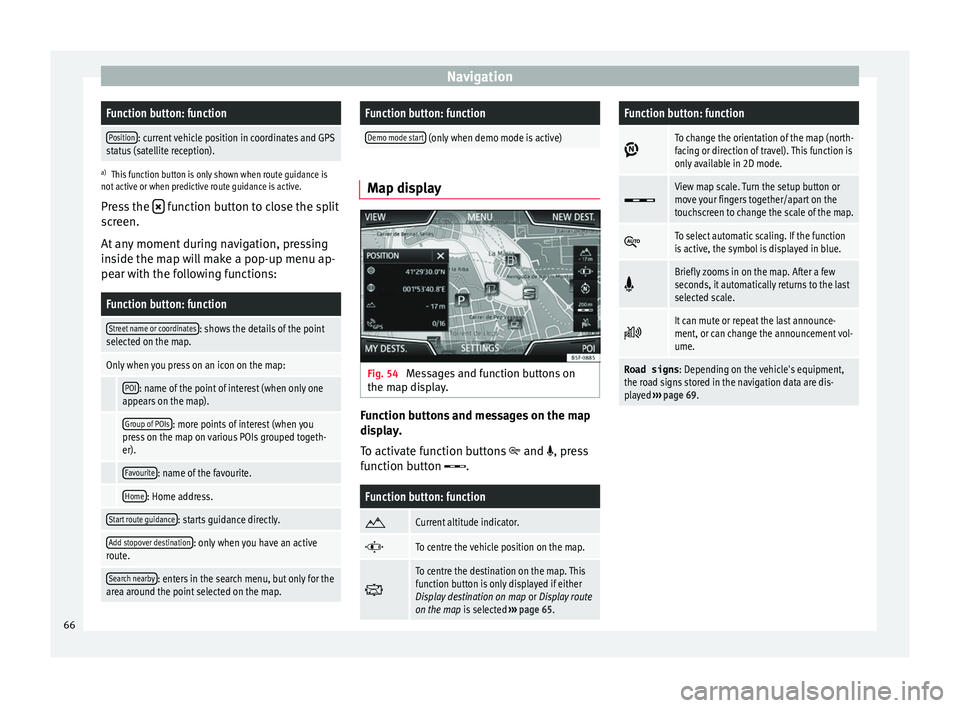
Demo mode start (only when demo mode is active) Map display
Fig. 54
Messages and function buttons on
the m ap di
s
play. Function buttons and messages on the map
di
s
p
lay.
To activate function buttons
and , press
function button .
Function button: function
Current altitude indicator.
To centre the vehicle position on the map.
To centre the destination on the map. This
function button is only displayed if either
Display destination on map
or Display route
on the map is selected ››› page 65.
Function button: function
To change the orientation of the map (north-
facing or direction of travel). This function is
only available in 2D mode.
View map scale. Turn the setup button or
move your fingers together/apart on the
touchscreen to change the scale of the map.
To select automatic scaling. If the function
is active, the symbol is displayed in blue.
Briefly zooms in on the map. After a few
seconds, it automatically returns to the last
selected scale.
It can mute or repeat the last announce-
ment, or can change the announcement vol-
ume.
Road signs
: Depending on the vehicle's equipment,
the road signs stored in the navigation data are dis-
played ››› page 69. 66
Page 71 of 108
Navigation
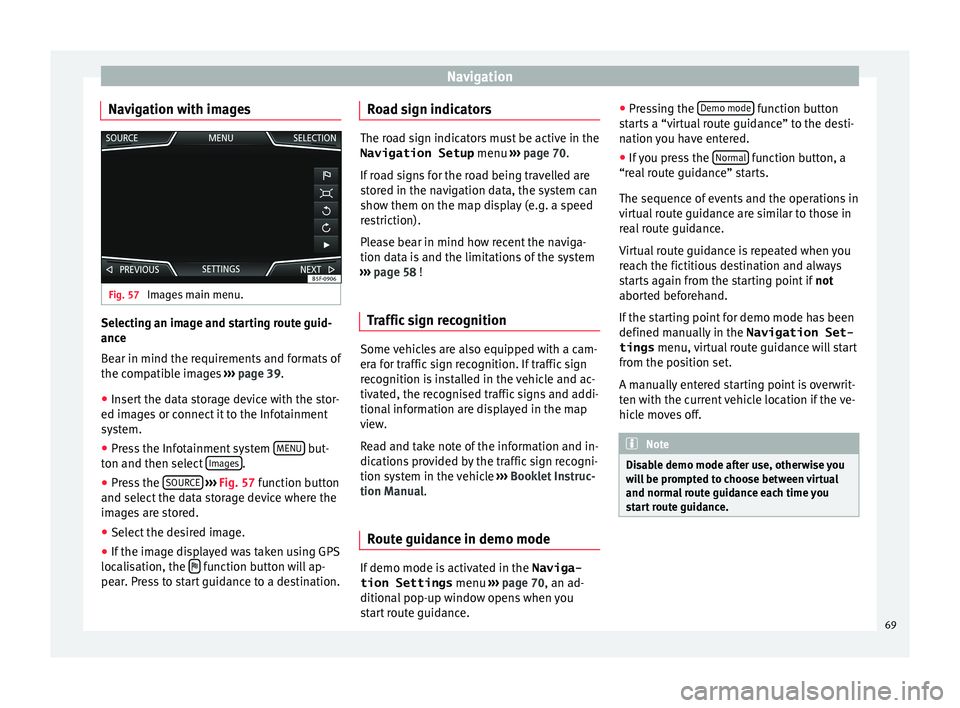
Navigation with images Fig. 57
Images main menu. Selecting an image and starting route guid-
anc
e
B e
ar in mind the requirements and formats of
the compatible images ››› page 39.
● Insert the data storage device with the stor-
ed image
s or connect it to the Infotainment
system.
● Press the Infotainment system MENU but-
t on and then sel
ect
Images .
● Press the SOURC
E
› ›
› Fig. 57
function button
and select the data storage device where the
images are stored.
● Select the desired image.
● If the image displayed was taken using GPS
localis
ation, the function button will ap-
pe ar
. Pr
ess to start guidance to a destination. Road sign indicators The road sign indicators must be active in the
Navigation Setup menu ›››
page 70.
If road signs for the road being travelled are
stored in the navigation data, the system can
show them on the map display (e.g. a speed
restriction).
Please bear in mind how recent the naviga-
tion data is and the limitations of the system
››› page 58 !
Traffic sign recognition Some vehicles are also equipped with a cam-
er
a f
or tr
affic sign recognition. If traffic sign
recognition is installed in the vehicle and ac-
tivated, the recognised traffic signs and addi-
tional information are displayed in the map
view.
Read and take note of the information and in-
dications provided by the traffic sign recogni-
tion system in the vehicle ›››
Booklet Instruc-
tion Manual.
Route guidance in demo mode If demo mode is activated in the
Naviga-
tion Settings menu ››
›
page 70, an ad-
ditional pop-up window opens when you
start route guidance. ●
Pres
sing the Demo mode function button
s t
ar
ts a “virtual route guidance” to the desti-
nation you have entered.
● If you press the Normal function button, a
“r e
al
route guidance” starts.
The sequence of events and the operations in
virtual route guidance are similar to those in
real route guidance.
Virtual route guidance is repeated when you
reach the fictitious destination and always
starts again from the starting point if not
aborted beforehand.
If the starting point for demo mode has been
defined manually in the Navigation Set-
tings menu, virtual route guidance will start
from the position set.
A manually entered starting point is overwrit-
ten with the current vehicle location if the ve-
hicle moves off. Note
Disable demo mode after use, otherwise you
wi l
l be prompted to choose between virtual
and normal route guidance each time you
start route guidance. 69
Page 73 of 108
NavigationFunction button: function
Select preferred fuel station: The selected petrol station
mark will be shown before other points of interest in
the search.
Fuel warning: The warning to refuel is active.
If the fuel level reaches the reserve level, the corre-
sponding warning is generated which permits the
search for petrol stations.
Version information: Information on the stored navigation
data.
Maximum speeds: Shows the speed limits, depending on
the road, for the current country.
Advanced settings: To make advanced adjustments to the
navigation.
Time display: displayed during route guidance.
Estimated time of arrival: The estimated time of arrival
at the final destination is displayed.
Duration: The estimated travelling time to the final
destination is displayed.
Status line: displayed during route guidance.
Destination: The distance calculated to final desti-
nation is displayed.
Next stopover: The calculated distance until next
stopover is displayed.
Note: National border crossed: Displays the speed lim-
its of the country in question when crossing the bor-
der.
Demo mode: When Demo mode is activated and
route guidance is started, virtual guidance to the en-
tered destination can be initiated ››› page 69.
Function button: function
Define demo mode starting point: if demo mode is acti-
vated, a fictitious starting point for virtual route
guidance can be defined when the vehicle is sta-
tionary.
Waypoint modeb) : To start Offroad navigation.
a) This function depends on the country.
b) Only available for the model: “Navi System Plus”.
Navigation in Offroad mode*
Introduction 3 Only
available for the model: Navi System Plus
O
ffroad* navigation is a function for offroad
driving that provides directions in “non-digi-
tised areas” at low speeds.
Non-digitised areas are areas about which
the system does not have information for the
streets or terrain. It does not detect streets,
buildings or natural limits such as mountains
or rivers, although they may be shown on the
map.
Offroad* navigation is not suitable for driving
on conventional roads as it does not detect
one-way streets, motorway entries or similar. Offroad Navigation Menu 3 Only available for the model: Navi System Plus
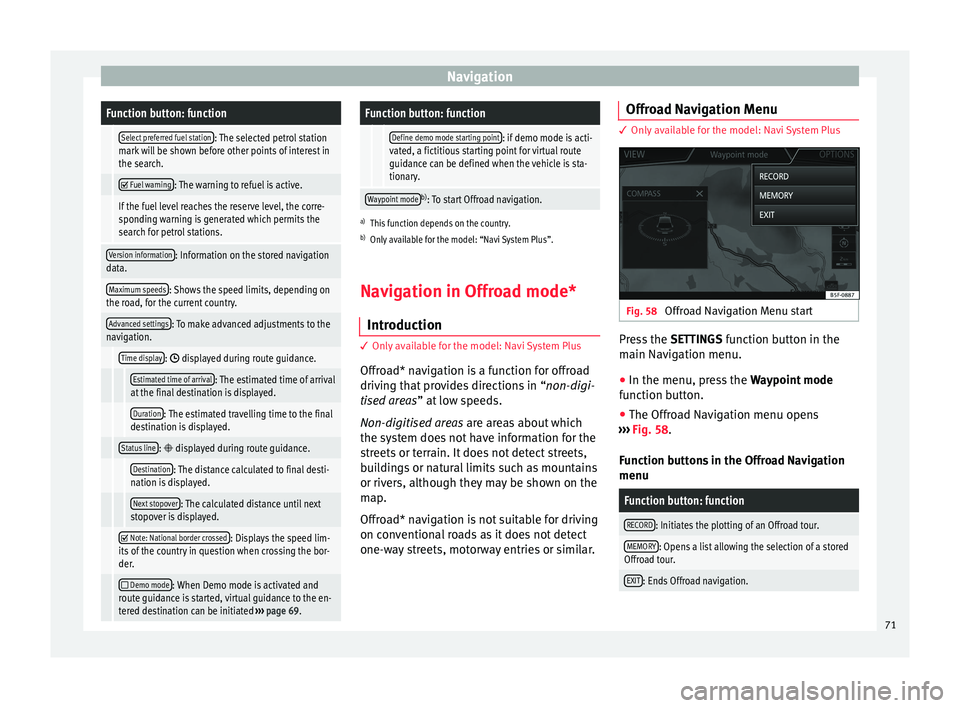
Fig. 58
Offroad Navigation Menu start Press the
SETTINGS function button in the
m ain Nav
igation menu.
● In the menu, press the Way
point mode
function button.
● The Offroad Navigation menu opens
›››
Fig. 58.
Function buttons in the Offroad Navigation
menu
Function button: function
RECORD: Initiates the plotting of an Offroad tour.
MEMORY: Opens a list allowing the selection of a stored
Offroad tour.
EXIT: Ends Offroad navigation. 71