2017 Seat Mii ESP
[x] Cancel search: ESPPage 2 of 28

SEAT S.A. is permanently concerned about continuous development of its t\
ypes and models. For this reason we ask you to under-
stand, that at any given time, changes regarding shape, equipment and te\
chnique may take place on the car delivered. For this reason
no right at all may derive based on the data, drawings and descriptions \
in this current handbook.
All texts, illustrations and standards in this handbook are based on the\
status of information at the time of printing. Except for error
or omission, the information included in the current handbook is valid a\
s of the date of closing print.
Re-printing, copying or translating, whether total or partial is not all\
owed unless SEAT allows it in written form.
SEAT reserves all rights in accordance with the “Copyright” Act.
All rights on changes are reserved.
❀This paper has been manufactured using bleached non-chlorine cellulose.
© SEAT S.A. - Reprint: 15.08.16
About this manual
This manual contains information, recommen-
dations, advice and warnings related to your
radio system. The other publications in the
vehicle documentation contain further infor -
mation of which you should be aware for your
own safety and for that of your passengers.
Ensure that the onboard documentation is
kept in the vehicle at all times. This is espe -
cially important when lending or selling the
vehicle to another person.
This manual contains a description of the
equipment supplied with the vehicle at the
time of press. Some of the units described
herein will not be available until a later date or
is only available in certain markets. The
illustrations are intended as a general
guide and may vary from the equipment �tted
in your vehicle in some details.
The screen colour and the colour of the infor -
mation displayed on it can vary according to
vehicle model.
Directions and positions of components (e.g.
right, left, front, rear) are always relative to the
direction of travel of the vehicle unless other -
wise stated.
The equipment marked with an aster -
isk* is �tted as standard only in certain
versions, and is only supplied as op -
tional extras for some versions, or are
only offered in certain countries.
® All registered marks are indicated with
®. Although the copyright symbol does
not appear, it is a copyrighted mark.
>> The section is continued on the follow -
ing page.
WARNING
Texts preceded by this symbol contain infor -
mation on safety. They warn you about possi -
ble dangers of accident or injury.
CAUTION
Texts with this symbol draw your attention to
potential sources of damage to your vehicle.
For the sake of the environment
Texts preceded by this symbol contain rele-
vant information concerning environmental
protection.
Note
Texts preceded by this symbol contain additio -
nal information.
Page 6 of 28

Introduction
Introduction Gener a
l
operating information
Safety notes WARNING
Distracting the driver in any way can lead to
an acc ident
and cause injuries. Operating the
radio system can distract you from the road.
● Always drive carefully and responsibly.
● Select volume settings that allow you to
eas
ily hear signals from outside the vehicle
at all times (e.g. emergency services sirens
and horns).
● If you set the volume excessively high you
may
suffer damage to your ears. This can also
happen if you are exposed to an excessively
high volume even for a short time. WARNING
The volume level may suddenly change when
you sw it
ch audio source or connect a new au-
dio source.
● Reduce the base volume before switching
audio source or c
onnecting a new audio
source. WARNING
Connecting, inserting or removing a data me-
dium whil e driv
ing can distract your attention
from the traffic and cause an accident. WARNING
Connecting leads for external devices may
ob s
truct the driver.
● Arrange the connecting leads so that they
do not ob
struct the driver. WARNING
External devices that are loose or not proper-
ly sec ur
ed could move around the interior
during a sudden driving or braking manoeu-
vre or an accident, and cause damage or in-
jury.
● Do not place or fit external equipment to
the doors, wind
screen, steering wheel, dash
panel, the backs of the seats, on top of or
near the area marked “AIRBAG” or between
these areas and the occupants. External devi-
ces can cause serious injury in an accident,
especially when the airbags inflate. WARNING
Opening a CD player's housing may lead to
injuries fr
om invisible laser radiation.
● Only have CD players repaired by a special-
ised work
shop. CAUTION
The unit can be damaged by incorrect inser-
tion of a d at
a medium or insertion of an in-
compatible data medium.
● When inserting and removing a CD, always
hold it
at a right angle to the front of the
drive without tilting so as not to scratch it.
● If a CD or DVD is inserted while another is
alre
ady in the unit or being ejected, the DVD
drive may be irreparably damaged. Always
wait until the data medium is completely
ejected. CAUTION
Any foreign objects attached to a data medi-
um and non-rou nd d
ata media can damage
the CD player.
● Only clean, 12-cm standard CDs should be
used!
–Do not affi
x stickers or other items to the
data medium. Stickers may peel off and
damage the drive.
– Do not use printable data media. Printed
labels and coverings may peel off and
damage the CD drive.
– Do not insert 8-cm mini CD singles or
non-round CDs (irregularly-shaped CDs).
– Do not insert DVD-Plus discs, Dual Discs
or Flip Discs, as these are thicker than
normal CDs. 4
Page 7 of 28

Introduction
CAUTION
The vehicle loudspeakers may be damaged if
the v o
lume is too high or the sound is distor-
ted. Additional displays
Depending on the vehicle, the factory-set as-
si
s
tance systems are temporarily displayed
on the screen. These displays disappear au-
tomatically when they are no longer required.
All displays appear only after completely re-
starting the radio system. Note
● Only a sm
all amount of pressure is needed
to operate the unit.
● Due to country-specific legislation, certain
function
s cannot be selected when the vehi-
cle is travelling above a certain speed.
● Using a mobile telephone in the vehicle
may
cause noise from the vehicle loudspeak-
ers.
● On some vehicles with ParkPilot, the vol-
ume of the audio sourc
e is automatically low-
ered when reverse gear is selected. Rotary/push knobs, unit and function
b
utt
on
s Overview
● Rotary/push knobs.
● Labelled unit buttons (har
d keys).
● Function buttons (soft k
eys).
Rotary/push knobs
The left-hand rotary/push knob
››› Fig. 1 8 is referred to as the volume con-
tro l
or the on/off switch.
The right-hand rotary/push knob 14 is refer-
r ed t
o a
s the setting knob.
Unit buttons and function buttons
The labelled buttons on the unit are referred
to as “unit buttons” and are pictured as a
button symbol with, e.g. the MEDIA unit but-
t on ›
›
› Fig. 1 10 .
Ther e ar
e 5 u
nlabelled unit buttons below the
screen ›››
Fig. 1 11 . These unit buttons are re-
f err
ed t
o as “function buttons” as their func-
tions depend on the active function mode.
The function assigned to a function button is
shown on the corresponding button in the
lower section of the display (e.g. ›››
Fig. 2). Switching on and off ●
To switch the unit on or off manually, briefly
pre s
s the rotary knob ››› Fig. 1 8 .
When the unit i
s switched on the system
starts up. The last audio source used is
played at the last selected volume setting,
provided this does not exceed the preselec-
ted “switch-on volume” ( Volume ›››
page 18).
D ependin
g on the unit and country in ques-
tion, the unit is switched off when the engine
is turned off or the key is removed. If the unit
comes on again without the ignition being
switched on, it will switch off automatically
after 30 minutes (switch-off delay).
Energy management
If, when the ignition is switched off and the
unit switched on, the battery voltage falls be-
low the minimum onboard power supply volt-
age, an audible warning sounds and LOW
BATTERY appears. You should switch the
unit off.
Anti-theft encryption
Once the anti-theft code has been entered for
the first time, it remains stored in the vehicle
(convenience radio coding). If you have to en-
ter the anti-theft code manually, for example,
if you have fitted the unit in another vehicle,
consult a Seat dealer. »
5
Page 12 of 28

Audio mode
Storing stations on the station but-
t on
s Fig. 8
Selecting the frequency band. Fig. 9
Station buttons display. When storing a station to a station button,
an
y
s
tation already stored to the same sta-
tion button in the same memory level will be
overwritten.
Assigning individual station buttons manual-
ly
● Select the frequency band.
● Select the station. ●
Switc
h to Station buttons.
● Press and hold the chosen s
tation button
until you hear a tone.
● The station currently playing ( RADIO 1)
wi
ll then be stored to that station button.
The station button to which the station cur-
rently playing is assigned is displayed high-
lighted on the screen ››› Fig. 8.
In the AM or DAB mode, it is possible to up-
date the station list by pressing down and
holding the function button ››› Fig. 8.
Tuning in to stored stations ●
Select the frequency band with the stored
s t
ation
you are looking for.
● Briefly press the station b
utton to which
the desired station is stored.
Depending on the settings it is possible to
switch between stations of a frequency band
with the arrow buttons and
(Buttons
with arrows: › ›
›
page 18).
A stored station can only be played if it can
be received at your current location. Digital radio mode (DAB, DAB+
and audio DMB)*
Introduction Some units are equipped with an additional
DAB r
a
dio receiver.
The DAB radio receiver supports the DAB,
DAB+ and DMB-Audio broadcasting stand-
ards.
In Europe, digital radio is transmitted via
Band III frequencies (174 MHz to 240 MHz)
and the L Band (1452 MHz to 1492 MHz).
The frequencies of the two bands are referred
to as “channels” and each has a channel
name e.g. 12 A .
Several DAB stations are combined into one
channel with the additional services availa-
ble in a “block”.
DAB is currently not available in all areas . In
areas without DAB, is displayed in DAB ra-
dio mode. The system and functions settings
allow in this case a change of FM station
››› page 18. In the system and functions
settings there is the configuration of other
settings for the tracking of stations and for
playing DAB notifications. Note
The radio stations are responsible for the
cont ent
of the information sent.10
Page 13 of 28

Audio mode
Operation Fig. 10
RADIO main menu: Selecting the fre-
quency b and. Fig. 11
RADIO main menu: Station buttons
di s
p
layed. Starting DAB radio mode
● Press the RADIO unit button.
● Press the D
AB
› ›
› Fig. 10
function button to
start the DAB Radio mode. After switching to DAB radio mode, the avail-
able fr
equency bands (FM, AM and DAB 1)
) are
displayed in the bottom line of the screen
››› Fig. 10. If the RADIO unit button is pressed
ag ain, mor
e f
eatures for the DAB radio receiv-
er will be displayed.
The last DAB radio station tuned in ( RADIO
21 ) is displayed in the centre line of the
screen and is played, if it can still be received
in the current location. The group of selected
stations is displayed in the upper bar of the
screen to the left ( DAB 3) ››› Fig. 11 .
Additional DAB stations
Some DAB stations temporarily or perma-
nently offer additional stations, (for example,
for broadcasting sports events).
If there is an additional station available, this
will also be indicated in the main display
next to the name of the station. In the list of
stations, additional stations are identified by
“2nd” on the right margin.
To move to an additional station, select the
station list with the right rotary knob
››› page 2 ››› Fig. 1 14 .
A lt
ern
atively, the selection is made by repeat-
edly pressing the station button correspond-
ing to the main station ››› page 10. The name of the additional available station
is di
splayed in the centre of the screen in the
main DAB menu.
The additional stations cannot be stored.
Changing DAB radio stations
The function and operation are analogous to
the description for FM and AM 1)
Radio mode.
Manually scrolling through the channels of
the DAB frequency band
● Press the function button Frequency
b and.
The s t
ation that you are currently listening to
is shown in the middle of the screen. If the
tuned channel broadcasts a DAB set, its
name will be displayed under the channel
number. If a new valid channel is selected,
the set received in it will play the first DAB
station. 1)
This depends on the country and unit in question.
11
Page 14 of 28

Audio mode
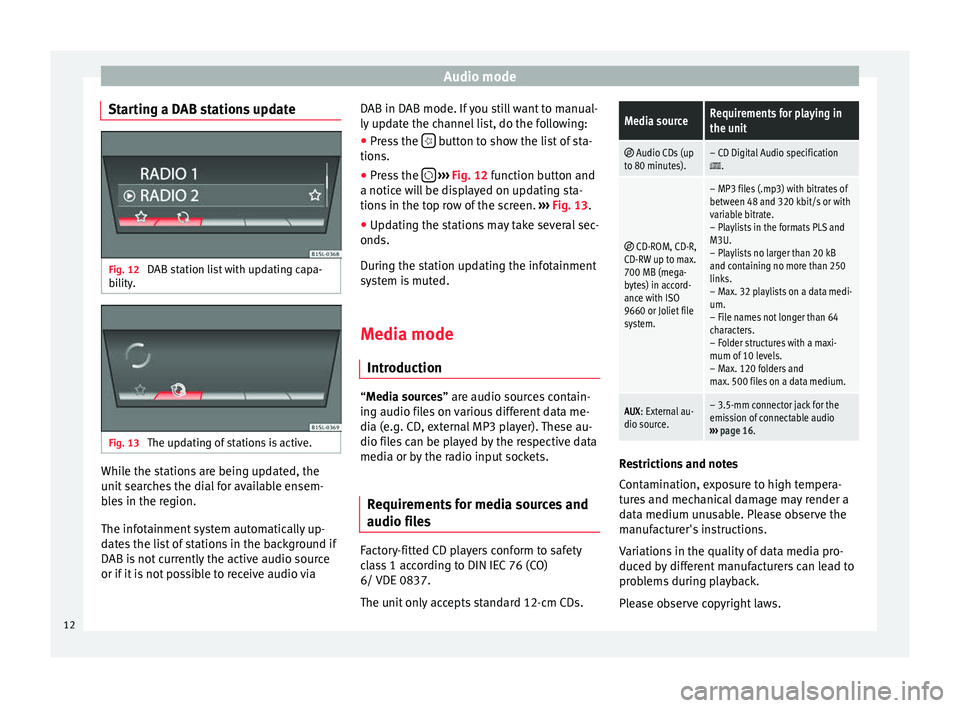
Starting a DAB stations update Fig. 12
DAB station list with updating capa-
bi lity
. Fig. 13
The updating of stations is active. While the stations are being updated, the
u
nit
se
arches the dial for available ensem-
bles in the region.
The infotainment system automatically up-
dates the list of stations in the background if
DAB is not currently the active audio source
or if it is not possible to receive audio via DAB in DAB mode. If you still want to manual-
ly updat
e the channel list, do the following:
● Press the button to show the list of sta-
tion s.
● Pr e
ss the
› ››
Fig. 12
f
unction button and
a notice will be displayed on updating sta-
tions in the top row of the screen. ››› Fig. 13.
● Updating the stations may take several sec-
onds.
Durin
g the station updating the infotainment
system is muted.
Media mode
Introduction “M
edia sources” are audio sources contain-
in g audio fi
les on various different data me-
dia (e.g. CD, external MP3 player). These au-
dio files can be played by the respective data
media or by the radio input sockets.
Requirements for media sources and
audio file
s Factory-fitted CD players conform to safety
c
l
a
ss 1 according to DIN IEC 76 (CO)
6/ VDE 0837.
The unit only accepts standard 12-cm CDs.
Media sourceRequirements for playing in
the unit
Audio CDs (up
to 80 minutes).– CD Digital Audio specification.
CD-ROM, CD-R,
CD-RW up to max.
700 MB (mega-
bytes) in accord-
ance with ISO
9660 or Joliet file
system.
– MP3 files (.mp3) with bitrates of
between 48 and 320 kbit/s or with
variable bitrate.
– Playlists in the formats PLS and
M3U.
– Playlists no larger than 20 kB
and containing no more than 250
links.
– Max. 32 playlists on a data medi-
um.
– File names not longer than 64
characters.
– Folder structures with a maxi-
mum of 10 levels.
– Max. 120 folders and
max. 500 files on a data medium.
AUX : External au-
dio source.– 3.5-mm connector jack for the
emission of connectable audio
››› page 16. Restrictions and notes
C
ont
amin
ation, exposure to high tempera-
tures and mechanical damage may render a
data medium unusable. Please observe the
manufacturer's instructions.
Variations in the quality of data media pro-
duced by different manufacturers can lead to
problems during playback.
Please observe copyright laws.
12
Page 19 of 28

Audio mode
●
Inter f
erence noise may be heard if the ex-
ternal audio source is powered from the 12-
volt power socket of the vehicle.
● Please read and observe the manufactur-
er's ins
truction manual for the external audio
source. Track information display
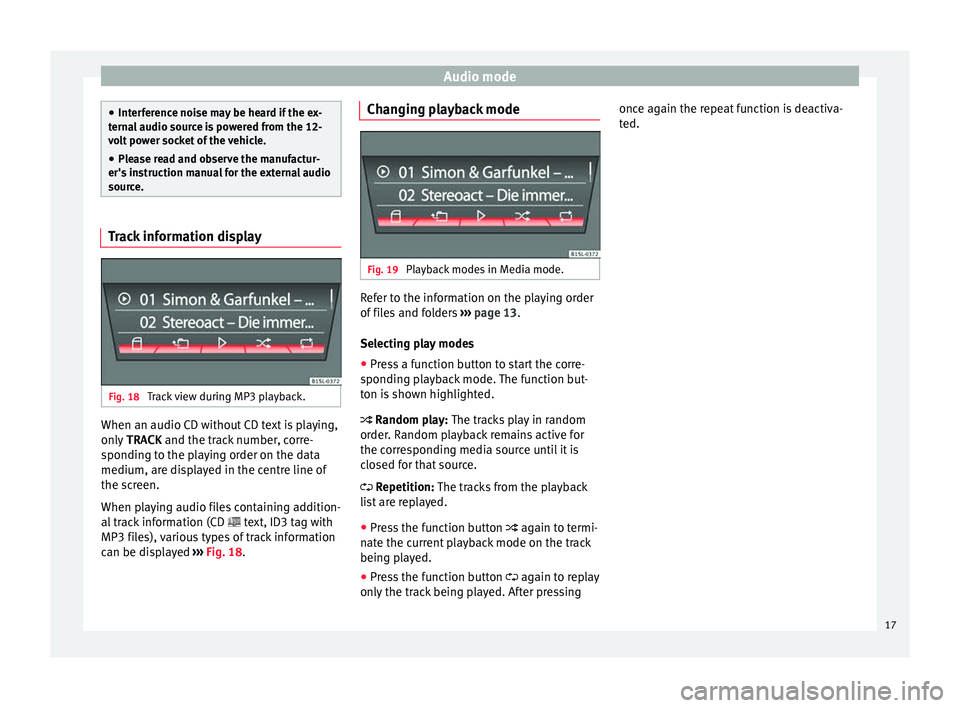
Fig. 18
Track view during MP3 playback. When an audio CD without CD text is playing,
on
ly
TRACK and the tr
ack number, corre-
sponding to the playing order on the data
medium, are displayed in the centre line of
the screen.
When playing audio files containing addition-
al track information (CD text, ID3 tag with
MP3 files), various types of track information
can be displayed ››› Fig. 18. Changing playback mode
Fig. 19
Playback modes in Media mode. Refer to the information on the playing order
of
fi
l
es and folders ››› page 13.
Selecting play modes
● Press a function button to start the corre-
sponding p
layback mode. The function but-
ton is shown highlighted.
Random play: The tracks play in random
order. Random playback remains active for
the corresponding media source until it is
closed for that source.
Repetition: The tracks from the playback
list are replayed.
● Press the function button again to t
ermi-
nate the current playback mode on the track
being played.
● Press the function button again to r
eplay
only the track being played. After pressing once again the repeat function is deactiva-
ted.
17
Page 22 of 28

Settings menu
Once the corresponding FM station has been
f ou
nd,
(FM) is displayed after the station
name. When reception for the corresponding
DAB station returns, the unit will switch back
to DAB mode after a short time.
If the reception of the selected DAB station is
lost and the station cannot be found on the
FM frequency band, the radio will be muted. 20