2017 Seat Mii USB
[x] Cancel search: USBPage 5 of 32
Overview
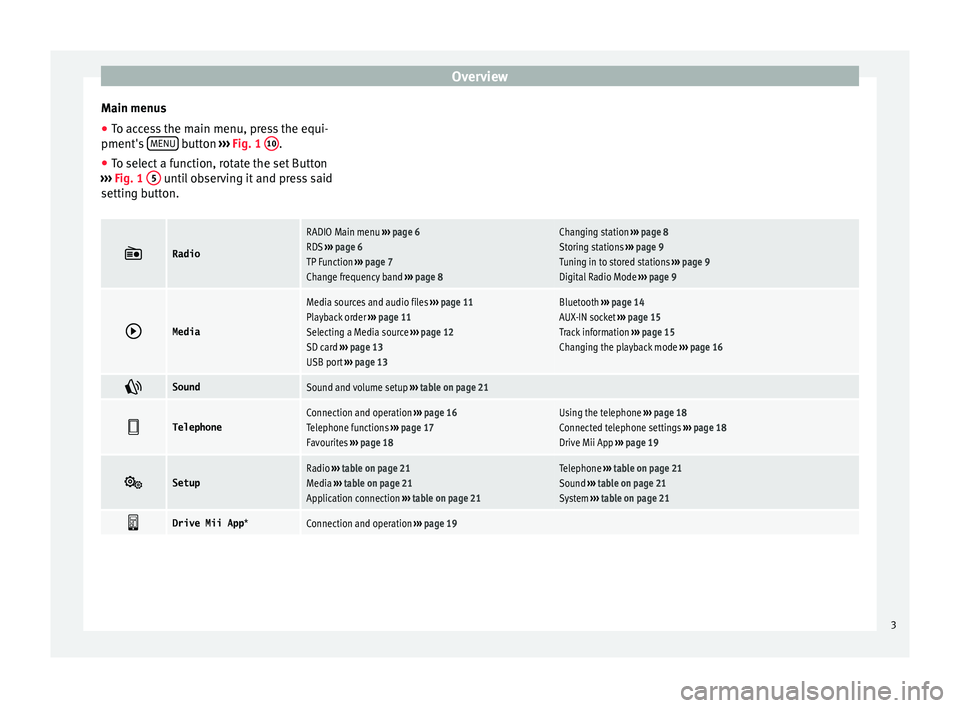
Main menus
● To access the main menu, press the equi-
pment's MENU button
›››
Fig. 1
10 .
● To select a function, rotate the set Button
› ›
›
Fig. 1 5 until observing it and press said
settin g b
utt
on.
Radio
RADIO Main menu
››› page 6
RDS ››› page 6
TP Function ››› page 7
Change frequency band ››› page 8Changing station ››› page 8
Storing stations ››› page 9
Tuning in to stored stations ››› page 9
Digital Radio Mode ››› page 9
Media
Media sources and audio files
››› page 11
Playback order ››› page 11
Selecting a Media source ››› page 12
SD card ››› page 13
USB port ››› page 13Bluetooth ››› page 14
AUX-IN socket ››› page 15
Track information ››› page 15
Changing the playback mode ››› page 16
SoundSound and volume setup
››› table on page 21
TelephoneConnection and operation
››› page 16
Telephone functions ››› page 17
Favourites ››› page 18Using the telephone ››› page 18
Connected telephone settings ››› page 18
Drive Mii App ››› page 19
SetupRadio
››› table on page 21
Media ››› table on page 21
Application connection ››› table on page 21Telephone ››› table on page 21
Sound ››› table on page 21
System ››› table on page 21
Drive Mii App
*Connection and operation ››› page 19 3
Page 14 of 32
Audio mode
The audio files st
or ed on data storage devi-
ces are often organised by means of folders
and playlists to determine a certain
playing order.
Tracks, folders and playback lists on a data
device are each sorted based on name in al-
phanumeric order.
Sub-folders are treated as folders and are
numbered in accordance with the sequence
found on the CD.
The illustration ››› Fig. 15 shows an example
of a MP3 data device, that contains tracks, ,
folders and sub-folders .
The tracks and folders on this data device are
displayed and played based on the following
order:
Tracks 1 and
2 in the r
oot directory
(ROO T) of
the data media.
Tracks 3 and
4 in the fir
st folder F1 of
the r oot
directory of the data device (dis-
play: 01).
Track 5 in the fir
st subfolder F1.1 of the
f o
lder F1 (display: 02).
Track 6 in the fir
st subfolder F1.1.1 of
the s ubf
older F1.1 (display: 03).
Track 7 in the sec
ond subfolder F1.2 of
the f o
lder F1 (display: 04).
Tracks 8 and
9 in the sec
ond folder F2
(di s
play: 05).
1.
2.
3.
4.
5.
6. With regard to the playing order, playlists
are tre
ated like folders. Note
The play order can be modified by selecting
differ ent
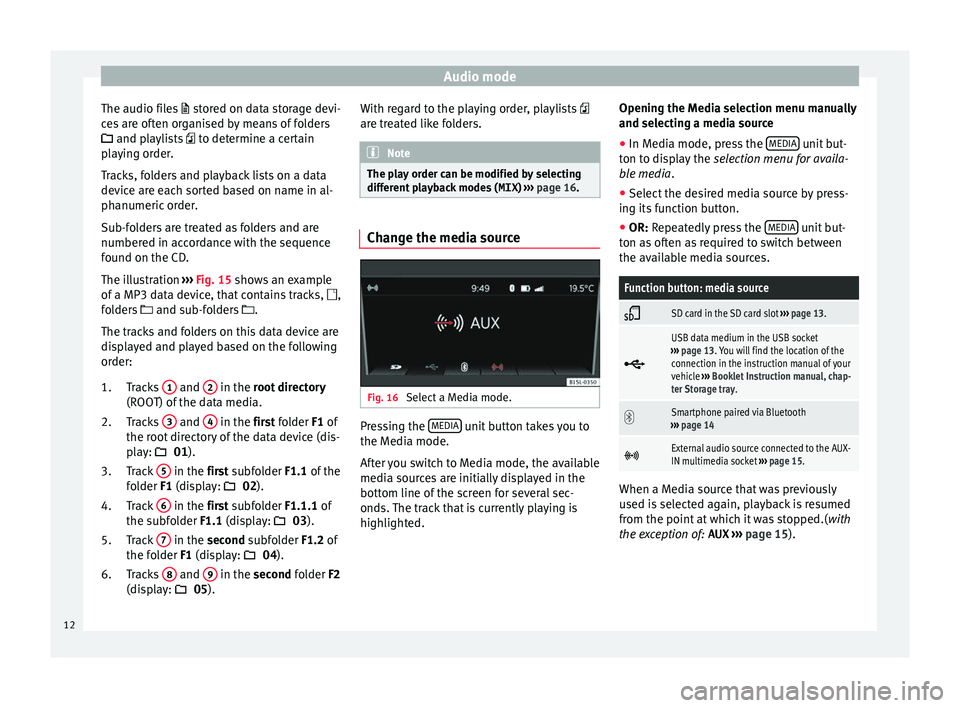
playback modes ( MIX) ››› page 16. Change the media source
Fig. 16
Select a Media mode. Pressing the
MEDIA unit button takes you to
the M edi
a mode.
Af
ter you switch to Media mode, the available
media sources are initially displayed in the
bottom line of the screen for several sec-
onds. The track that is currently playing is
highlighted. Opening the Media selection menu manually
and selecting a medi
a source
● In Media mode, press the MEDIA unit but-
t on t
o di
splay the selection menu for availa-
ble media.
● Select the desired media source by press-
ing its f
unction button.
● OR: Repeatedly press the MEDIA unit but-
t on a
s
often as required to switch between
the available media sources.
Function button: media source
SD card in the SD card slot
››› page 13.
USB data medium in the USB socket
››› page 13. You will find the location of the
connection in the instruction manual of your
vehicle ››› Booklet Instruction manual, chap-
ter Storage tray.
Smartphone paired via Bluetooth
››› page 14
External audio source connected to the AUX-
IN multimedia socket
››› page 15. When a Media source that was previously
u
sed i
s
selected again, playback is resumed
from the point at which it was stopped.( with
the exception of: AUX ››› page 15).
12
Page 15 of 32
Audio mode
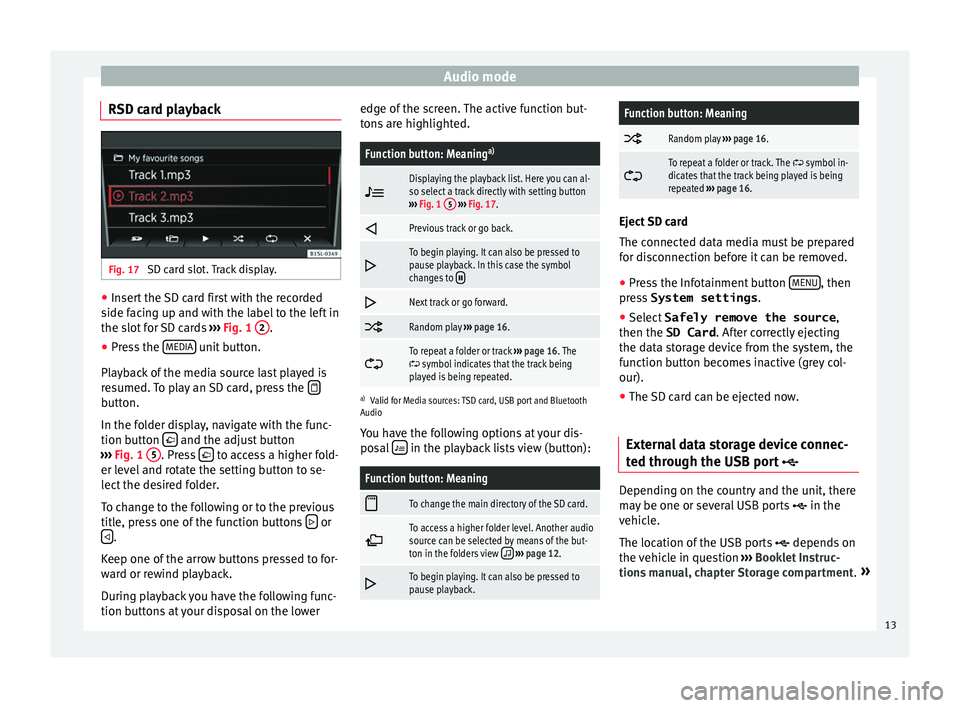
RSD card playback Fig. 17
SD card slot. Track display. ●
Insert the SD card first with the recorded
s ide f
ac
ing up and with the label to the left in
the slot for SD cards ››› Fig. 1 2 .
● Press the MEDIA unit button.
Pl a
y
back of the media source last played is
resumed. To play an SD card, press the button.
In the f
o
l
der display, navigate with the func-
tion button and the adjust button
› ›
›
Fig. 1 5 . Press
to access a higher fold-
er l ev
el
and rotate the setting button to se-
lect the desired folder.
To change to the following or to the previous
title, press one of the function buttons or
.
K eep one of
the arr
ow buttons pressed to for-
ward or rewind playback.
During playback you have the following func-
tion buttons at your disposal on the lower edge of the screen. The active function but-
tons
are highlighted.
Function button: Meaning a)
Displaying the playback list. Here you can al-
so select a track directly with setting button
››› Fig. 1 5
››› Fig. 17.
Previous track or go back.
To begin playing. It can also be pressed to
pause playback. In this case the symbol
changes to
Next track or go forward.
Random play
››› page 16.
To repeat a folder or track
››› page 16. The symbol indicates that the track being
played is being repeated.
a) Valid for Media sources: TSD card, USB port and Bluetooth
Audio
You have the following options at your dis-
posal in the playback lists view (button):
Function button: Meaning
To change the main directory of the SD card.
To access a higher folder level. Another audio
source can be selected by means of the but-
ton in the folders view
››› page 12.
To begin playing. It can also be pressed to
pause playback.
Function button: Meaning
Random play
››› page 16.
To repeat a folder or track. The symbol in-
dicates that the track being played is being
repeated ››› page 16. Eject SD card
The connect
ed d
ata media must be prepared
for disconnection before it can be removed.
● Press the Infotainment button MENU , then
pre s
s System settings .
● Select Safely remove the source ,
then the SD Card . After c
orrectly ejecting
the data storage device from the system, the
function button becomes inactive (grey col-
our).
● The SD card can be ejected now.
External data storage device connec-
ted through the USB por
t Depending on the country and the unit, there
m
a
y
be one or several USB ports in the
vehicle.
The location of the USB ports depends on
the vehicle in question ››› Booklet Instruc-
tions manual, chapter Storage compartment. »
13
Page 16 of 32
Audio mode
Audio files on an external data medium con-
nect ed t
o the USB por
t can be played and
controlled via the Infotainment system.
Where this manual refers to external data
storage devices, this means USB mass stor-
age devices containing supported audio
files, such as MP3 players, iPods™ and USB
sticks.
Only compatible audio files are shown. Other
files are ignored.
The remaining operations for handling exter-
nal data media (change of track, track selec-
tion and activating playback modes) are per-
formed similarly to those of the other audio
sources (e.g “Playing SD card” ››› page 13.
Instructions and restrictions
The number of USB ports and the compat-
ibility with Apple™ devices, as well as with
other media players, depend on the unit.
The USB port supplies the usual USB volt-
age of 5 volts for a USB connection.
Due to the large number of different data me-
dia and various iPod™, iPad™ and iPhone™
generations available, it is not possible to
guarantee error-free operation of all func-
tions described here.
Take into account all other instructions and
limitations regarding requirements for media
sources ››› page 11. Disconnecting
The connected d
ata media must be prepared
for disconnection before it can be removed.
● Press the Infotainment button MENU , then
pr e
s
s System settings .
● Select Saf
ely
r
emove the source , then the
USB . After correctly ejecting the data stor-
ag e dev
ic
e from the system, the function but-
ton becomes inactive (grey colour).
● Now the data storage device can be discon-
nected.
Pla
yback via Bluetooth ® Connection of an audio source via Bluetooth
In Bluet
ooth Audio mode ®
audio fi l
es being
played on a Bluetooth, allows you to listen to
audio files being played on a Bluetooth ®
(e.g., a mobile telephone) connected by
Bluetooth ®
(audio playback by Bluetooth ®
).
Requirements
● The Bluetooth® audio source has to be
compatib
le with the A2DP Bluetooth profile ®
.
● In the Bluetooth settings menu, the
Audio BT (A2DP/AVRCP)
› ›
›
table on page 21
function has to be active. Starting the audio transmission by Blue-
tooth
®
● Activ
ate Bluetooth ®
vis
ibility on the exter-
nal Bluetooth ®
audio source (e.g., mobile tel-
ephone).
● Lower the base volume on the Infotainment
syst
em.
● Press the MEDIA unit button.
● Press the function button to select Blue-
t ooth ®
a s
a media source.
● Initiate a search of the Bluetooth ®
device
de
sired.
● Please refer to the instructions on the
scr
een of the Infotainment system and on the
Bluetooth ®
audio source regarding the rest
of the procedure.
You may still need to manually start playback
on the Bluetooth ®
source. When playback on
the Bluetooth® audio source is stopped, the
Infotainment system remains in Bluetooth ®
Audio mode.
Controlling playback
The extent to which the Bluetooth ®
audio
source can be controlled via the Infotainment
system depends on the connected Blue-
tooth ®
audio source.
With media players that support the AVRCP
Bluetooth ®
profile, playback on the Blue-
tooth ®
audio source can be automatically
started or stopped when the unit is switched
14
Page 21 of 32
Audio mode
Note
● A devic e c
onnected via Bluetooth ®
, if it
supports this profile, it shall always be used
at the same time for calls and audio via Blue-
tooth ®
.
● To manage the media and the telephone
with the connect
ed mobile telephone, consult
and take into consideration the manufactur-
er’s electronics instruction manual. Drive Mii App*
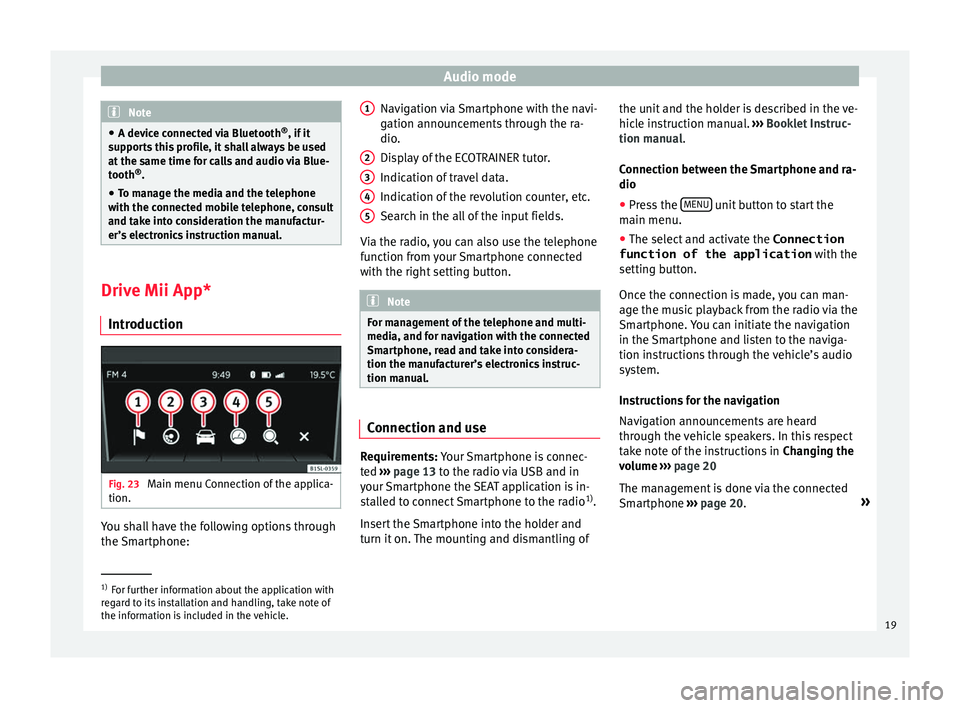
Intr oduction Fig. 23
Main menu Connection of the applica-
tion. You shall have the following options through
the
Sm
ar
tphone: Navigation via Smartphone with the navi-
gation announc
ements through the ra-
dio.
Display of the ECOTRAINER tutor.
Indication of travel data.
Indication of the revolution counter, etc.
Search in the all of the input fields.
Via the radio, you can also use the telephone
function from your Smartphone connected
with the right setting button. Note
For management of the telephone and multi-
media, and f or n
avigation with the connected
Smartphone, read and take into considera-
tion the manufacturer’s electronics instruc-
tion manual. Connection and use
Requirements: Y
our
Sm
artphone is connec-
ted ›››
page 13 to the radio via USB and in
your Smartphone the SEAT application is in-
stalled to connect Smartphone to the radio 1)
.
Insert the Smartphone into the holder and
turn it on. The mounting and dismantling of 1 2
3
4
5 the unit and the holder is described in the ve-
hic
l
e in
struction manual. ››› Booklet Instruc-
tion manual.
Connection between the Smartphone and ra-
dio
● Press the MENU unit button to start the
m ain menu.
● The sel ect
and activate the Connection
function of the application with the
setting b
utton.
Once the connection is made, you can man-
age the music playback from the radio via the
Smartphone. You can initiate the navigation
in the Smartphone and listen to the naviga-
tion instructions through the vehicle’s audio
system.
Instructions for the navigation
Navigation announcements are heard
through the vehicle speakers. In this respect
take note of the instructions in Changing the
volume ››› page 20
The management is done via the connected
Smartphone ››› page 20. »1)
For further information about the application with
re g
ard to its installation and handling, take note of
the information is included in the vehicle. 19
Page 25 of 32

Settings menuMenu options: submenus with repercussion
Remove safely
: With this option you can safely re-
move an SD card inserted in or connected to a USB de-
vice.
Factory settings : You can reset the Radio, Me-
dia , Sound and System factory settings individually
or all together.
System information : Display of unit technical data.
Intellectual property rights : Details of the
software used.
a) Valid only for the FM frequency band.
b) This depends on the country and unit in question.
Functional description of speed-dependent
volume adjustment (GALA)
The speed-dependent volume regulation au-
tomatically increases the volume as the vehi-
cle speed increases.
You can set the degree to which the volume
increases with speed on a scale between 1
and 7.
If a low value is set, the volume increases on-
ly slightly as the speed of the vehicle increa-
ses. At a high setting the volume increases
further. At 0 speed-dependent volume ad-
justment is switched off.
DAB-FM LINKING Function
If reception of the currently selected DAB sta-
tion is lost (e.g. no DAB available), the unit attempts to find the station on the FM fre-
quency band and t
une to it.
Automatic station tracking between frequen-
cy bands only works if the DAB station and
the FM station transmit the same station
identifier or the DAB signal indicates a corre-
sponding station on the FM frequency band.
Once the corresponding FM station has been
found, (FM) is displayed after the station
name. When reception for the corresponding
DAB station returns, the unit will switch back
to DAB mode after a short time.
If the reception of the selected DAB station is
too weak and the station can no longer be
found on the FM frequency band, the radio
will be muted. 23
Page 26 of 32

Other information
Other information Abbr ev
i
ations
A2DPTechnology included by many manufactur-
ers to transmit audio signals via Bluetooth
(Advanced Audio Distribution Profile).
AMModulation of the wave amplitude (medium
wave, MW)
AUX-INAdditional audio input (Auxiliary Input)
DABDigital transmission standard for digital ra-
dio (Digital Audio Broadcasting)
DINGerman Standards Authority (Deutsches In-
stitut für Normung).
EONAssistance for other radio transmission net-
works (Enhanced Other Network)
FMFrequency modulation (ultra-short wave,
UKW)
MP3Audio file compression format.
PINPersonal identification number.
RDSRadio data system.
TPTraffic reports function in Radio mode (Traf-
fic Program).
USBUniversal Serial Bus24
Page 27 of 32

Index
Index
A
Ad dition
al
di
splays . . . . . . . . . . . . . . . . . . . . . . . . . . . . . . . . . 4
Adjusting the output volume . . . . . . . . . . . . . . . . . 15
Anti-theft encryption . . . . . . . . . . . . . . . . . . . . . . . . 5
AUX . . . . . . . . . . . . . . . . . . . . . . . . . . . . . . . . . . . . . 15
AUX-IN multimedia socket . . . . . . . . . . . . . . . . . . . 15
B Basic Volume changing . . . . . . . . . . . . . . . . . . . . . . . . . . . . . . . . 5
Buttons . . . . . . . . . . . . . . . . . . . . . . . . . . . . . . . . . . . 2
C
Code see Anti-theft encryption . . . . . . . . . . . . . . . . . . . 5
Controls . . . . . . . . . . . . . . . . . . . . . . . . . . . . . . . . . . . 2
D
DAB activate . . . . . . . . . . . . . . . . . . . . . . . . . . . . . . . . 10
automatic playback (SCN) . . . . . . . . . . . . . . . . . 10
autostore . . . . . . . . . . . . . . . . . . . . . . . . . . . . . . . 10
broadcasting standards . . . . . . . . . . . . . . . . . . . 10
changing channels . . . . . . . . . . . . . . . . . . . . . . . 10
changing station . . . . . . . . . . . . . . . . . . . . . . . . . 10
channel . . . . . . . . . . . . . . . . . . . . . . . . . . . . . . . . 10
main menu . . . . . . . . . . . . . . . . . . . . . . . . . . . . . 10
notifications . . . . . . . . . . . . . . . . . . . . . . . . . . . . 10
set . . . . . . . . . . . . . . . . . . . . . . . . . . . . . . . . . . . . 10
station tracking . . . . . . . . . . . . . . . . . . . . . . . . . . 23
station update . . . . . . . . . . . . . . . . . . . . . . . . . . 11
Delayed switch-off . . . . . . . . . . . . . . . . . . . . . . . . . . 5 Digital Radio
see DAB . . . . . . . . . . . . . . . . . . . . . . . . . . . . . . . . . 9
E
Ener
gy management . . . . . . . . . . . . . . . . . . . . . . . . 5
External audio sources USB . . . . . . . . . . . . . . . . . . . . . . . . . . . . . . . . . . . 13
External audio source (AUX) . . . . . . . . . . . . . . . . . 15
F
Function buttons (virtual buttons) . . . . . . . . . . . . . 4
Functions settings see SETUP . . . . . . . . . . . . . . . . . . . . . . . . . . . . . . 21
I Interference from a mobile telephone . . . . . . . . . . 4
Introduction . . . . . . . . . . . . . . . . . . . . . . . . . . . . . . . 4
L LOW BATTERY . . . . . . . . . . . . . . . . . . . . . . . . . . . . . . 5
Lowering the volume . . . . . . . . . . . . . . . . . . . . . . . . 4
M
Main menu RADIO . . . . . . . . . . . . . . . . . . . . . . . . . . . . . . . . . . 6
SETUP . . . . . . . . . . . . . . . . . . . . . . . . . . . . . . . . . 21
SOUND . . . . . . . . . . . . . . . . . . . . . . . . . . . . . . 21
MEDIA . . . . . . . . . . . . . . . . . . . . . . . . . . . . . . . . . . . 11 AUX . . . . . . . . . . . . . . . . . . . . . . . . . . . . . . . . . . . 15
change media source . . . . . . . . . . . . . . . . . . . . . 12
external data device connected to a USB port . 13
instructions . . . . . . . . . . . . . . . . . . . . . . . . . . . . . 11
media source selection menu . . . . . . . . . . . . . . 12
MP3 files . . . . . . . . . . . . . . . . . . . . . . . . . . . . . . . 11
playback mode . . . . . . . . . . . . . . . . . . . . . . . . . . 16 playing order . . . . . . . . . . . . . . . . . . . . . . . . . . . . 11
pla
ylists . . . . . . . . . . . . . . . . . . . . . . . . . . . . . . . . 11
random playback (Mix) . . . . . . . . . . . . . . . . . . . 16
requirements . . . . . . . . . . . . . . . . . . . . . . . . . . . 11
track information . . . . . . . . . . . . . . . . . . . . . . . . 15
Mobile telephone bluetooth . . . . . . . . . . . . . . . . . . . . . . . . . . . . . . 16
P Playback of a Media source AUX-IN connection . . . . . . . . . . . . . . . . . . . . . . . 15
bluetooth . . . . . . . . . . . . . . . . . . . . . . . . . . . . . . 14
SD card . . . . . . . . . . . . . . . . . . . . . . . . . . . . . . . . 13
USB port . . . . . . . . . . . . . . . . . . . . . . . . . . . . . . . 13
Q
Quick reference guide . . . . . . . . . . . . . . . . . . . . . . . 4
R RADIO changing frequency . . . . . . . . . . . . . . . . . . . . . . . 8
changing stations . . . . . . . . . . . . . . . . . . . . . . . . . 8
frequency bands . . . . . . . . . . . . . . . . . . . . . . . . . . 8
main menu . . . . . . . . . . . . . . . . . . . . . . . . . . . . . . 6
station buttons . . . . . . . . . . . . . . . . . . . . . . . . . . . 9
station name . . . . . . . . . . . . . . . . . . . . . . . . . . . . . 6
storing stations . . . . . . . . . . . . . . . . . . . . . . . . . . . 9
tuning to a station frequency . . . . . . . . . . . . . . . . 8
Radio code see Anti-theft encryption . . . . . . . . . . . . . . . . . . . 5
RDS . . . . . . . . . . . . . . . . . . . . . . . . . . . . . . . . . . . . . . 6 On - Off . . . . . . . . . . . . . . . . . . . . . . . . . . . . . . . . 21
TP (traffic news station) . . . . . . . . . . . . . . . . . . . . 7
Replay . . . . . . . . . . . . . . . . . . . . . . . . . . . . . . . . . . . 16
Requirements for Media sources and audio files . . . . . . . . . . . 11
Rotary/push knobs . . . . . . . . . . . . . . . . . . . . . . . . . 4
25