Page 81 of 294

1.75
X = Seat not suitable for fitting child seats ISOFIX.
IUF/IL = On equipped vehicles, seat which allows an approved “Universal”/“\
semi-universal” or “vehicle specific” child seat to be
attached using the ISOFIX system; check that it can be fitted.
(1) A carrycot can be installed across the vehicle and will take up at least \
two seats. Position the child with his or her feet nea rest
the door.
(2) Move the front seat as far forward as possible to install a rear-facing \
child seat, then move back the seat in front as far as it will
go, although without allowing it to come into contact with the child sea\
t.
(3) Forward-facing child seat; position the seatback of the child seat in co\
ntact with the seatback of the vehicle seat. In all sit ua-
tions, remove the rear headrest of the seat on which the child seat is p\
ositioned. This must be done before fitting the child s eat
(please refer to the section entitled “Rear headrests” in Section\
3). Do not push the seat in front of the child more than half way
back on its runners and do not recline the seatback more than 25°.
CHILD SEATS: attachment using the ISOFIX system (11/12)
Page 92 of 294

1.86
xAnti-lock braking warning
light
This lights up when the ignition is
switched on and goes out after a few
seconds.
If it lights up when you are driving, it in-
dicates a fault in the anti-lock braking
system.
Braking will then be as normal, without
the ABS. Contact an approved Dealer
as soon as possible.
ÔCoolant temperature warn-
ing light
This comes on when the ignition is
switched on.
If it turns red, stop and let the engine
idle for a minute or two.
The temperature should lower and the
warning light should return to a blue
colour. If not, stop the engine. Let the
engine cool down before checking the
coolant.
Contact an approved Dealer.
WARNING LIGHTS (3/4)
Warning light, additive level
and faults in the exhaust gas
reduction system
Refer to the information on "Additive
tank" in Section 1.
ÄToxic Fume Filter System
Warning Light
For vehicles equipped with this option,
the light comes on when the ignition is
switched on then goes out.
– If it lights up continuously, consult your approved dealer as soon as
possible;
– if it flashes, reduce the engine speed until the light stops flashing. Contact
your approved Dealer as soon as
possible.
Refer to the information on “Advice:
antipollution, fuel economy and driving”
in Section 2.
Electronic Stability Program
(ESP) and traction control
system warning light
This lights up when the ignition is
switched on and goes out after a few
seconds.
There are several reasons for the warn-
ing light to come on: please refer to the
information on “Driver correction de-
vices and aids” in Section 2.
A
The display of information shown below DEPENDS ON THE VEHICLE EQUIPMENT \
AND COUNTRY.
Page 93 of 294

1.87
WARNING LIGHTS (4/4)
ΦSpeed limiter and cruise
control indicator lights
See the information on the “Speed lim-
iter” and “Cruise control” in Section 2.
Tyre pressure loss warning
Please refer to the information
on the “Tyre pressure loss warning” in
Section 2.
Traction control warning
light
Refer to the information on “Driving cor-
rection devices and aids” in Section 2.
ÉPreheating warning light
(diesel version)
This should come on when the igni-
tion is switched on. It indicates that the
heater plugs are in operation.
It goes out when preheating is com-
plete. The engine can be started.
A
The display of information shown below DEPENDS ON THE VEHICLE EQUIPMENT \
AND COUNTRY.
Š‰Gear change indicators
This lights up to advise you to
change to a higher gear (up arrow) or
lower gear (down arrow).
ECO mode warning light
This comes on when ECO
mode is activated.
Please refer to the information on
“Driving advice, Eco-driving” in
Section 2.
ßFront seat belt reminder
warning light
It lights up on the central display when
the engine is started and, if the driv-
er's seat belt is not fastened, the light
flashes and a beep sounds for about
2 minutes when the vehicle reaches a
speed of about 9.92 mph (16 km/h).
Depending on the vehicle, this flashes if
the front passenger seat belt is not fas-
tened.
2 Door(s) open warning light
\bEngine standby warning
light
Please see information in the para-
graph on “Stop and Start Function” in
Section 2.
Unavailability of engine
standby warning light
Please see information in the para-
graph on “Stop and Start Function” in
Section 2.
Page 94 of 294
1.88
DISPLAYS AND INDICATORS (1/2)
Rev counter 1(graduations x 1000)
2
Speedometer 2(km or miles per hour)
Overspeed buzzer
Depending on the vehicle, a buzzer
sounds for approximately 10 seconds
every 40 seconds, as long as the vehi-
cle is travelling in excess of 72 mph
(120 km/h).
Driving style indicator 4
Please refer to the information on “Eco-
driving” in Section 2.
Low engine oil level warning
When the engine is started, display 3
alerts the driver when the oil level is at
its minimum. Refer to the information
on the “Engine oil level” in Section 4.
Fuel gauge 5
3
1
5
4
Page 101 of 294
1.95
The display of information shown below DEPENDS ON THE VEHICLE EQUIPMENT \
AND COUNTRY.
ON-BOARD COMPUTER: trip settings (4/4)
Examples of selectionsInterpreting the display selected
TYRE PRESSURE SET
i) Reset the tyre pressure.Please refer to the information on the “Tyre pressure loss warning” in Section 2.
SPEED LIMITER
j) Cruise control/speed limiter programmed speed.Refer to the information on the “Speed limiter” and “Cruise con\
trol” in Section 2.
90 km/h
CRUISE CONTROL 90 km/h
k) Clock and temperature.Please refer to the information on the “Clock and exterior temperatur\
e” in Section 1.
13° 16:30
NO MESSAGE
MEMORISED l) Trip log. Successive display:
– information messages (passenger airbag OFF etc.);
– operating fault messages (check the injection system, etc.).
ADBLUE 62%
m) Percentage volume of remaining additives. Refer to the information on “Additive tank” in Section 1.
Page 103 of 294

1.97
TRIP COMPUTER AND WARNING SYSTEM: operating fault messages
These appear with the © warning light and mean that you should drive very carefully to an author\
ised dealer as
soon as possible. If you fail to follow this recommendation, you risk da\
maging your vehicle.
They disappear when the display selection key is pressed or after severa\
l seconds and are stored in the computer log. The
© warning light stays on. Examples of operating fault messages are given \
in the following pages.
Examples of messages Interpreting the display selected
« CLEAN DIESEL FILTER » Indicates the presence of water in the diesel filter; contact an approve\
d Dealer
as soon as possible.
« CHECK VEHICLE » Indicates a fault in one of the pedal sensors, battery management system\
or oil
level sensor.
« CHECK AIRBAG » Indicates a fault in the restraint system in addition to the seat belts.\
In the event
of an accident, it is possible that they may not be triggered.
« Check antipollution system » – Indicates a fault in the vehicle’s emission control system.
– Indicates a fault in the emissions reduction system when it is accompani\
ed
by the
warning light. Refer to the information on «Additive tank» in
Section 1.
Page 109 of 294
1.103
Daytime running lights
function
(front lights only)
The daytime running lights come on
automatically with no action on stalk 1
when the engine is started, and they go
off once the engine is switched off.
EXTERIOR LIGHTING AND SIGNALS (1/4)
šSide lights
Turn the ring 2 until the symbol
is opposite mark 3.
An indicator light on the instrument
panel will come on.
Switching off the side lights
Manually, move ring 2 to position 0.
1
Before driving at night,
check that the electrical
equipment is operating cor-
rectly and adjust the head-
light beams (if your vehicle is not
carrying its normal load). As a gen-
eral precaution, check that the lights
are not obscured (by dirt, mud,
snow or objects being transported).
312
When driving on the left in a left-
hand drive vehicle (or vice versa),
drivers must re-adjust their lights
throughout their stay (see “Adjusting
headlight beams” in Section 1).
Page 117 of 294

1 .
111
Before any action involving the windscreen (washing the vehicle, de-ic-\
ing, cleaning the windscreen, etc.) return stalk 1 to position A (park).
Risk of injury and/or damage.
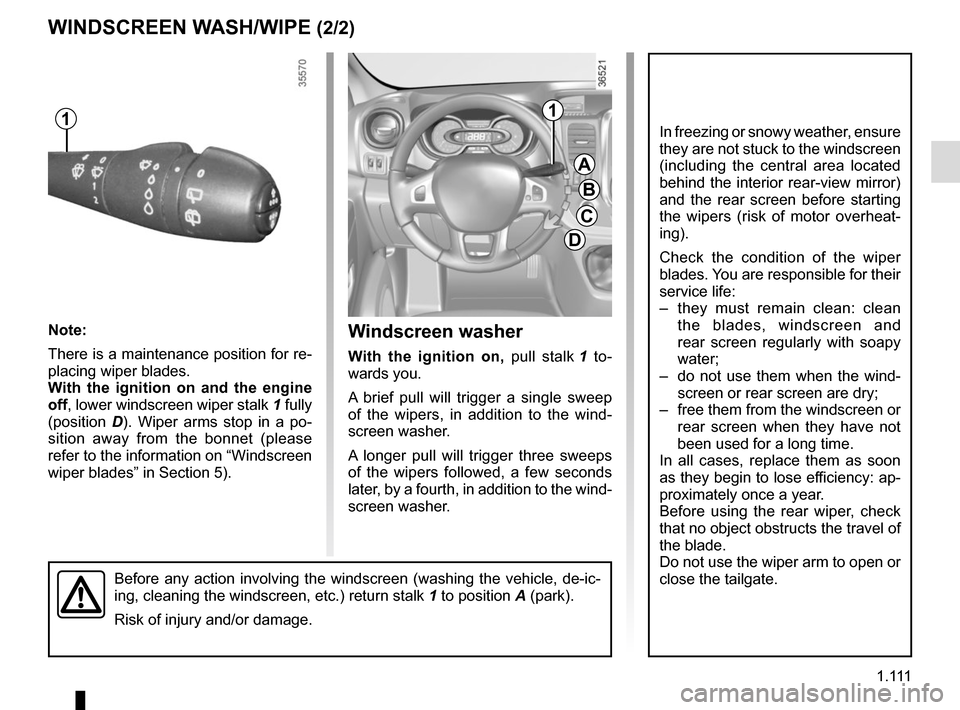
Windscreen washer
With the ignition on, pull stalk 1 to-
wards you.
A brief pull will trigger a single sweep
of the wipers, in addition to the wind-
screen washer.
A longer pull will trigger three sweeps
of the wipers followed, a few seconds
later, by a fourth, in addition to the wind-
screen washer.
WINDSCREEN WASH/WIPE (2/2)
A
B
C
D
11
In freezing or snowy weather, ensure
they are not stuck to the windscreen
(including the central area located
behind the interior rear-view mirror)
and the rear screen before starting
the wipers (risk of motor overheat-
ing).
Check the condition of the wiper
blades. You are responsible for their
service life:
– they must remain clean: clean the blades, windscreen and
rear screen regularly with soapy
water;
– do not use them when the wind- screen or rear screen are dry;
– free them from the windscreen or rear screen when they have not
been used for a long time.
In all cases, replace them as soon
as they begin to lose efficiency: ap-
proximately once a year.
Before using the rear wiper, check
that no object obstructs the travel of
the blade.
Do not use the wiper arm to open or
close the tailgate.
Note:
There is a maintenance position for re-
placing wiper blades.
With the ignition on and the engine
off, lower windscreen wiper stalk 1 fully
(position D). Wiper arms stop in a po-
sition away from the bonnet (please
refer to the information on “Windscreen
wiper blades” in Section 5).