2017 RENAULT SCENIC Screen
[x] Cancel search: ScreenPage 19 of 96

GB.17
OPERATING PRINCIPLES (2/4)
5
678
Multimedia screen
Navigating a menu
Use the rotating control 5 to move from
menu to menu. Confirm by pressing the
central 6 button to enter the menu.
14
For safety reasons, carry
out these operations when
the vehicle is stationary.
Confirming/cancelling a selection
Press the central button 6 to confirm a
change.
Press the 7 button to cancel a choice
and return to the previous menu.
Press the 8 button to go back to the
welcome screen.
Page 20 of 96

GB.18
Pop-up menus
From most system menus, the pop-up
menu 12 lets you quickly access cur-
rent page functions.
12
Favourites - Navigation
Add Favourite
Remove a Favourite
Remove all Favourites
– press the joystick 11 to open the se-
lected element;
– in the tabs menus, move the joy- stick 11 left or right to switch from
one tab to another.
Confirming/cancelling a selection
Press the joystick 11 to confirm a
change.
Press the 9 button to cancel a choice
and return to the previous menu.
Press the 10 button to go back to the
welcome screen.
OPERATING PRINCIPLES (3/4)
For safety reasons, carry
out these operations when
the vehicle is stationary.
109
11
Central control
Navigating a menu
Use the joystick 11 to move from menu
to menu:
– Move the joystick 11 up or down to
move around the different areas of
the screen (upper bar, central zone,
lower bar);
– turn the joystick 11 to move between
different elements of a zone;
Page 21 of 96
GB.19
OPERATING PRINCIPLES (4/4)Introduction to the main
menu
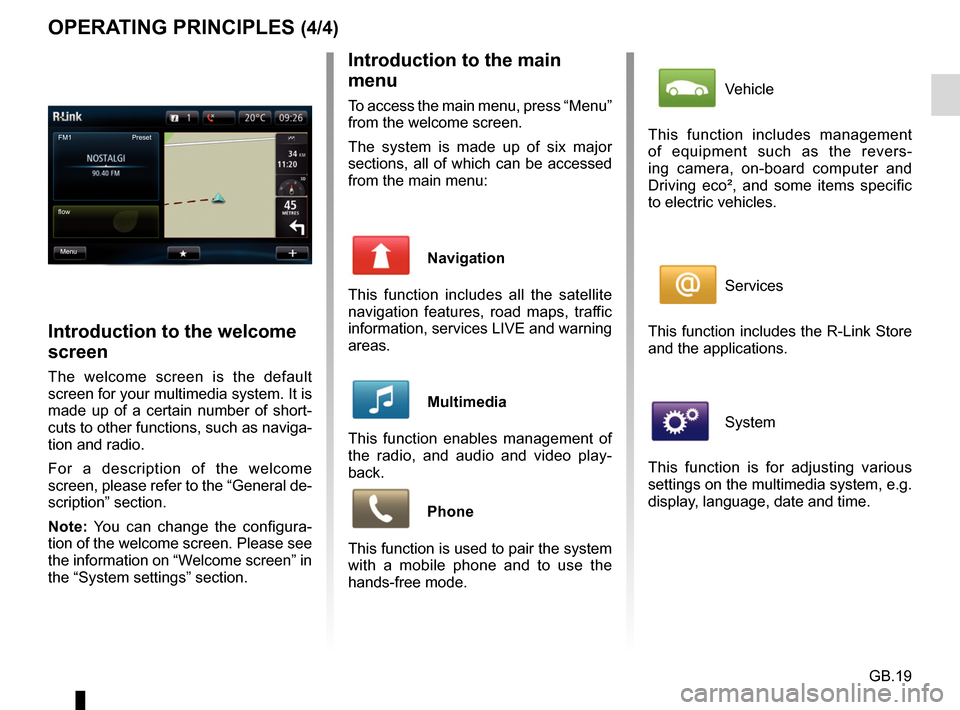
To access the main menu, press “Menu”
from the welcome screen.
The system is made up of six major
sections, all of which can be accessed
from the main menu:
Navigation
This function includes all the satellite
navigation features, road maps, traffic
information, services LIVE and warning
areas.
Multimedia
This function enables management of
the radio, and audio and video play-
back.
Phone
This function is used to pair the system
with a mobile phone and to use the
hands-free mode.
Introduction to the welcome
screen
The welcome screen is the default
screen for your multimedia system. It is
made up of a certain number of short-
cuts to other functions, such as naviga-
tion and radio.
For a description of the welcome
screen, please refer to the “General de-
scription” section.
Note: You can change the configura-
tion of the welcome screen. Please see
the information on “Welcome screen” in
the “System settings” section.
FM1
flow Preset
Menu
Vehicle
This function includes management
of equipment such as the revers-
ing camera, on-board computer and
Driving eco², and some items specific
to electric vehicles.
Services
This function includes the R-Link Store
and the applications.
System
This function is for adjusting various
settings on the multimedia system, e.g.
display, language, date and time.
Page 22 of 96
GB.20
SWITCHING ON/OFF
Switching on
The multimedia system switches on au-
tomatically when the ignition is switched
on. In other cases, press the start/stop
button
.
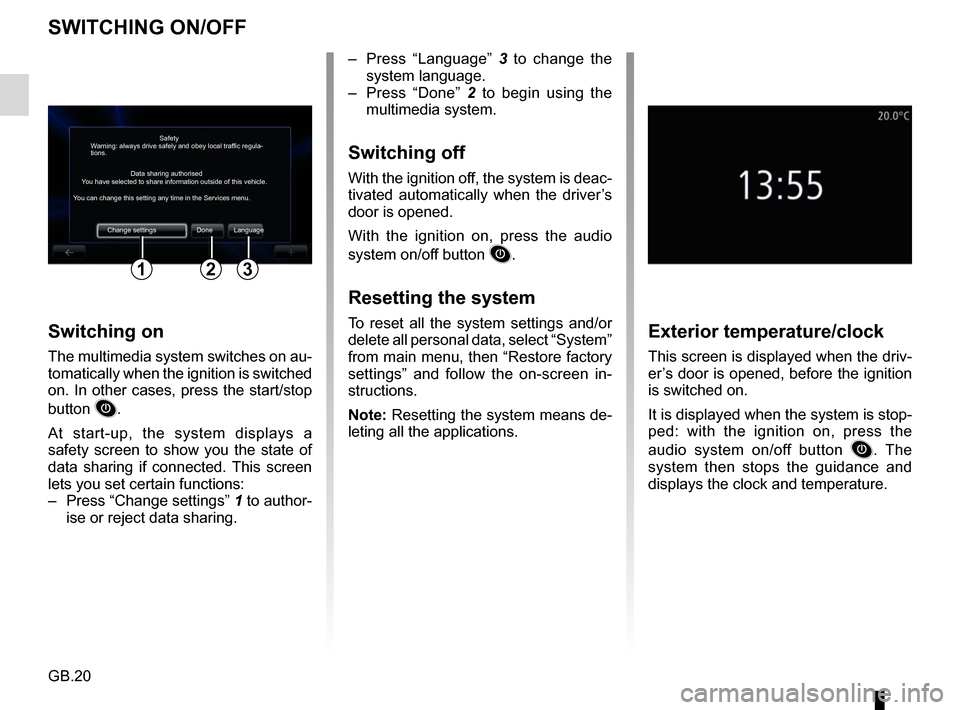
At start-up, the system displays a
safety screen to show you the state of
data sharing if connected. This screen
lets you set certain functions:
– Press “Change settings” 1 to author-
ise or reject data sharing.
Exterior temperature/clock
This screen is displayed when the driv-
er’s door is opened, before the ignition
is switched on.
It is displayed when the system is stop-
ped: with the ignition on, press the
audio system on/off button
. The
system then stops the guidance and
displays the clock and temperature.
– Press “Language” 3 to change the
system language.
– Press “Done” 2 to begin using the
multimedia system.
Switching off
With the ignition off, the system is deac-
tivated automatically when the driver’s
door is opened.
With the ignition on, press the audio
system on/off button
.
Resetting the system
To reset all the system settings and/or
delete all personal data, select “System”
from main menu, then “Restore factory
settings” and follow the on-screen in-
structions.
Note: Resetting the system means de-
leting all the applications.
Safety
Data sharing authorised
Warning: always drive safely and obey local traffic regula-
tions.
You have selected to share information outside of this vehicle.
You can change this setting any time in the Services menu.
Change settings Done Language
123
Page 23 of 96
GB.21
ADD, MANAGE FAVOURITES
Add favourites
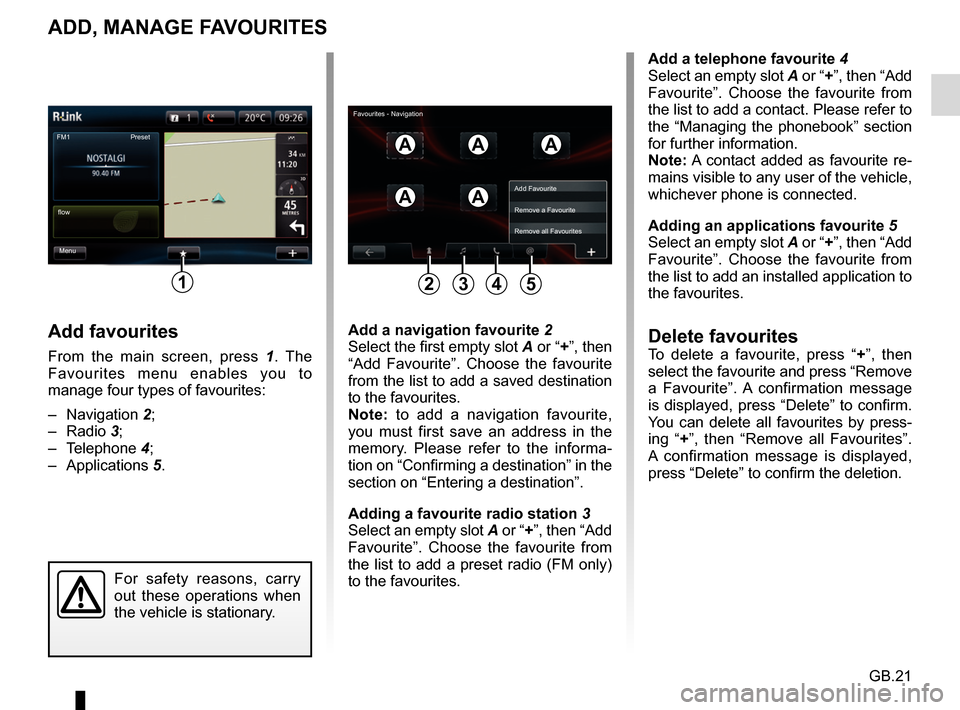
From the main screen, press 1. The
Favourites menu enables you to
manage four types of favourites:
– Navigation 2;
– Radio 3;
– Telephone 4;
– Applications 5.
Add a telephone favourite 4
Select an empty slot A or “+”, then “Add
Favourite”. Choose the favourite from
the list to add a contact. Please refer to
the “Managing the phonebook” section
for further information.
Note: A contact added as favourite re-
mains visible to any user of the vehicle,
whichever phone is connected.
Adding an applications favourite 5
Select an empty slot A or “+”, then “Add
Favourite”. Choose the favourite from
the list to add an installed application to
the favourites.
Delete favouritesTo delete a favourite, press “ +”, then
select the favourite and press “Remove
a Favourite”. A confirmation message
is displayed, press “Delete” to confirm.
You can delete all favourites by press-
ing “+ ”, then “Remove all Favourites”.
A confirmation message is displayed,
press “Delete” to confirm the deletion.
Add a navigation favourite
2
Select the first empty slot A or “+”, then “Add Favourite”. Choose the favourite
from the list to add a saved destination
to the favourites.
Note: to add a navigation favourite,
you must first save an address in the
memory. Please refer to the informa-
tion on “Confirming a destination” in the
section on “Entering a destination”.
Adding a favourite radio station 3
Select an empty slot A or “+”, then “Add
Favourite”. Choose the favourite from
the list to add a preset radio (FM only)
to the favourites.
FM1
Menu
flow Preset
1
AAA
AA
For safety reasons, carry
out these operations when
the vehicle is stationary.
Add Favourite
Remove a Favourite
Remove all Favourites
2435
Favourites - Navigation
Page 24 of 96

GB.22
USING VOICE RECOGNITION (1/6)
Voice recognition system
Your multimedia system has a voice
recognition system
which allows
voice control of some functions and ap-
plications of the multimedia system and
your phone. This enables you to use
your multimedia system or your phone
while keeping your hands on the steer-
ing wheel.
From the main voice control menu, you
can use voice control to control three
functions of your multimedia system:
– navigation;
– telephone;
– installed applications.
Note: the position of the voice recogni-
tion button
varies (control on steer-
ing wheel or column). To find out more,
please see your driver’s handbook.
Activation of the multimedia
system's voice recognition
To activate the voice recognition
system, press the voice recognition
button
in your vehicle. The touch-
screen will display the main voice con-
trol menu.
Page 29 of 96
GB.27
USING VOICE RECOGNITION (6/6)
Bastien's phoneAdd device
Activating the phone's
voice recognition with the
multimedia system
To use your phone's voice recognition
system with your multimedia system
you should:
– connect your telephone to the mul-timedia system (refer to the section
on “Connecting, disconnecting a tel-
ephone”);
– ensure that your phone has a voice recognition function compatible with
your multimedia system.
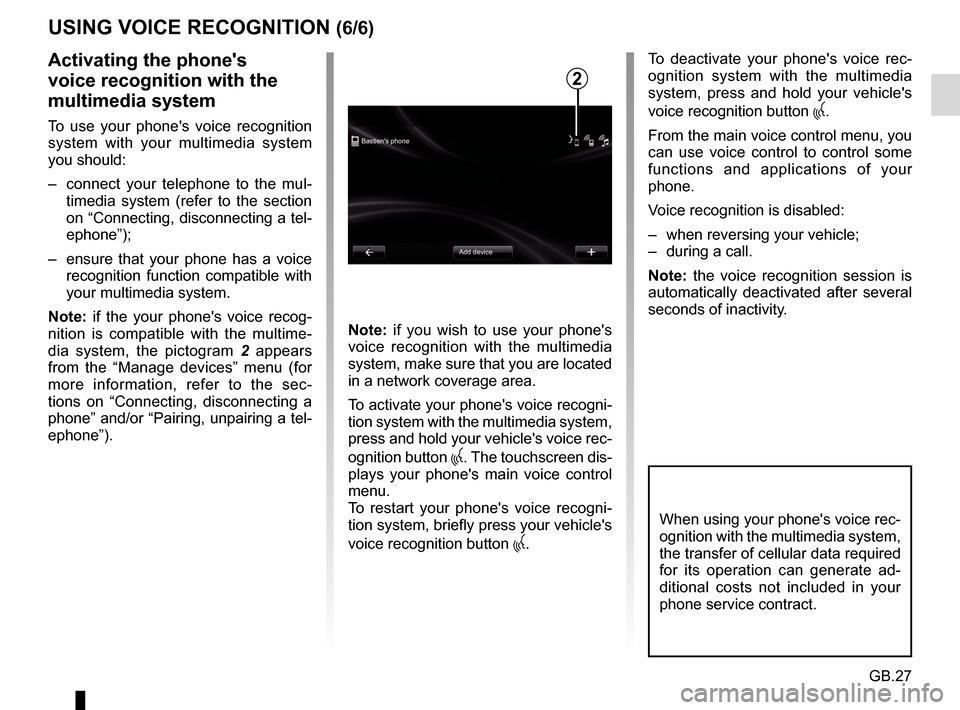
Note: if the your phone's voice recog-
nition is compatible with the multime-
dia system, the pictogram 2 appears
from the “Manage devices” menu (for
more information, refer to the sec-
tions on “Connecting, disconnecting a
phone” and/or “Pairing, unpairing a tel-
ephone”). Note: if you wish to use your phone's
voice recognition with the multimedia
system, make sure that you are located
in a network coverage area.
To activate your phone's voice recogni-
tion system with the multimedia system,
press and hold your vehicle's voice rec-
ognition button
. The touchscreen dis-
plays your phone's main voice control
menu.
To restart your phone's voice recogni-
tion system, briefly press your vehicle's
voice recognition button
.
To deactivate your phone's voice rec-
ognition system with the multimedia
system, press and hold your vehicle's
voice recognition button
.
From the main voice control menu, you
can use voice control to control some
functions and applications of your
phone.
Voice recognition is disabled:
– when reversing your vehicle;
– during a call.
Note: the voice recognition session is
automatically deactivated after several
seconds of inactivity.
2
When using your phone's voice rec-
ognition with the multimedia system,
the transfer of cellular data required
for its operation can generate ad-
ditional costs not included in your
phone service contract.
Page 34 of 96
GB.32
ENTERING A DESTINATION (5/5)
Note: if you do not confirm, this page
will close after ten seconds and guid-
ance will start automatically.
Note: depending on the vehicle charge
level, if you can reach your destination,
guidance is launched – if the charge
level is too low, the system offers to
search for a recharging terminal on the
way.
Note: “ IQ Routes™” is a function which
optimises the journey time using statis-
tical data and calculates routes based
on the average traffic levels on that day
and time. To activate or deactivate this
function, refer to the “Navigation set-
tings” section.
Latest map guarantee
After delivery of your new vehicle you
have about 60 days in which to update
the map free of charge.
Once this time has elapsed, you will
need to pay for updates.
For more information, please see an
Authorised Dealer.54
Go to...ConfirmLIVE
Magny-les-hameaux 0:15 h
8.5 km
The quickest way IQ Routes
1 Janvier, 0:32
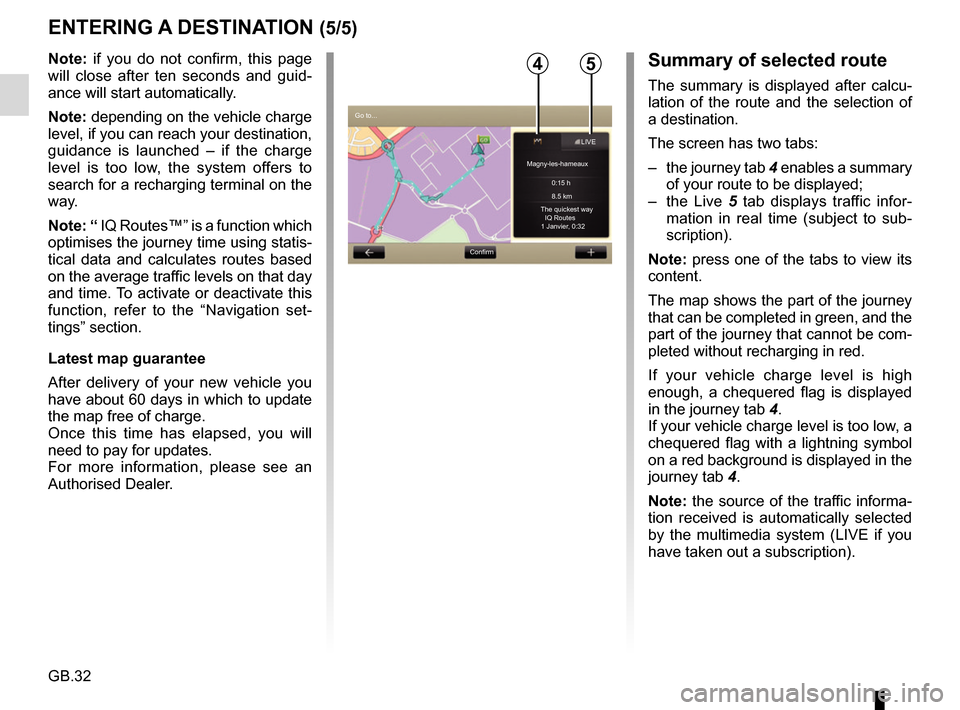
Summary of selected route
The summary is displayed after calcu-
lation of the route and the selection of
a destination.
The screen has two tabs:
– the journey tab 4 enables a summary
of your route to be displayed;
– the Live 5 tab displays traffic infor-
mation in real time (subject to sub-
scription).
Note: press one of the tabs to view its
content.
The map shows the part of the journey
that can be completed in green, and the
part of the journey that cannot be com-
pleted without recharging in red.
If your vehicle charge level is high
enough, a chequered flag is displayed
in the journey tab 4.
If your vehicle charge level is too low, a
chequered flag with a lightning symbol
on a red background is displayed in the
journey tab 4.
Note: the source of the traffic informa-
tion received is automatically selected
by the multimedia system (LIVE if you
have taken out a subscription).