Page 57 of 248

1.51
ON-BOARD COMPUTER: general information (1/2)
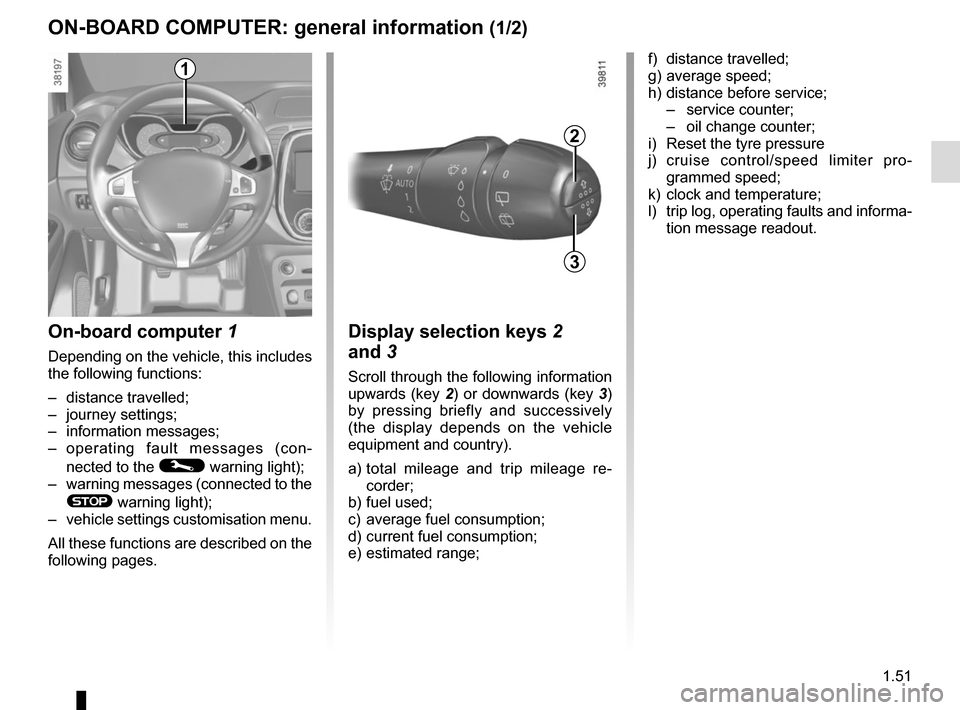
On-board computer 1
Depending on the vehicle, this includes
the following functions:
– distance travelled;
– journey settings;
– information messages;
– operating fault messages (con-
nected to the
© warning light);
– warning messages (connected to the
® warning light);
– vehicle settings customisation menu.
All these functions are described on the
following pages.
Display selection keys 2
and 3
Scroll through the following information
upwards (key 2) or downwards (key 3)
by pressing briefly and successively
(the display depends on the vehicle
equipment and country).
a) total mileage and trip mileage re-
corder;
b) fuel used;
c) average fuel consumption;
d) current fuel consumption;
e) estimated range;
2
3
f) distance travelled;
g) average speed;
h) distance before service;
– service counter;
– oil change counter;
i) Reset the tyre pressure
j) cruise control/speed limiter pro- grammed speed;
k) clock and temperature;
l) trip log, operating faults and informa- tion message readout.1
Page 63 of 248
1.57
TRIP COMPUTER: trip settings (5/5)
Examples of selectionsInterpreting the display selected
i) Reset the tyre pressure. Please refer to the information on the “Tyre pressure
loss warning” in Section 2.
TYRE PRESSURE
: SET TPW TYRE PRESSURE SET
SPEED LIMITER CRUISE CONTROL j) Cruise control/speed limiter programmed speed.
Refer to the information in “Cruise control” and
“Speed limiter” in Section 2.
13° 16:30 k) Clock and temperature.
Please refer to the information under “Clock and ex-
terior temperature”.
NO MESSAGE MEMORISED l) Trip log.
Successive display:
– information messages (passenger airbag OFF etc.);
– operating fault messages (Check injection system,
etc.).
Page 68 of 248
1.62
Wait a few seconds, the minutes will
flash: repeatedly press or press and
hold button 3 or 4 to set the time.
When setting is complete, the hours
and minutes remain displayed conti-
nuously for 2 seconds: your setting is
registered.
You may change the display.Display A
To access the display 2 for setting the
time, press button 3 or 4 on the stalk 1.
Wait a few seconds; the hours and min-
utes will begin to flash. You are now in
setting mode, press and hold button 3
or 4 to set the hour.
Once the minutes flash, repeatedly
press or press and hold button 3 ou 4
to set the time.
CLOCK AND EXTERIOR TEMPERATURE (1/2)
3
4
If the power supply is cut (battery
disconnected, supply wire cut, etc.),
the clock must be reset.
We recommend that you do not
adjust these settings while driving.
9°C 12:00
2
A
1
1
Page 69 of 248
1.63
Display B
Vehicles fitted with touch-screen
multimedia, navigation aid systems,
telephones, etc.
Refer to the separate instructions for
the function to understand the special
features of this equipment.
External temperature
indicator
Special note:
When the exterior temperature is - 3°C
to + 3°C, the °C characters flash (si-
gnalling a risk of ice on the road).
External temperature in-
dicator
As ice formation is related
to climatic exposure, local
air humidity and temperature, the
external temperature alone is not
sufficient to detect ice.
CLOCK AND EXTERIOR TEMPERATURE (2/2)
If the power supply is cut (battery disconnected, supply wire cut, etc.\
), the clock
must be reset.
We recommend that you do not adjust these settings while driving.
B