2017 RENAULT ALASKAN fog light
[x] Cancel search: fog lightPage 91 of 340

To cancel the flashing, move the lever to the oppo-
site direction.
See “Settings” earlier in this section to enable/dis-
able the lane change signal. FRONT FOG LIGHTS (where fitted)
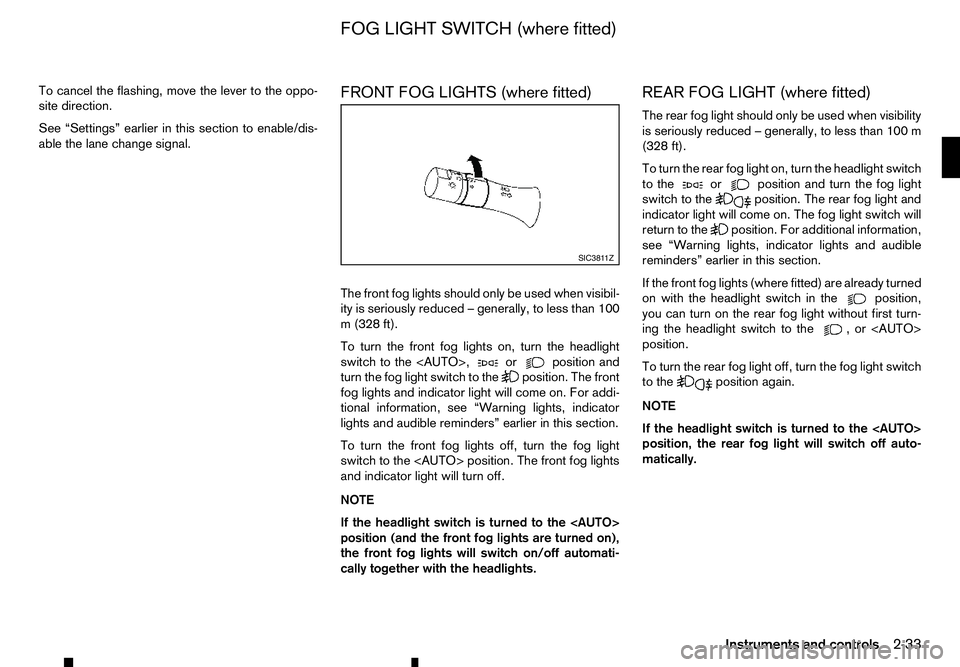
The front fog lights should only be used when visibil-
ity is seriously reduced
–generally, to less than 100
m( 328 ft).
To turn the front fog lights on, turn the headlight
switch to the
turn the fog light switch to the position. The front
fog lights and indicator light will come on. For addi-
tional information, see “Warning lights, indicator
lights and audible reminders” earlier in this section.
To turn the front fog lights off, turn the fog light
switch to the
and indicator light will turn off.
NOTE
If the headlight switch is turned to the
position (and the front fog lights are turned on),
the front fog lights will switch on/off automati-
cally together with the headlights. REAR FOG LIGHT (where fitted)
The rear fog light should only be used when visibility
is seriously reduced
–generally, to less than 100 m
(328 ft).
To turn the rear fog light on, turn the headlight switch
to the or position and turn the fog light
switch to the position. The rear fog light and
indicator light will come on. The fog light switch will
return to the position. For additional information,
see “Warning lights, indicator lights and audible
reminders” earlier in this section.
If the front fog lights (where fitted) are already turned
on with the headlight switch in the position,
you can turn on the rear fog light without first turn-
ing the headlight switch to the ,o r<
AUTO>
position.
To turn the rear fog light off, turn the fog light switch
to the position again.
NOTE
If the headlight switch is turned to the
position, the rear fog light will switch off auto-
matically. SIC381 1Z
FOG LIGHT SWITCH (where fitted)
Instruments and controls2-33
Page 92 of 340

WARNING
In freezing temperatures, the washer fluid may
freeze on the windscreen and obscure your vi-
sion. Warm the windscreen with the defogger be-
fore you wash the windscreen.
CAUTION
• Do not operate the washer continuously for
longer than 30 seconds.
• Do not operate the washer if the window
washer fluid reservoir is empty.
• If the wiper operation is interrupted by snow
or ice, the wiper may stop moving to protect
its motor. If this occurs, turn the wiper switch
to the OFF position and remove the snow or
ice on and around the wiper arms. In approxi-
mately
1minute, turn the switch on again to
operate the wiper.
WINDSCREEN WIPER AND WASHER
SWITCH The windscreen wiper and washer operate when
the ignition switch is in the
ONposition.
Wiper operation
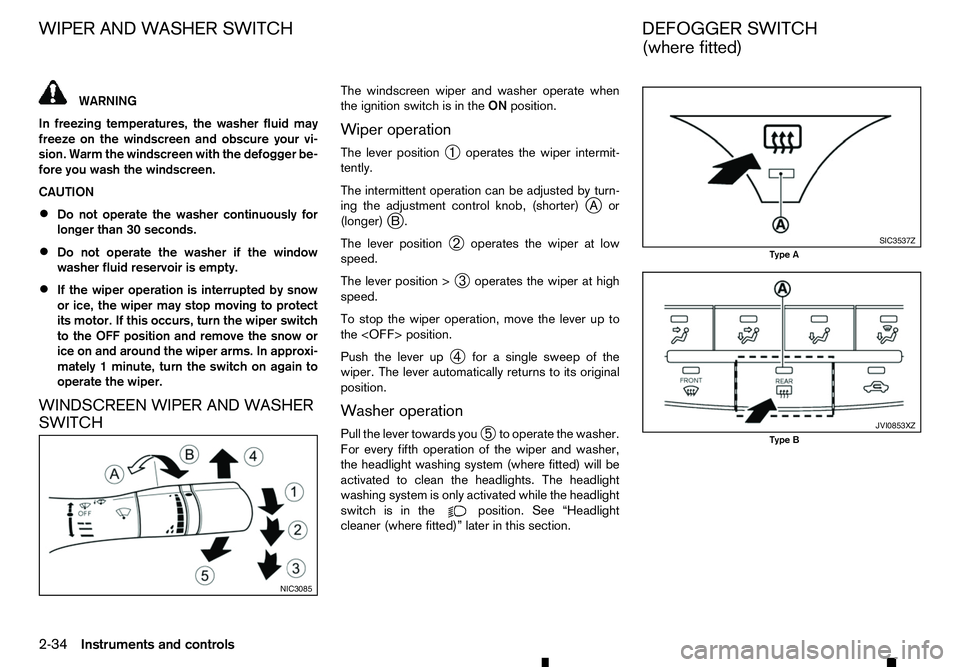
The lever position ➀operates the wiper intermit-
tently.
The intermittent operation can be adjusted by turn-
ing the adjustment control knob, (shorter) j
Aor
(longer) j
B.
The lever position ➁operates the wiper at low
speed.
The lever position > ➂operates the wiper at high
speed.
To stop the wiper operation, move the lever up to
the
Push the lever up ➃for
asingle sweep of the
wiper. The lever automatically returns to its original
position.
Washer operation
Pull the lever towards you ➄to operate the washer.
For every fifth operation of the wiper and washer,
the headlight washing system (where fitted) will be
activated to clean the headlights. The headlight
washing system is only activated while the headlight
switch is in the position. See “Headlight
cleaner (where fitted)” later in this section. NIC3085 SIC3537Z
Type A
JVI0853XZ
Type B
WIPER AND WASHER SWITCH
DEFOGGER SWITCH
(where fitted)
2-34 Instruments and controls
Page 93 of 340

The rear window defogger switch operates when
the ignition switch is in the ONposition.
The defogger is used to reduce the moisture, fog or
frost on the rear window and outside rearview mir-
ror (where fitted) surfaces to improve the rear view.
When the defogger switch is pushed, the indicator
light j
Ai lluminates and the rear window defogger operates for approximately 15 minutes. After the
preset time has passed, the defogger will turn off
automatically.
To turn the rear window defogger off manually, push
the defogger switch again.
CAUTION
• When operating the defogger continuously,
be sure to start the engine. Otherwise, it may
cause the battery to discharge.
• When cleaning the inner side of the window,
be careful not to scratch or damage the elec-
trical conductors on the surface of the win-
dow. To clean the headlights, pull the windscreen washer
switch towards you while the headlight switch is in
the position and the ignition switch is in the ON
position.
NOTE
The headlight cleaner will automatically operate
every fifth operation of the wiper and washer
switch.
HEADLIGHT CLEANER SWITCH
(where fitted)
The headlight cleaner operates when the headlight
and turn signal switch is in the position and the
ignition switch is in the ON position.
To operate the headlight cleaner push the headlight
cleaner switch located on the driver’s side, lower
left side of the instrument panel.
CAUTION
• Do not operate the cleaner continuously for
more than 15 seconds. NIC3102
Type C-LHD JVI1022XZ
Type C-RHD SIC2255Z
Headlight cleaner switch (where fitted)
HEADLIGHT CLEANER
(where fitted)
Instruments and controls 2-35
Page 97 of 340

•
This power outlet is not designed for use with
ac igarette lighter unit.
• Do not use accessories that exceed
acom-
bined power draw of 12 volt, 120W (10A)
• Do not use double adapters or more than one
electrical accessory.
• Use this power outlet with the engine running
to avoid discharging the vehicle battery.
• Avoid using when the air conditioner, head-
lights or rear window defogger is on (where
fitted).
• Push the plug in as far as it will go. If good
contact is not made, the plug may overheat or the internal temperature fuse may blow.
• Before inserting or disconnecting
aplug, be
sure that the electrical accessory being used
is turned OFF.
• When not in use, be sure to close the cap. Do
not allow water or any liquid to contact the
outlet. WARNING
• The storage compartments should not be
used while driving so that the full attention
may be given to vehicle operation.
• Keep the storage lids closed while driving to
help prevent injury in an accident or
asudden
stop.
GLOVE BOX
To open the glove box, pull the handle ➀.
To close, push the lid in until the lock latches. CONSOLE BOX
To open the console box lid, push up the knob
j
Aa nd pull up the lid.
To close, push the lid down until the lock latches. JVI1 102XZ JVI1026XZ
STORAGE
Instruments and controls
2-39
Page 155 of 340

MANUAL AIR CONDITIONER AND
HEATER (Type A)
1. Air recirculation button
2. Rear defogger
button (See “Defogger
switch (where fitted)” in the “2. Instruments
and controls” section.) (where fitted)
3. Temperature control dial
4. A/C
(air conditioner) button
5. Fan speed control dial
6. Air flow control dial
Controls
Turning system on/off:
To turn on the system, turn the fan speed control dial out of the <0> position. Turn the dial
counter clockwise to the <0> position to turn off the
system. Fan speed control:
Turn the fan speed control dial clockwise to
increase the fan speed.
Turn the fan speed control dial anticlockwise
to decrease the fan speed.
Temperature control:
Turn the temperature control dial to set the desired
temperature. Turn the dial between the middle and
the right position to select the hot temperature. Turn
the dial between the middle and the left position to
select the cool temperature. Air flow control:
This dial allows you to select the air flow outlets.
m —
Air
flows from centre and side vents.
m
—
Air
flows from centre and side vents
and foot outlets.
m —
Air
flows mainly from the foot outlets.
m
—
Air
flows from the defogger and foot
outlets.
m —
Air
flows mainly from the defogger
outlets.
Outside air circulation:
Push the air recirculation button. (The indica-
tor light will turn off.) The air flow is drawn from out-
side the vehicle.
Select the outside air circulation mode for normal
heating or air conditioning operation.
Air recirculation:
Push the air recirculation button. (The indica-
tor light will illuminate.)
The air flow is recirculated inside the vehicle.
A/C (Air Conditioner) operation:
Push the A/Cbutton to turn on or off the air condi-
tioner. When the air conditioner is on, the A/Cindi-
cator light on the button illuminates. JVH0928XZ
Display screen, heater and air conditioner, and audio system
4-23
Page 156 of 340

Heater operation
Heating:
This mode is used to direct heated air from the foot
outlets.
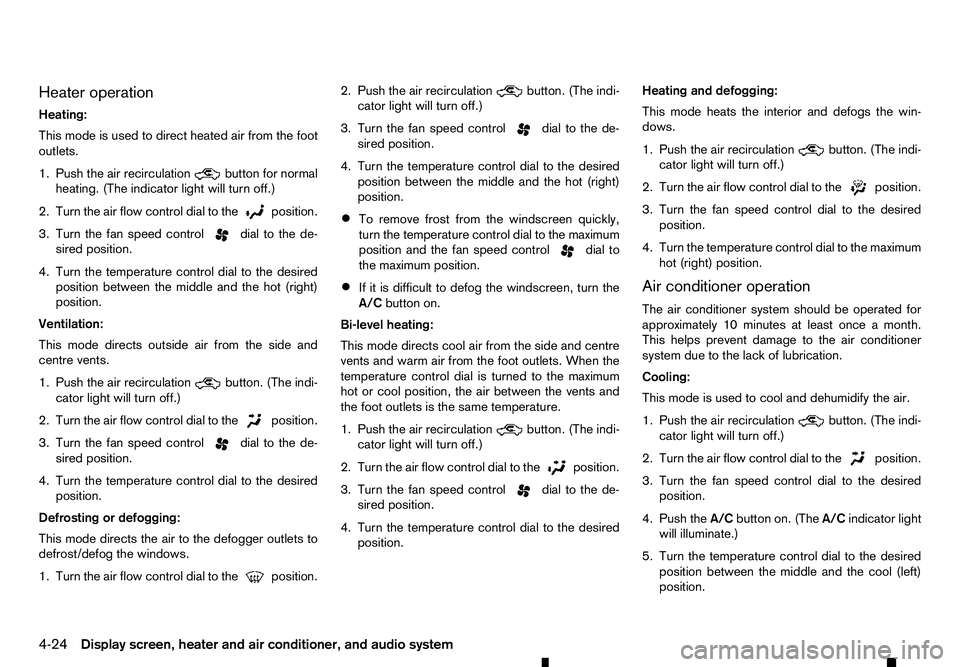
1. Push the air recirculation button for normal
heating. (The indicator light will turn off.)
2. Turn the air flow control dial to the position.
3. Turn the fan speed control
dial to the de-
sired position.
4. Turn the temperature control dial to the desired position between the middle and the hot (right)
position.
Ventilation:
This mode directs outside air from the side and
centre vents.
1. Push the air recirculation button. (The indi-
cator light will turn off.)
2. Turn the air flow control dial to the position.
3. Turn the fan speed control
dial to the de-
sired position.
4. Turn the temperature control dial to the desired position.
Defrosting or defogging:
This mode directs the air to the defogger outlets to
defrost/defog the windows.
1. Turn the air flow control dial to the position.2. Push the air recirculation
button. (The indi-
cator light will turn off.)
3. Turn the fan speed control dial to the de-
sired position.
4. Turn the temperature control dial to the desired position between the middle and the hot (right)
position.
• To remove frost from the windscreen quickly,
turn the temperature control dial to the maximum
position and the fan speed control dial to
the maximum position.
• If it is difficult to defog the windscreen, turn the
A/C
button on.
Bi-level heating:
This mode directs cool air from the side and centre
vents and warm air from the foot outlets. When the
temperature control dial is turned to the maximum
hot or cool position, the air between the vents and
the foot outlets is the same temperature.
1. Push the air recirculation button. (The indi-
cator light will turn off.)
2. Turn the air flow control dial to the position.
3. Turn the fan speed control
dial to the de-
sired position.
4. Turn the temperature control dial to the desired position. Heating and defogging:
This mode heats the interior and defogs the win-
dows.
1. Push the air recirculation button. (The indi-
cator light will turn off.)
2. Turn the air flow control dial to the position.
3. Turn the fan speed control dial to the desired
position.
4. Turn the temperature control dial to the maximum hot (right) position.
Air conditioner operation
The air conditioner system should be operated for
approximately 10 minutes at least once amonth.
This helps prevent damage to the air conditioner
system due to the lack of lubrication.
Cooling:
This mode is used to cool and dehumidify the air.
1. Push the air recirculation button. (The indi-
cator light will turn off.)
2. Turn the air flow control dial to the position.
3. Turn the fan speed control dial to the desired
position.
4. Push the A/Cbutton on. (The A/Cindicator light
will illuminate.)
5. Turn the temperature control dial to the desired position between the middle and the cool (left)
position.
4-24 Display screen, heater and air conditioner, and audio system
Page 157 of 340

Av
isible mist may be seen coming from the vents in
hot, humid conditions as the air is cooled rapidly.
This does not indicate amalfunction.
• For quick cooling when the outside temperature
is high, push the air recirculation button.
(The indicator light will turn on.) Be sure to return
the air recirculation button to turn off for
normal cooling.
Dehumidified heating:
This mode is used to heat and dehumidify the air.
1. Push the air recirculation button. (The indi-
cator light will turn off.)
2. Turn the air flow control dial to the position.
3. Turn the fan speed control
dial to the de-
sired position.
4. Push the A/Cbutton on. (The A/Cindicator light
will illuminate.)
5. Turn the temperature control dial to the desired position between the middle and the hot (right)
position.
Dehumidified defogging:
This mode is used to defog the windows and dehu-
midify the air.
1. Push the air recirculation button. (The indi-
cator light will turn off.)
2. Turn the air flow control dial to the position.
3. Turn the fan speed control
dial to the de-
sired position. 4. Push the
A/Cbutton on. (The A/Cindicator light
will illuminate.)
5. Turn the temperature control dial to the desired position.
Display screen, heater and air conditioner, and audio system 4-25
Page 158 of 340

MANUAL AIR CONDITIONER AND
HEATER (Type B)
1. A/C
button/Fan speed control dial
2. Air flow control buttons
3. Temperature control dial
4. Front defogger button
5. Rear defogger
button (See “Defogger
switch (where fitted)” in the “2. Instruments
and controls” section.) (where fitted)
6. Air recirculation button
Controls
Turning system on/off:
To turn on the system, turn the fan speed control dial out of the
anticlockwise to the
system. Fan speed control:
Turn the fan speed control dial clockwise to
increase the fan speed.
Turn the fan speed control dial anticlockwise
to decrease the fan speed.
Ventilation:
This mode directs outside air from the side and
centre vents.
1. Push the air recirculation button. (The indi-
cator light will turn off.)
2. Push the button. (The indicator light will
turn on.)
3. Turn the fan speed control dial to the de-
sired position.
4. Turn the temperature control dial to the desired position. Temperature control:
Turn the temperature control dial to set the desired
temperature. Turn the dial between the middle and
the right position to select the hot temperature. Turn
the dial between the middle and the left position to
select the cool temperature.
Air flow control:
Push one of the air flow control buttons to select the
air flow outlets.
m
—
Air
flows mainly from centre and side
vents.
m —
Air
flows mainly from centre and side
vents and foot outlets.
m —
Air
flows mainly from the foot outlet
and partly from the defogger.
m —
Air
flows mainly from the defogger and
foot outlets.
Outside air circulation:
Push the air recirculation button. (The indica-
tor light will turn off.) The air flow is drawn from out-
side the vehicle.
Select the outside air circulation mode for normal
heating or air conditioning operation.
Air recirculation:
Push the air recirculation button on. (The indi-
cator light will illuminate.)
The air will recirculate inside the vehicle. JVH0888XZ
4-26 Display screen, heater and air conditioner, and audio system